Showing posts with label Sandwiches. Show all posts

Wednesday, April 30, 2014

Grilled Goat Cheese with Hazelnuts and Basil Honey


Last week was a wonderful whirlwind of a week.  My family and I spent 7 days touring some of the most beautiful spots in Western Europe and places that I never thought I'd get to see.  Canals, castles, cathedrals, vast tulip fields and the North Sea were the highlights of our trip through Luxembourg, Belgium and The Netherlands.  And even with all of the anticipation before the trip, we were not let down in the least by what we got to see and experience.


The sights were not to be outdone by the food (and beer!) that we got to taste along the way.  I think my favorites tastes were in Belgium.  I love what they can do with their world famous beer, whether in a stew with tender pieces of beef or saucing the most perfect confit of rabbit.  And the waffles.  Oh!  The waffles.  We had the best Liege style waffles from a little van in the Burg platz in Bruges.  I will perfect that recipe for special mornings here at home, promise. 

I think the best surprise for me, both in the feel of the city and it's food was Delft in The Netherlands.  Delft is tucked in right next to the big, bustling international city of The Hague and couldn't feel any more opposite from its neighbor.  We arrived on a rainy afternoon to a sleepy city greeting us with it's cheerful signature blue and white pottery and cheese shops filled to the brim with giant wheels of Gouda-style cheese.  After buying a perfect little Delftware Dutch shoe and sampling our fill of cheese we found a great local favorite for lunch.  My pick on that day was the perfect topper to the sweet afternoon in the city- a grilled sandwich made with Dutch goat cheese, hazelnuts and something described as basil honey.  I was totally intrigued.  And hooked with the first bite, the sum being so much greater than the parts.  Thank you Delft for a new favorite.


Grilled Goat Cheese with Hazelnuts and Basil Honey
Makes one sandwich, but easily multiplied to make as many as you like.
For the printable, click here.

This is an incredibly simple sandwich with components that seem like they would never work together.  But they do, trust me on this one.  And the basil honey that so intrigued me?  Turns out it was nothing more than local honey blended with basil.  So easy, but it really makes the sandwich.  You can make this sandwich with a panini press or in a cast iron skillet. 

For each sandwich you'll need:
2 slices of good bread like a ciabatta or peasant loaf
1 ounce of soft goat cheese (perhaps a little more if you're using the longer middle slices of your loaf of bread)
1 tbs coarsely chopped hazelnuts
1 1/2 tbs light flavored honey
1 tbs chopped basil
a touch of butter for the pan

Heat the panini press or cast iron skillet.

Toast the hazelnuts in a small skillet over medium heat until they just begin to turn a light golden color.  Remove from the heat.  In a separate small bowl mix together the honey and basil.  You could blend them together if you like, but it isn't a make or break to the end result.

Spread the goat cheese on one slice of the bread.  Sprinkle with the toasted hazelnuts.  Spread the basil and honey mixture on the second slice of bread.  Place the second slice of bread (honey side down) over the first and press together.  Lightly butter your pan or panini press.  Place the sandwich in the pan or panini press and cook until lightly toasted and the cheese starts to get a bit melty.  Don't forget to flip and press your sandwich with a spatula if you're using a cast iron pan!  Slice in half and serve warm.


Thursday, February 20, 2014

Herb and Greek Yogurt Egg Salad


It's been a rough few weeks here folks.  I won't go into specifics, but needless to say there have been a lot of long, sleepless nights and many days spent in bed or vegging out on the couch recuperating from one illness after another.  I've found it impossible to find the time or mental where-with-all to make any food of note during this whole time.  There have been a lot of chicken soups and simple pastas.

But we're back in working order around our house and the sun has been shining here in southern Germany for the past few days.  It's made me feel much more optimistic after the bleary and rain sodden winter we've been having.  The market in the town square this morning was bursting with early spring beauty.  Everyone was selling tulips, spring onions, radishes and baby artichokes.  It seems the Earth is reviving herself at the same time that my family has shaken ourselves free of illness.  It seems fortuitous.


So I'm slowly working my way through the recipes that have been brewing in my head.  Starting small, I think, is the way to go here.  And, honestly, I can't think of a simpler way to introduce the first signs of spring.

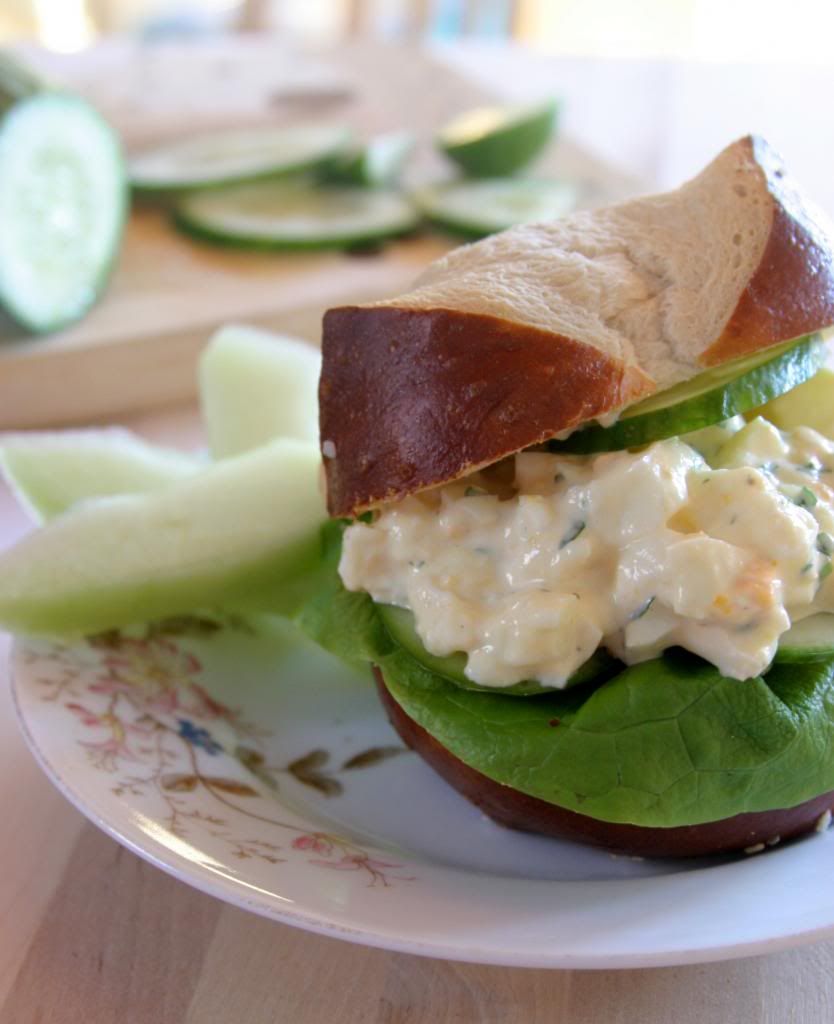
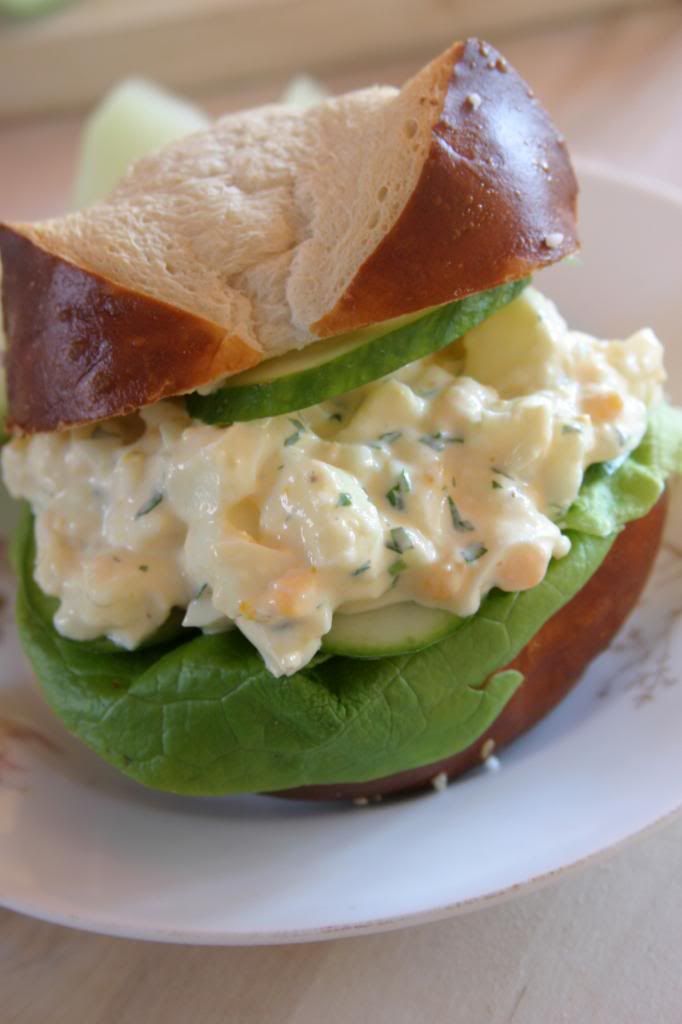
This just happens to be the very first egg salad that I have eaten let alone made at home.  It always seemed a bit odd to me, a salad of chopped eggs and mayonnaise.  I've never been a mayo fan so that's probably the first reason why I shied away from egg salad.  But I thought I might give it a try the other day and was thoroughly surprised with how much I enjoyed the simple salad.  Lightened up with some herbs and Greek yogurt and paired with quite possible the best roll in the world- the German pretzel roll (or laugenbrotchen around these parts), this is an egg salad for the novice.  But truly, everyone will enjoy it.

Welcome to spring.


Herb and Greek Yogurt Egg Salad
Makes 4 servings.
For the printable recipe, click here.

I had a disastrous time trying to peel my eggs for this salad.  Perhaps that's what inspired the salad in the first place.  Craggy hard-boiled eggs are just not pretty enough for deviled eggs, so I needed an alternative.  Also, I didn't quite cook my eggs through enough so only a few of the yolks make it into the salad which is why the salad in the photos looks so pale.  I was fine with that, but yours will be a more traditional yellow color.  I suggest chives and parsley for the herbs here, but feel free to go with dill or tarragon if you prefer.  If you can't find pretzel bread ( I found it showing up at stores in the states before we left for Germany), a whole grain bread would be just at home in this sandwich.  Don't forget some sliced cucumbers- you will enjoy the freshness and crunch.


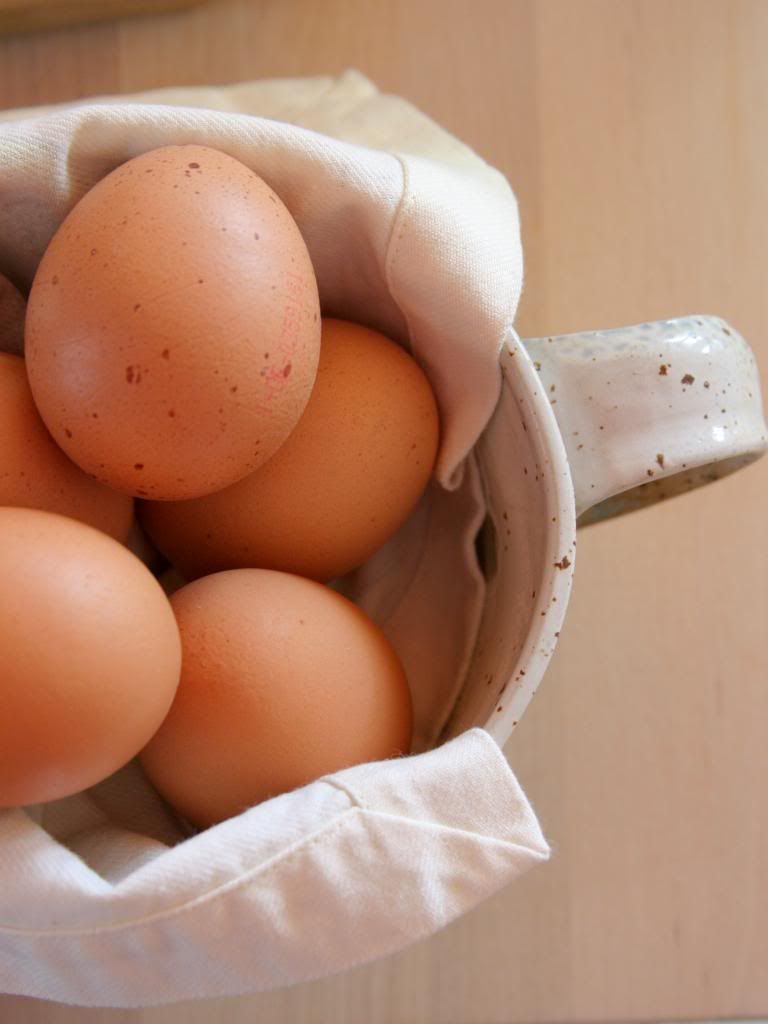
6 large eggs
2 tbs mayonnaise
2 tbs Greek yogurt
1tsp Dijon mistard
2 tsp chopped herbs (chives, parsley, dill or tarragon)
salt and pepper to taste

Place the eggs in a single layer in a saucepan.  Fill the pan with water to about an inch above the top of the eggs.  Bring the water slowly to a boil over medium heat.  Once the water just begins to simmer begin a timer.  Cook the eggs for 10 minutes. 

Remove the eggs from the heat after the 10 minutes.  Carefully pour the hot water from the pot and fill it with cool water to stop the eggs cooking.  When the eggs are cool, carefully peel and chop them to 1/2 inch dice.

Gently stir the chopped eggs, mayonnaise, Greek yogurt and herbs together in a medium bowl.  Season to taste with salt and pepper.  Keep the egg salad covered and in the refrigerator until ready to serve.


Thursday, November 8, 2012

BBQ Turkey Sloppy Joes

This is a fantastically simple recipe that I have been dying to share for quite some time.  But it hasn't been easy.  For one reason or another, my pictures just never come out the way that I want them too.  Perhaps sloppy joes are just not all that photogenic.  This isn't a pretty sandwich, but I've come to the realization that this it's not meant to be beautiful.  It's meant to be a dribble down your arms, fall out of the bun, three napkin kind of sandwich.  A down and dirty sandwich.  And the taste makes up for the lack any beauty, so really I'm not complaining.  I just wish for once it would have cooperated with my desire to take a pretty picture.

So this is my final try.  I only got two decent pictures from the whole bunch I've taken, and those two are just going to have to do.  Because, really truly, this is one of those recipes that once you try it you will wonder how you didn't know about it until now.  It's a top 10 favorite in my house.  A recipe that makes it into the regular rotation with no complaints from anybody.  And it's a quick weeknight meal.  What's not to love about that?  Absolutely nothing!
BBQ Turkey Sloppy Joes
Serves 6
Click here for the printable.

This is a very adaptable sandwich.  Feel free to use ground beef instead of the turkey.  The two are pretty interchangeable in my house.  You can add some chili powder to kick up the spice or use plain tomatoes to make it more little kid friendly (though my little kid likes the green chiles).  Sometimes I melt some cheese like sharp cheddar or pepper jack onto the inside of the top bunSometimes I don't.  And the choice of bun is up to you- these little panini rolls were great, but I also really like a toasted potato bun.

3 tbs vegetable or canola oil
1 medium onion, diced
1 1/2 lbs ground turkey
1 clove of garlic, very finely diced
1 14 oz. can of chopped tomatoes, preferably fire roasted and with green chiles
3/4 cup ketchup
1 cup your favorite BBQ sauce
1/4 cup tomato paste
2 tbs apple cider vinegar
1 tsp (or more up to 2 tsp) ground cumin
salt and pepper to taste

In a large saute pan, heat the oil over medium heat.  When it begins to shimmer, add the onions and saute (stirring frequently) until they are translucent and lightly golden.  Add the turkey and cook until browned.  Stir in the garlic and cook just until the garlic is fragrant, about 1 minute.

Stir in the tomatoes, ketchup, BBQ sauce, tomato paste, vinegar and cumin.  Bring to a simmer, then reduce the heat to medium low and cook, stirring often, for about 20 minutes or until the sauce is thick.  Season with salt and pepper.

Serve, spooned onto toasted buns.


Monday, July 16, 2012

Rosemary Semolina Bread {A Tuesdays with Dorie Post}

 Making bread is like coming home for me.  It's the simplest of things and the oldest of memories.

I can picture my grandmother standing in her kitchen pulling a fresh loaf out of the oven.  I was always at her side, like a little fly buzzing around her legs and getting in the way.  I absolutely loved being with her in the kitchen and I could tell that she wouldn't trade those days with me for anything either.
 My grandmother was teaching me, sharing all that she knew with me in the only way she knew how.  She was a barely literate immigrant from Italy.  There were very few written recipes.  And the ones that were written were only legible if you could decipher my grandmother's special blend of English and Italian.  I quickly learned what a "bustine" of yeast (an envelope) was and that when I was asked for some "sugaro" that I should bring my grandmother sugar.  Mostly I learned by watching and by helping.  I learned to feel the dough with my own little ball of dough that my grandmother would give me, so that I would know in my hands how a finished dough should feel.  I learned what the rising dough should smell like and how to know when a loaf was baking and ready.  It's all thanks to my Nana. 
Which is why I jumped at the chance to host this week's Tuesdays with Dorie recipe- semolina bread.  It's a simple and humble loaf.  Not all that pretty to look at, but wholly transformed by one of my grandmother's favorite ingredients, semolina (a milled durum wheat that is typically used in making pasta).  It reminds me of her and of our times together in her kitchen when I was a child.  The bread is a little bit nutty and golden from the semolina, and completely filled with the fragrance of my Nana'a kitchen.

Please visit the other Tuesdays with Dorie bakers and their beautiful blogs- see how they enjoyed making and eating this wonderful bread.

Rosemary Semolina Bread
From Baking with Julia, written by Dorie Greenspan.  Recipe contributed by Nick Malgieri.
For a printable version, click here.

I vowed that I was going to follow this recipe to a "t" when I learned I was hosting this week.  I was doing really well until I spotted the rosemary sitting on my counter that my husband had just cut from our garden plant.  I couldn't resist chopping up a couple of sprigs and tossing it into the  dough as it whizzed around my food processor.  And I'm so happy that I did.  The rosemary-scented bread made for the best grilled cheese sandwich I have ever eaten.  When dipped in our favorite roasted red pepper soup, the sandwich (and the bread) was a home run.

THE SPONGE:
1 cup warm water
1 tsp active dry yeast
1 cup unbleached all-purpose flour

Pour the warm water and yeast into a medium bowl.  Whisk to combine.  When the yeast has dissolved and is creamy, about 5 minutes, stir in the flour.

Cover the bowl and let it rest at room temperature until the sponge doubles in volume, about 2 hours (1 1/2 hours in a hot kitchen).


THE DOUGH:
the sponge (above)
1/2 to 3/4 cup unbleached all-purpose flour
3/4 cup semolina flour
2 tsp salt
1 tbs olive oil
1 to 2 tbs chopped fresh rosemary

To make the dough in a food processor:
Scrape the sponge into a food processor fitted with a metal blade.  Add 1/2 cup of the all-purpose flour and the rest of the ingredients and pulse on and off until the dough forms a ball on the blade.  If the dough doesn't form a ball, add another 1/4 cup of all-purpose flour a tablespoon at a time, pulsing to mix it in.  Let the dough rest in the bowl for 5 minutes, then process for a full 20 second.  The dough will be sticky.

To make the dough in a mixer:
Scrape the sponge into the bowl of a mixer fitted with the dough hook.  Add 1/2 cup of the all-purpose flour and the rest of the ingredients (be sure to chop the rosemary very finely because you won't have the blade of the food processor to help you chop it further).  Mix on medium speed until you have a dough that is smooth and elastic, but somewhat sticky, about 5 minutes.  If the dough is too soft, add up to 1/4 cup more of the all-purpose flour 1 tablespoon at a time.

First rise
Turn the dough into an oiled bowl, cover the bowl with plastic wrap and let the dough rise at room temperature until it doubles in volume, about 2 hours.

Shaping and second rise
Turn the dough onto a floured surface and deflate it by flattening it with your palms.  Pat the dough into a rough oval shape and then roll it, from one long side to the other, to form a plump loaf.  Tuck the ends under and transfer the loaf to a parchment paper lined baking sheet.  Cover it lightly with oiled plastic wrap and allow it to rest until it doubles in volume again, about 2 hours.

Baking the bread
Preheat your oven to 400 degrees.

Holding a single edged razor or sharp serrated knife at a 30-degree angle to the loaf, slash lines up and over the width of the loaf.  The lines should be at an angle and about an inch away from each other.

Bake for about 35 minutes, until deeply golden or an instant read thermometer inserted into the bottom of the loaf reads 210 degrees.  Transfer the bread toa  rack and cool completely.

Storing
The bread can be kept at room temperature for a day; cover it loosely with plastic wrap.  For longer storage, wrap it airtight and freeze for up to one month.  Thaw, still wrapped, at room temperature.


Friday, June 29, 2012

Blackened Steak Sandwiches

Why is it that grilling is typically portrayed as a "man's job"?  Is there really something so inherently manly about cooking food over a flame?  I cook over a flame every time I use my gas stove.  Can there be that much of a difference between that type of cooking and throwing a steak on the grill that makes people think only a man should be grilling my dinner?
It's a question I've pondered quite a bit lately.  I watched my 7 year old son become absolutely transfixed and obsessed with tending to our campfire a few weekends ago.  I know for sure my husband's favorite part of camping is getting that fire going (and I'm definitely NOT allowed to do the cooking over that flame!).  I muttered my thoughts aloud as we were roasting marshmallows and our friends laughed at me while reminding me that fire is in every man's genes.
It's possible that there is some genetic component to it all.  My husband used to love to grill.  When we were first married he was the official steak grillmaster in the family.  And I happily handed him the patter of seasoned steaks to do with as he wished over that open flame. But somewhere along the way that changed.  For me, it's more about controlling how my food turns out than using the grill.  I became less willing to relinquish control over the outcome of my food as I became more confident in my cooking.  And perhaps it's also a matter of taste.  If it were up to my hubby, our dinner would be coated in a thick layer of Montreal steak seasoning instead of lovely things like meyer lemons and goat cheese.
Since I've taken over the grilling duties, I've come to love it.  I grill practically every day in the summer months and have even been known to cook on the grill during a rainy Seattle November because my kitchen was being renovated.  I've learned its hotspots, how to turn on the one burner that will never light properly, and where to place the veggies I want to slowly cook and not just scorch.  You'd be amazed what you can cook on a grill- you can even use your everyday pots and pans on it or use your grill to roast your Thanksgiving turkey!  My grill is one of my favorite cooking tools right up there next to my beloved 5 quart Le Creuset pot.
Blackened Steak Sandwiches
Serves 4.  Rub recipe adapted from Bon Apetit, September 2000.
For a printable version, click here.

Since I've taken over the grill, this has become a regular on our dinner table.  Everyone loves it!  The beauty of this sandwich is that it's extremely inexpensive, very easy to prepare and everyone can put it together the way they like.  It's a great meal for serving a crowd (hello, 4th of July BBQ!).  Our favorite toppings include roasted red peppers and home made blue cheese dressing.  I made some home-baked potato chips to go with it on this particular evening.  For the recipe check out this link.


2 lbs of sirloin steaks
2 tbs paprika
1 tbs ground black pepper
1 tbs kosher salt
2 tsp garlic powder
1 tsp dried oregano
1 tsp dried thyme
1/2 tsp cayenne
3 tbs melted and cooled butter

Take the steaks out of the refrigerator about 1/2 hour before you intend to grill them.  Mix together the rub ingredients in a small bowl.  Liberally sprinkle the rub over both sides of the steaks, pressing the rub in as you go.  Let the steaks rest on the counter for 25-30 minutes. 

When you are ready to grill, pour the melted butter over both sides of the steaks.  Grill them over medium high heat for 5-6 minutes per side for medium.  Don't get too worried if the steaks get quite dark- they're blackened after all.  But do watch for flare-ups.   That butter tends to drip and cause flames that will burn your steaks.  So don't walk away!  Let the steaks rest for 5 minutes after taking them off the grill.

Thinly slice the steaks and serve on toasted sandwich rolls with roasted red peppers and blue cheese dressing.