Showing posts with label Christmas. Show all posts

Sunday, December 21, 2014

Whole Wheat Cookie Butter Waffles and What I "Chairish"


We are a military family.  And that means a great many things.  There are the things you think of instantly like sacrifice, deployments, pride, love of country, transience.

Without question these things all apply to my family.  For sure we've had our share of trying times just like any other military family.  Both of our sons have spent a long periods of time without their dad at home.  That wasn't easy on the boys or their dad.  And in the meantime I had to be both mom and dad for them and hope that they weren't missing too much.  Nothing about that was simple or fun.  And just when I thought that things were going to be normal and whole when my Navy man got home from long deployments we found that there was confusion about how we all fit back together.  The boys didn't know their dad and he didn't know them.  And how did I fit in the picture now that I was needed less than I had been the days, weeks and months before?

But the thing about that struggle is that in the end, it's what makes our family as strong as it is.  It makes us appreciate each other and every day that we have together.  What a blessing that is.

One of the least appealing aspects of being a Navy spouse is all that moving around.  If I'm talking about the emotional side of things there is the loss of ever feeling rooted in a place; settled and home.  It's a game of "new and old".  My kids are the new ones in school, we have to make new friends, settle into a new house and neighborhood and start new jobs.  Then there's the old- we miss our old friends, liked the old house better or could find our way around in the old place so much better than the new one.  That's a lot to handle every few years.  There's quite a bit of wear and tear on the hearts of our military families.

But it's not just our hearts and minds that take a beating.  Our things go through just as much stress and strain with each move.  Imagine taking apart your cabinets, beds, tables and shelves every three years, packing them up and shipping them to a new home across the country.  Then there's the toys, clothes, pots and pans, TVs, books and dishware to wrap and pack into boxes.  It's a difficult life being our "stuff".  You know the saying "This is why we can't have nice things"?  Well, that's certainly true of my family and many like mine. 
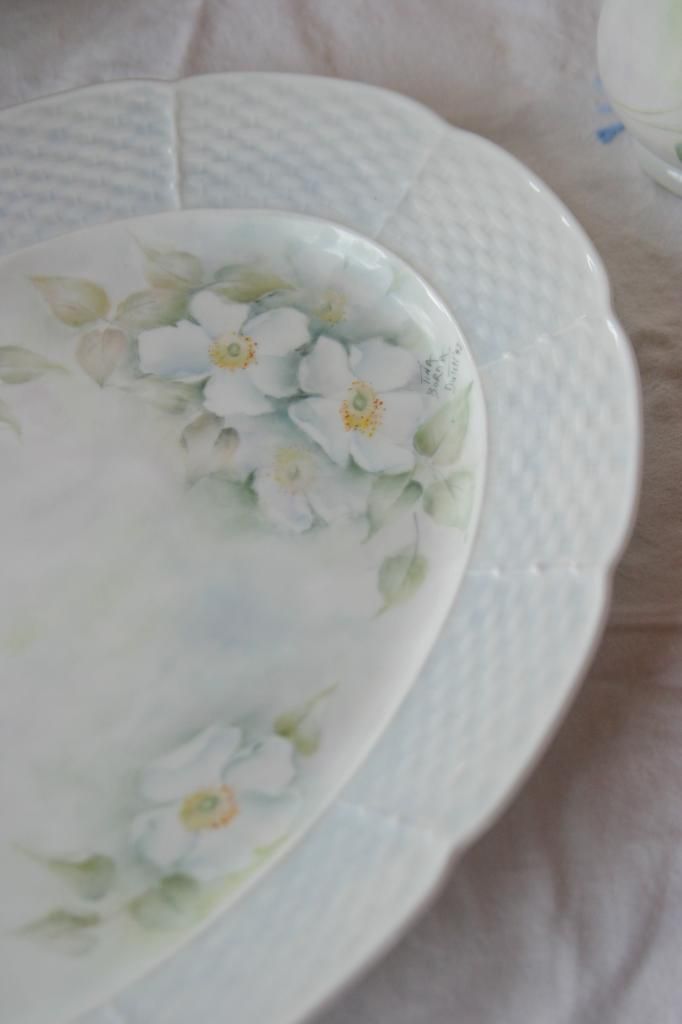


When we moved to Germany last year a good deal of our most precious belongings were sent into long term storage.  I just couldn't bear the idea of my mother in law's Limoge china set being shipped on a boat and handled time and time again before it got to me a continent and ocean later.  Or my husband's beautiful wooden high chair from childhood being taken apart and the screws and bolts lost or legs broken.  In the end there were only a couple of precious family heirlooms that made the trip with us- things I just couldn't imagine not being in our home.

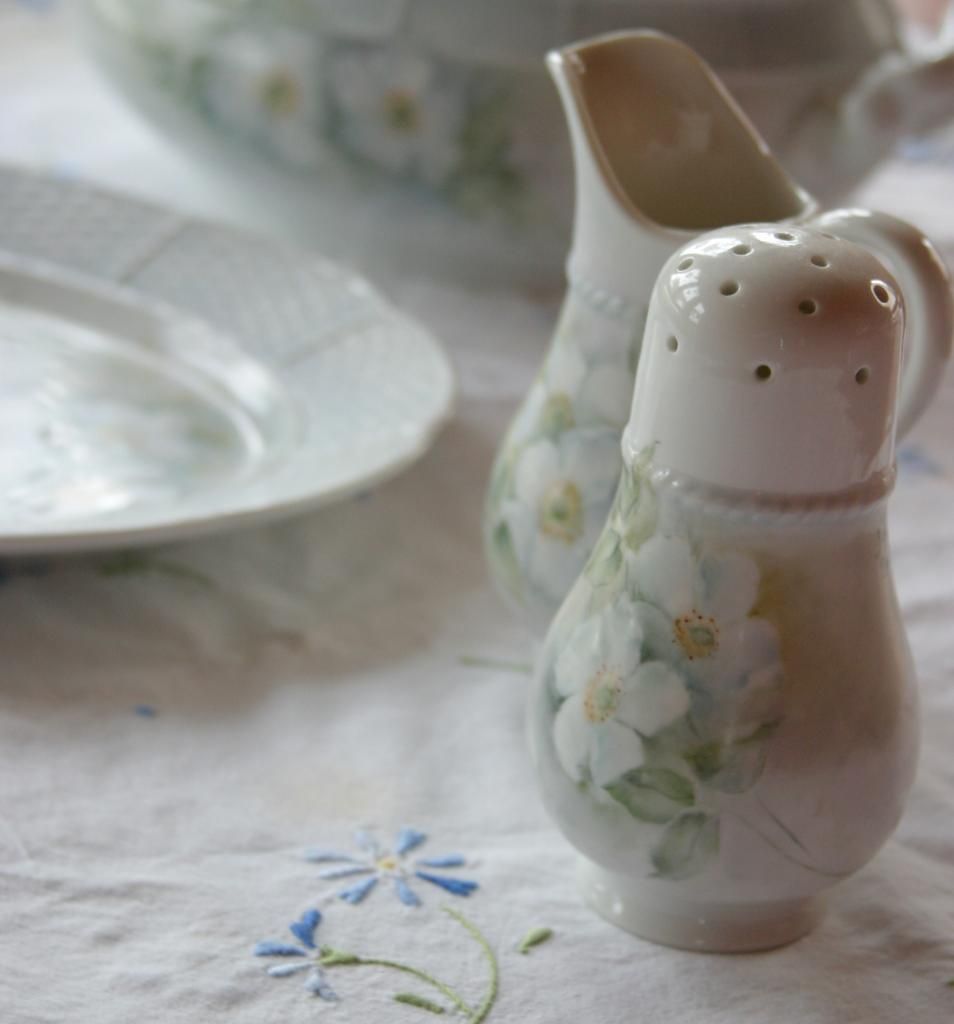
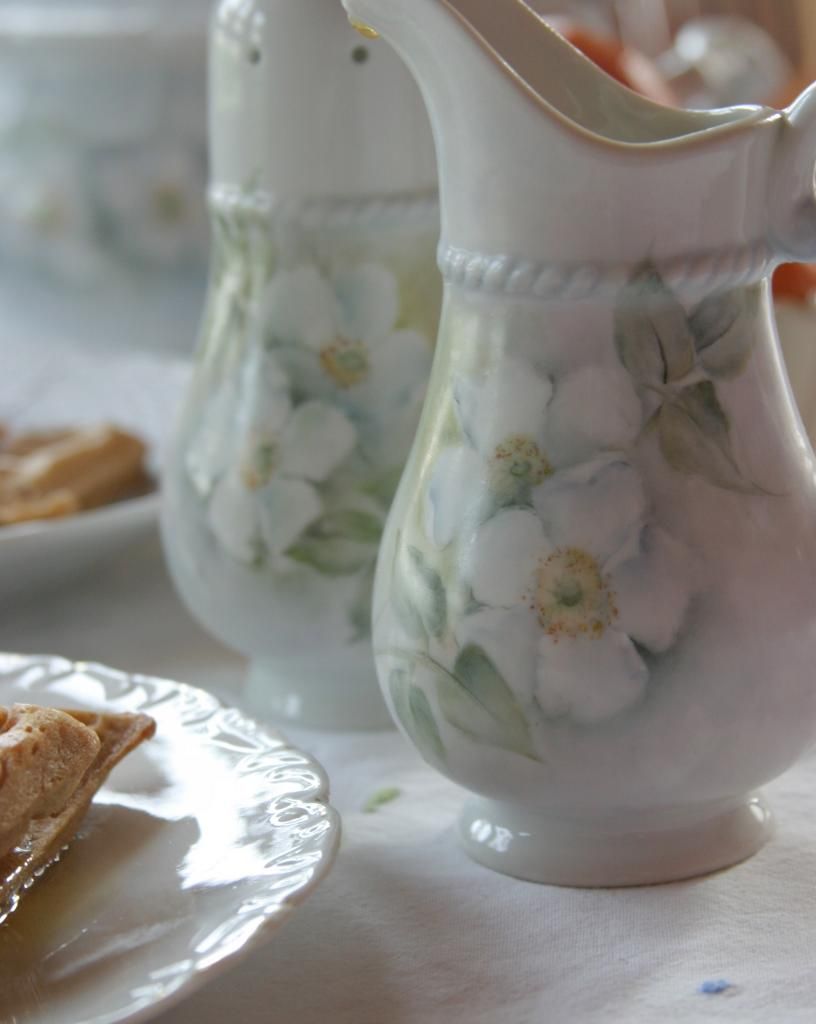
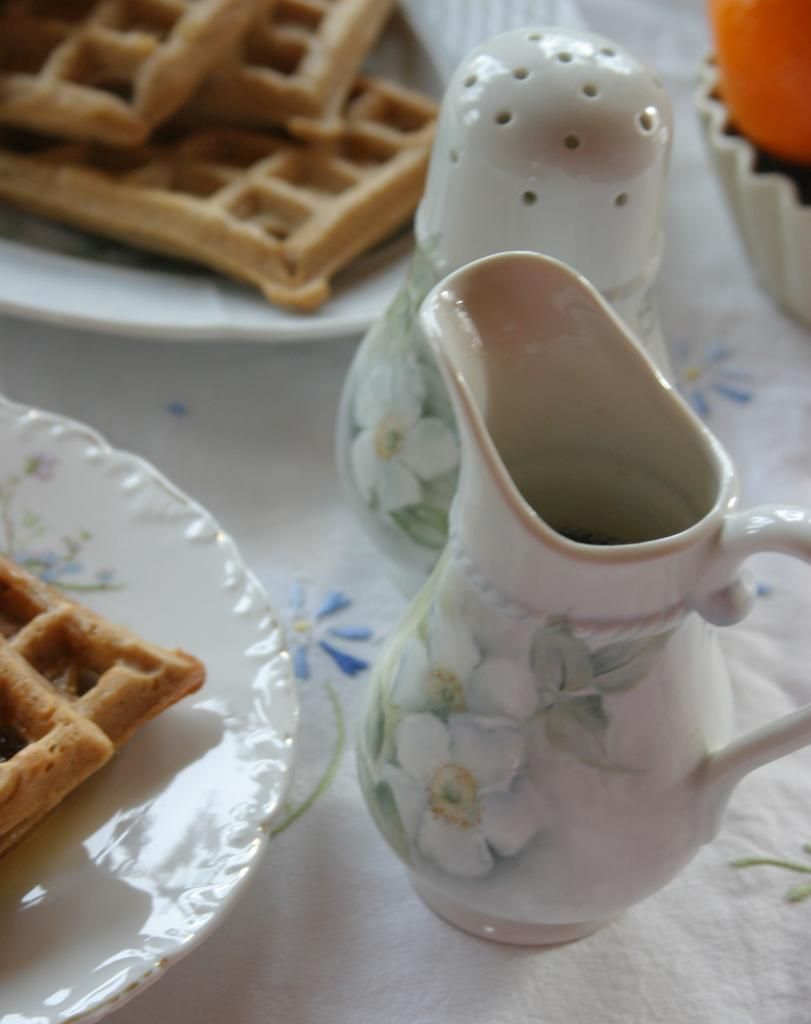
One of those things is the china set that was hand painted by my mother for my husband and me.  There are only a few pieces- a soup tureen and platter, maple syrup pitcher and powdered sugar shaker.  But they are one of the last pieces Mom painted after a long run of painting and selling china out of our home as a side business.  Not too many others in our family can say that they have a piece custom made just for them and I always look at them with pride and awe that they were made for us.  They are precious to me.  In fact I very rarely use them for fear of them breaking.  The soup tureen has never seen a drop of soup!
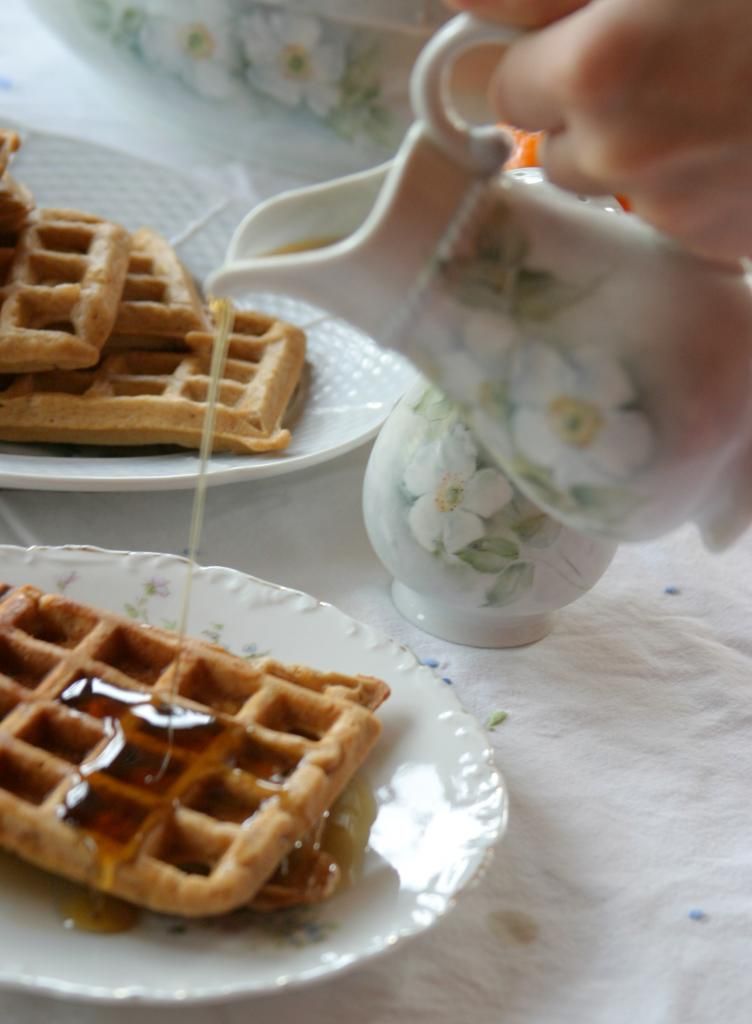

Not long ago I was approached by the lovely folks over at Chairish to write a post featuring a family heirloom that I "chairish" and how I showcase it in my home.  (Haven't heard of Chairish?  It's a modern day consignment shop where you can buy and sell vintage home decor, furniture and jewelry along with like-minded stylish folks all over the US)  I had to think about this one for a while not having too many of those precious items with me.  But when my eyes landed in my mother's china pieces I knew it was time to break them free from their years of sitting on a shelf in my china cabinet.

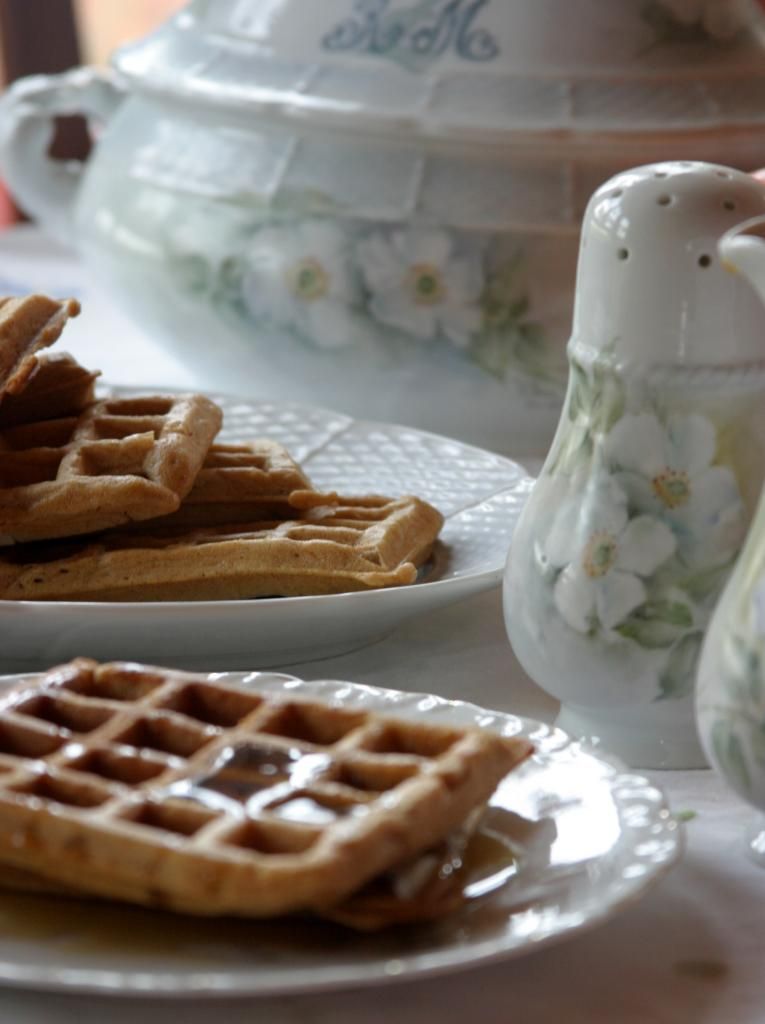
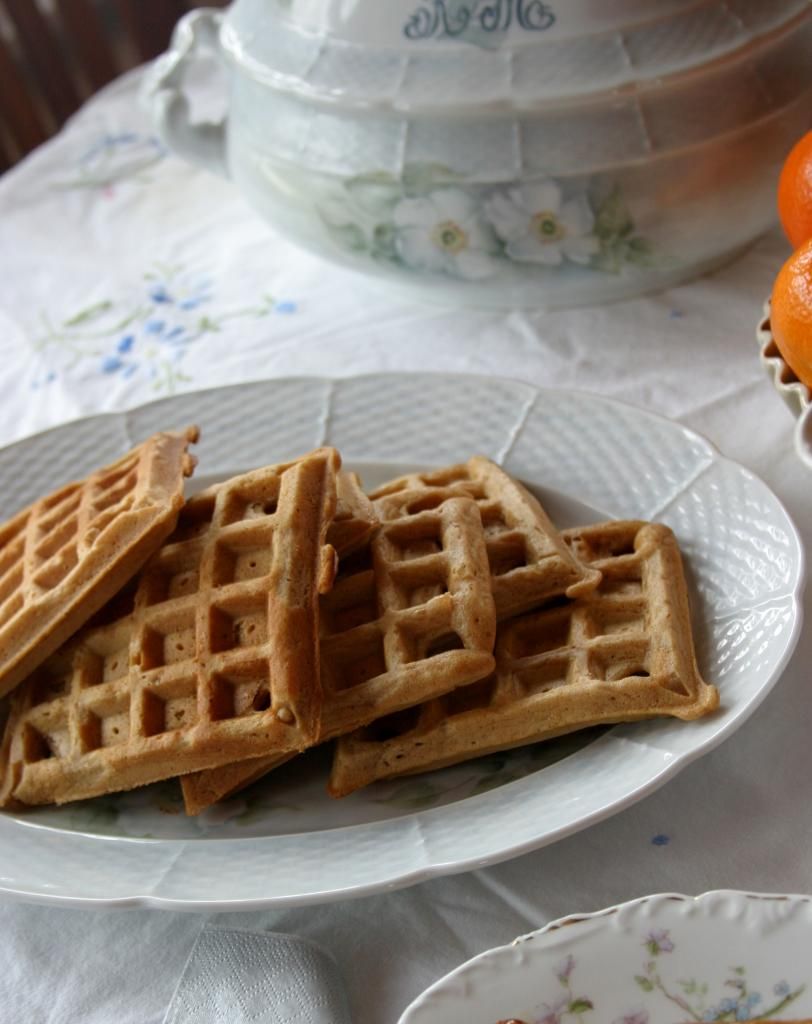
So here they are in all of their glory, serving up what will likely be Christmas breakfast for the people who I cherish most in the world- my family.  I can't think of a better reason to use the prettiest china in my cabinet.


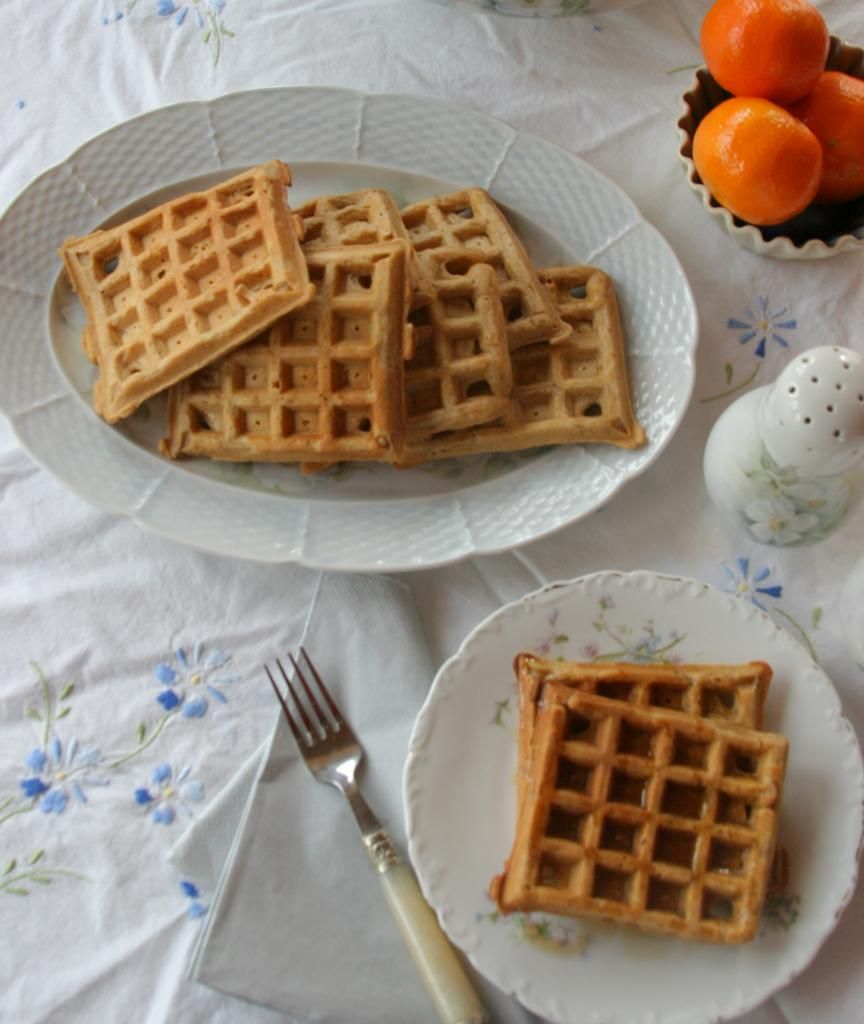
Whole Wheat Cookie Butter Waffles
Serves 6 hungry folks or 8 regular ones.
For the printable recipe, click here.

My usual Christmas morning breakfast is gingerbread pancakes.  Having discovered the beauty that is speculoos cookie butter, I thought I'd switch it up a bit this year.  So these waffles were born.  I tried to balance the sweet cookie butter with a healthier flour, so these waffles are half whole wheat and half all purpose.  And to further bring out the buttery cookie-ness of the waffles I browned the butter that went into the batter.  Otherwise these are fairly straightforward and very easy waffles to make.  No yeast or whipping egg whites here, just mix, pour into the waffle maker and enjoy.  And if you really feel like these aren't fit for breakfast I can see absolutely no reason why you couldn't crisp up a couple of waffles and sandwich them around a scoop of ice cream.  What a treat!

5 tbs butter
1 cup whole wheat flour
1 1/4 cups all purpose flour
3/4 cup speculoos cookie butter
1 tbs brown sugar
2 eggs
2 1/4 cups milk
1/4 cup neutral flavored oil

Place the butter in a small saucepan over medium low heat.  Melt the butter and then continue cooking the butter until the  milk solids begin to turn a light golden brown (3-4 minutes longer).  Remove from heat and cool completely.

Heat your waffle maker according to manufacturer's directions.

In a large bowl stir together the cookie butter, brown sugar, eggs, milk and oil.  Add the whole wheat and all purpose flour and stir until just combined.  Stir in the cooled butter.

Spray your waffle maker with cooking spray or brush with butter.  Pour 1/4-1/3 cup of the batter into each section of the waffle maker (this will, of course, depend on your particular waffle maker and the size and shape of the waffles it makes so you may have to adjust that amount to fit your situation).  Cook according to manufacturer's instructions.  I typically find that when you no longer see stream rising from the closed waffle maker, the waffles are finished.  Keep the finished waffles on a warm platter.

Serve with warm maple syrup, butter and powdered sugar.

Leftover waffles can be wrapped in foil and placed in a zip top bag in the freezer.  They warm up nicely in a 350 degree oven or toaster and will keep for three months in the freezer.


** This post contains links to other websites, but I was in no way compensated for my efforts.  All opinions, photographs and recipes are my own.


Friday, December 12, 2014

Just a Little Thing...A New Book and My Favorite Christmas Cookie Ever

A year of work has finally come to an end.....


After a lot of recipe collecting and bugging my Mom for her instructions for my favorite childhood treats, writing, editing, photographing and a few extra pounds from, ehem, taste testing.....this labor of love is finally finished.  It's just a little thing- 18 recipes that represent the collective kitchen wisdom of three generations of my family bound together into one sweet book.  My Mom and I worked together to make this book before some of these recipes disappeared forever without being written down.  My original intention was to give copies as gifts for my family, but I got so many requests for a copy from friends far and wide that I decided to self publish the book and offer it for sale.

So if you head on over to Blurb, you'll find My Mother's Kitchen for sale in a few different formats.  You can grab a hard or soft cover 7x7 inch book or download an ebook for your iphone or iPad.  I'd be honored if you were fond enough of me or my recipes to purchase yourself a copy.  Thrilled and humbled beyond belief as well.


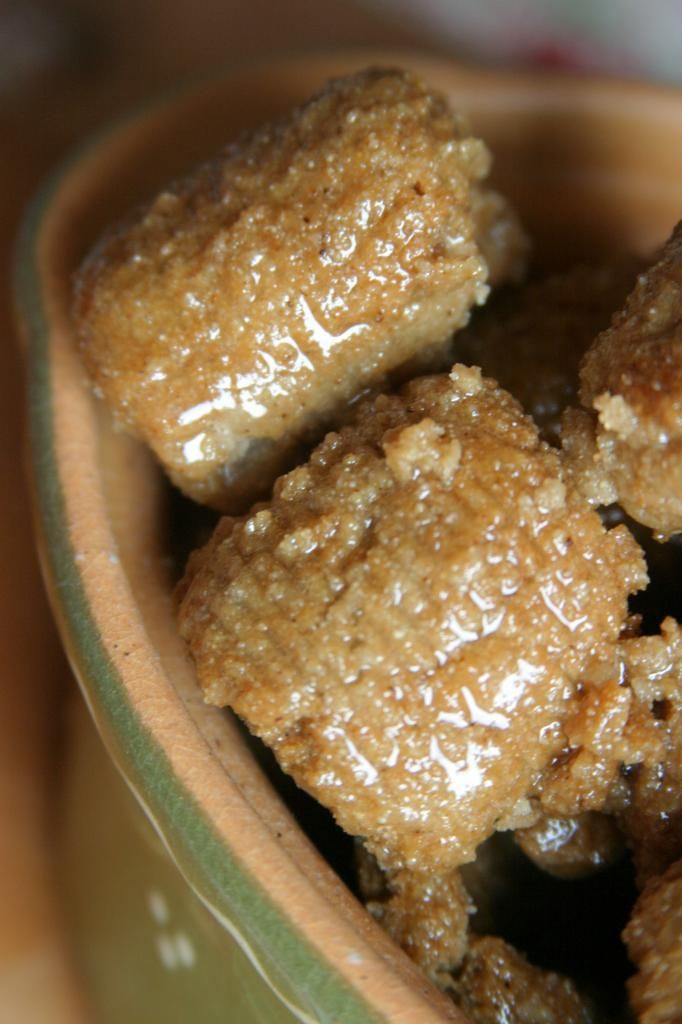
I thought I'd give you a little taste of what's in the book today.  In keeping with the current theme of European cookies, here's my favorite Italian cookie.  We always called them dardeeds because that's how my Nana pronounced it, but I have since come to find out that the actual name for this cookie is turdilli.  I'm sticking with dardeeds, but you can call them whatever you like.  Maybe call them delicious.  Turdilli are definitely a regional secret from Calabria- most people have never seen or heard of them.  I aim to change that right now.


Turdilli {or Dardeeds}

Makes a mountain of cookies.  Divide the recipe by 3 for a more reasonable amount.
For the printable of this recipe, click here. 


3 cups neutral flavored oil           
2 cups dry red wine               
1 cup whiskey               
11 1/2 cups + 1 tbs all purpose flour       
8 1/2 cups semolina flour           
2 tsp sugar               
3 eggs                   
½ tsp ground cinnamon
1 tbs ground clove


Neutral flavored oil for frying
2 cinnamon sticks
12 whole cloves, divided
 2 lbs. honey
1/4 cup sugar


Place the oil, wine and whiskey in a large pot.  Bring to a boil over medium heat.  Boil for just a couple of minutes to burn off the alcohol.  Remove from the stove and cool.

In a large mixing bowl stir together the flour, semolina, sugar, ground cloves and ground cinnamon.  Pour in the cooled liquid ingredients and the 3 eggs.  Mix until you have a cohesive, sturdy dough. 

In a large pot, pour enough oil to fill the pot about three inches deep.  Place the cinnamon sticks and 7 cloves into the oil.  Insert a candy thermometer into the pot.  Heat over medium until the oil reaches 350 degrees.


In the meantime, cut small sections of dough (keep the rest of the dough in a covered bowl) and form ropes about the diameter of your thumb. Cut into ¾ to 1” pieces and roll them on a fork or a wooden board used to roll cavatelli/gnocchi. Fry the dardeeds in batches, turning gently once, until golden.  Let cool.

Rub the sides of a bowl large enough to hold all the finished dardeeds with half a lemon.  Place the honey in a pot large enough to hold all the dardeeds. Add the remain cloves to the honey. Mix the sugar and flour together and add it to the honey also. Warm the mixture to just above a simmer but not quite boiling.  Add the dardeeds and toss gently until they are all coated well. Remove from heat and turn out into the prepared bowl. Keep covered with foil.


Tuesday, December 9, 2014

German Gingerbread {Lebkuchen}


This past week my youngest son's school had a Christmas party.  Families were invited and we grilled bratwurst over fire pits in the school yard, had hot punch and shared Christmas sweets.  If this seems like an idyllic German setting, let me set the record straight.  It was dark at 4:00 pm, 37 degrees out and mistily foggy.  It was a GREAT idea and I was super excited for it, but the reality was not so wonderful.  Let's just say we only lasted as long as it took my oldest to grill his bratwurst (which took way longer than his patience held out, truly) and have a few cookies.


I brought cookies to the celebration (of course).  I was excited and just a bit nervous to bring these particular cookies.  We had spent the weekend before exploring the Christmas markets in Munich and Salzburg and I fell in love with the cookie booths in both the German and Austrian cities. It's THE cookie around these parts.  And everyone's mom or grandma has their own way of making lebkuchen that is the "best" or "only" way to do it.  I think I went to one booth at the market in Salzburg that had 10 different versions for sale.  Some were studded with candies fruit, some dressed up with a chocolate coat and more plain versions decorated with almonds.  After all the tastings (purely for scientific reasons, of course) my favorites were lightly sweet and mildly spicy with a simple glaze and chewy middle.

The big question was- would my American version of everyone's favorite go over with the teachers and family's at my son's school.  I breathed a huge sigh of relief when I popped in the morning after the big grill out and the teacher gave me a big thumbs up while snacking on the leftover cookies.  Phew!  I'm so glad because I just love this cookie and having others feel the same way just feels so good.


German Gingerbread {Lebkuchen}
Makes about 3 dozen 3 inch cookies.
For the printable recipe, click here.

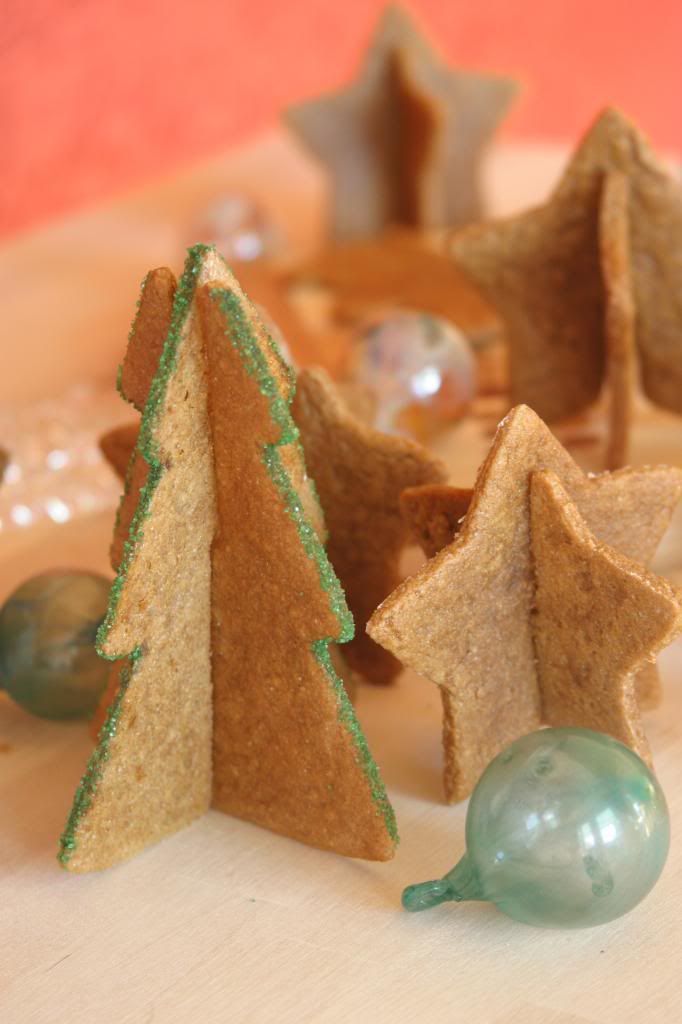
This recipe is the result of quite a bit of research into traditional lebkuchen recipes.  There were so many ways I could have gone, but I think after much tinkering I came up with my ideal version.  A few notes.  First, many lebkuchen recipes require long resting times either before or after baking to produce a more mature flavor.  I suppose that would work, but I found that an overnight rest in the fridge before baking was just right for my tastebuds.  Feel free to let the dough rest up to three days if you fancy a stronger spiciness.  Second, though I loved the snowflake cookie cutter that I used when making the cookies for this photo, I probably wouldn't use it again.  The spiky parts of the cookie baked much more quickly than I would have liked and I missed the chewy center that is the hallmark of the lebkuchen.  I think the angel shape was perfect, but if you really want to go traditional most lebkuchen that I saw in the markets were round.  If you find the cookies drying out as you keep them on your counter, take a cue from the Germans and place a slice of apple in your cookie jar to keep your lebkuchen fresh.

1/2 cup honey
2/3 cup packed brown sugar
1 large egg
2 1/2 cups all purpose flour
1/2 cup almond flour

1 tbs cocoa powder
1/2 tsp baking soda
1 tsp cinnamon
1/2 tsp ground cloves
1/2 tsp ground ginger
1/4 tsp ground cardamom
1/2 tsp fresh lemon zest

1/2 cup sifted powdered sugar
2 tsp water

In a large bowl beat the honey, brown sugar and egg together.  Add the dry ingredients and carefully stir then into the wet ingredients until they are fully incorporated.  Cover the bowl and refrigerate the dough overnight and up to 3 days.

When ready to bake the cookies, preheat your oven to 350 degrees and line a cookie sheet with parchment.  Roll the dough out on a lightly floured surface (it can be a bit sticky) to 1/4 inch thick.  Cut shapes using a cookie cutter between 2 and 3 inches in diameter.  Place cookies on the prepared cookie sheet with a couple of inches between each cookie.  Bake one sheet at a time for 5-7 minutes.  You want the cookies to puff in the center and get just the lightest of golden on the edges but NOT browned.  If you let the cookies bake until browned they will be hard and lose their chewy middle.  Let the cookies cool for a couple of minutes to make them easier to handle before transferring them to a wire rack to cool completely.

Continue rolling and cutting cookies until you are out of dough (scraps can be rerolled a few times before it gets tough).

Meanwhile, mix together the powdered sugar and water to get a thin glaze.  When the cookies are completely cooled, brush them with the glaze.  Give the glaze a few minutes to set before serving.

Cookies will keep in an airtight container for 3 days on the counter.


Thursday, November 20, 2014

Swedish Dream Cookies {Dromkakor}


So last we met I had decided that I was going to put less pressure on myself.  Ha!  That didn't last long.  Not only am I in the midst of trying to finish up a family cookbook project before Christmas (2 recipes left to make and photograph- yay!)  but I went and decided to up the stakes here on this little old blog as well.  I've decided to do something that I've never tried before and do a series of themed posts from now until the end of the year.  How's that for slowing down and not feeling like I have to live up to any standard? 

If nothing else, it will certainly put some pressure on the waistband of my jeans (cue the groans for the cheesy joke now). 


So what's this theme all about, you might ask?  Here in Germany there is no Thanksgiving (duh), so things move along from apples and pumpkins right to Christmas.  And pretty quickly too.  The world-famous Christmas markets start up next week and my family is skipping the turkey this year and heading to Munich for the first market of the season.  Can't.  Wait. 

All the holiday hub bub has me thinking about my favorite part of Christmas.  The cookies.  So inspired by our travels and surroundings I decided to feature a selection of European cookies.  Some are simple and perfect for the busy holiday season and some are time consuming traditional cookies of the season.  I'm starting simple with a cookie from a country I haven't been to yet, but it's on the bucket list.  I must admit, I'm really tickled about the whole thing.  This is going to be so much fun!


Swedish Dream Cookies {Dromkakor}
Makes about 4 dozen cookies.  Very slightly adapted from Saveur.
For the printable recipe, click here.

These cookies are about the simplest things I can imagine making (next to good old American chocolate chip ones).  No fancy equipment or exotic ingredients required here.  They are crisp and melt in your mouth, in other words truly dreamy just as their name suggests.  I added just the tiniest bit of nutmeg to the dough which isn't a pronounced flavor but adds to the buttery richness of the cookie.  They remind me of a brown butter cookie with their nutty caramel-ly undertones but with none of the extra work required.  They may just become my go-to, in a pinch cookie.  And yours too.

1 2/3 cups all purpose flour
3/4 tsp freshly grated nutmeg
1 tsp baking soda
8 tbs softened butter (1 stick)
1 1/4 cups cane sugar
1 1/2 tsp vanilla extract or 2 tsp vanilla paste
1/3 cup canola oil

Preheat your oven to 300 degrees.

In a small bowl, stir together the flour, nutmeg and baking soda.  Set aside.

In a large bowl, beat together the butter and sugar until pale and fluffy.  Add in the vanilla and beat for another few seconds until thoroughly mixed.  Add the oil and stir together until smooth.  Slowly stir in the flour mixture just until combined.

Portion the dough 1 tablespoon at a time into balls.  Place the balls 2 inches apart on parchment lined baking sheets.  Bake the cookies one sheet at a time for about 25 minutes.  The cookies will crack on top slightly and be very pale golden brown.  Cool on a wire rack before serving.


Tuesday, December 17, 2013

Spelt (or Whole Wheat) Gingersnap Cookies {Tuesdays with Dorie}


This morning as I was dropping off my little one at school I caught a glimpse of another Mom who must be much more on top of things than I am.  She was carry a little bundle of cookies all bagged up and be-ribboned to give to teachers as gifts.  And it dawned on me- Christmas is in just one week.  I've only got three more days to pull together something tasty and sweet for my boys' teachers. 

How did that happen?  Didn't I just implore good old St. Nick to gift me with a bit more time? 


My plan was to bake up a few batches of tried and true cookies- including my favorite chai spiced chocolate crinkle cookies and maybe some pizzelles- to gift to teachers and neighbors.  We've got a cookie swap coming up in a few days as well and the there's Operation Cookie Drop, which the USO organizes to drop off cookies to soldiers, sailors and airmen who are stuck standing watch on Christmas Eve and Christmas day.  In other words, I think I'll be up to my eyeballs in cookies for the next few days.  Thanks to my hubby, who gave me my Christmas present (a new Kitchen Aid mixer!) early, I think I'm up to the task.  The only question is which other cookies I want to include in my treat bags?

I think these little cookies may just make the cut.  I already have a favorite molasses cookie- from Cooks Illustrated- so I wasn't too sure about these, but I gave them a shot anyway.  Unlike most other cookie recipes, this one only makes about a dozen cookies.  I kind of like that.  There are just enough cookies to satisfy without making so many that you can't stand them anymore by the time you finish them off.  They're chewy, warmly spiced and couldn't be any more Christmas-y if they tried.

 
It's been forever since I posted a Tuesdays with Dorie recipe and I missed the fun group of bloggers that I get to bake along with.  That international move just completely got in the way.  And then, of course, I had to figure out how to get by in this tiny kitchen of mine and how to find what I need in the German grocery stores.  Just like everything else lately, I'm a bit behind and still trying to play catch up.  But I'm slowly getting there and this is the first step in getting back to normal (or at least my new normal).  I'm going to include the recipe because I made a few changes.  And here's the link to find everyone else's version of these tasty little cookies.

Spelt (or Whole Wheat) Gingersnap Cookies
Makes about 1 dozen cookies.  Adapted from Baking with Julia, edited by Dorie Greenspan.  Recipe by David Blom.
Click here for the printable.

I love that the ingredients list for these cookies is relatively short and the process is fairly simple and straightforward.  I did feel the need to tweak it just a bit though.  The first batch I made was strictly by the books.  I found that for being called a gingersnap, the original didn't seem to have a whole lot of ginger or snap to it.  So I upped the amount of spice a bit and added cloves.  I liked the first batch, but felt my second lived up to its name more fully.  I also swapped out the all purpose flour for spelt flour.  Mostly because it was at the front of my cabinet, but also because I knew I could hide it easily from my family in an already deeply colored dough.  I quite enjoyed the depth that it cave the cookie.  If you can't find spelt, you can certainly use whole wheat or all purpose flour.


1/4 cup sugar
3 tbs unsulfured molasses
2 tbs butter at room temperature
1/2 tsp ground ginger
1/4 tsp cinnamon
1/8 tsp ground cloves
1/8 tsp baking soda
1 1/2 tbs water
3/4 cup spelt (or whole wheat) flour

To glaze the cookies, you'll need 1 tbs molasses and 1 tbs water.

In the bowl of a mixer fitted with the paddle attachment (or a bowl suitable for use with a hand mixer) place the sugar, molasses, butter spices and baking soda.  Mix on medium speed until the butter is whipped and creamy and all of the ingredients fully incorporated.  This should take about 2 minutes.  Slowly mix in the baking soda and flour until you have a soft dough, about 1 minute more.

Wrap the dough in plastic wrap, shaping it into a rough square or rectangle.  Place the dough into the refrigerator until it firms up, 2 to 3 hours (or freeze for 45 minutes).

When ready to bake the cookies, remove the dough from the refrigerator and preheat your oven to 325 degrees.  Line 2 baking sheets with parchment paper or a nonstick silicone liner.

Generously flour your work surface and rolling pin as the dough is quite sticky.  Roll the dough out into a rectangle between 1/8 and 1/4 inch thick.  Using a 2 inch cookie cutter dipped in flour, cut out cookies from the dough.  Place them on the baking sheets with just a bit of room between them- they spread very little if at all.  You can re-roll the scraps and cut out more cookies.  If the dough is too soft, place it back into the refrigerator or freezer until it firms up a bit.

Mix the glaze and brush it on the unbaked cookies.  Don't be too generous with the glaze, it can make the cookies a bit soggy.  Bake the cookies for about 6 minutes.  They will puff up and become just a bit firm (they will fall back down when cooling).  Cool the cookies on the baking sheet for about a minute before removing them to finish cooling on a wire rack.  The cookies will keep for up to 4 days in a well sealed container.


Friday, December 13, 2013

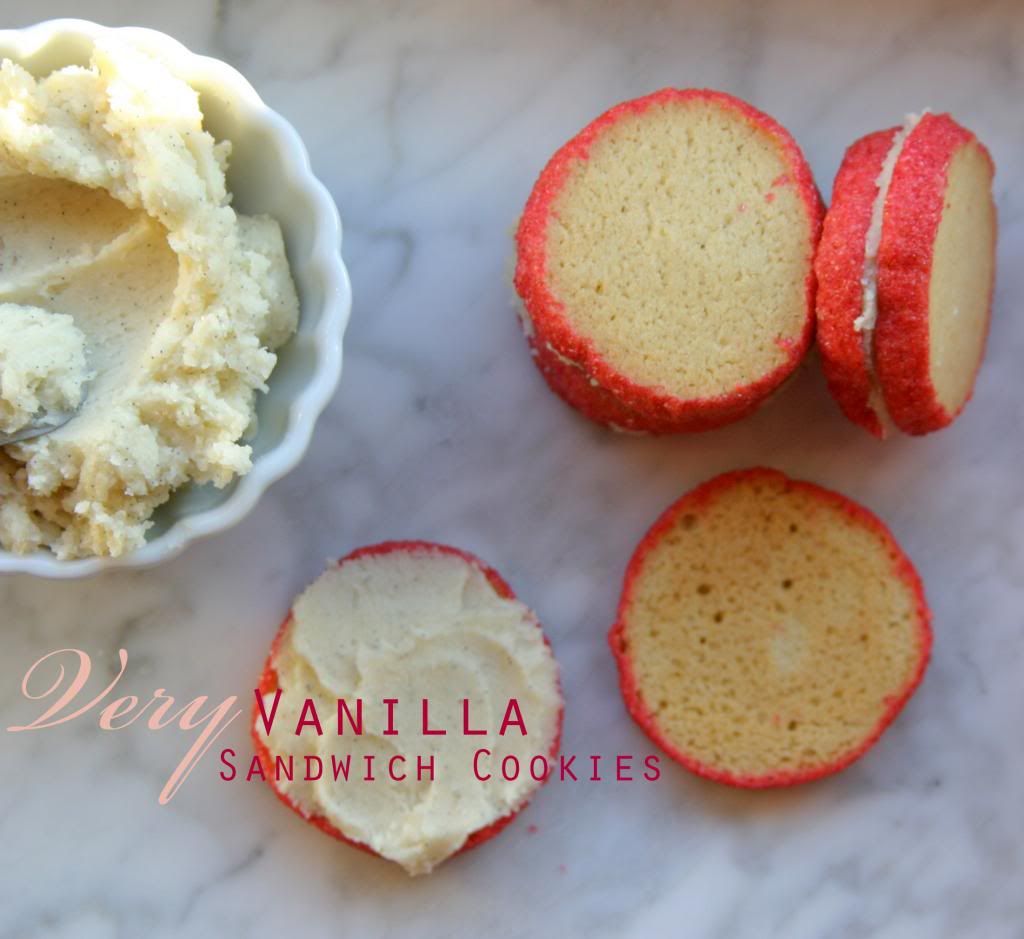
Very Vanilla Sandwich Cookies


I feel like I'm just playing catch up lately.  We came back from Rome and flew straight back into the rush of life, but I'm not so sure I was ready.   Maybe I'm still in a food coma from all the pasta I ate on vacation and with the rush of the holidays and my oldest's (ninth!) birthday I feel like December is whizzing by at world record speed.  I need everything to Slow.  The.  Heck.  Down.  Already!

Seriously.  I'd like to actually enjoy the holiday season without feeling like I'm three steps behind at every turn.  I know I'm not alone in this feeling, right?  Can we write a big letter to Santa asking him to just slow the Earth turning for the next 14 days.  We can all sign the letter so that it looks super official.  We'll just ask for the world to go a little teensy bit slower so we can all have a few more minutes each day.  I promise I don't need anything else this year except this little wish for a bit more time.  Is that too much?  You're all with me, aren't you?


I don't know if Santa will come through for me, so in the meantime I'm trying desperately to dig myself out of a mountain of Christmas presents and shipping boxes that need to make their way back to the States (probably not in time, I'm so sorry family!) and cards that I have every intention of signing, addressing and sending today.  But instead I'm blogging so you can guess how much progress I'll be making on the gift and card projects.  Oh and baking.  There's that too.

Peanut butter chocolate chip cookies for my oldest to share with his class for his birthday.  Dark chocolate and cherry pannettone for me to share with my friends on the drive for a mini-girls weekend at the Cologne Christmas market a few hours away.  And cookies for my little one's class advent get together (that's what they do here in Germany- Advent, not Christmas).  For this party we were asked to bring something from our cultural heritage.  I decided to go with a very American sugar cookie jazzed up a bit.  I was nervous about these cookies because they're a bit sweeter than European tastes generally go for, but they were (thankfully) a hit. 

Now I just have to decide what cookies to bring to the office cookie swap next week.  Oh, and get working on that letter to Santa.  I really only need a few more minutes.


Very Vanilla Sandwich Cookies
Makes about 2 dozen cookies sandwiches.  Adapted from Pure Vanilla by Shauna Sever.
For the printable, click here.

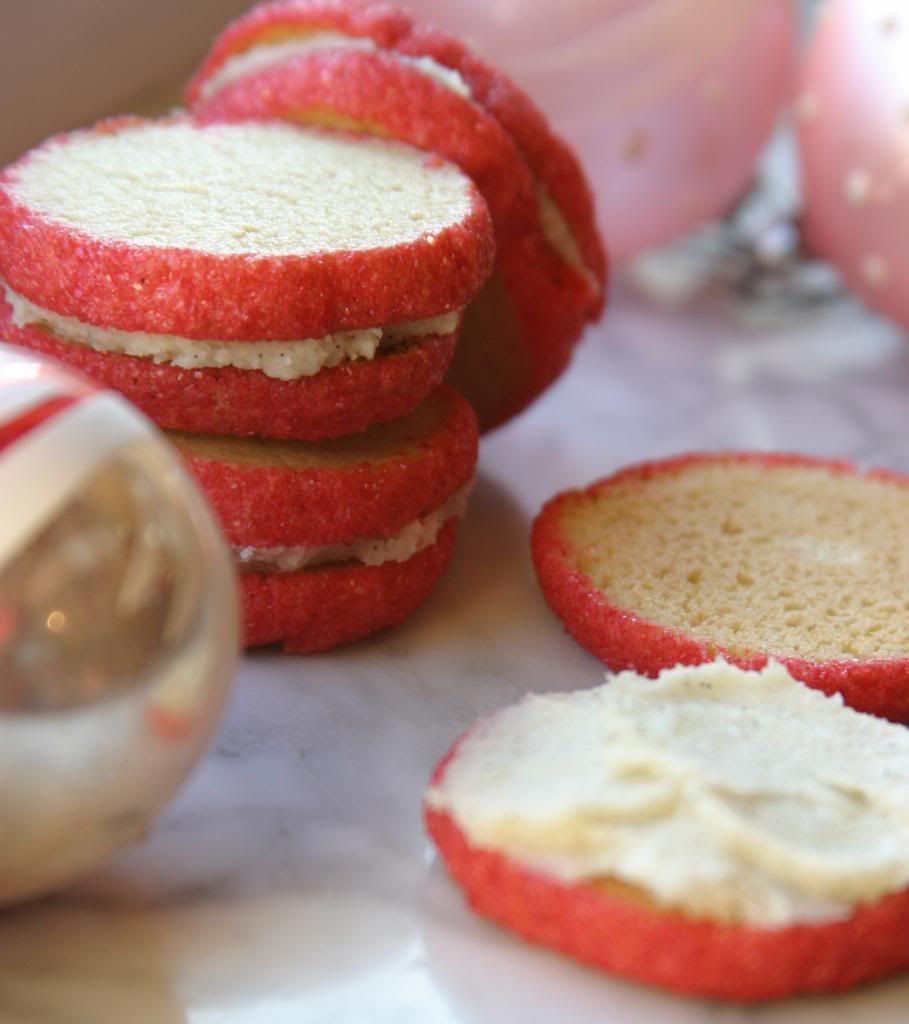
These cookies are just about the most perfect bite of vanilla ever.  Tender and crisp shortbread-like cookies sandwiched around a light vanilla butter cream- what's not to like?  You can keep the cookies plain and simple or jazz them up by rolling the edges in colored sugar before refrigerating the dough.  I think the sparkly version is perfect for a holiday party, personally.  I didn't do much to change to original cookie because it's so darn good.  I added pinch of cardamom for just a bit of depth to the cookie and swapped out the white chocolate filling (I am just not a fan of white chocolate) for a simple butter cream.  The cookies are the perfect thing to keep in the freezer for when you want to slice off and bake just a few, as even without the creamy filling they're quite good.

Another note, since moving to Germany I have not purchased a stand mixer.  I bought an inexpensive hand mixer and have used that occasionally, but the majority of the baking I have done has been completely by hand.  I swear my right arm muscles have never been as strong.  I will give directions for these cookies using a stand mixer but you can get them whipped up using even the weakest of hand mixers or the power of your own biceps.

For the cookies:
3/4 cup (1 1/2 sticks) butter, at room temperature
1/2 cup granulated sugar
1 tbs vanilla extract
1 large egg plus 1 egg yolk
2 cups all purpose flour
1/4 tsp baking soda
1/4 tsp cardamom

For the vanilla bean butter cream:
4 tbs butter at room temperature
1 vanilla bean
1 1/2 cups powdered sugar
1/4 cup granulated sugar
2 tsp vanilla extract

Optional: colored sanding sugar for decorating

In the bowl of a stand mixer with the paddle attachment, beat the butter, sugar and vanilla on medium speed until light and fluffy, about 2 minutes.  Add the egg and egg yolk and beat until well blended.  Reduce the speed to low and stir in the flour, baking soda and cardamom until the dry ingredients are thoroughly incorporated.

Turn the dough out onto a lightly floured work surface and divide it in half.  Roll each half into a log about 8 inches long and 1 1/2 inches in diameter.  If you are dressing up the edges in colored sugar, pour about 1/4 cup sugar onto a piece of waxed paper or flat platter.  Roll the dough logs in the sugar to coat the outside.  Wrap each log in wax or parchment paper and refrigerate until firm, 1-2 hours (you can freeze the dough for up to 6 months at this point as well).

When you're ready to bake the cookies preheat your oven to 350 degrees.  Line 2 baking sheets with parchment or a silicone liner.

Slice the dough into 1/4 inch rounds and place the cookies about 1 inch apart on the baking sheets.  Bake until the cookies are firm and the edges just begin to turn golden, about 12-15 minutes.  Let the cookies cool for about 2 minutes on the baking sheets and then transfer to a wire rack to cool completely.

While the cookies cool, make the vanilla butter cream.  Beat the butter for about 2 minutes until it  becomes creamy.  Slice the vanilla bean in half lengthwise.  Using the back of your knife, scrape the vanilla bean caviar from the pod.  Add the vanilla caviar to the butter along with the powdered sugar and beat the mixture on low speed.  Gradually add the granulated sugar and then the vanilla extract until fully combined, light and fluffy.

Spread a heaping teaspoon of butter cream on the bottom of one cooled cookie and then top with another cookie.  Repeat with the remaining cookies and cream  Store the filled cookies in the refrigerator in a sealed container (alternately, you can store the unfilled cookies at room temperature and the butter cream in the refrigerator until ready to fill).


Monday, November 11, 2013

Spiced Apple Glühwein


I've been restless lately.  Antsy, if you will.  Germany is a great place to be, but I haven't found my "thing" here yet.  You know that thing that I mean.  It's the one that gets you out of bed in the morning and makes you excited for the day that's to come.  I'm not sure how I want to spend my time- what would be the most valuable way to spend the hours I have free during the day.  Do I want to volunteer on the base?  Take German language courses?  Work on my fitness or simply explore the area and work on my photography?  Not knowing what to do with my time means I usually end up roaming around doing not much of anything.  That's about the least fulfilling way to spend my time and it's been incredibly frustrating.


What I've been up to lately in my journey to find a purpose, my "thing" if you will, is planning several upcoming family getaways.  At the very least it's a nice distraction.  We've done quite a bit of traveling around Germany and it's been wonderful to see the culture and history of the country we're living in.  But my restless spirit is in need of more.  This past weekend was the start of that "more"  for me.  Hours of scouring the internet and pouring through travel books led to a whirlwind trip to Alsace, France. 


We spent the weekend gazing up at the most stunning Cathedrals and searching out castles and sunset views of the Alsatian wine country.  It was incredibly beautiful.  I gazed in the window of every boulangerie and patisserie we passed.  The kugelhopf that Alsace is known for was featured in every shop.  There were half timbered houses lining the streets and canals in an area of the town of Strasbourg called "Petite France".  Here we wandered around and found flea markets and food vendors lining the sidewalks.  I scored the best fromage blanc with cinnamon and plums at a stall right next to live geese and ducks for sale.  Seriously?  I suppose the French take fresh food very seriously.

As we drove home last night through the first snowfall in the Black Forest (can you get more fabulously cliche than that?), I felt renewed.  I have a few souvenirs in my wine cellar and additions to my pottery collection, but the best thing that I brought back was a peace that I think will last until the next big adventure.  In the meantime, I have a Thanksgiving feast for all of our American friends to whip up and a trip to Rome to plan.  I'm so looking forward to a little bit of home as well as the newest city to conquer.  I guess finding my "thing:" can wait just a little longer.


Spiced Apple Glühwein
Serves 4-6 people.  Adapted from a traditional German recipe.
For the printable recipe, click here.

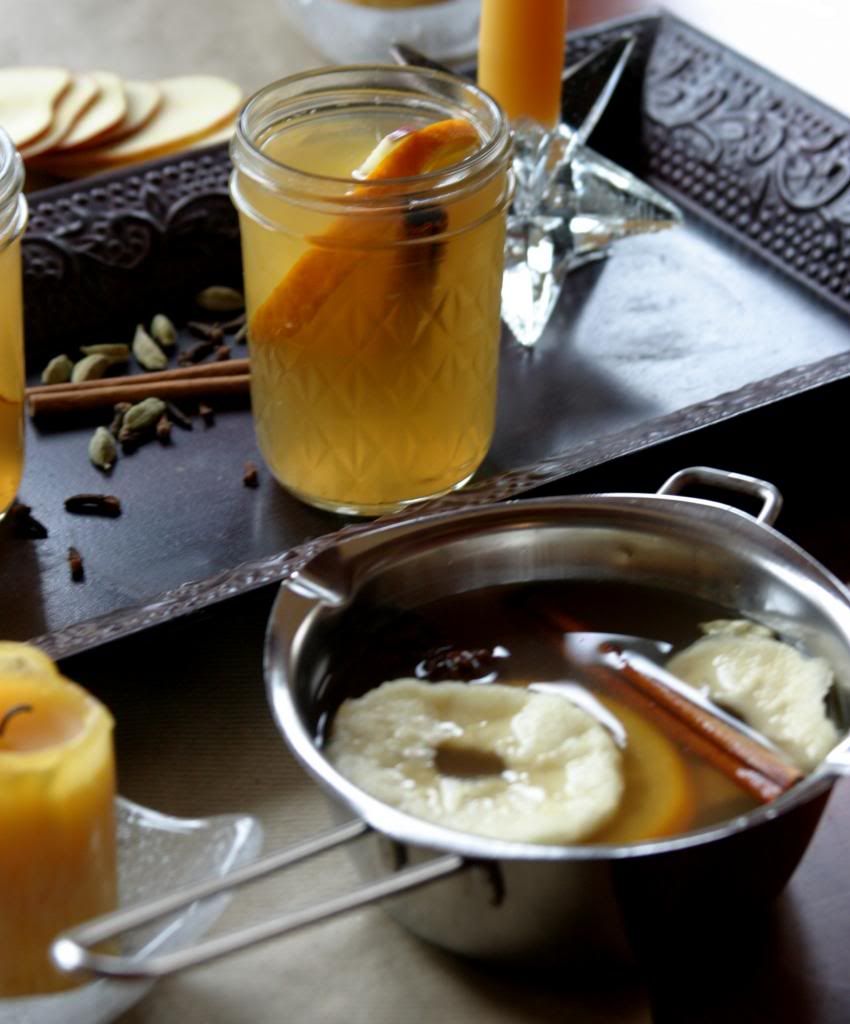
As the winter kicks into gear here in Europe, this is the sort of warm drink that you can find in every Christmas market, crepe shop and corner restaurant.  Whether you call it mulled wine, vin chaud or glühwein the constants are warm wine and wintery spices. What else goes in is up to you.  I like the traditional red wine but sometimes it can be too sweet and heavy.  This white wine version is light and lightly spiced- perfect for sipping with a house full of friends and family on a chilly Thanksgiving afternoon or after a few hours of raking leaves in the yard.  You can let it simmer on the lowest setting on your stove top or pour it in a slow cooker set to low and leave it on the counter for everyone to sample.  When I made my version pictured here I put the whole spices straight into the pot with the juice and wine.  I think I would have liked a bit more of the spice flavor to come through so I am suggesting that you toast the spices until fragrant before stirring them into the wine.  The recipe below reflects this change. 

1 bottle of dry white wine such as a Pinot Gris, Sauvingon Blanc, or Viognier
1 cup of unsweetened apple juice (preferably fresh pressed and unfiltered if you can get it)
3 tbs raw or turbinado sugar
1 orange sliced into thin rounds
8 slices of dried apple
3 cinnamon sticks
5 whole cardamom pods
1 star anise
8 cloves
thinly sliced apple for serving

In a medium pot stir together the wine, apple juice, sugar, orange slices and dried apple.  In a separate small, dry pan toast the spices over medium low heat for just a minute or two.  You'll know they are ready when the spices become very fragrant.  Stir the spices into the rest of the ingredients.  Heat the glühwein over low heat for at least 15 minutes before serving.  Serve each cup with a slice of apple (and a cinnamon stick if you wish).


Wednesday, December 12, 2012

Pizzelle | Brown Butter Maple and Traditional Anise {The Great Food Blogger Cookie Swap 2012}

There's a lot of talk about my family in this space.  My Mom and Nana are enormously influential in my life and I feel like so much of what I do is in honor of what they taught me.  The title of my blog says it all- too me food and cooking is at the heart of everything I do for and with my family.  It is me giving my heart to others.

I don't talk too much about the other side of my family, the family that I married into when I said "I do" 13 years ago.  That's not to mean that I don't value them or haven't learned an enormous amount from them, because I have.  It's just that for the most part, food was a necessity for them, not a joyful experience or the inspiration for cherished memories like it was during my childhood.  These cookies are one of the few rare exceptions and the thing that connects my food heritage with my in-laws', most especially my father in law.
My father in law grew up a poor immigrant from the Ukraine in an even poorer coal mining town in Pennsylvania.  This was the Great Depression, so there were no luxuries to speak of and all the children did their part to help the family.  When his mother passed away, my father in laws' oldest sister, Annie, stepped in to raise him and his siblings.  Annie was sister and mother to him.  Though I never got to meet her, I hear the stories and know that she must have been a very special woman.

When Annie married a man of Italian heritage, her Eastern European roots intertwined with his and the Italian favorites of her husband became the mainstay of her cooking.  She excelled at it from what I hear.  Every Christmas, both Ukrainian and Italian treats were made and Annie's younger brother (my father in law) fell in love with a simple Italian cookie, the pizzelle.  So much so that when his own children grew up and got married, he made sure he sent each off with a pizzelle maker of his or her own.  That's how I aquired mine and I cherish it.
My father in law likes to act gruff and tough.  He's a man who grew up in hard times and did everything he could to instill a strong work ethic in his children, while setting an excellent example himself.  He did a fine job, I must say.  But under that tough-as-nails exterior is a man with a very generous heart.  A bit like Santa Claus, he's a giver who doesn't ask for acknowledgement or thanks.  I saw that side of him for the first time as he gave me this pizzelle maker with a twinkle in his eye.  I will remember it forever.

These cookies were sent to three lovely ladies and fellow food bloggers as part of the Great Food Blogger Cookie Swap of 2012.  I was so excited to take part in this event for the second year in a row with almost 500 other food bloggers.  In return I received some very tasty cookies.  There were Mexican Hot Chocolate cookies from Deetz at Cookies and Kiddos and Lemon Honey Drop cookies from Brenda of Meal Planning Magic.  I'm still waiting on my third dozen, but I'm sure it will be here any day now.  Thanks ladies!
Pizzelle
Makes about 2 dozen cookies.  Adapted from The International Cookie Cookbook, by Nancy Baggett.
Click here for the printable recipe.

Traditional Anise Pizzelle:
10 tbs butter, melted and cooled
2 1/4 cups all-purpose flour
1/4 tsp baking powder
2 eggs
2/3 cup sugar
1 tsp anise extract
1 tsp anise seeds

Heat the pizzelle maker according to manufacturer's directions.

In a large bowl, beat the eggs and sugar until light and frothy.  Add the anise extract and anise seeds and mix for just a moment.  Add the dry ingredients and beat on low speed until the mixture is smooth.  Add in the cooled butter and mix just until incorporated.

Lightly brush the interior surfaces of the pizzelle maker with vegetable oil, making sure to get into the grooves, or spray with non-stick spray.  Place a heaping tablespoon of batter slightly behind the center of the pizzelle pressing area. Close the lid and squeezing tightly or locking the clasp, cook for 20 seconds.  Check for desired brownness of the pizzelle and if necessary cook for 5 seconds more.  We like our lightly browned, so 20 seconds is perfect.  Using a heat-proof spatula, gently remove the cookie from the iron and lay flat on waxed or parchment paper to cool.  Repeat with remaining dough.  Cookies will keep for up to 5 days when stored in an airtight container, though they may soften.

Maple Brown Butter Pizzelle:
10 tbs butter
2 1/4 cup flour
1/4 tsp baking powder
2 eggs
2/3 cup maple sugar
3 tbs good quality maple syrup

Follow the same procedure as the traditional pizzelle, the only difference is that you will need to brown the butter first.  In a small saucepan, gently heat and melt the butter.  Continue heating it until the milk solids have turned a golden brown and you can smell a distinctly nutty aroma.  Let cool and continue with the rest of the steps.

Thursday, December 6, 2012

Caramel, Pear and Gingerbread Trifle


So you remember those gingerbread cakes I wrote about earlier this week?  I know, who could forget a sweet little wonder like that?  I did love them served simply with some sweetened mascarpone cream, but my creative juices got flowing with the first bite and I knew I couldn't just leave well enough alone.  (Sigh) I never can.  And I had the perfect excuse- the first Christmas party of the season was coming up and I had been tasked with bringing a dessert.  Or maybe I had volunteered, which is something I definitely would have done considering how much I love baking.  No matter...


It didn't take me long to come up with the combination of flavors in this trifle.  It's loosely based on a cake my mom made when I was a girl.  It was a chocolate and pear upside down cake and one of Mom's specialties.  Now, that chocolate cake is a pretty far cry from this intense gingerbread, but they are both rich in their own ways and I just knew that the velvety pears and caramelized bottom of the cake would be a perfect match for my babcakes. The cakes were already made, so I was halfway home.  It was just a matter of poaching a few pears and whipping up a caramel pastry cream and I would be set.  Easy peasy lemon squeezy.


Caramel, Pear and Gingerbread Trifle
Serves 15-18 people- the recipe can easily be halved.
Click here for the printable recipe.

This recipe makes a large trifle- one for a party or big family gathering.  It's a no pressure kind of dessert because it's meant to be sort of messy.  There's no perfect looking trifle, after all.  The caramel pastry cream and poached pears need to be cool in order to assemble the trifle, so you can make all the components up to a few days ahead and then put it all together the night before your soiree.  No last minute rushing around to finish this beauty- and that makes it all the more beautiful.

1 recipe Gingerbread Babycakes
3 riesling poached pears, cooled
2 cups heavy whipping cream, whipped with 1/3 cup sugar to soft peaks
1/4 cup caramel sauce (you can buy a good quality one or make one such as this one)

Caramel Pastry Cream
1/2 cup cornstarch
1 cup sugar
8 egg yolks
4 cups milk
4 tbs water
1 tsp vanilla

In a large bowl, stir together the cornstarch and a 1/2 cup of the sugar.  Whisk in the egg yolks until the yolks become lighter in color.  Set aside.

In a large saucepan, stir together the water and the remaining sugar. Cook over medium high heat, swirling occasionally until the syrup begins to take on a light amber color.  This takes only a few minutes.  Watch carefully, it goes quickly from a light caramel to burnt.  Remove the pan from the heat and carefully stir in the milk.  If you pour the milk in slowly enough the caramel will melt right into it.  If you do what I did and lose patience and pour too quickly, you'll have lumps of caramel.  They will melt in the next step, so don't panic.

Place the pan with the milk/caramel mixture back over the heat and bring to a simmer, stirring.  When it reaches a simmer, slowly pour the milk mixture into the egg mixture you set aside earlier.  Keep on whisking so that you don't get lumps.  Pour the whole thing back into the pan and place it back over the heat.  Reduce the temperature of the stove to medium and cook the custard until it becomes thick and creamy.  Stir in the vanilla and remove from the heat.  Pour the mixture into a clean bowl and press a piece of plastic wrap down over the surface of the custard.  Refrigerate until cool.

To assemble the trifle
If you have made baby gingerbread cakes, you'll need to slice 6 of the 8 cakes into 1/2 inch slices.  If you made a large 10 inch cake, slice 3/4 of the cake.  Save the rest for snacking or freeze it for another day.

Slice the pears thinly.

In a large bowl or trifle dish, place a dollop of the caramel pastry cream and spread it out.  Lay 1/3 of the cake slices over the cream to cover the bottom of the bowl.  Spoon 1/3 of the remaining caramel pastry cream over the cake layer and spread it to cover the cake.  Evenly distribute the slices of 1 pear over the cream.  Drizzle a bit of caramel sauce over the pears.  Top the pears with 1/3 of the whipped cream.  Repeat the layering twice more finishing the trifle off with a drizzle of caramel sauce.  Cover and refrigerate overnight.


Tuesday, December 4, 2012

Gingerbread Baby Cakes {A Tuesdays with Dorie Post}


It's beginning to look a lot like Christmas...

I've received my first Christmas cards and attended the first party of the season already.  The neighborhood is beginning to resemble a good Griswold Christmas lighting scheme.  It's truly my favorite time of the year and I make no apologies for it.  Case in point- my husband told me that he was "assaulted" by the music from the Christmas station I had programmed on my car radio last weekend.  Assaulted?  Hardly.  He should have just appreciated the music stylings of Bing Crosby, Nat King Cole and perhaps the Grinch thrown in for good measure.  I certainly do as it's the background soundtrack to everything I do these days.


And these little cakes fit into the mood of the season perfectly.  I'm so happy that my fellow Tuesdays with Dorie bakers decided to go with this recipe to start off December.  Warm spices, molasses and a hint of the unexpected black pepper are just the sort of thing I am craving.  One bite in and my hubby exclaimed that this is like his favorite molasses crinkle cookie in cake form- just what I was going for!  Perfect!


I tested out one little cake with some lightly sweetened mascarpone and slices of Asian pear that had been poached in a chai-spiked syrup.  It was simple perfection.  But I had my eye on the rest of the cakes for something a bit more indulgent.  Let's just say it involved caramel and whipped cream.  But you'll have to check back later in the week for that recipe.  I know, I'm such a tease...
In the meantime, I implore you to try out the cake for yourself.  The recipe, shared by Karen, our esteemed hostess this week, says to use baby cake pans to bake the cakes.  Well, I don't have baby cake pans but I do have ramekins so that's what I used.  8 ramekins were just right.  A couple of other minor changes I made were to omit the espresso powder, which I didn't have, increase the cocoa powder by a tablespoon and add just a pinch of cinnamon and cloves. 

As always check out how my fellow bakers fared with this lovely cake and come on back for part two on Thursday! 


Thursday, November 29, 2012

Chai Spiced Honeycomb Brittle


What happens when you let your 8 and 3 year old boys use your laptop to watch movies on a VERY long two day drive from northern Washington to southern California?  Somehow all your settings have changed and your wireless modem has gotten turned off and your keys seem a bit sticky.  I have no idea how any of this happened without my knowledge- I was sitting only three feet away from them after all.  But however watchful I was, those little hands just seemed to find ways to get into trouble.

So this morning as I was all set to wax poetic about Christmas cookies and my favorite music mix for the season, those sticky keys started getting in the way.  Whole paragraphs were lost and pictures needed reloading.  I suppose it's just about right for how I feel in the kitchen these days though.  Somehow things that I would never have trouble with are causing me grief.  Is it just because I'm getting older?  Are those two loveable but trouble-making munchkins driving me to distraction?  I may never know.


The solution for me?  More cookies.  More treats.  More baking.  Even if what I make isn't the prettiest, the edges are a bit too brown or I make a huge mess in my kitchen, I don't mind.  I don't even need to eat whatever I pull from my ovens, in fact I often give away much more than what I keep.   It's the stirring, kneading, measuring and creating that are the important parts of the process for me.  It's cathartic and relaxing.  And if I end up needing to scrape an inch thick layer of solid hardened sugar off my candy thermometer because I forgot to pull it out of the pan at the right moment, so be it.  Someone will enjoy the brittle I was making when Mt. Vesuvius erupted from the pot of boiling honey on my stove.


Chai Spiced Honeycomb Brittle
Adapted from Martha Stewart.  Makes one rimmed baking sheet of brittle (plenty to pack into several Christmas cookie tins as gifts).
Click here for the printable.

The honey in this brittle gives it a nice depth of flavor and adds to the whole idea that the brittle is a bit like a honeycomb.  The airy texture comes from adding baking soda to the hot caramel mixture, which a pretty neat chemical reaction for the kids to see.  Just keep them away from the stove, 300 degree sugar can cause serious burns.  And use a pretty large pot when cooking the caramel, the mixture will expand to at least twice the volume when you add the baking soda.  You don't want to have to scrape that all off your counter if it overflows!

1 1/2 cups sugar
1/4 cup water
1/4 cup honey
3/4 tsp chai spice mix*
1 tbs baking soda

Line a rimmed baking sheet with a silicone liner (you could also spray it with non-stick spray or rub a coating of vegetable oil over the pan).  Set aside.

Stir together the sugar, water, honey and spices in a large saucepan.  Over high heat bring the mixture to a boil, stirring constantly.  Reduce the heat to medium high and continue to cook the simmering mixture, stirring occasionally.  Using a candy thermometer, monitor the temperature of the caramel.  You need the caramel to reach 300 degrees, which will take about 15-20 minutes.  When the caramel reaches 300 degrees, remove the pan from the stove and whisk in the baking soda.  The mixture will increase in volume significantly, so be careful of your fingers!

Immediately pour the brittle mixture into your prepared pan, letting it settle naturally into the pan.  If you try to spread it out, it will lose it's airy texture.  It will settle on its own.  When it's cool, break the brittle into pieces and store in an airtight container for up to one week.

* You can use a ready made chai mix if you can find one in your market in the spice section.  I like to make my own mix.  I use 1/2 tsp cinnamon, 1/2 tsp ground ginger, 1/2 tsp ground cloves and 3/4 tsp ground cardamom.


Tuesday, October 2, 2012

Pumpkin Cranberrry Bread {A Tuesdays with Dorie Post}

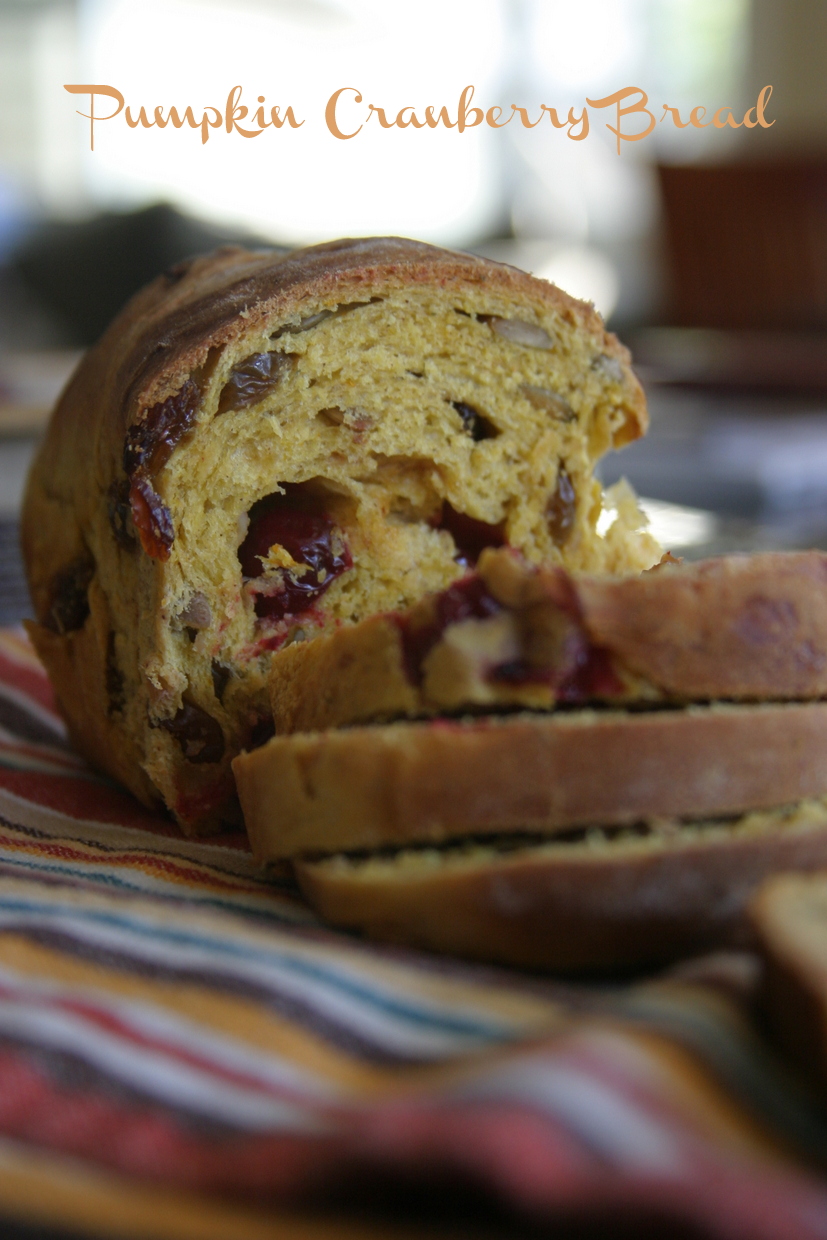
Initially I was skeptical about this first choice for October's Tuesdays with Dorie recipies.  So much so, in fact, that I almost didn't even bother trying it.  I mean, really, how many pumpkin bread recipes do we need?  The blogosphere is chock full of them and if you took a quick look at Pinterest, you'd find pumpkin bread all over the place.  Admittedly, I hadn't actually looked at the recipe yet.  But boy am I glad I did, because if I hadn't, I would have missed out on one beauty of a bread.  A yeast bread, not a quick bread as I had assumed.  As an added bonus, it's colorful and jam-packed with fall spices and little nuggets of bright flavors.   Now that I can get excited about.
The only problem that I had with this tasty little bread was the waiting time.  I just don't have the patience to wait for an overnight rise when I am as excited as I was to try this bread out.  I don't mind one, even two, rising times, but an overnight wait?  Well, I just couldn't do it.  The bread would just have to settle for a couple hours in the fridge while I picked the kids up from school and ran a few errands, but that was all it was going to get.  Thankfully, I think neither the flavor nor texture of the bread suffered.  One bite into the soft warm bread slathered with butter and I knew I hadn't sacrificed anything in the name of my impatience.  Pure heaven.
The best part- see those bright red gobs of goodness?  Those are fresh cranberries (well, actually frozen ones left over from last winter's scone making), not dried.  Without them, this bread would be nice, but nothing special.  It's the unexpected tartness contasting with the sweet pumpkin and warm spices that take the bread from the realm of the ordinary, to the extraordinary.  So as soon as those bags of cranberries start showing up in your market, scoop up several.  You'll want to have extra on hand to make this bread over and over through the fall and winter.  I promise, it's that good.

Oh, and just to be on the side of full disclosure, I didn't actually use pumpkin, but butternut squash leftover from a pound cake experiment.  Made no difference whatsoever, in my opinion.  And in place of the walnuts, I added toasted pumpkin seeds.  It just seemed appropriate.  I think you'd agree.
.
As usual, I implore you to go find the full recipe over at our hostesses' blog, This Bountiful Backyard.  Rebecca didn't seem to enjoy the fresh cranberries as much as I did, but I won't hold that against her and neither should you.  She did a beautiful job hosting and taking care of the fantastic recipe.  Maybe some of the other Tuesdays with Dorie bakers agreed with me.  I'm about to go find out!


Monday, January 2, 2012

Tangerine Olive Oil Cake {In Instagram!}

It's a new year and I'm trying new things.  That's what you're supposed to do, right?  So I'm breaking out my iPhone and trying out a fun new app (new for me anyway, but I've been hearing about it for ages) called Instagram.  It lets you take pictures you shoot with your phone and color and tint them in all sorts of ways.  Want a family photo to look like a polaroid from the 70s?  Or like a negative from old school film cameras?  Instagram lets you do it.  It's fun and you can get some interesting shots.  So today's pics are courtesy of my iPhone and Instagram.  (BTW, this is by no means an endorsement of any product, I'm just having fun with my phone!)
So winter is in full swing here in California.  What does that mean for me?  Lots and lots and lots of citrus.  My trees are full of oranges, tangerines, grapefruits and lemons.  Literally dripping with fruit.  I love all of the bright freshness of the citrus amidst the winter greens, potato gratins, braises and stews that dominate the winter food scene.  It's enough to make you believe, even just for a few bites, that you're somewhere tropical.  It can't really get better than that, can it?  My boys, both large and small, love eating the tangerines straight from the tree.  And is there really anything better than fresh squeezed orange juice with breakfast?  I'm truly in love with my backyard citrus trees.
I can't seem to shake the baking kick from the holiday season, so I decided to take some of the tangerines and try them out in a cake from a book I found while perusing the local store over Christmas.  The book is full of wonderful seasonal recipes and I couldn't resist the gorgeous purple and green spring onions on the cover.  This recipe is only one of several that I've already cooked up from the book and the first one that I decided to put a personal, decidedly Italian, spin on.  And so far it's my favorite.  Light, refreshing, not too sweet, and so darn pretty- it's a cake worthy of guests but just right for afternoon tea as well.
Tangerine Olive Oil Cake
Adapted from Cooking in the Moment by Andrea Reusing.
You can use any sweet, small orange for this cake, such as tangerines, clementines or satsumas.  Be sure to pick out the seeds if you use a seeded variety like I did.  The cake is lovely served with a bit of lightly sweetened whipped cream.  Oh, and I recommend that you remove the tangerine slices before eating.  While they make the cake stunningly bright and pretty, they can be bitter.

For the syrup:
6 small tangerines or other orange of your choice
1 tbs lemon juice
1 cup sugar

For the cake:
4 tbs butter at room temperature
3 tbs good quality olive oil
3/4 cup sugar
2 eggs
1/3 cup semolina flour
2/3 cup all-purpose flour
1 tsp baking powder
1/4 tsp kosher salt

Preheat the oven to 375 degrees and butter an 8 inch round cake pan.

Finely grate the zest of 2 of the tangerines (you want about 1 tbs).  Cut them in half and juice them (you want about 1/3 cup of juice).  Slice the remaining tangerines into 1/4 inch thick slices.  Combine the juice, tangerine slices, lemon juice and sugar in a small saucepan.  Bring to a simmer over low heat.  Continue to simmer for another 5 minutes, or until the tangerine slices begin to become translucent.  Remove the slices with a slotted spoon onto a plate.  Continue to simmer the syrup until it has reduced to 1/2 cup, another 5 minutes or so.  Set aside.

In the bowl of a stand mixer, beat together the butter and sugar until it is light and fluffy.  Add the olive oil and beat for another 2 minutes.  Add the eggs, one at a time, until they are fully incorporated, then beat in the tangerine zest. 

In a small bowl, stir together the semolina, flour, baking powder and salt.  Slowly add the flour mixture to the butter/olive oil mixture with the mixer on low speed, just until the flour is fully incorporated.  Pour the batter into the prepared pan and arrange the tangerine slices over the top.  Bake for 10 minutes.  Reduce the oven temperature to 350 degrees and continue baking the cake until the top is lightly golden and the center springs back when gently touched.  This should take another 20-25 minutes.

Let the cake cook in the pan on a baking rack for about 5 minutes.  Using a wooden skewer, poke holes all over the cake.  Brush the reserved syrup over the cake using a pastry brush.  Repeat this two or three times.  Let the cake cool completely.  Unmold and serve sliced into wedges and topped with whipped cream.