Showing posts with label Citrus. Show all posts
Friday, March 4, 2016
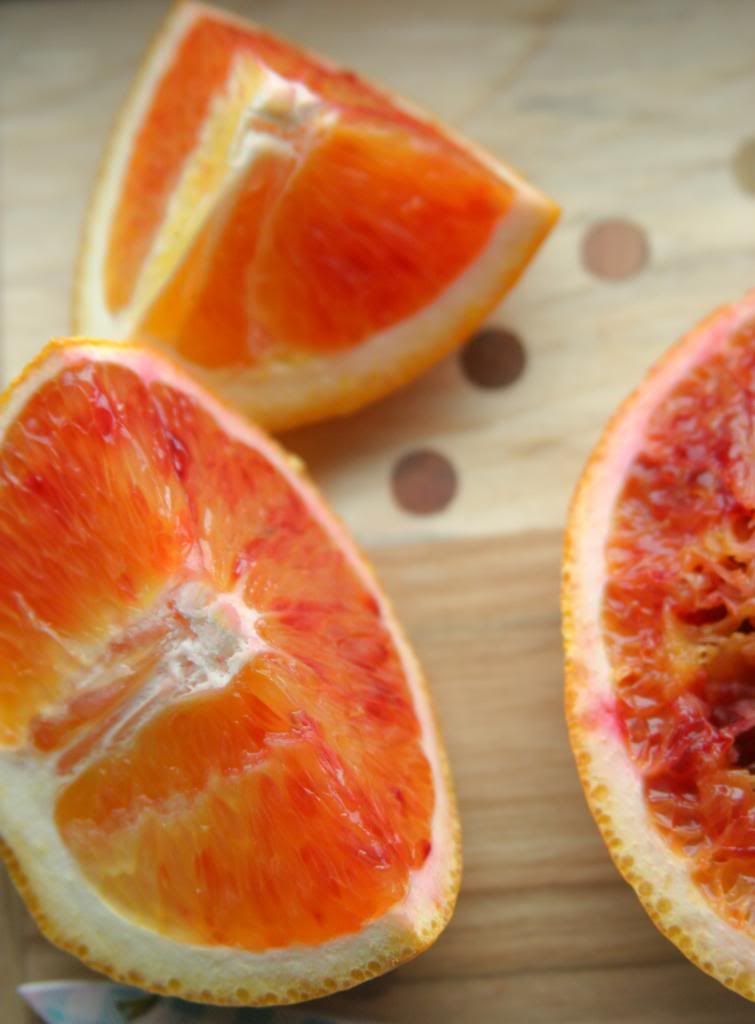
Orange Olive Oil Polenta Cake
I'm trying to shake off the gloomy mood around here. Reading back over my posts as of late, I feel like I've been in a kind of funk and it shows. So I'm purposefully taking on a decidedly more positive tone today. Let's see how it fits, shall we?
I reconnected with an old high school friend not too long ago. She's been through some rough stuff in her life, including some very devastating losses. But she's the most positive person and I'm always looking forward to reading the things she posts on Facebook and scrolling past the inspirational quotes she finds on Instagram. Yup, she's one of THOSE people. Perpetually happy and trying to make the world a better place, one inspirational quote at a time. We all know someone like that, don't we? On our worst days we roll our eyes and scroll quickly past. On our best we think, "Yes! That's exactly how I feel!".
A few days ago my friend posted this little gem,
"'It's impossible,' said pride.
'It's risky,' said experience.
'It's pointless,' said reason.
'Give it a try,' whispered the heart."
It's the kind of thing that's layered on top of a photo of a mountain climber or amazing landscape that I usually don't even bother looking at. But that day I did. I suppose I was feeling optimistic and it struck a chord with me. You see, I had done just the thing about a week earlier. I had put myself out there to be scrutinized and (hopefully) accepted in a role that would take my work to another level. It was a move very far outside my comfort zone and had required an almost "close your eyes and go for it without thinking too much" sort of move to make it happen.
The same day that quote rolled across my screen I got the email saying that although they had enjoyed working with me in the past, there was no room at the moment for me to contribute. Included in the email was an offer for me to do a bit of behind the scenes work in lieu of the position I was hoping for. Which is sweet and I'm happy to do anything that will get my foot in the door, but at it's heart it was still what I had dreaded most- rejection. It's the greatest leap of faith in yourself and your abilities to risk rejection in that way. My leap, it seems, fell just that short of making it to the other side.
The funny thing is, I'm okay with that. It was risky, but not impossible or pointless. I listened to the whispers of my heart and tried. I think that's win. Maybe not the win that I was hoping for, but better than giving in to fear and not having tried at all. It's what I try to teach my kids and what I aimed to instill in my students when I was still in the classroom- getting something wrong or failing is not the worst thing that can happen. In fact, those moments teach us the best lessons about ourselves and about how to improve for the next time. Because there will be a next time, you can be sure of it. So this time, my aim was off a bit. Next time? Who knows?
Orange Olive Oil Polenta Cake
Makes one 9 x 5 inch loaf. Adapted from smitten kitchen.
For the printable recipe, click here.
I love this sort of one bowl, quick and easy cake to have around for an afternoon snack or if a friend drops by. Wrap a sheet of parchment and pretty ribbon around one and you've got a wonderful hostess gift. The orange (I used sweet cara cara oranges, but blood oranges or valencias would be just as at home here) gives a bright, citrus-y sweetness, the olive oil a bit of depth and the polenta adds just a hint of crunch to the bite that I find irresistible. The polenta or corn meal that you choose will change the texture depending on how finely ground it is. The one that I used is a nice happy medium and it suits this cake just fine. This is a chance to break out that good olive oil you've been saving- with as much as is in the cake you will taste the difference.
1 cup (200g) cane sugar
3 oranges
1/3 cup buttermilk or plain yogurt
3 large eggs
2/3 cup good quality extra virgin olive oil
1 cup all purpose flour
3/4 cup ground polenta or corn meal
1 1/2 tsp baking powder
1/4 tsp baking soda
1/2 tsp fine sea salt
Butter a 9x5 inch loaf pan and set aside. Preheat oven to 350 degrees.
Place the sugar in a large bowl. Zest one of the oranges over the bowl directly into the sugar (the orange flavor in this cake is subtle, if you'd like to make it more pronounced grate the zest of a second orange into the bowl). Rub the zest into the sugar with your fingertips to release the oils.
Remove the peel and pith of one orange (supreme the orange) by cutting off the top and bottom to reveal the fruit inside. Then, run your knife along the curve of the orange to remove the remaining skin and pith. Holding the orange in your hand, cut away the wedges of orange between the membranes. Drop the orange pieces into the bowl with the sugar and zest. Break up the segments into 1/4 inch pieces with your fingers.
Juice the remaining two oranges into a small bowl or liquid measuring cup. You should have about 1/2 cup of juice. Stir the buttermilk into the juice then pour it into the bowl with the sugar mixture. Stir the mixture together with a whisk. Add the eggs and olive oil to the bowl and whisk until fully combined.
Carefully whisk in the flour, polenta, baking powder, baking soda and salt into the wet ingredients just until incorporated. Pour the batter into the prepared pan and place in the oven.
Bake for 50-55 minutes. The cake will be golden and a knife or toothpick inserted in the center will come out clean. Cool the cake on a wire rack for 5 minutes. Run a palette or butter knife around the edge of the pan and invert the cake onto the rack. Cool completely (right side up). Wrapped airtight the cake will keep for three days.
Thursday, August 20, 2015
Lemon Zucchini Bread {Revisited}
A dear friend of mine recently sent me a text asking for a recipe I shared a few years ago in the early days of this page. Someone had gifted her some zucchini and having tasted my version of zucchini bread once-upon-a-time she was looking to make it for herself. The only problem was that she couldn't find the recipe anywhere on my page. Not a trace of the delicious lemony zucchini bread popped up in any of her searches. Curious, I did a bit of digging myself (it's my blog so of course I can find it right?)
Friday, February 13, 2015
Honeyed Blood Orange Curd
When I lay my baby girl down on her changing table she breaks into a fit of giggles and many times the giggles turn into a full on hearty, belly laugh that doesn't stop until we're done. I can't imagine for the life of me what is so funny about diaper changes, truly. But whatever she imagines causes this moment of pure joy that is so infectious, no matter what my mood is I can't help but join in the merriment. It's such pure and unadulterated happiness, so simple and sweet with nothing held back. Those are the moments that make my Mama heart sing.
It got me thinking about moments like that in my own life. There are plenty of memories from my childhood and silliness with my sister, unforgettable moments with my best friend from high school and my college roommates, sledding (zooming!) down a 7km Swiss road with my then 4 year old son in the blindingly fresh snow. But what I've come to realize, sadly, is that the scales are tipped in favor of childhood. As we get older there are fewer and fewer instances of that sort of joy. We are either too busy to notice the moments that could spark the laughter or are too self conscious to let ourselves go the way a small child would.
So I've vowed to myself to join in with my my sweet girl when she gets giggly. I want to tip the scale back in the other direction. Because joy shouldn't be limited by age.
Honeyed Blood Orange Curd
Makes about 1 pint
For the printable recipe, click here.
This curd is really quite lovely, sweet without being overly cloying. It's not quite as tart as a lemon curd because the blood orange is a beautifully fragrant and sweet citrus. I hold back on the sweetener (honey in this case) to keep the orange flavor at the forefront and keep the curd from getting too sweet. It makes a great spread for biscuits and scones, a dip for berries (if you can find any quality ones in the same season as the oranges) and fills pastries beautifully. In this case, I made small pavlovas (a sort of flat-ish meringue) that I filled with a scoop of curd. The result was a taste that brought me back to the days of running after the ice cream truck on a hot summer afternoon as a kid. Talk about joy! The curd and pavlova combination is a sophisticated dessert that is unfussy and easy to make and reminiscent of a cloud-like creamsicle. Childhood joy for an adult palate- perfect. The meringue recipe is not mine, so I will simply give you the link (though I use lemon juice in place of the vinegar and add a smidge more vanilla) to the recipe from The Kitchn. Any way you use it, this blood orange curd is quite something else.
Zest of 1 blood orange
1 cup freshly squeezed blood orange juice (3-4 oranges)
1/4 cup mild flavored honey (this is a perfect time to use orange or citrus blossom honey)
2 large eggs
2 egg yolks
4 tbs unsalted butter, room temperature
1/8 tsp fine sea salt
In a small saucepan, bring the orange juice to a simmer over medium heat. Continue to simmer the juice until it has reduced by half. Remove from the heat and let it cool to room temperature.
Add the zest, honey, eggs, egg yolks, butter and salt to the saucepan and whisk to combine. Place the pan over medium low heat. Cook, stirring continuously with a heat proof spatula until the curd begins to thicken. Take care to get into the corners of the pot with the spatula. The curd is ready to ready to remove from the heat when it is thick and glossy and coats the spatula. Remove from the heat and cool completely. Refrigerate in a covered container until ready to use.
The curd will keep for a week in the refrigerator.
Friday, January 31, 2014
Baked Yeast Doughnuts with Blood Orange Glaze
Those hands. Those sweet little boy fingers. I've used my little man's hands a few times in photos for this blog and the results are always so captivating to me. I don't know that you can get any more pure than little hands helping shape dough or adding ingredients to a bowl. They just want to help- be in the mix- and it's always a joyful experience. The photos are some of my all-time favorites because they capture such important yet small moments.
But they're no longer the chubby little toddler hands, dimpled and clumsy, that used to love holding onto my index finger as we walked along together. These hands have more slender, sure and independent fingers than they did even a few months ago. Fingers that hesitate a moment before gabbing onto my hand as we walk home from school. They now wield scissors with abandon and accuracy (for better or worse) and would much rather stack LEGOs than help his mom in the kitchen.
Here's the thing, though. The little guy is still just 4 years old so there are times when he wants to be considered a "big boy" like his 9 year old brother, and times when he's still, blessedly, just a little boy. He likes to twist his hair between his fingers (and gets mad if it gets cut too short to be "twirled") and stick his first two fingers in his mouth when tired. Signs that my sweet little mama's boy is still in there somewhere despite his desire to grow up as quickly as he can.
When he agreed to actually stand still for three minutes and help me take photos of these sweet little doughnuts, I grabbed my camera as fast as I could. I know those moments of patience for me and my desires are going to come less and less frequently as he grows up and I want to capture as many of them as I can. Besides, it's really hard to get a four year old to stand still with a handful of warm, sweet-glazed doughnuts. (Full disclosure, it would be just as hard to get me to stand still with these babies in my hand too.)
Baked Yeast Doughnuts with Blood Orange Glaze
Makes about 3 dozen 2 1/2 inch round doughnuts.
For the printable recipe, click here.
These doughnuts are based on the sugar and spice doughnuts I made about a year ago. They are wonderfully tender and delicious and just as good as their fried counterparts. I like to make them small because, sadly, they don't keep too well after baking. The small ones just seem to go faster than big doughnuts. My guess is that it's just too easy to pop one in your mouth as you walk through the kitchen so everyone is tempted to grab one on the go.
1 egg
1/4 cup sugar
1 cup milk, heated to 115 degrees
1 tbs active dry yeast
2 tsp freshly grated orange zest
2 1/2 cup to 3 1/2 cup all-purpose flour
1/4 cup room temperature butter, cut into cubes
1 1/2 cups powdered sugar
3-4 tbs fresh blood orange juice
In the bowl of a mixer fitted with the paddle attachment, beat the egg and sugar together until the sugar dissolves. Add the milk, vanilla, zest and yeast and mix on medium speed until blended. Add 2 cups of the flour a 1/2 cup at a time with the mixer on low speed. Beat until the dough is thick and begins to pull away from the sides of the bowl.
Switch to the dough hook. With the mixer on medium add the chunks of butter one piece at a time, beating until no large chunks of butter are left, 3-5 minutes. Reduce the speed to low and add additional flour, 1/2 cup at a time, until the dough gathers around the hook and comes cleanly off the sides of the bowl. You want a soft, moist but not overly sticky dough.
***You can also do all of this by hand in a large bowl. Follow the same steps simply using a wooden spoon to do the mixing. Do the final mixing with your hands if it becomes too difficult to use the spoon***
Lightly butter a large bowl and turn the dough into the bowl. Cover with plastic wrap and let the dough rise in the refrigerator overnight (or, if making right away, place the bowl in a warm spot and let the dough double in volume, about 1 hour).
When you are ready to bake the doughnuts, pull the dough from the refrigerator (or from your bowl on the counter) and roll it out on a lightly floured work surface to 1/2 inch thick. Using a round 2 1/2 inch cutter, cut the doughnuts out. Place the doughnuts on a parchment lined baking sheet at least 1 inch apart from each other. Cover with a kitchen towel and let rise in a warm spot for 30-35 minutes for refrigerated dough and 15-20 minutes for room temperature dough, until nearly doubled in size. Preheat the oven to 400 degrees while the doughnuts rise.
Bake the doughnuts for 5-8 minutes until they are lightly golden. While they are baking, mix the powdered sugar and 3 tbs of the blood orange juice in a shallow bowl. Add any additional juice in small amounts until you have a smooth, spreadable glaze. When the doughnuts come out of the oven, immediately dip or drizzle the baked doughnuts with the glaze. The doughnuts are best eaten right away.
Friday, November 22, 2013
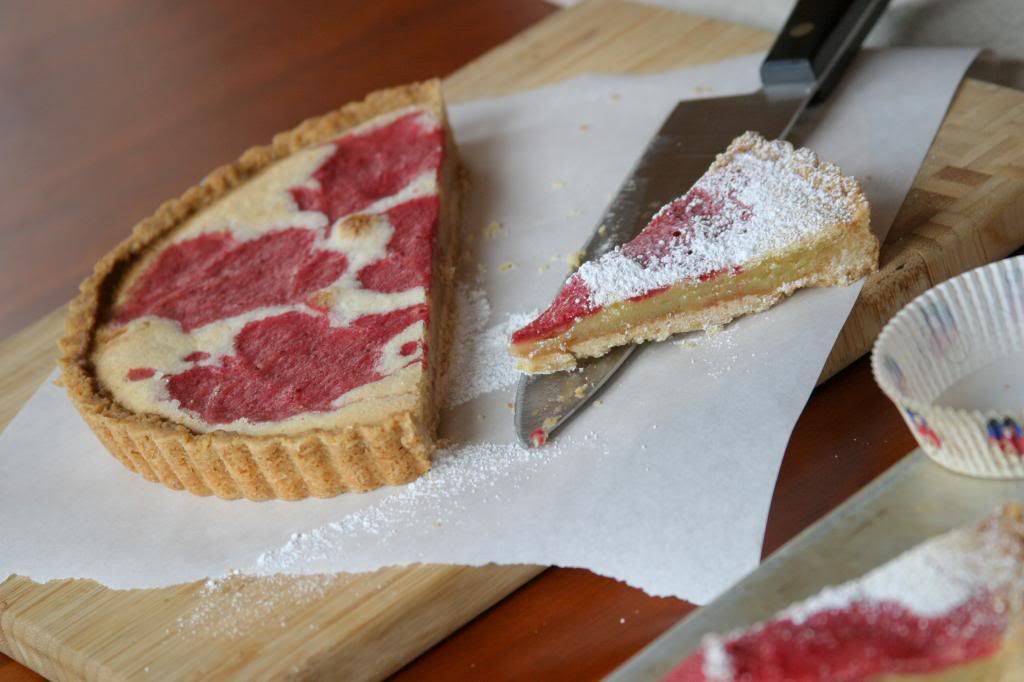
Cranberry Lemon Bars
Well, Thanksgiving for us is a thing of the past. And yes, I know that even though we are ahead of the rest of the US as far as times zones go we are not so far ahead as to actually BE after Thanksgiving which is still a week away. I may have been in a Mommy-fog since my oldest was born almost 9 years ago, but I can at least count that far. It's one of our favorite holidays though unless you're on an American military base, not exactly a popular one here in Germany. We decided that we'd really miss a big, old-fashioned holiday if we didn't throw one ourselves. But here's the problem- we'll be in Rome on the actual date.
Okay, I realize that being in Rome isn't really a problem. In fact, I will be incredibly thankful to be able to enjoy a place I've been wanting to explore for forever. So as I tuck into a platter of spaghetti carbonara on Thanksgiving day (and not, as a friend suggested, on wings at the Hard Rock Cafe just to say we "did" American on a very American holiday) I will be grateful for my good luck and the friends and family who will be traveling along with me to the Eternal City.
I've said before that we usually spend Thanksgiving with our "adopted" family of friends gathered in our military travels and the dinner we had this past weekend was no exception. Sixteen friends, both old a new, crammed themselves into our home to enjoy the big turkey feast. And we enjoyed every last bite as well as the company with which it was shared. Thankfully, I had help preparing the meal because there's no way my tiny oven could have churned out enough food unless I spent a good three days preparing and cooking. I love my friends, but that's just not happening. So, except for the pumpkin pie that my oldest dropped when retrieving it from our (American-sized) refrigerator in the basement, we feasted in proper American style.
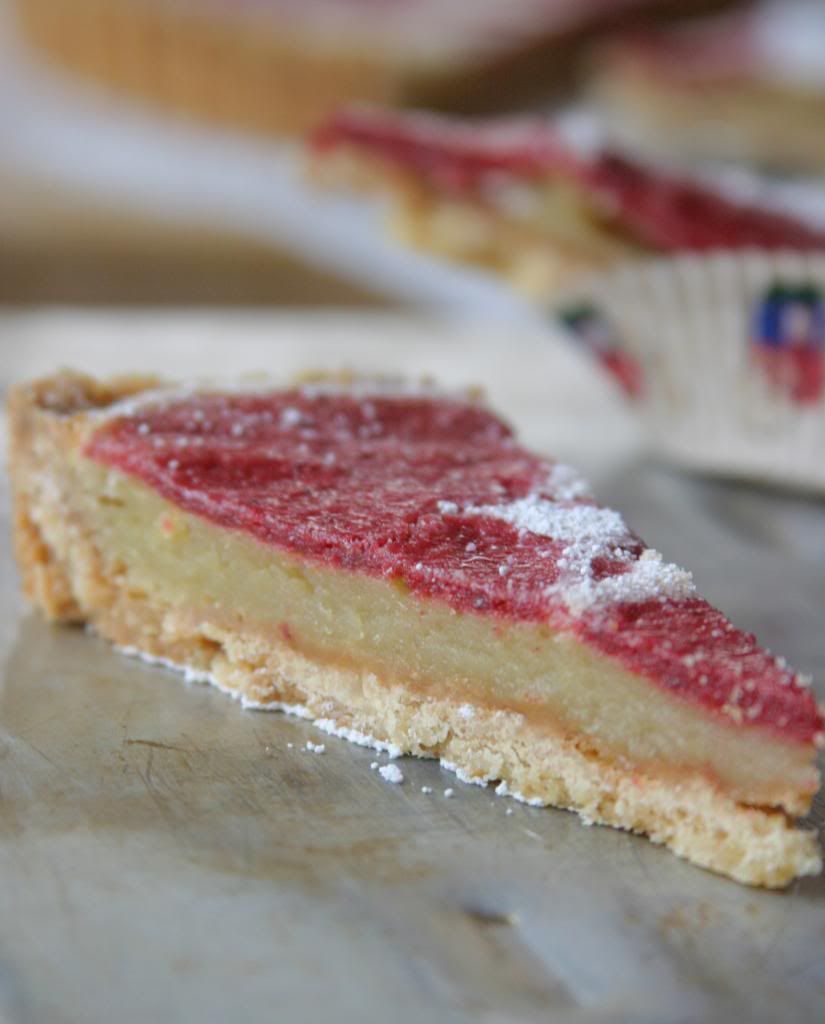
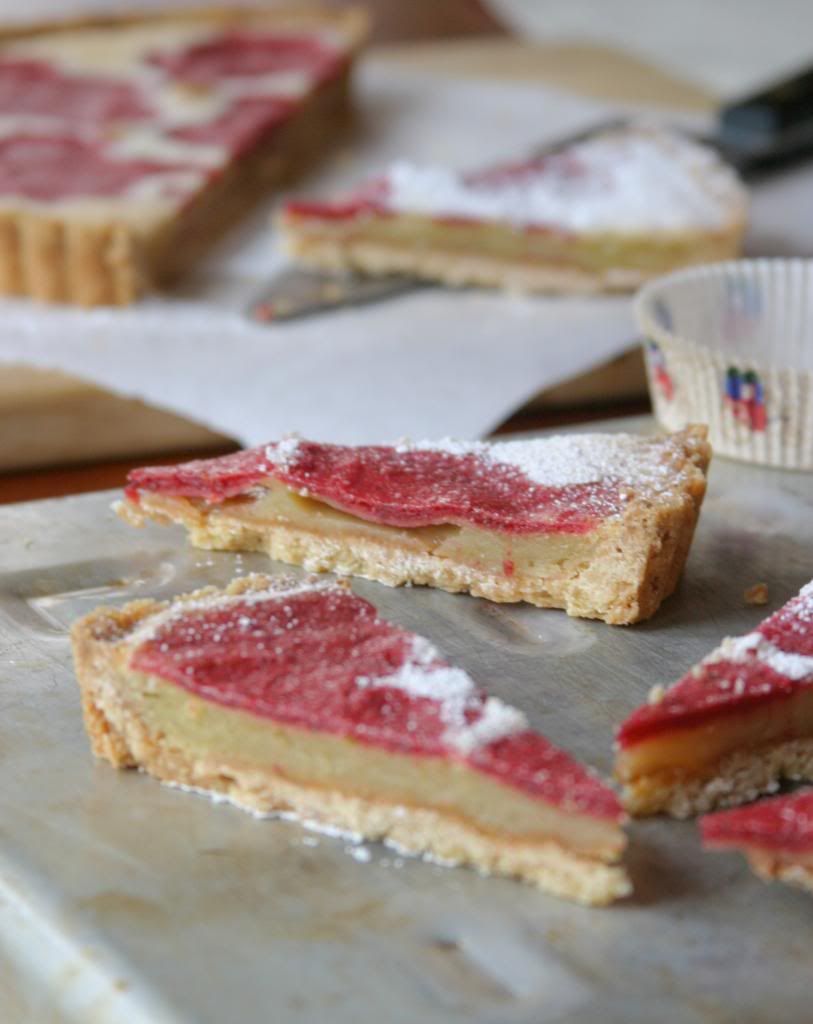
The best part about the day after Thanksgiving? No, not the shopping- I loathe Black Friday shopping. It's the leftovers of course! Apple pie and cold sweet potatoes for breakfast. Shepherd's pie made from just about every part of the meal. Warmed pumpkin dinner rolls swiped with a dollop of the perfect cranberry sauce for a mid-morning snack. Today's offering is yet another way to use up those cranberries in case you made way too much like I did this year. These lemon bars are a great way to break up all of the heaviness of Thanksgiving leftovers. Bright with lemon and tart cranberry flavor and much less fussy than all of those apple pies you will have cursed just days before.
Another great thing about the day after Thanksgiving? You are officially allowed to listen to Christmas music. I've got my Pandora fired up as I type this cranking out some Trans Siberian Orchestra. Here's to a very joyous Thanksgiving and the best leftovers ever!
Cranberry Lemon Bars
Makes 12 triangles from an 8 inch tart pan or 12 squares from an 8 x 8 in square pan.
Adapted very slightly from Food & Wine magazine. Click here for the printable.
Our mail from the States trickles in slowly here in Germany. So the November issue of Food & Wine didn't land on my table until the day after I made my Thanksgiving feast. Which actually worked out just fine because I spied this recipe and knew I had the perfect cranberry sauce sitting in my fridge. I didn't use the cranberry mixture the magazine suggested so I'll give you the link to my recipe below. If you have your own favorite cranberry recipe, go ahead and use it here, just promise me you won't use the stuff from the can, please? The only other changes I made were to halve the recipe because I wasn't feeding a Thanksgiving crowd and this amount is just perfect for my family and to up the amount of lemon zest in the filling. The bars are so pretty on a dark, dreary fall afternoon and the tart/sweet taste paired with an easy, press-in crust are just right for a tired chef and tired post-Thanksgiving palate.
For the crust:
10 tbs cold butter, cut into small cubes
1/4 cup plus 2 tbs sugar
1 1/4 cups all purpose flour
For the lemon filling:
2 eggs
1 egg yolk
1 1/2 tsp grated lemon zest
1/4 cup fresh lemon juice
1 1/4 cup sugar
6 tbs all purpose flour
For the cranberry swirl:
1/3 cup of spiced cider cranberry sauce or 1/3 cup cranberries cooked with 2 tbs sugar and a pinch of cloves until sauce thickens and berries pop
Preheat your oven to 350 degrees.
To make the crust:
In a food processor or mixer blend the butter and sugar until the butter gets slightly fluffy and creamy (about 2 minutes). Add the flour and a pinch of kosher salt and blend until the flour is incorporated. Press the dough evenly into an 8 inch tart pan with a removable bottom or an 8 inch square baking pan that has been lined with parchment paper (let the parchment overhang the edges by an inch or two). Refrigerate for 15-20 minutes until the dough is firm. Bake the crust for 20-25 minutes or until the crust is lightly golden. Cool completely before filling.
To make the lemon filling:
In a medium bowl, whisk together the eggs, egg yolk, lemon zest, lemon juice, sugar and flour.
Assemble the tart and bake:
Blend the cranberries until smooth. Add 1/4 cup of the lemon mixture and blend.
Pour the lemon filling into the prepared crust. Dollop the cranberry mixture in several places over the lemon filling. With the tip of a knife or toothpick, swirl the cranberry sauce through the lemon filling. Bake the bars at 350 for 25-30 minutes until the filling is set.
Cool completely on a rack. Cut into 12 wedges or squares depending on the pan you used. Dust with powdered sugar before serving. Store in a sealed container in the refrigerator for up to 3 days.
Monday, November 11, 2013
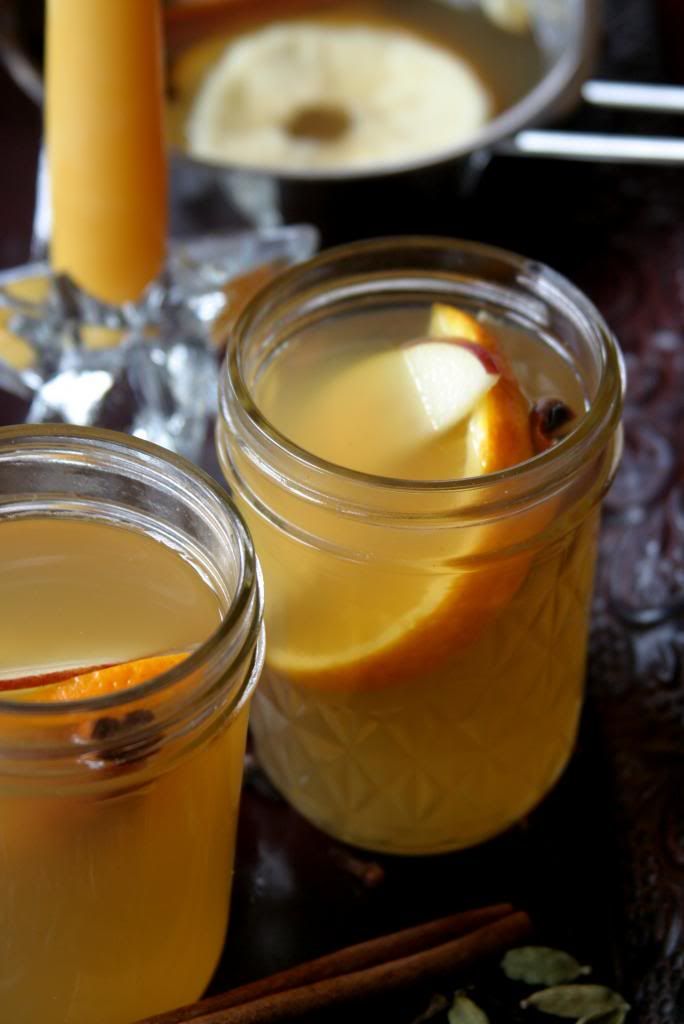
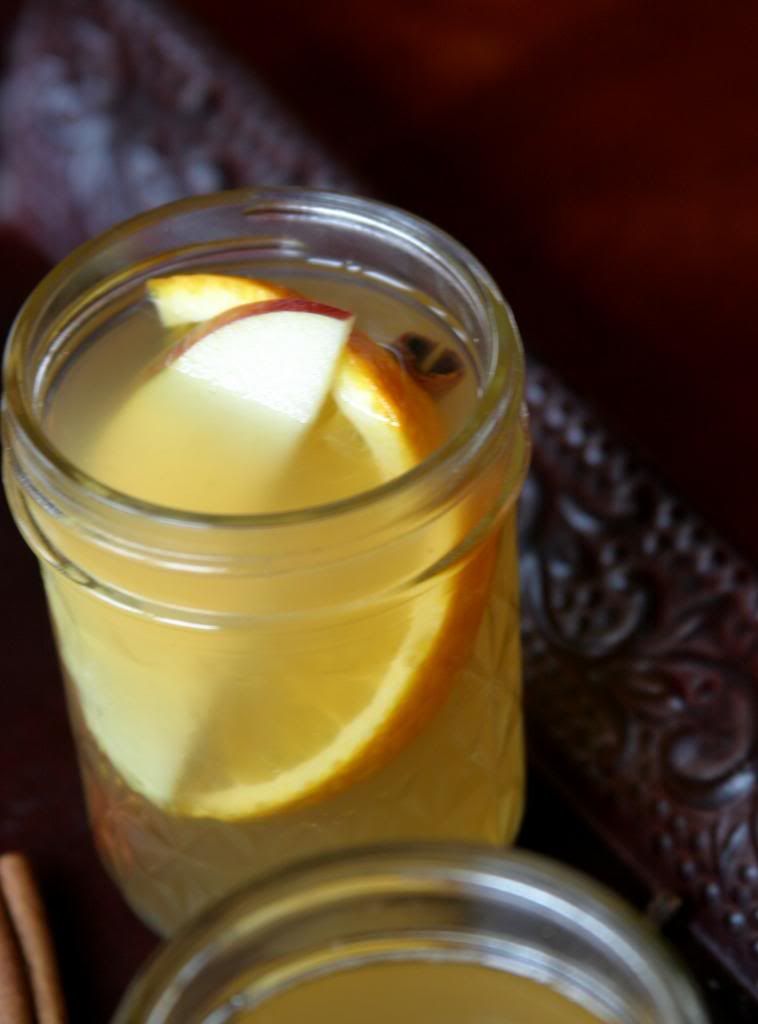
Spiced Apple Glühwein
I've been restless lately. Antsy, if you will. Germany is a great place to be, but I haven't found my "thing" here yet. You know that thing that I mean. It's the one that gets you out of bed in the morning and makes you excited for the day that's to come. I'm not sure how I want to spend my time- what would be the most valuable way to spend the hours I have free during the day. Do I want to volunteer on the base? Take German language courses? Work on my fitness or simply explore the area and work on my photography? Not knowing what to do with my time means I usually end up roaming around doing not much of anything. That's about the least fulfilling way to spend my time and it's been incredibly frustrating.
What I've been up to lately in my journey to find a purpose, my "thing" if you will, is planning several upcoming family getaways. At the very least it's a nice distraction. We've done quite a bit of traveling around Germany and it's been wonderful to see the culture and history of the country we're living in. But my restless spirit is in need of more. This past weekend was the start of that "more" for me. Hours of scouring the internet and pouring through travel books led to a whirlwind trip to Alsace, France.
We spent the weekend gazing up at the most stunning Cathedrals and searching out castles and sunset views of the Alsatian wine country. It was incredibly beautiful. I gazed in the window of every boulangerie and patisserie we passed. The kugelhopf that Alsace is known for was featured in every shop. There were half timbered houses lining the streets and canals in an area of the town of Strasbourg called "Petite France". Here we wandered around and found flea markets and food vendors lining the sidewalks. I scored the best fromage blanc with cinnamon and plums at a stall right next to live geese and ducks for sale. Seriously? I suppose the French take fresh food very seriously.
As we drove home last night through the first snowfall in the Black Forest (can you get more fabulously cliche than that?), I felt renewed. I have a few souvenirs in my wine cellar and additions to my pottery collection, but the best thing that I brought back was a peace that I think will last until the next big adventure. In the meantime, I have a Thanksgiving feast for all of our American friends to whip up and a trip to Rome to plan. I'm so looking forward to a little bit of home as well as the newest city to conquer. I guess finding my "thing:" can wait just a little longer.
Serves 4-6 people. Adapted from a traditional German recipe.
For the printable recipe, click here.
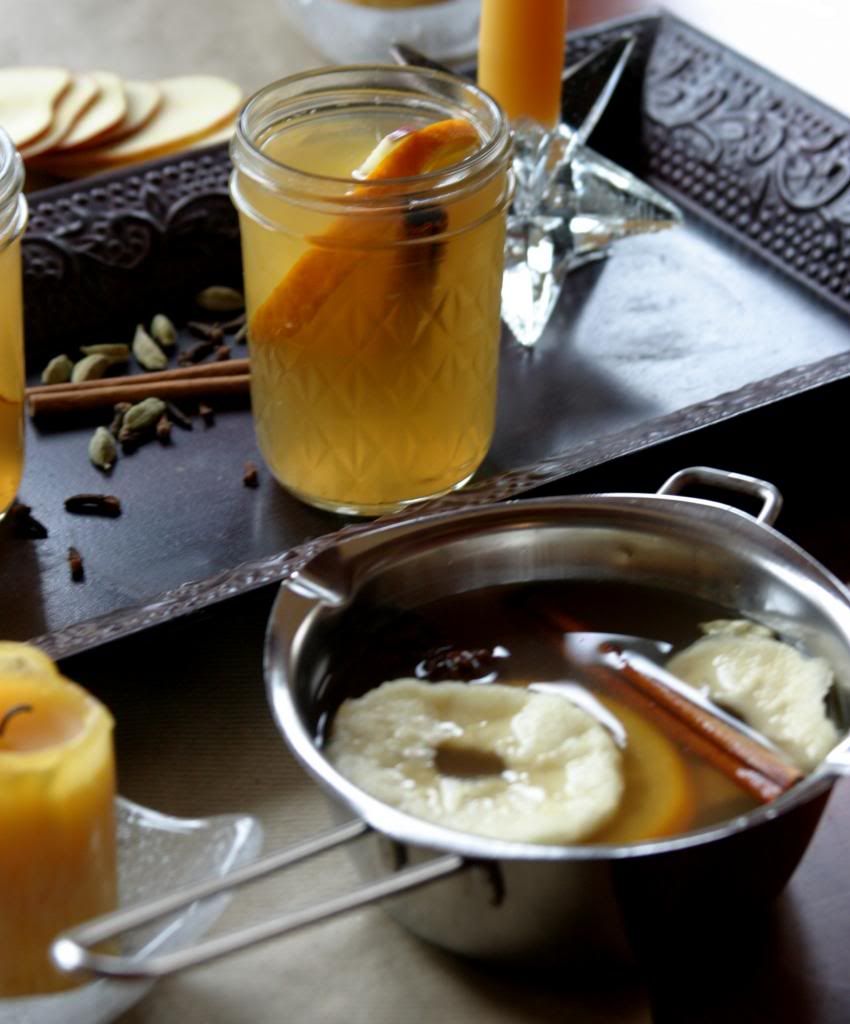
As the winter kicks into gear here in Europe, this is the sort of warm drink that you can find in every Christmas market, crepe shop and corner restaurant. Whether you call it mulled wine, vin chaud or glühwein the constants are warm wine and wintery spices. What else goes in is up to you. I like the traditional red wine but sometimes it can be too sweet and heavy. This white wine version is light and lightly spiced- perfect for sipping with a house full of friends and family on a chilly Thanksgiving afternoon or after a few hours of raking leaves in the yard. You can let it simmer on the lowest setting on your stove top or pour it in a slow cooker set to low and leave it on the counter for everyone to sample. When I made my version pictured here I put the whole spices straight into the pot with the juice and wine. I think I would have liked a bit more of the spice flavor to come through so I am suggesting that you toast the spices until fragrant before stirring them into the wine. The recipe below reflects this change.
1 bottle of dry white wine such as a Pinot Gris, Sauvingon Blanc, or Viognier
1 cup of unsweetened apple juice (preferably fresh pressed and unfiltered if you can get it)
3 tbs raw or turbinado sugar
1 orange sliced into thin rounds
8 slices of dried apple
3 cinnamon sticks
5 whole cardamom pods
1 star anise
8 cloves
thinly sliced apple for serving
In a medium pot stir together the wine, apple juice, sugar, orange slices and dried apple. In a separate small, dry pan toast the spices over medium low heat for just a minute or two. You'll know they are ready when the spices become very fragrant. Stir the spices into the rest of the ingredients. Heat the glühwein over low heat for at least 15 minutes before serving. Serve each cup with a slice of apple (and a cinnamon stick if you wish).
Labels:
Appetizers,
Christmas,
Citrus,
Drinks,
Fall,
German,
Thanksgiving,
Winter
Monday, May 27, 2013
Pineapple Lime Lemonade
It's unofficial start to the summer, and this is my new official summer drink.
I ordered this drink as an afterthought at a local Mexican place a few weeks ago and after one sip I was hooked. Afterwards, I spent more time than I should probably admitobsessing over thinking about it. I just couldn't shake the memory of the first refreshing sweet-tart sip. It stuck with me and I knew I wouldn't be able to move on unless I could perfect my own version at home.
Yes, I know, it's just lemonade. But, I'm telling you that the sweetness from the pineapple and the slight bitter/tart flavor of the lime take this lemonade to a place somewhere beyond the ordinary and everyday. I dare you to try it and not become obsessed with it to.
Double dog dare you.
Pineapple Lime Lemonade
Makes 1 pitcher, about 2 quarts.
For the printable recipe, click here.
1/2 cup sugar
3 3/4 cup water, divided
zest and juice of 1 lime, plus 1 lime sliced into wedges
1 cup lemon juice (from 5-6 lemons)
1 cup pureed fresh pineapple (from about 1/4 of a pineapple)
1 large handful ice
In a small saucepan, heat the sugar and 3/4 cup of the water until the sugar melts.
Place the lime zest in the bottom of a 2 quart pitcher. Pour the warm sugar syrup over the zest and let cool. Stir in the lemon juice, pureed pineapple, lime wedges and remaining 3 cups water. Stir in the ice and let the lemonade get cold. You can drink the lemonade right away, but if you let it sit overnight, the lime wedges impart an extra lime-y tartness that we found to be quite delicious.
Serve in cold glasses with an additional wedge of lime.
I ordered this drink as an afterthought at a local Mexican place a few weeks ago and after one sip I was hooked. Afterwards, I spent more time than I should probably admit
Double dog dare you.
Pineapple Lime Lemonade
Makes 1 pitcher, about 2 quarts.
For the printable recipe, click here.
1/2 cup sugar
3 3/4 cup water, divided
zest and juice of 1 lime, plus 1 lime sliced into wedges
1 cup lemon juice (from 5-6 lemons)
1 cup pureed fresh pineapple (from about 1/4 of a pineapple)
1 large handful ice
In a small saucepan, heat the sugar and 3/4 cup of the water until the sugar melts.
Place the lime zest in the bottom of a 2 quart pitcher. Pour the warm sugar syrup over the zest and let cool. Stir in the lemon juice, pureed pineapple, lime wedges and remaining 3 cups water. Stir in the ice and let the lemonade get cold. You can drink the lemonade right away, but if you let it sit overnight, the lime wedges impart an extra lime-y tartness that we found to be quite delicious.
Serve in cold glasses with an additional wedge of lime.
Tuesday, April 23, 2013
Tea Scented Macarons with Lemon Cream
This is the post that almost wasn't. I tried and failed the first time. Yes, that does happen, even to someone as experienced in the kitchen as me. I should have taken a few pictures of the mess that resulted on my baking sheets, but I was so irritated with myself that I just stuck the baking sheets in my sink and walked away. But, as I used to say back in my teaching days, you learn as much, if not more, from your failures as you do from your successes. And perhaps I was just as motivated to try again by the look of disappointment of my 4-year old sous chef's face when he earned that I had to throw out all of the cookies he had helped me make. Boy, does that kid know how to get to me.
Here's the other thing that kept me trying- I knew something was wrong with that first batch and I didn't listen to my instincts. Instead I just crossed my fingers and hoped that the macarons would turn out okay. But if you had asked me to be truly honest, I knew they wouldn't. And of course, I was right. Instead of cute little cookies with the characteristic smooth tops and "feet" at the bottom, I ended up with a soupy mess coating my silicone baking mats. There was too much egg white and I knew it right from the start. It took me another week and a half to work up the courage to try again. But I couldn't let it go. It was at the back of my mind nagging at me the whole time.
Attempt number two was much more successful. There were a few cracks and smooshed bottoms (I think I should have let them bake for another minute or two), but over all I was delighted with the result of my macaron experiment. The inspiration came from one of my favorite drinks- the Arnold Palmer- and a more than giant lemon macaron that I actually had to cut into three pieces and share because there was no way I could eat it all by myself....okay, I totally could have eaten it but it wouldn't have been wise....
I had meant to submit these macarons for Love & Olive Oil's April kitchen challenge but after my initial failure I just couldn't get my act together on time. No matter, I'm still glad I tried again. And so is that little sous chef of mine, his sad face wiped away by the many macarons he swiped while I was getting together the materials to photograph them. It's a good things he's cute.
Tea Scented Macarons with Lemon Cream
Makes enough for about 2 dozen 2 inch sandwiched macarons. Recipes adapted from Les Petit Macarons, by Kathryn Gordon and Anne E. McBride and Food and Wine Magazine.
For the printable recipe, click here.
I've made macarons before- there's even a recipe for chocolate macarons posted on this site. So I'm not a stranger to them. I thought I would try a different method this time around. Bad idea. After my initial failed attempt to use a "quick method" of making macarons, I thought I would do much better with a more traditional recipe. And I was right. I made these macarons using the French meringue method and I was happy with both the ease with which they came together and the resulting cookies. One trick is to age the eggs. I left mine on the counter in a bowl while I made the lemon curd and waited it for it to cool.
I used my absolute favorite tea in the world for these macarons because I had just enough left in the bottom of my tin to make the cookies but not enough to make a cup of tea. It's a black tea called Marco Polo from France. I think Earl Grey would be a wonderful substitute for the more expensive tea. The lemon creme is a combination of two recipes and requires an extra step beyond making traditional lemon curd, but I think beating in the almond paste helped tame some of the tartness of the lemon. Trust me, it's still plenty lemony.
For the Lemon Cream:
5 egg yolks
1 whole egg
1 tsp lemon zest
2/3 cup fresh lemon juice
1/4 cup plus 2 tbs honey
4 tbs butter, but into small pieces
4 oz. almond paste (not marzipan)
In a medium heavy bottomed pan, whisk together the egg yolks, egg, lemon zest, lemon juice and honey. Cook this mixture over medium low heat, whisking constantly, until it is thickened and glossy. Remove from the heat and stir in the butter. Place the lemon curd in a bowl and cover the surface directly with plastic wrap. Refrigerate until cool, at least three hours.
To finish the cream, place the almond paste in the bowl in of a mixer and beat until it is crumbled. Add 1 cup of the cooled lemon curd to the mixer slowly and beat until combined. Refrigerate until needed, up to one week.
For the Tea Scented Macarons:
1 1/4 cups almond flour
3/4 cups powdered sugar
2 tsp ground Earl Grey tea (use a mortar and pestle, spice grinder or small food processor to grind it very finely)
1 tbs powdered egg whites
3/4 cup sugar
1/2 cup egg whites (from 4 eggs- crack the eggs, quickly beat with a fork to break up the whites and then measure)
1/2 tsp cream of tartar
Preheat your oven to 200 degrees and line 2 baking sheets with parchment or a silicone baking sheets.
Place the almond flour, powdered sugar and tea in the bowl of a food processor. Pulse the mixture several times to blend and grind the almonds very finely. Pour the almond mixture into a fine-meshed sieve and sift onto a sheet of waxed paper.
In the bowl of a mixer, quickly whisk together the powdered egg whites and sugar. Add the egg whites and cream or tartar and whisk until thoroughly combined. Turn on the mixer and, using the whip attachment, whip the egg whites until they are thick, glossy and form stiff peaks.
Remove the bowl from the mixer and quickly fold in the almond mixture until fully incorporated. Fill a pastry bag fitted with a half inch tip or a half inch hole cut in the tip with the macaron batter. Pipe the batter onto the prepared baking sheets into half dollar sized mounds about 1 1/2 inches apart. To remove any "tails" from the piping and any air bubbles, slam the baking sheets on the counter at least three times and up to six.
Bake the macarons for 15 minutes, then raise the heat to 350 degrees and continue baking the shells for 9 more minutes until the foot and edge of the cookie are firm and the shells just come off the parchment. Slide the parchment onto a cooling rack and cool the macarons completely.
To fill, turn half of the macarons with the flat side up and pipe or spoon the lemon cream about 1/2 inch high and leaving a 1/4 edge around the cream. Gently press another cookie on the top, flat side down. Store in an airtight container in the refrigerator for up to 3 days.
Here's the other thing that kept me trying- I knew something was wrong with that first batch and I didn't listen to my instincts. Instead I just crossed my fingers and hoped that the macarons would turn out okay. But if you had asked me to be truly honest, I knew they wouldn't. And of course, I was right. Instead of cute little cookies with the characteristic smooth tops and "feet" at the bottom, I ended up with a soupy mess coating my silicone baking mats. There was too much egg white and I knew it right from the start. It took me another week and a half to work up the courage to try again. But I couldn't let it go. It was at the back of my mind nagging at me the whole time.
Attempt number two was much more successful. There were a few cracks and smooshed bottoms (I think I should have let them bake for another minute or two), but over all I was delighted with the result of my macaron experiment. The inspiration came from one of my favorite drinks- the Arnold Palmer- and a more than giant lemon macaron that I actually had to cut into three pieces and share because there was no way I could eat it all by myself....okay, I totally could have eaten it but it wouldn't have been wise....
I had meant to submit these macarons for Love & Olive Oil's April kitchen challenge but after my initial failure I just couldn't get my act together on time. No matter, I'm still glad I tried again. And so is that little sous chef of mine, his sad face wiped away by the many macarons he swiped while I was getting together the materials to photograph them. It's a good things he's cute.
Tea Scented Macarons with Lemon Cream
Makes enough for about 2 dozen 2 inch sandwiched macarons. Recipes adapted from Les Petit Macarons, by Kathryn Gordon and Anne E. McBride and Food and Wine Magazine.
For the printable recipe, click here.
I've made macarons before- there's even a recipe for chocolate macarons posted on this site. So I'm not a stranger to them. I thought I would try a different method this time around. Bad idea. After my initial failed attempt to use a "quick method" of making macarons, I thought I would do much better with a more traditional recipe. And I was right. I made these macarons using the French meringue method and I was happy with both the ease with which they came together and the resulting cookies. One trick is to age the eggs. I left mine on the counter in a bowl while I made the lemon curd and waited it for it to cool.
I used my absolute favorite tea in the world for these macarons because I had just enough left in the bottom of my tin to make the cookies but not enough to make a cup of tea. It's a black tea called Marco Polo from France. I think Earl Grey would be a wonderful substitute for the more expensive tea. The lemon creme is a combination of two recipes and requires an extra step beyond making traditional lemon curd, but I think beating in the almond paste helped tame some of the tartness of the lemon. Trust me, it's still plenty lemony.
For the Lemon Cream:
5 egg yolks
1 whole egg
1 tsp lemon zest
2/3 cup fresh lemon juice
1/4 cup plus 2 tbs honey
4 tbs butter, but into small pieces
4 oz. almond paste (not marzipan)
In a medium heavy bottomed pan, whisk together the egg yolks, egg, lemon zest, lemon juice and honey. Cook this mixture over medium low heat, whisking constantly, until it is thickened and glossy. Remove from the heat and stir in the butter. Place the lemon curd in a bowl and cover the surface directly with plastic wrap. Refrigerate until cool, at least three hours.
To finish the cream, place the almond paste in the bowl in of a mixer and beat until it is crumbled. Add 1 cup of the cooled lemon curd to the mixer slowly and beat until combined. Refrigerate until needed, up to one week.
For the Tea Scented Macarons:
1 1/4 cups almond flour
3/4 cups powdered sugar
2 tsp ground Earl Grey tea (use a mortar and pestle, spice grinder or small food processor to grind it very finely)
1 tbs powdered egg whites
3/4 cup sugar
1/2 cup egg whites (from 4 eggs- crack the eggs, quickly beat with a fork to break up the whites and then measure)
1/2 tsp cream of tartar
Preheat your oven to 200 degrees and line 2 baking sheets with parchment or a silicone baking sheets.
Place the almond flour, powdered sugar and tea in the bowl of a food processor. Pulse the mixture several times to blend and grind the almonds very finely. Pour the almond mixture into a fine-meshed sieve and sift onto a sheet of waxed paper.
In the bowl of a mixer, quickly whisk together the powdered egg whites and sugar. Add the egg whites and cream or tartar and whisk until thoroughly combined. Turn on the mixer and, using the whip attachment, whip the egg whites until they are thick, glossy and form stiff peaks.
Remove the bowl from the mixer and quickly fold in the almond mixture until fully incorporated. Fill a pastry bag fitted with a half inch tip or a half inch hole cut in the tip with the macaron batter. Pipe the batter onto the prepared baking sheets into half dollar sized mounds about 1 1/2 inches apart. To remove any "tails" from the piping and any air bubbles, slam the baking sheets on the counter at least three times and up to six.
Bake the macarons for 15 minutes, then raise the heat to 350 degrees and continue baking the shells for 9 more minutes until the foot and edge of the cookie are firm and the shells just come off the parchment. Slide the parchment onto a cooling rack and cool the macarons completely.
To fill, turn half of the macarons with the flat side up and pipe or spoon the lemon cream about 1/2 inch high and leaving a 1/4 edge around the cream. Gently press another cookie on the top, flat side down. Store in an airtight container in the refrigerator for up to 3 days.
Tuesday, March 26, 2013
Strawberry Swirl & Lemon Ice Cream {No Machine Required!}
I have a bad habit that I am trying to kick- I'm addicted to cookbooks. The cupboards above my microwave and fridge are bursting with books ranging from small volumes focused on a single subject to huge, glossy hardbacks covering the whole of bread making. It's a collection that I have been curating for over 15 years and I can't pass by a bookstore or magazine stand without taking a peek at the food-related volumes. Some I buy for their beauty and I want to make every single recipe in the book- one of my current faves is Ripe: A Cook in the Orchard, by Nigel Slater. The photos are what my dreams are made of, simple and beautiful, and the fruit- oh my! And some I choose because of a single recipe that I simply can't live without.
So I was browsing through Anthropologie a couple of weeks ago (another addiction to be tackled at a later date) and I stopped by a stack of Kinfolk magazines. If you haven't seen one, let me tell you about it- this simply lovely magazine is devoted to gatherings, small and large and is beautifully photographed, simply styled, and partners those photos with thoughtful prose. I love it, but it's not necessarily cost effective at $18 a volume. So, with no intention of buying, I flipped through it and got stopped in my tracks by an ice cream recipe. Two pages, a beautiful photo and a surprisingly easy recipe. I considered for a moment snapping a pic of the recipe with my iphone. I promise it was a fleeting thought. My morals got the better of me and I took it to the counter. Sigh. $18 for an ice cream recipe.
But it was so worth it. I didn't stick to the recipe, but used it as a springboard for my own inspiration. And the result is an ice cream that had my kids silent at the table while eating (except for the occasional declarations of "I love this ice cream!"). So worth it.
Strawberry Swirl & Lemon Ice Cream
Serves 4 (makes 1 pint). Adapted from Kinfolk, A Guide for Small Gatherings, Vol. 7.
For the printable recipe, click here.
The joy of this recipe is its simplicity. No ice cream machine is required here, simply a bowl and a whisk. So anyone can make it. There is a tiny bit of liquor in the mix, but you won't taste it. It's purpose is to help the ice cream from setting up too solidly. You can leave it out if you like, but it will effect the texture of the ice cream. Instead, if the alcohol is the issue, try heating the lemon juice, sugar and rum mixture at a low simmer for a minute or two. Just be sure to cool it completely before proceeding with the recipe. In my opinion, this ice cream is the epitome of early spring in a bowl. But I also can't wait until summer to try it with blackberries and blueberries. Whatever berry you choose, I promise you'll love it.
1/2 cup plus 2 tbs lemon juice (from about 3 lemons)
zest of 1 lemon
1 cup powdered sugar
2 tbs white rum or white tequila
1/2 cup sour cream or creme fraiche
1 cup heavy cream
3/4 cup chopped strawberries, blended until smooth
Stir together the lemon juice, lemon zest, sugar and rum until the sugar is dissolved. Set aside.
In a medium bowl, whip together the sour cream and heavy cream until thick with either a whisk or or electric mixer. Add this mixture to bowl with the lemon mixture and stir until fully incorporated. Pour it into a freezer proof container and freeze.
After about 1 1/2 hours, remove the container from the freezer. The ice cream should be partially set, but not firm yet. Gently pour the strawberry puree over the ice cream as you stir so that it swirls through. Do not stir until it is fully mixed in- you want the streaks and swirls. Return to the freezer and freeze until set, at least another 1 1/2 hours.
So I was browsing through Anthropologie a couple of weeks ago (another addiction to be tackled at a later date) and I stopped by a stack of Kinfolk magazines. If you haven't seen one, let me tell you about it- this simply lovely magazine is devoted to gatherings, small and large and is beautifully photographed, simply styled, and partners those photos with thoughtful prose. I love it, but it's not necessarily cost effective at $18 a volume. So, with no intention of buying, I flipped through it and got stopped in my tracks by an ice cream recipe. Two pages, a beautiful photo and a surprisingly easy recipe. I considered for a moment snapping a pic of the recipe with my iphone. I promise it was a fleeting thought. My morals got the better of me and I took it to the counter. Sigh. $18 for an ice cream recipe.
But it was so worth it. I didn't stick to the recipe, but used it as a springboard for my own inspiration. And the result is an ice cream that had my kids silent at the table while eating (except for the occasional declarations of "I love this ice cream!"). So worth it.
Strawberry Swirl & Lemon Ice Cream
Serves 4 (makes 1 pint). Adapted from Kinfolk, A Guide for Small Gatherings, Vol. 7.
For the printable recipe, click here.
The joy of this recipe is its simplicity. No ice cream machine is required here, simply a bowl and a whisk. So anyone can make it. There is a tiny bit of liquor in the mix, but you won't taste it. It's purpose is to help the ice cream from setting up too solidly. You can leave it out if you like, but it will effect the texture of the ice cream. Instead, if the alcohol is the issue, try heating the lemon juice, sugar and rum mixture at a low simmer for a minute or two. Just be sure to cool it completely before proceeding with the recipe. In my opinion, this ice cream is the epitome of early spring in a bowl. But I also can't wait until summer to try it with blackberries and blueberries. Whatever berry you choose, I promise you'll love it.
1/2 cup plus 2 tbs lemon juice (from about 3 lemons)
zest of 1 lemon
1 cup powdered sugar
2 tbs white rum or white tequila
1/2 cup sour cream or creme fraiche
1 cup heavy cream
3/4 cup chopped strawberries, blended until smooth
Stir together the lemon juice, lemon zest, sugar and rum until the sugar is dissolved. Set aside.
In a medium bowl, whip together the sour cream and heavy cream until thick with either a whisk or or electric mixer. Add this mixture to bowl with the lemon mixture and stir until fully incorporated. Pour it into a freezer proof container and freeze.
After about 1 1/2 hours, remove the container from the freezer. The ice cream should be partially set, but not firm yet. Gently pour the strawberry puree over the ice cream as you stir so that it swirls through. Do not stir until it is fully mixed in- you want the streaks and swirls. Return to the freezer and freeze until set, at least another 1 1/2 hours.
Tuesday, March 5, 2013
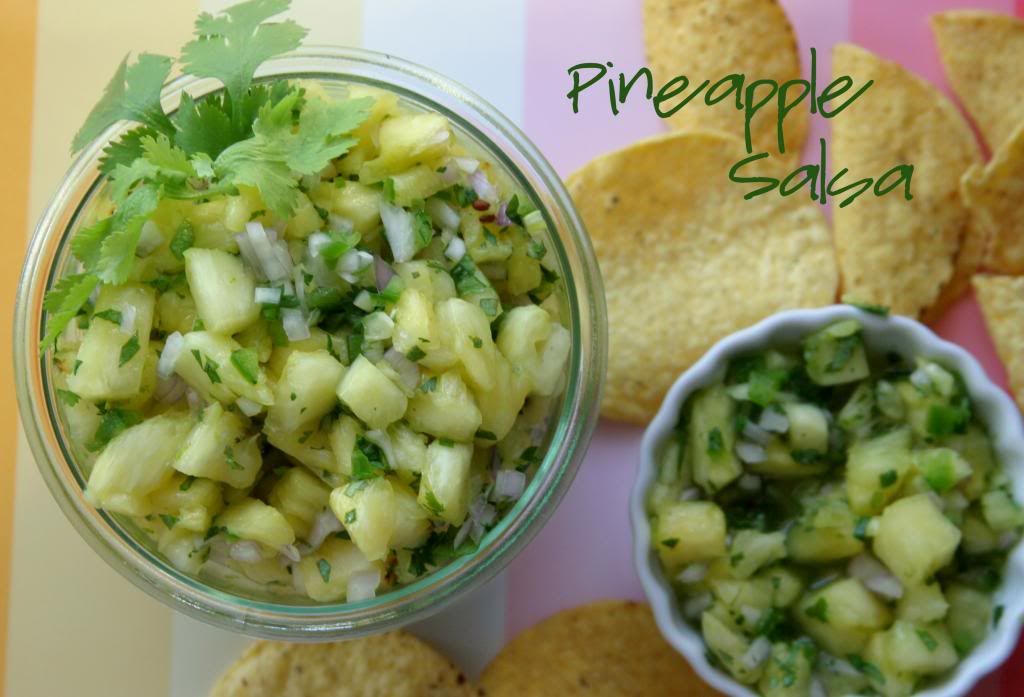
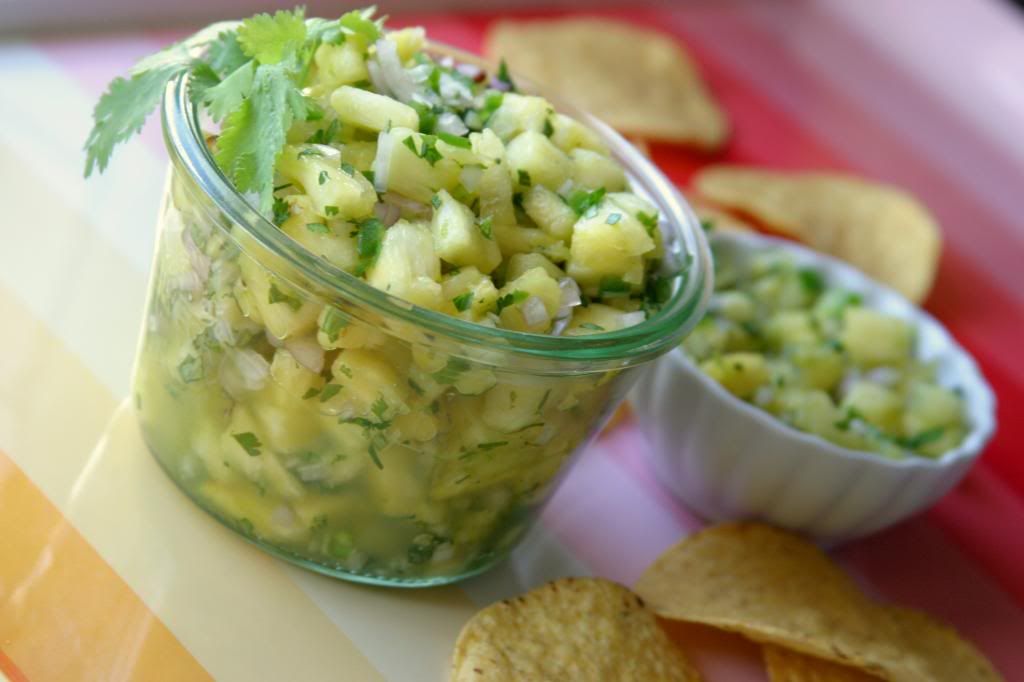
Pineapple Salsa
Everyone in my house is trying desperately to get over a nasty flu bug that hit us hard this past week. My husband had it first and then the boys and I fell prey to the virus this past weekend. The coughing and fevers have been pretty intense and I don't mind saying that I'm pretty tired of the whole darn thing.
One of the worst aspects of this for me (besides the horrific cough that just won't die) is the complete lack of taste that I've been suffering from. Food is pretty central to who I am and not being able to taste a single thing is beginning to drive me nuts. When I have the strength to, I'm making the most flavorful foods I can scrounge up- grilled steak with balsamic vinegar and rosemary was last night's dinner. I sort of tasted it. I suppose that should be considered a win, but it's still awfully disheartening. I'll keep trying and hopefully I'll be back in fighting shape soon.
But in the meantime, here's a simple and full of flavor salsa destined to wake up your tired winter tastebuds. The jar is sitting at the front of my refrigerator shelf taunting me with the bright citrus, sweetness and spice it knows I just can't wait to taste.
Pineapple Salsa
Makes about 2 1/2 cups.
For the printable recipe, click here.
This is a super-simple twist on a salsa that I just love. Its inspiration is a dish that I used to get at a favorite restaurant at our first duty station in Pensacola, FL, The Fish House. I'm finally getting around to making it at home 12 years after leaving there. The salsa is great as a dip for chips, but I like it as a topping for grilled chicken or pork. Sprinkle some on a taco or fajita for a burst of fresh flavor.
2 cups fresh pineapple, diced
1 large shallot or 1/2 small red onion, diced
zest of 1 lime
juice of 1 lime
1/4 cup chopped cilantro
1/2 tsp salt
1 jalapeno pepper, finely diced
Toss all the ingredients except the pepper in a medium bowl. Add the pepper to taste ( I had a surprisingly super hot jalapeno this last time and ended up only using half, but I've used a whole pepper before as well and still had a mild salsa). Allow the ingredients to macerate together for a half hour before using.
Store salsa in a covered container in the refrigerator for up to 3 days.
One of the worst aspects of this for me (besides the horrific cough that just won't die) is the complete lack of taste that I've been suffering from. Food is pretty central to who I am and not being able to taste a single thing is beginning to drive me nuts. When I have the strength to, I'm making the most flavorful foods I can scrounge up- grilled steak with balsamic vinegar and rosemary was last night's dinner. I sort of tasted it. I suppose that should be considered a win, but it's still awfully disheartening. I'll keep trying and hopefully I'll be back in fighting shape soon.
But in the meantime, here's a simple and full of flavor salsa destined to wake up your tired winter tastebuds. The jar is sitting at the front of my refrigerator shelf taunting me with the bright citrus, sweetness and spice it knows I just can't wait to taste.
Pineapple Salsa
Makes about 2 1/2 cups.
For the printable recipe, click here.
This is a super-simple twist on a salsa that I just love. Its inspiration is a dish that I used to get at a favorite restaurant at our first duty station in Pensacola, FL, The Fish House. I'm finally getting around to making it at home 12 years after leaving there. The salsa is great as a dip for chips, but I like it as a topping for grilled chicken or pork. Sprinkle some on a taco or fajita for a burst of fresh flavor.
2 cups fresh pineapple, diced
1 large shallot or 1/2 small red onion, diced
zest of 1 lime
juice of 1 lime
1/4 cup chopped cilantro
1/2 tsp salt
1 jalapeno pepper, finely diced
Toss all the ingredients except the pepper in a medium bowl. Add the pepper to taste ( I had a surprisingly super hot jalapeno this last time and ended up only using half, but I've used a whole pepper before as well and still had a mild salsa). Allow the ingredients to macerate together for a half hour before using.
Store salsa in a covered container in the refrigerator for up to 3 days.
Labels:
Appetizers,
Citrus,
Fruit,
Quick,
Sauces and Dressings,
Sides,
Vegetarian
Wednesday, February 20, 2013
Orange Pistachio Madeleines
I confess to having a bit of a thing for a certain Mr. Branson.
You see, I have recently discovered (and becomesmitten with addicted to) "Downton Abbey". I know I'm a bit late to the party, but through the power of Netflix, Hulu and the PBS website I have managed to watch three seasons of the show practically without taking a breath. I have always loved period dramas and especially early 20th century pieces when the women were required to wear the most fabulous hats. I so wish I could have lived in a time when it was acceptable to wear hats on a daily basis (I'm a bit obsessed with the hats, I'm afraid) or when getting dressed for dinner was a decidedly formal affair. So I suppose that I never really stood a chance at resisting this fabulous BBC export.
I also confess to having inadvertently absorbed a few of the old fashioned phrases into my own speech. I pick up accents quickly, so watching the genteel lords and ladies for three solid days leaves me thinking and quite often speaking using their very formal vernacular. My sons have started looking at me quizzically when I respond to their questions with answers like "I should think not!" or "That won't do at all!" (of course, spoken with a British accent in my own mind). I think they believe I'm beginning to lose my mind. But I don't mind their looks, I just love the way those phrases just roll off the tongue. It's almost poetic.
I imagine these madeleines would be the sort of thing Mrs. Patmore would bake up for afternoon tea. Lady Grantham and the other women of the family would sit and gossip while having their tea and snacking on a few sweet little cakes. Divine. At least, that's how I felt as I nibbled on my own madeleines while catching up on the latest happenings from Downton and sipping a cup of tea one quiet afternoon not too long ago. Of course, these days madeleines are not reserved simply for lords and ladies, just ask my three year old son who gobbled up three or four of his own before rolling his eyes when I told him he'd had "quite enough of that, young man".
Orange Pistachio Madeleines
Makes 12 madeleines. Adapted from this recipe of mine which was adapted from Martha Stewart.
For the printable recipe, click here.
These have become one of my favorite quick treats. Making the batter is simpler and requires less equipment than mixing a cookie or cake batter, it only requires a quick pop in the fridge while the oven is heating up. I thought I might regret buying a pan that I can only use for one thing, but I've since realized that it was a wise investment.
For the madeleines:
4 tbs butter, melted and cooled (plus more for brushing on the pan)
2 tbs honey
1/2 tsp vanilla extract
zest of 1 orange
1/4 cup very finely chopped unsalted pistachios (a mini chopper or food processor will do a great job)
1/2 cup flour
1 tsp baking powder
2 eggs
1/3 cup sugar
For the glaze:
1 tsp orange zest
1 tsp freshly squeezed orange juice
1/3 cup powdered sugar
In a small bowl, stir together the melted butter, honey, vanilla, and orange zest. Set aside.
In a larger bowl, whisk together the flour,chopped nuts and baking powder. Stir in the sugar and eggs. Add the butter mixture and stir just to combine. Cover the bowl and refrigerate for 30 minutes. Much like popovers and crepes, the batter will bake better when chilled.
While the batter is chilling, preheat your oven to 425 degrees and prepare the madeleine pan by buttering the mold.
Spoon the batter into the molds so that each is about 3/4 filled. Bake for 8 minutes, or until the edges are lightly browned. Be careful- the madeleines can go from just right to over-browned and dry very quickly. Remove the pan from the oven and place on a baking rack to cool for a couple of minutes. Once the madeleines are cool enough to handle, remove them from the pan and cool completely on the baking rack.
While the madeleines are cooling, make the glaze by whisking together the ingredients in a small bowl. If the glaze is too thick, add a few more drops of orange juice until it is smooth and has a slightly thin consistency. Brush the glaze over the cooled madeleines and let set for about 10 minutes.
You see, I have recently discovered (and become
I also confess to having inadvertently absorbed a few of the old fashioned phrases into my own speech. I pick up accents quickly, so watching the genteel lords and ladies for three solid days leaves me thinking and quite often speaking using their very formal vernacular. My sons have started looking at me quizzically when I respond to their questions with answers like "I should think not!" or "That won't do at all!" (of course, spoken with a British accent in my own mind). I think they believe I'm beginning to lose my mind. But I don't mind their looks, I just love the way those phrases just roll off the tongue. It's almost poetic.
I imagine these madeleines would be the sort of thing Mrs. Patmore would bake up for afternoon tea. Lady Grantham and the other women of the family would sit and gossip while having their tea and snacking on a few sweet little cakes. Divine. At least, that's how I felt as I nibbled on my own madeleines while catching up on the latest happenings from Downton and sipping a cup of tea one quiet afternoon not too long ago. Of course, these days madeleines are not reserved simply for lords and ladies, just ask my three year old son who gobbled up three or four of his own before rolling his eyes when I told him he'd had "quite enough of that, young man".
Orange Pistachio Madeleines
Makes 12 madeleines. Adapted from this recipe of mine which was adapted from Martha Stewart.
For the printable recipe, click here.
These have become one of my favorite quick treats. Making the batter is simpler and requires less equipment than mixing a cookie or cake batter, it only requires a quick pop in the fridge while the oven is heating up. I thought I might regret buying a pan that I can only use for one thing, but I've since realized that it was a wise investment.
For the madeleines:
4 tbs butter, melted and cooled (plus more for brushing on the pan)
2 tbs honey
1/2 tsp vanilla extract
zest of 1 orange
1/4 cup very finely chopped unsalted pistachios (a mini chopper or food processor will do a great job)
1/2 cup flour
1 tsp baking powder
2 eggs
1/3 cup sugar
For the glaze:
1 tsp orange zest
1 tsp freshly squeezed orange juice
1/3 cup powdered sugar
In a small bowl, stir together the melted butter, honey, vanilla, and orange zest. Set aside.
In a larger bowl, whisk together the flour,chopped nuts and baking powder. Stir in the sugar and eggs. Add the butter mixture and stir just to combine. Cover the bowl and refrigerate for 30 minutes. Much like popovers and crepes, the batter will bake better when chilled.
While the batter is chilling, preheat your oven to 425 degrees and prepare the madeleine pan by buttering the mold.
Spoon the batter into the molds so that each is about 3/4 filled. Bake for 8 minutes, or until the edges are lightly browned. Be careful- the madeleines can go from just right to over-browned and dry very quickly. Remove the pan from the oven and place on a baking rack to cool for a couple of minutes. Once the madeleines are cool enough to handle, remove them from the pan and cool completely on the baking rack.
While the madeleines are cooling, make the glaze by whisking together the ingredients in a small bowl. If the glaze is too thick, add a few more drops of orange juice until it is smooth and has a slightly thin consistency. Brush the glaze over the cooled madeleines and let set for about 10 minutes.
Tuesday, February 5, 2013
Meyer Lemon Focaccia {A Tuesdays with Dorie Post}
I would like to believe that I have many positive virtues. I am kind, a good listener, and a loyal friend. However I also know that there are several virtues that I would love to have that my character simply lacks. At the top of that list is patience. I try my hardest to be a patient mother, wife and friend. For me it is hard work and something I have to be very conscious of, because it just doesn't come naturally. I've been reading a series of books with my oldest in which the main characters are Greek demigods and each has a fatal flaw that gets him or her into trouble- ego, blind loyalty, short sightedness, that sort of thing. And I've often thought to myself while reading the stories that I would probably have more than one fatal flaw and one of them would most definitely be impatience. I don't think I would make a very good demigod.
In this case, my lack of patience meant that a lot of precious ingredients and my time all went to waste because I just couldn't wait a full day (or even 6 hours for that matter) for this lovely focaccia dough to rise properly. I had such high hopes of a tender and airy bread with a lightly crispy exterior and a salty sweet topping. Unfortunately, I was extremely disappointed. The thing is, I'm not a stranger to focaccia. I've made several of them that have graced this blog before. My favorite of them is a roasted grape focaccia that I made on a fall morning a couple of years ago. Of course, even in that post I mentioned that the dough would greatly benefit from an overnight rest in the fridge. So I ought to know better. I ought to follow my baking instincts instead of letting my impatience get the better of me. But my fatal flaw struck again.
I didn't let my dough rise nearly enough. A couple of hours on my counter and a couple more in the fridge just weren't enough to allow the yeast to do its thing and create the big air bubbles that are characteristic if a good focaccia. Instead I had a tough, almost cracker-like bread with a dull flavor. Though my topping was spot on- thinly sliced meyer lemons sprinkled with rosemary and a mix of coarse sugar and sea salt- it couldn't make up for the flaws in the bread. It would have been the perfect accompaniment to the roasted chicken I had planned for it to go along side. Sigh.
But I am determined to learn from my mistakes. I still have a ball of dough waiting for me in the refrigerator. I will try again and hopefully overcome my fatal flaw. The next focaccia will be exactly how it was meant to be, I just know it.
Perhaps my fellow bakers fared better in their attempts to be patient than I did. To find out, simply head on over to the Tuesdays with Dorie webpage and check out everyone else's breads. You can find the recipe for the focaccia on our host's site, Wandering Through. Just judging by Sharmini's cover photo, her focaccia rose perfectly. Maybe I'll read her post to see how she accomplished it while I wait (impatiently, of course) for my dough to rise.
In this case, my lack of patience meant that a lot of precious ingredients and my time all went to waste because I just couldn't wait a full day (or even 6 hours for that matter) for this lovely focaccia dough to rise properly. I had such high hopes of a tender and airy bread with a lightly crispy exterior and a salty sweet topping. Unfortunately, I was extremely disappointed. The thing is, I'm not a stranger to focaccia. I've made several of them that have graced this blog before. My favorite of them is a roasted grape focaccia that I made on a fall morning a couple of years ago. Of course, even in that post I mentioned that the dough would greatly benefit from an overnight rest in the fridge. So I ought to know better. I ought to follow my baking instincts instead of letting my impatience get the better of me. But my fatal flaw struck again.
I didn't let my dough rise nearly enough. A couple of hours on my counter and a couple more in the fridge just weren't enough to allow the yeast to do its thing and create the big air bubbles that are characteristic if a good focaccia. Instead I had a tough, almost cracker-like bread with a dull flavor. Though my topping was spot on- thinly sliced meyer lemons sprinkled with rosemary and a mix of coarse sugar and sea salt- it couldn't make up for the flaws in the bread. It would have been the perfect accompaniment to the roasted chicken I had planned for it to go along side. Sigh.
But I am determined to learn from my mistakes. I still have a ball of dough waiting for me in the refrigerator. I will try again and hopefully overcome my fatal flaw. The next focaccia will be exactly how it was meant to be, I just know it.
Perhaps my fellow bakers fared better in their attempts to be patient than I did. To find out, simply head on over to the Tuesdays with Dorie webpage and check out everyone else's breads. You can find the recipe for the focaccia on our host's site, Wandering Through. Just judging by Sharmini's cover photo, her focaccia rose perfectly. Maybe I'll read her post to see how she accomplished it while I wait (impatiently, of course) for my dough to rise.
Tuesday, January 15, 2013
Creamy Dreamy Lemony Hummus
The Merriam-Webster dictionary defines metamorphosis in this way:
Metamorphosis: noun \ˌme-tə-ˈmȯr-fə-səs\ a striking alteration in appearance, character, or circumstances
There are other meanings of the word, as we all know, that refer to the radical change in appearance and form of an organism at a certain interval in its life. And while a caterpillar changing into a butterfly is beautifully fascinating (and was, in a way, the inspiration for these musings), it is not where my mind goes to on this particular day. Instead, I wonder about the "striking alteration in... character and circumstances" that are in the works for my life this coming year.
I've always been the kind of person who spends a great deal of time thinking about every detail of my life- overthinking quite often, truth be told. I plan out entire conversations and interactions with others so that I know my point will be made and my intentions not misunderstood. I conjure up memories from the past and replay them to my satisfaction. I dream about the days to come and what my role will be in the lives of those I care about. The food to be cooked, the bedtime stories to be read, and the chores and errands for the day as well larger and more philosophical musings all roll around in my head in a constant swirl vying for my attention. It's no wonder I have a terrible memory. There's just too much going on in there for me to give any new thoughts their due attention.
In the sometimes mindless and rhythmic task of chopping, peeling and stirring that comes with food preparation, my mind actually rests. I know it seems like the opposite should be true, but I think if you ask anyone who really loves cooking they will tell you that same thing. The mind is focused on those tasks and all of the babble in the background quiets down. Except that on an afternoon not that long ago as I was peeling chick peas in an effort to make a smoother and creamier hummus, I was struck by the odd beauty of the pile of translucent skins on my counter. They reminded me of the skins and shells shed by an animals undergoing some sort of transformation. A metamorphosis- shedding the old to make way for the new and better. And it sent my mind reeling.
My own life will be undergoing a radical metamorphosis this year. By mid-year there is a very strong possibility that my family will be pulling up our stakes here in America and moving to parts unknown somewhere in the world. At the very least we will be leaving a community we have come to love and will have to learn to navigate in a whole new arena. And I'm not sure I'm ready for it. But that's the way life works isn't it? You often get thrown into the deep end with no forewarning and you either figure out which way is up and make your way to the surface or get lost and never find your way to the top. While I've never been the greatest swimmer, I'm cautiously hopeful that I can get to the surface without too much difficulty.
It is my hope that the change is a true metamorphosis for me. Not only a change in circumstances, but in character as well. That I learn to adapt, enjoy my new surroundings, learn from the native people, see and experience all the new land and culture have to offer and, most importantly, teach my children that change is not only good but necessary to survival and fulfillment in life. The butterfly is always more beautiful than the caterpillar it started out as.
Creamy Dreamy Lemony Hummus
Makes about 2 cups.
For the printable recipe, click here.
This recipe isn't all that different from my previously posted hummus here on the blog, but with two notable exceptions. First, in order to get a lusciously creamy texture, I have learned that peeling the chick peas is the key. It isn't difficult, you just pinch the pea and it pops right out of the skin, but it does take a few extra minutes. I promise it will be worth it. And while you're peeling your chick peas, you can roast a lemon that will provide you with the sweetest juices ever for your hummus. Those few extra minutes take a really good hummus and make it spectacular.
1 lemon
1/4 cup water
6 tbs tahini (sesame seed paste)
2 tbs olive oil
3 garlic cloves
1/2 tsp kosher salt
1/4 tsp cumin
pinch of cayenne
1 15-oz can of chick peas (garbanzo beans), drained and rinsed
Preheat your oven to 450 degrees. Cut the lemon in half and place the halves, cut side up, in a small roasting dish. Roast for 20 minutes. Let cool. Juice the lemon halves in order to get 3 tbs juice.
While the lemon is roasting, peel the chick peas. Pinching the pea between your thumb and index finger, pop the pea from the skin and into the open palm of your opposite hand or directly into a bowl. Discard the skins.
In a small bowl, stir together the lemon juice and water. Set aside. In another small bowl, stir together the tahini and olive oil. Again, set aside.
In the bowl of a food processor, place the peeled chick peas (minus a small handful for topping the hummus), the garlic, cumin, salt, and cayenne. Pulse the mixture several times until almost fully ground together. Scrape down the sides of the bowl. With the food processor running, slowly pour in the lemon juice and water. Continue to process for about 30 more seconds. Scrape down the bowl again. Begin running the food processor a third time and slowly pour in the tahini and olive oil. Blend until smooth.
Serve with toasted pita chips and veggies. Hummus will keep for three to five days in the refrigerator.
Metamorphosis: noun \ˌme-tə-ˈmȯr-fə-səs\ a striking alteration in appearance, character, or circumstances
There are other meanings of the word, as we all know, that refer to the radical change in appearance and form of an organism at a certain interval in its life. And while a caterpillar changing into a butterfly is beautifully fascinating (and was, in a way, the inspiration for these musings), it is not where my mind goes to on this particular day. Instead, I wonder about the "striking alteration in... character and circumstances" that are in the works for my life this coming year.
I've always been the kind of person who spends a great deal of time thinking about every detail of my life- overthinking quite often, truth be told. I plan out entire conversations and interactions with others so that I know my point will be made and my intentions not misunderstood. I conjure up memories from the past and replay them to my satisfaction. I dream about the days to come and what my role will be in the lives of those I care about. The food to be cooked, the bedtime stories to be read, and the chores and errands for the day as well larger and more philosophical musings all roll around in my head in a constant swirl vying for my attention. It's no wonder I have a terrible memory. There's just too much going on in there for me to give any new thoughts their due attention.
In the sometimes mindless and rhythmic task of chopping, peeling and stirring that comes with food preparation, my mind actually rests. I know it seems like the opposite should be true, but I think if you ask anyone who really loves cooking they will tell you that same thing. The mind is focused on those tasks and all of the babble in the background quiets down. Except that on an afternoon not that long ago as I was peeling chick peas in an effort to make a smoother and creamier hummus, I was struck by the odd beauty of the pile of translucent skins on my counter. They reminded me of the skins and shells shed by an animals undergoing some sort of transformation. A metamorphosis- shedding the old to make way for the new and better. And it sent my mind reeling.
My own life will be undergoing a radical metamorphosis this year. By mid-year there is a very strong possibility that my family will be pulling up our stakes here in America and moving to parts unknown somewhere in the world. At the very least we will be leaving a community we have come to love and will have to learn to navigate in a whole new arena. And I'm not sure I'm ready for it. But that's the way life works isn't it? You often get thrown into the deep end with no forewarning and you either figure out which way is up and make your way to the surface or get lost and never find your way to the top. While I've never been the greatest swimmer, I'm cautiously hopeful that I can get to the surface without too much difficulty.
It is my hope that the change is a true metamorphosis for me. Not only a change in circumstances, but in character as well. That I learn to adapt, enjoy my new surroundings, learn from the native people, see and experience all the new land and culture have to offer and, most importantly, teach my children that change is not only good but necessary to survival and fulfillment in life. The butterfly is always more beautiful than the caterpillar it started out as.
Creamy Dreamy Lemony Hummus
Makes about 2 cups.
For the printable recipe, click here.
This recipe isn't all that different from my previously posted hummus here on the blog, but with two notable exceptions. First, in order to get a lusciously creamy texture, I have learned that peeling the chick peas is the key. It isn't difficult, you just pinch the pea and it pops right out of the skin, but it does take a few extra minutes. I promise it will be worth it. And while you're peeling your chick peas, you can roast a lemon that will provide you with the sweetest juices ever for your hummus. Those few extra minutes take a really good hummus and make it spectacular.
1 lemon
1/4 cup water
6 tbs tahini (sesame seed paste)
2 tbs olive oil
3 garlic cloves
1/2 tsp kosher salt
1/4 tsp cumin
pinch of cayenne
1 15-oz can of chick peas (garbanzo beans), drained and rinsed
Preheat your oven to 450 degrees. Cut the lemon in half and place the halves, cut side up, in a small roasting dish. Roast for 20 minutes. Let cool. Juice the lemon halves in order to get 3 tbs juice.
While the lemon is roasting, peel the chick peas. Pinching the pea between your thumb and index finger, pop the pea from the skin and into the open palm of your opposite hand or directly into a bowl. Discard the skins.
In a small bowl, stir together the lemon juice and water. Set aside. In another small bowl, stir together the tahini and olive oil. Again, set aside.
In the bowl of a food processor, place the peeled chick peas (minus a small handful for topping the hummus), the garlic, cumin, salt, and cayenne. Pulse the mixture several times until almost fully ground together. Scrape down the sides of the bowl. With the food processor running, slowly pour in the lemon juice and water. Continue to process for about 30 more seconds. Scrape down the bowl again. Begin running the food processor a third time and slowly pour in the tahini and olive oil. Blend until smooth.
Serve with toasted pita chips and veggies. Hummus will keep for three to five days in the refrigerator.
Tuesday, December 11, 2012
Meyer Lemon Muffins
I have a serious obsession with lemons. I think it's probably one of the most used ingredients in all of my recipes here on the blog. I feel lost when I don't have any in my kitchen. And I know most women will think me crazy, but 9 times out of 10 when I am offered the choice of a lemon flavored sweet over a chocolate one, I will choose the lemon. I LOOOOVE the sweet puckery flavor of those golden gems. L. O. V. E.
But there is a citrus fruit that I hold in even higher regards than the simple supermarket lemon- the Meyer lemon. There is something intoxicating about the scent of this special fruit. One whiff and I am in heaven. I have a very small tree in my backyard that is nearly crumbling under the weight of the huge Meyers that hang from it ripening. When the wind blows in the right direction and the breeze blows their scent in through my open back door, it's incredible. Maybe I can make an eu de Meyer lemon and keep the scent nearby all year long.
The first little Meyers of the season made their way into my hands last week. I've said it before and it continues to hold true, living in California is such an advantage when it comes to the availability of produce. When it comes to citrus, this is especially the case. When my CSA offered a 3 lb bag of Meyers for an insanely low price, I didn't even hesitate to add one to my cart. One question remained. How do I maximize the potential of my treasured citrus fruit?
First up, Three Citrus Marmalade made with clementines, valencia oranges and Meyer lemons (yum! sweet, not bitter and straight up orange flavor). Then these wonderful cookies. At this point, I had four lemons left. I debated making my favorite scones, but wasn't in the mood for the cranberries. I wanted pure, unadulterated Meyer lemon. Enter this muffin. Thank you LA Times for understanding me and knowing just what I needed.
Meyer Lemon Muffins
Makes 18 muffins. Adapted from the LA Times.
Click here for the printable recipe.
Get ready for some serious Meyer lemon flavor. I would not try this recipe with a traditional supermarket lemon- they are entirely too tart and would overwhelm the muffin. If you can't find Meyer lemons, then try another lemon muffin recipe. But if you can find them and you can't stand wasting any part of the precious lemon, this is your recipe.
2 cups all-purpose flour
1 cup sugar
1 tsp baking soda
4 Meyer lemons, divided
2 eggs
1 cup milk
1/2 cup (1 stick) butter, melted and cooled
Preheat your oven to 400 degrees. Line a standard muffin tin with cupcake liners or butter the wells.
In a medium bowl, mix together the flour, sugar and baking soda. Set aside.
Using a sharp knife or vegetable peeler, cut the zest from three of the lemons. Try to remove the zest with as little of the white pith as possible. Place the zest in a blender. Return to the zested lemons and trim as much of the pith from the lemons. Discard the pith. Chop the lemons into several pieces, removing and discarding the seeds. Place the chopped lemon pieces into the blender with the zest and puree until as smooth as possible.
Add the lemon puree, eggs, milk and melted butter to the dry ingredients and stir until just combined. Fill the muffin wells halfway with the batter. Slice the remaining lemon paper thin and lay a slice on top of each muffin. Bake for 18-20 minutes, rotating the pan halfway through baking. The finished muffins will have a golden color and feel springy to the touch.
If you didn't use liner papers, run a butter knife or this spatula around the outside of the muffins to release them. Remove the muffins from the tin and cool on a baking rack. The muffins will keep stored in an airtight container for up to three days.
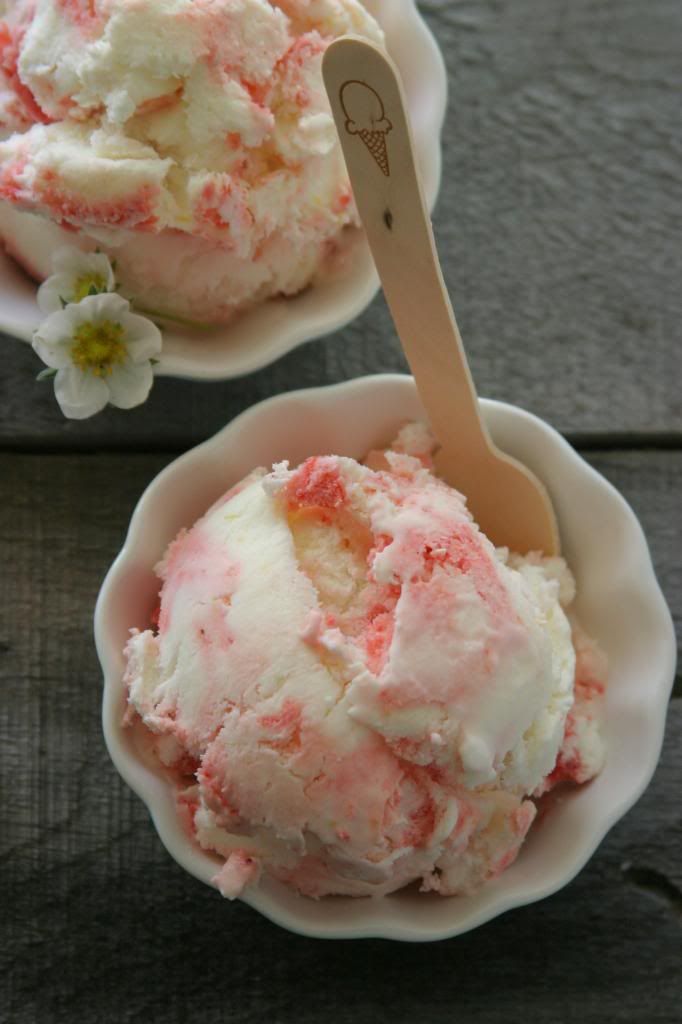
But there is a citrus fruit that I hold in even higher regards than the simple supermarket lemon- the Meyer lemon. There is something intoxicating about the scent of this special fruit. One whiff and I am in heaven. I have a very small tree in my backyard that is nearly crumbling under the weight of the huge Meyers that hang from it ripening. When the wind blows in the right direction and the breeze blows their scent in through my open back door, it's incredible. Maybe I can make an eu de Meyer lemon and keep the scent nearby all year long.
The first little Meyers of the season made their way into my hands last week. I've said it before and it continues to hold true, living in California is such an advantage when it comes to the availability of produce. When it comes to citrus, this is especially the case. When my CSA offered a 3 lb bag of Meyers for an insanely low price, I didn't even hesitate to add one to my cart. One question remained. How do I maximize the potential of my treasured citrus fruit?
First up, Three Citrus Marmalade made with clementines, valencia oranges and Meyer lemons (yum! sweet, not bitter and straight up orange flavor). Then these wonderful cookies. At this point, I had four lemons left. I debated making my favorite scones, but wasn't in the mood for the cranberries. I wanted pure, unadulterated Meyer lemon. Enter this muffin. Thank you LA Times for understanding me and knowing just what I needed.
Meyer Lemon Muffins
Makes 18 muffins. Adapted from the LA Times.
Click here for the printable recipe.
Get ready for some serious Meyer lemon flavor. I would not try this recipe with a traditional supermarket lemon- they are entirely too tart and would overwhelm the muffin. If you can't find Meyer lemons, then try another lemon muffin recipe. But if you can find them and you can't stand wasting any part of the precious lemon, this is your recipe.
2 cups all-purpose flour
1 cup sugar
1 tsp baking soda
4 Meyer lemons, divided
2 eggs
1 cup milk
1/2 cup (1 stick) butter, melted and cooled
Preheat your oven to 400 degrees. Line a standard muffin tin with cupcake liners or butter the wells.
In a medium bowl, mix together the flour, sugar and baking soda. Set aside.
Using a sharp knife or vegetable peeler, cut the zest from three of the lemons. Try to remove the zest with as little of the white pith as possible. Place the zest in a blender. Return to the zested lemons and trim as much of the pith from the lemons. Discard the pith. Chop the lemons into several pieces, removing and discarding the seeds. Place the chopped lemon pieces into the blender with the zest and puree until as smooth as possible.
Add the lemon puree, eggs, milk and melted butter to the dry ingredients and stir until just combined. Fill the muffin wells halfway with the batter. Slice the remaining lemon paper thin and lay a slice on top of each muffin. Bake for 18-20 minutes, rotating the pan halfway through baking. The finished muffins will have a golden color and feel springy to the touch.
If you didn't use liner papers, run a butter knife or this spatula around the outside of the muffins to release them. Remove the muffins from the tin and cool on a baking rack. The muffins will keep stored in an airtight container for up to three days.
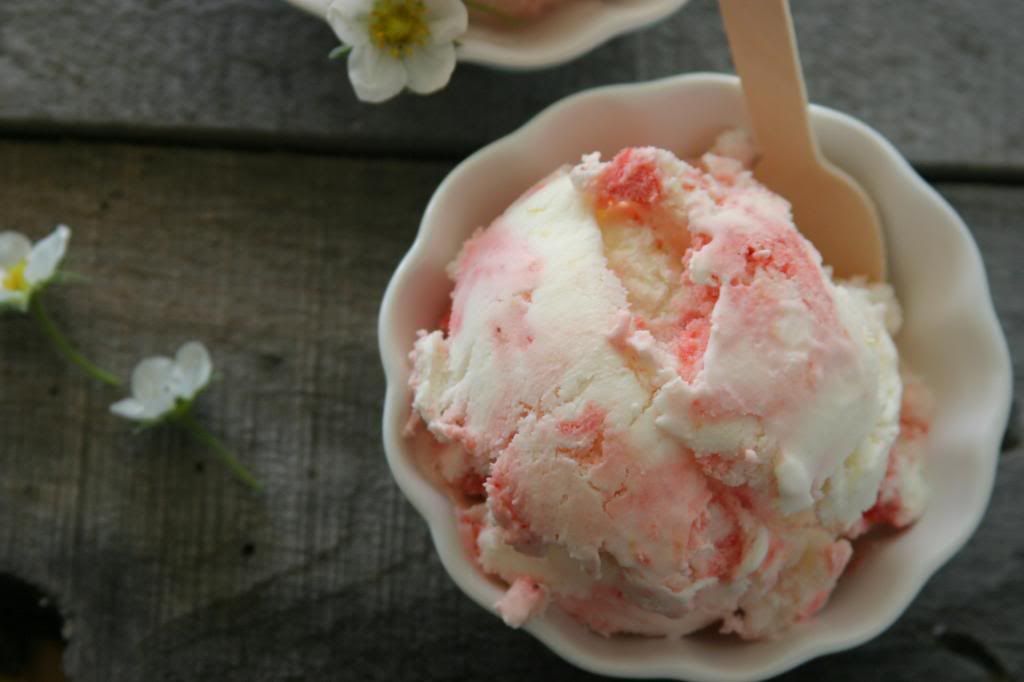
Subscribe to:
Posts (Atom)