Showing posts with label Cookies. Show all posts

Monday, September 21, 2015

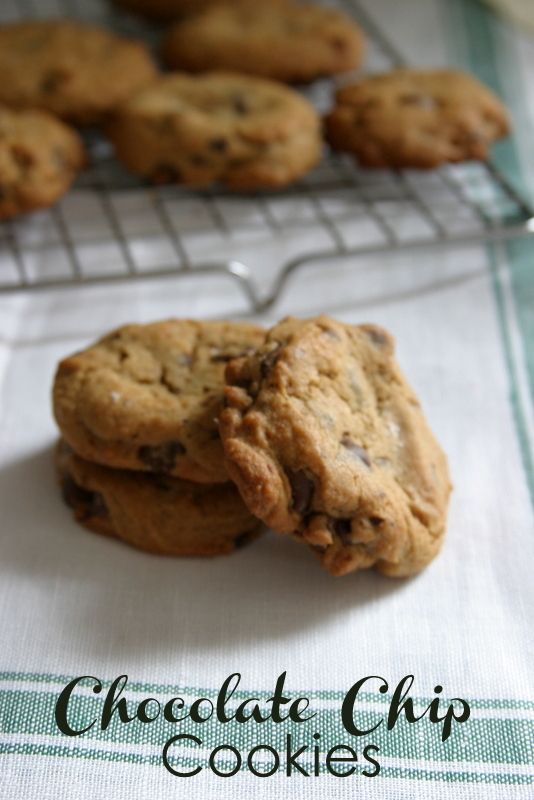
The Only Chocolate Chip Cookie


I've been thinking about the meaning of the word "home" a lot lately.  For so many reasons, I suppose.  But there are two that really seem to standout in my mind.

A recent trip to Budapest, one of the most surprisingly beautiful cities I have visited in Europe, brought my family face to face with hundreds of refugees fleeing the war torn Middle East for a better life.  These people were walking from Budapest with the hopes of finding a safe and secure new home in Germany.  Families, young men, and small children carrying their lives on their backs and leaving they only home they have ever known.  You can watch the stories on the news and read about the crisis that is facing Europe right now, but to actually watch the people walking past you is something altogether different.  Clarifying.  And you wonder if these people will ever again feel at "home".  Surely refugee camps, abandoned warehouses and halfway houses can't be the image of the new life they are desperately trying to find.  But all of these places are light years from the hell that was their home.  So maybe, just maybe, there's a glimmer of hope there.

Thursday, July 30, 2015

Wednesday, June 24, 2015

Tea Infused Butter and Cardamom Tea Shortbread Cookies


It's been very quiet in my house lately (okay, as quiet as a home with three kids 10 and under can be).  What I mean is, it's just kind of been us around here.  Many friends have moved away, some are away for the summer, visitors have come and gone.  My hubby has been traveling and working like crazy.  It's just been very......still.


A couple of weeks ago our niece blew in like a whirlwind to disrupt the stillness for a little while.  Only a little more than 10 years younger than me, she feels a little more like a friend than a niece.  She's a little like her mother- a bit of a gypsy, very independent, headstrong and outspoken.  And I mean all of those in the best possible way.  I'm a bit envious, I must admit.  She's in her mid-20s traveling around the world doing missionary work, deciding on grad school or the next step in her life, no ties and full of the promise of life.  I've known this young lady since she was a little girl but her adult self is a far cry from the little pixie who was a flower girl at my wedding.

Wednesday, April 15, 2015

Grain and Dairy Free Chestnut Flour Brownies


I feel spectacularly lucky to be living in Europe with my family.  The opportunities to experience the cultures and explore the history of this continent are the stuff of dreams for most people.  And we get to live that dream.  I spend a lot of time trying to photograph and document all of our travels and even the moments that have become commonplace for us because of living here.  My goal is to have a physical reminder of all the things we have seen and done so that my children will be able to hold onto the memories that they have made here.  I'm pretty confident that my oldest will be able to remember some of the highlights on his own, but at 6 years old Wyatt probably will only be able to retrieve bits and pieces if he's lucky.  And the baby has no idea that she isn't actually European, so photos of her in the incredible places she's been will be like looking at some other person's life when she flips through them in a few years.


To me, it's those memories that are the most important to take away with us from this adventure.  Much more so than any souvenir that will be stuck on a shelf or broken within days of buying it.  They will build my kids into the adults that they will be one day (sooner than I am ready for!).  I know for sure that mine have influenced my personality in so many ways.  We didn't take fancy vacations, we just didn't have the money for that.  So the memories that influenced me the most are of the times I spent in the kitchen with my mom and grandmother.  My skills are only so good because of the experiences that I was allowed to have alongside those two women.  To say that my most influential memories are all about food is an understatement.  In fact, even what I can recall from the few vacations that we did take is food.  Salty, delicious Virginia ham and Death by Chocolate in Colonial Williamsburg, anyone?  Or maybe catching crabs and eating pizza and boardwalk fries at the Jersey shore?


Recently, my mom has been struggling with some health issues and has been forced to reevaluate the way that she eats as a result.  She hasn't been able to eat many of the wonderful foods that she and my grandmother taught me how to make as a child.  I can't imagine how difficult it must be to have the memories of the pastries, cakes, and breads that she knows so well and not be able to eat any of them.  When we visited back home just last week we had a big family gathering.  After making cakes, cream puffs, breads and lemon bars for days, my mom had to just sit by and watch everyone else eat them.  As the guests started to leave and only close family was left lingering and chatting she asked me to make these for her.  Just a little pleasure in a moment when there were so many things she had to stay away from.  It was, of course, the least I could do for the woman who's lessons made me the person that I am.  I had been tinkering with a recipe that includes none of the things she has to stay away from but is still the comfort food she longs for.  I'm thrilled that by the end of that evening, I was able to present these brownies to her and hopefully, create another one of those memories that stays with you for a lifetime.


Grain and Dairy Free Chestnut Flour Brownies
Makes 12 brownies.  Adapted from Fig Jam and Lime Cordial.
For the printable recipe, click here.

I found chestnut flour in a natural food store recently and decided to give it a try.  It's so different from the other nut flours I've used before.  Unlike the grainy texture of almond or hazelnut flour, chestnut flour is silky and really feels like wheat flour.  It's a bit on the expensive side, but in this recipe a little goes a long way.  One bag will last quite a while if you care for it (like other nut flours, it stays the freshest when stored in the freezer).  In this recipe it really does well and helps give the brownie structure without imparting an overly nutty flavor.  The other new ingredient for me was coconut oil.  Admittedly, I cannot stand coconut.  So I was definitely hesitant to give it a go, but there really is no other good substitute for butter in a recipe like this except maybe vegetable oil.  I have to say that the coconut oil ended up doing a good job.  And while there was a slight aroma of coconut, I was happy that I couldn't taste it at all in the finished brownie.  Success.

5 tbs coconut oil
1 1/3 cups (8 oz) 60% cocao semisweet chocolate chips
2/3 cups cane sugar
1 tsp vanilla extract
2 eggs, room temperature
1/4 cup chestnut flour, sifted

Preheat your oven to 350 degrees.  Line an 8x8 inch baking pan with parchment paper.

In a large saucepan over medium heat, melt the coconut oil.  Once the coconut oil is melted stir in the chocolate chips and remove from the heat.  Stir the sugar into the chocolate mixture and then add the vanilla and eggs.  Stir until all are well combined.  Then add the chestnut flour and stir vigorously.  The batter will appear slightly curdled at first.  Keep stirring and you will see and almost magical transformation into a thick, smooth batter.  Pour the finished batter into the prepared pan.

Bake for about 20 minutes or until the top appears to have dulled in shine just a little bit and the center is just barely set.  Cool completely and then cut into 12 squares.  The brownies will keep for a couple of days stored in an airtight container.


Monday, January 12, 2015

Crispy Chewy Almond Cookies {Amaretti}


It's early January, cold and gray here in Germany and the snow from two weeks ago that was so beautiful and dazzling white as it laid fresh on the ground now lingers in slushy little piles that are the saddest remnants of their former selves.

It's easy to be a little melancholy right now. The weather is less than inspirational for sure. And all of the festive excitement of the holidays is a memory. Germany really has a love affair with Christmas that lasts for a good 6 weeks and the withdrawl from the festivity is tough to take.  The Christmas markets are over.  The twinkly lights and ornaments have been packed away and (in our case) the tree has been drug down the street to the neighborhood collection spot in a parking lot. It really is a sad sight to see- all of those beautiful trees just tossed into a big pile next to a soccer stadium and bus stop.


I'm not the kind of girl who makes New Year's resolutions. Probably because I know I'd never stick to them. I always try to do a little better with my health, eat a little better, stay on top of housework more. You know, the standard stuff.  It's not really working out just yet, but I promise when the weather gets better and the baby goes back to her normal sleepy schedule...

I do have to admit that I'm a little excited about a new "Mom and baby" yoga class starting soon, truth be told.  I happen to really like my yoga instructor and I could certainly use the help.  After three c-sections my core is.......well......let's not even go there. 

So you're not going to get a ton of new year healthy recipes from me (not really sorry about that, sorry!).  In my opinion, healthy eating really only works if you allow yourself a little treat now and again.  So I'll handle the little treats for you if you can manage the healthy part on your own.  Deal?  Deal.


Crispy Chewy Almond Cookies {Amaretti}
Makes about 6 dozen cookies.
For the printable recipe, click here.

These cookies are delightfully good.  There is a perfect balance between the shatteringly crisp exterior and chewy center that cannot be beat.  They are based on one of my favorites, the Italian pignoli cookie, but it turns out that I didn't have pine nuts in my freezer so I quickly decided to use the sliced almonds that were there instead and was totally pleased with the results (even my kids ate them and they hate nuts!).  I also ended up making my own almond paste for this cookie, something I had never done before.  I guess Germans don't use it (but they seem to really love marzipan- odd) because it was nonexistent in the local stores.  I actually really loved my homemade almond paste much more than the store bought stuff and it was so easy I may never buy it again.  If you don't have already ground almonds available just whiz some whole or slivered almonds up in your food processor or blender so that you end up with 1 1/2 cups of the ground stuff. 

Almond Paste:

1 1/2 cups ground almonds (or almond flour)
1 1/2 cups pure cane sugar
1 tsp pure vanilla extract (or almond extract if you want it extra almond-y)
1 egg white

Place the ground almonds into a food processor and pulse until the almonds begin to form a paste.  Add the rest of the ingredients and blend until you have a thick paste.  The almond paste can be refrigerated at this point for up to three days.

Cookie dough:

2 egg whites
1 recipe almond paste
2 tbs honey
3 tbs all purpose flour

Preheat your oven to 350 degrees.  Line a baking tray with parchment paper or a silicone baking mat.

In a large bowl beat the egg whites until they begin to get frothy.  Using a hand mixer or stand mixer, blend the almond paste into the egg whites in small increments until just blended in.  Add the honey and flour and beat until fully combined.

Spoon quarter sized mounds of the cookie dough 2 inches apart from each other on the prepared baking sheet (you could also pipe the dough with a piping bag).  Bake for 7-9 minutes until the tops of the cookies turn golden, they have spread and the tops have crackled.  Let them cool completely on the parchment or baking mat before peeling off.  To speed things up you can slide the parchment with the cookies onto a wire rack and replace it with a clean parchment to bake a second batch while the first batch cools.  You can continue to swap out the two sheets of parchment until all the cookies are baked.

The cookies keep well in an airtight container for 3-5 days.


Friday, December 12, 2014

Just a Little Thing...A New Book and My Favorite Christmas Cookie Ever

A year of work has finally come to an end.....


After a lot of recipe collecting and bugging my Mom for her instructions for my favorite childhood treats, writing, editing, photographing and a few extra pounds from, ehem, taste testing.....this labor of love is finally finished.  It's just a little thing- 18 recipes that represent the collective kitchen wisdom of three generations of my family bound together into one sweet book.  My Mom and I worked together to make this book before some of these recipes disappeared forever without being written down.  My original intention was to give copies as gifts for my family, but I got so many requests for a copy from friends far and wide that I decided to self publish the book and offer it for sale.

So if you head on over to Blurb, you'll find My Mother's Kitchen for sale in a few different formats.  You can grab a hard or soft cover 7x7 inch book or download an ebook for your iphone or iPad.  I'd be honored if you were fond enough of me or my recipes to purchase yourself a copy.  Thrilled and humbled beyond belief as well.


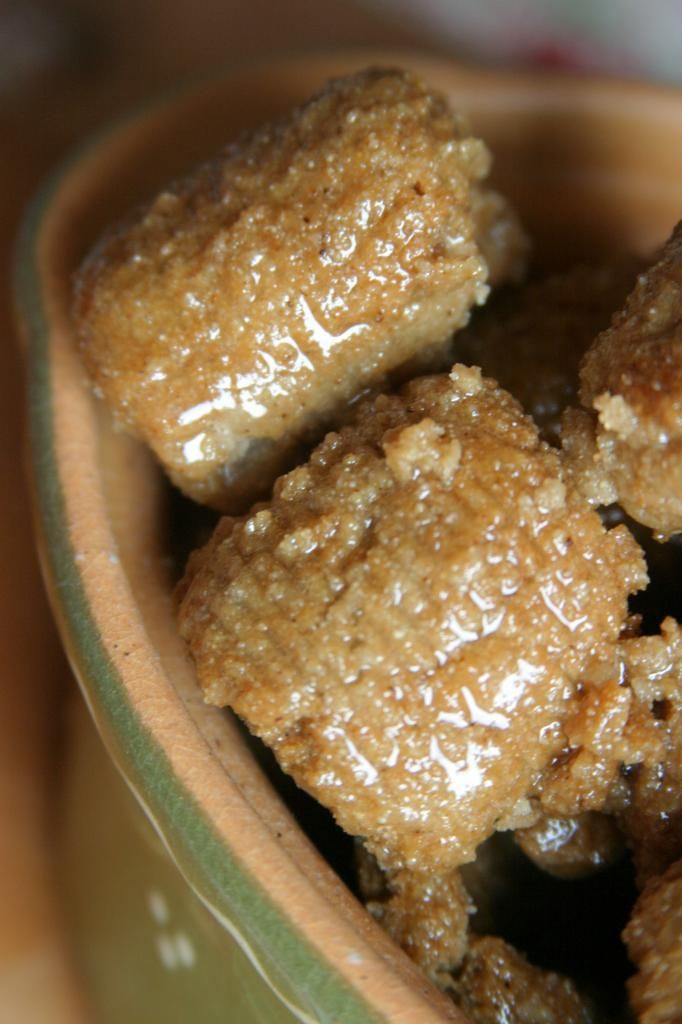
I thought I'd give you a little taste of what's in the book today.  In keeping with the current theme of European cookies, here's my favorite Italian cookie.  We always called them dardeeds because that's how my Nana pronounced it, but I have since come to find out that the actual name for this cookie is turdilli.  I'm sticking with dardeeds, but you can call them whatever you like.  Maybe call them delicious.  Turdilli are definitely a regional secret from Calabria- most people have never seen or heard of them.  I aim to change that right now.


Turdilli {or Dardeeds}

Makes a mountain of cookies.  Divide the recipe by 3 for a more reasonable amount.
For the printable of this recipe, click here


3 cups neutral flavored oil           
2 cups dry red wine               
1 cup whiskey               
11 1/2 cups + 1 tbs all purpose flour       
8 1/2 cups semolina flour           
2 tsp sugar               
3 eggs                   
½ tsp ground cinnamon
1 tbs ground clove


Neutral flavored oil for frying
2 cinnamon sticks
12 whole cloves, divided
 2 lbs. honey
1/4 cup sugar


Place the oil, wine and whiskey in a large pot.  Bring to a boil over medium heat.  Boil for just a couple of minutes to burn off the alcohol.  Remove from the stove and cool.

In a large mixing bowl stir together the flour, semolina, sugar, ground cloves and ground cinnamon.  Pour in the cooled liquid ingredients and the 3 eggs.  Mix until you have a cohesive, sturdy dough. 

In a large pot, pour enough oil to fill the pot about three inches deep.  Place the cinnamon sticks and 7 cloves into the oil.  Insert a candy thermometer into the pot.  Heat over medium until the oil reaches 350 degrees.


In the meantime, cut small sections of dough (keep the rest of the dough in a covered bowl) and form ropes about the diameter of your thumb. Cut into ¾ to 1” pieces and roll them on a fork or a wooden board used to roll cavatelli/gnocchi. Fry the dardeeds in batches, turning gently once, until golden.  Let cool.

Rub the sides of a bowl large enough to hold all the finished dardeeds with half a lemon.  Place the honey in a pot large enough to hold all the dardeeds. Add the remain cloves to the honey. Mix the sugar and flour together and add it to the honey also. Warm the mixture to just above a simmer but not quite boiling.  Add the dardeeds and toss gently until they are all coated well. Remove from heat and turn out into the prepared bowl. Keep covered with foil.


Tuesday, December 9, 2014

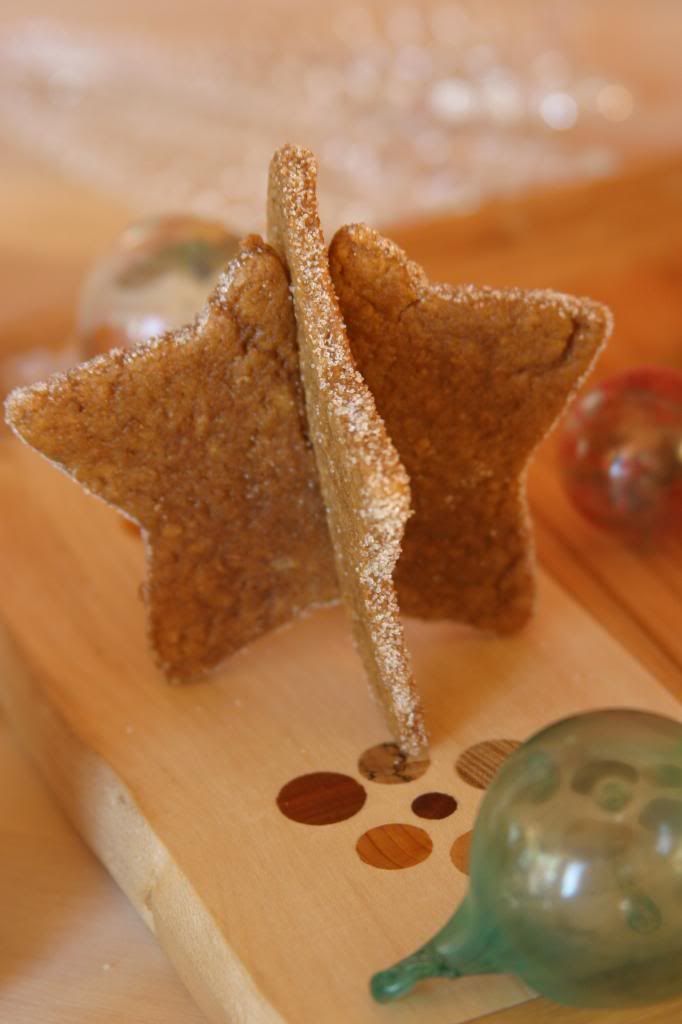
German Gingerbread {Lebkuchen}


This past week my youngest son's school had a Christmas party.  Families were invited and we grilled bratwurst over fire pits in the school yard, had hot punch and shared Christmas sweets.  If this seems like an idyllic German setting, let me set the record straight.  It was dark at 4:00 pm, 37 degrees out and mistily foggy.  It was a GREAT idea and I was super excited for it, but the reality was not so wonderful.  Let's just say we only lasted as long as it took my oldest to grill his bratwurst (which took way longer than his patience held out, truly) and have a few cookies.


I brought cookies to the celebration (of course).  I was excited and just a bit nervous to bring these particular cookies.  We had spent the weekend before exploring the Christmas markets in Munich and Salzburg and I fell in love with the cookie booths in both the German and Austrian cities. It's THE cookie around these parts.  And everyone's mom or grandma has their own way of making lebkuchen that is the "best" or "only" way to do it.  I think I went to one booth at the market in Salzburg that had 10 different versions for sale.  Some were studded with candies fruit, some dressed up with a chocolate coat and more plain versions decorated with almonds.  After all the tastings (purely for scientific reasons, of course) my favorites were lightly sweet and mildly spicy with a simple glaze and chewy middle.

The big question was- would my American version of everyone's favorite go over with the teachers and family's at my son's school.  I breathed a huge sigh of relief when I popped in the morning after the big grill out and the teacher gave me a big thumbs up while snacking on the leftover cookies.  Phew!  I'm so glad because I just love this cookie and having others feel the same way just feels so good.


German Gingerbread {Lebkuchen}
Makes about 3 dozen 3 inch cookies.
For the printable recipe, click here.

This recipe is the result of quite a bit of research into traditional lebkuchen recipes.  There were so many ways I could have gone, but I think after much tinkering I came up with my ideal version.  A few notes.  First, many lebkuchen recipes require long resting times either before or after baking to produce a more mature flavor.  I suppose that would work, but I found that an overnight rest in the fridge before baking was just right for my tastebuds.  Feel free to let the dough rest up to three days if you fancy a stronger spiciness.  Second, though I loved the snowflake cookie cutter that I used when making the cookies for this photo, I probably wouldn't use it again.  The spiky parts of the cookie baked much more quickly than I would have liked and I missed the chewy center that is the hallmark of the lebkuchen.  I think the angel shape was perfect, but if you really want to go traditional most lebkuchen that I saw in the markets were round.  If you find the cookies drying out as you keep them on your counter, take a cue from the Germans and place a slice of apple in your cookie jar to keep your lebkuchen fresh.

1/2 cup honey
2/3 cup packed brown sugar
1 large egg
2 1/2 cups all purpose flour
1/2 cup almond flour

1 tbs cocoa powder
1/2 tsp baking soda
1 tsp cinnamon
1/2 tsp ground cloves
1/2 tsp ground ginger
1/4 tsp ground cardamom
1/2 tsp fresh lemon zest

1/2 cup sifted powdered sugar
2 tsp water

In a large bowl beat the honey, brown sugar and egg together.  Add the dry ingredients and carefully stir then into the wet ingredients until they are fully incorporated.  Cover the bowl and refrigerate the dough overnight and up to 3 days.

When ready to bake the cookies, preheat your oven to 350 degrees and line a cookie sheet with parchment.  Roll the dough out on a lightly floured surface (it can be a bit sticky) to 1/4 inch thick.  Cut shapes using a cookie cutter between 2 and 3 inches in diameter.  Place cookies on the prepared cookie sheet with a couple of inches between each cookie.  Bake one sheet at a time for 5-7 minutes.  You want the cookies to puff in the center and get just the lightest of golden on the edges but NOT browned.  If you let the cookies bake until browned they will be hard and lose their chewy middle.  Let the cookies cool for a couple of minutes to make them easier to handle before transferring them to a wire rack to cool completely.

Continue rolling and cutting cookies until you are out of dough (scraps can be rerolled a few times before it gets tough).

Meanwhile, mix together the powdered sugar and water to get a thin glaze.  When the cookies are completely cooled, brush them with the glaze.  Give the glaze a few minutes to set before serving.

Cookies will keep in an airtight container for 3 days on the counter.


Thursday, November 20, 2014

Swedish Dream Cookies {Dromkakor}


So last we met I had decided that I was going to put less pressure on myself.  Ha!  That didn't last long.  Not only am I in the midst of trying to finish up a family cookbook project before Christmas (2 recipes left to make and photograph- yay!)  but I went and decided to up the stakes here on this little old blog as well.  I've decided to do something that I've never tried before and do a series of themed posts from now until the end of the year.  How's that for slowing down and not feeling like I have to live up to any standard? 

If nothing else, it will certainly put some pressure on the waistband of my jeans (cue the groans for the cheesy joke now). 


So what's this theme all about, you might ask?  Here in Germany there is no Thanksgiving (duh), so things move along from apples and pumpkins right to Christmas.  And pretty quickly too.  The world-famous Christmas markets start up next week and my family is skipping the turkey this year and heading to Munich for the first market of the season.  Can't.  Wait. 

All the holiday hub bub has me thinking about my favorite part of Christmas.  The cookies.  So inspired by our travels and surroundings I decided to feature a selection of European cookies.  Some are simple and perfect for the busy holiday season and some are time consuming traditional cookies of the season.  I'm starting simple with a cookie from a country I haven't been to yet, but it's on the bucket list.  I must admit, I'm really tickled about the whole thing.  This is going to be so much fun!


Swedish Dream Cookies {Dromkakor}
Makes about 4 dozen cookies.  Very slightly adapted from Saveur.
For the printable recipe, click here.

These cookies are about the simplest things I can imagine making (next to good old American chocolate chip ones).  No fancy equipment or exotic ingredients required here.  They are crisp and melt in your mouth, in other words truly dreamy just as their name suggests.  I added just the tiniest bit of nutmeg to the dough which isn't a pronounced flavor but adds to the buttery richness of the cookie.  They remind me of a brown butter cookie with their nutty caramel-ly undertones but with none of the extra work required.  They may just become my go-to, in a pinch cookie.  And yours too.

1 2/3 cups all purpose flour
3/4 tsp freshly grated nutmeg
1 tsp baking soda
8 tbs softened butter (1 stick)
1 1/4 cups cane sugar
1 1/2 tsp vanilla extract or 2 tsp vanilla paste
1/3 cup canola oil

Preheat your oven to 300 degrees.

In a small bowl, stir together the flour, nutmeg and baking soda.  Set aside.

In a large bowl, beat together the butter and sugar until pale and fluffy.  Add in the vanilla and beat for another few seconds until thoroughly mixed.  Add the oil and stir together until smooth.  Slowly stir in the flour mixture just until combined.

Portion the dough 1 tablespoon at a time into balls.  Place the balls 2 inches apart on parchment lined baking sheets.  Bake the cookies one sheet at a time for about 25 minutes.  The cookies will crack on top slightly and be very pale golden brown.  Cool on a wire rack before serving.


Tuesday, December 17, 2013

Spelt (or Whole Wheat) Gingersnap Cookies {Tuesdays with Dorie}


This morning as I was dropping off my little one at school I caught a glimpse of another Mom who must be much more on top of things than I am.  She was carry a little bundle of cookies all bagged up and be-ribboned to give to teachers as gifts.  And it dawned on me- Christmas is in just one week.  I've only got three more days to pull together something tasty and sweet for my boys' teachers. 

How did that happen?  Didn't I just implore good old St. Nick to gift me with a bit more time? 


My plan was to bake up a few batches of tried and true cookies- including my favorite chai spiced chocolate crinkle cookies and maybe some pizzelles- to gift to teachers and neighbors.  We've got a cookie swap coming up in a few days as well and the there's Operation Cookie Drop, which the USO organizes to drop off cookies to soldiers, sailors and airmen who are stuck standing watch on Christmas Eve and Christmas day.  In other words, I think I'll be up to my eyeballs in cookies for the next few days.  Thanks to my hubby, who gave me my Christmas present (a new Kitchen Aid mixer!) early, I think I'm up to the task.  The only question is which other cookies I want to include in my treat bags?

I think these little cookies may just make the cut.  I already have a favorite molasses cookie- from Cooks Illustrated- so I wasn't too sure about these, but I gave them a shot anyway.  Unlike most other cookie recipes, this one only makes about a dozen cookies.  I kind of like that.  There are just enough cookies to satisfy without making so many that you can't stand them anymore by the time you finish them off.  They're chewy, warmly spiced and couldn't be any more Christmas-y if they tried.

 
It's been forever since I posted a Tuesdays with Dorie recipe and I missed the fun group of bloggers that I get to bake along with.  That international move just completely got in the way.  And then, of course, I had to figure out how to get by in this tiny kitchen of mine and how to find what I need in the German grocery stores.  Just like everything else lately, I'm a bit behind and still trying to play catch up.  But I'm slowly getting there and this is the first step in getting back to normal (or at least my new normal).  I'm going to include the recipe because I made a few changes.  And here's the link to find everyone else's version of these tasty little cookies.

Spelt (or Whole Wheat) Gingersnap Cookies
Makes about 1 dozen cookies.  Adapted from Baking with Julia, edited by Dorie Greenspan.  Recipe by David Blom.
Click here for the printable.

I love that the ingredients list for these cookies is relatively short and the process is fairly simple and straightforward.  I did feel the need to tweak it just a bit though.  The first batch I made was strictly by the books.  I found that for being called a gingersnap, the original didn't seem to have a whole lot of ginger or snap to it.  So I upped the amount of spice a bit and added cloves.  I liked the first batch, but felt my second lived up to its name more fully.  I also swapped out the all purpose flour for spelt flour.  Mostly because it was at the front of my cabinet, but also because I knew I could hide it easily from my family in an already deeply colored doughI quite enjoyed the depth that it cave the cookie.  If you can't find spelt, you can certainly use whole wheat or all purpose flour.


1/4 cup sugar
3 tbs unsulfured molasses
2 tbs butter at room temperature
1/2 tsp ground ginger
1/4 tsp cinnamon
1/8 tsp ground cloves
1/8 tsp baking soda
1 1/2 tbs water
3/4 cup spelt (or whole wheat) flour

To glaze the cookies, you'll need 1 tbs molasses and 1 tbs water.

In the bowl of a mixer fitted with the paddle attachment (or a bowl suitable for use with a hand mixer) place the sugar, molasses, butter spices and baking soda.  Mix on medium speed until the butter is whipped and creamy and all of the ingredients fully incorporated.  This should take about 2 minutes.  Slowly mix in the baking soda and flour until you have a soft dough, about 1 minute more.

Wrap the dough in plastic wrap, shaping it into a rough square or rectangle.  Place the dough into the refrigerator until it firms up, 2 to 3 hours (or freeze for 45 minutes).

When ready to bake the cookies, remove the dough from the refrigerator and preheat your oven to 325 degrees.  Line 2 baking sheets with parchment paper or a nonstick silicone liner.

Generously flour your work surface and rolling pin as the dough is quite sticky.  Roll the dough out into a rectangle between 1/8 and 1/4 inch thick.  Using a 2 inch cookie cutter dipped in flour, cut out cookies from the dough.  Place them on the baking sheets with just a bit of room between them- they spread very little if at all.  You can re-roll the scraps and cut out more cookies.  If the dough is too soft, place it back into the refrigerator or freezer until it firms up a bit.

Mix the glaze and brush it on the unbaked cookies.  Don't be too generous with the glaze, it can make the cookies a bit soggy.  Bake the cookies for about 6 minutes.  They will puff up and become just a bit firm (they will fall back down when cooling).  Cool the cookies on the baking sheet for about a minute before removing them to finish cooling on a wire rack.  The cookies will keep for up to 4 days in a well sealed container.


Friday, December 13, 2013

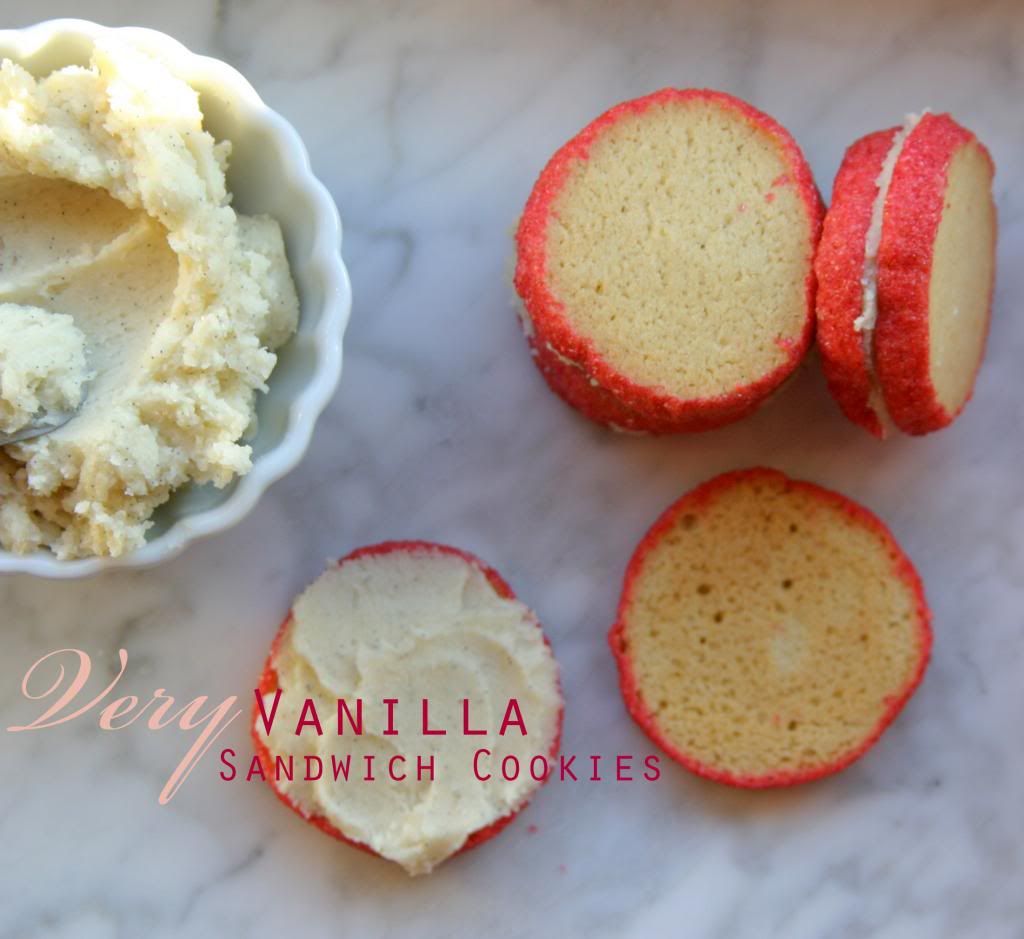
Very Vanilla Sandwich Cookies


I feel like I'm just playing catch up lately.  We came back from Rome and flew straight back into the rush of life, but I'm not so sure I was ready.   Maybe I'm still in a food coma from all the pasta I ate on vacation and with the rush of the holidays and my oldest's (ninth!) birthday I feel like December is whizzing by at world record speed.  I need everything to Slow.  The.  Heck.  Down.  Already!

Seriously.  I'd like to actually enjoy the holiday season without feeling like I'm three steps behind at every turn.  I know I'm not alone in this feeling, right?  Can we write a big letter to Santa asking him to just slow the Earth turning for the next 14 days.  We can all sign the letter so that it looks super official.  We'll just ask for the world to go a little teensy bit slower so we can all have a few more minutes each day.  I promise I don't need anything else this year except this little wish for a bit more time.  Is that too much?  You're all with me, aren't you?


I don't know if Santa will come through for me, so in the meantime I'm trying desperately to dig myself out of a mountain of Christmas presents and shipping boxes that need to make their way back to the States (probably not in time, I'm so sorry family!) and cards that I have every intention of signing, addressing and sending today.  But instead I'm blogging so you can guess how much progress I'll be making on the gift and card projects.  Oh and baking.  There's that too.

Peanut butter chocolate chip cookies for my oldest to share with his class for his birthday.  Dark chocolate and cherry pannettone for me to share with my friends on the drive for a mini-girls weekend at the Cologne Christmas market a few hours away.  And cookies for my little one's class advent get together (that's what they do here in Germany- Advent, not Christmas).  For this party we were asked to bring something from our cultural heritage.  I decided to go with a very American sugar cookie jazzed up a bit.  I was nervous about these cookies because they're a bit sweeter than European tastes generally go for, but they were (thankfully) a hit. 

Now I just have to decide what cookies to bring to the office cookie swap next week.  Oh, and get working on that letter to Santa.  I really only need a few more minutes.


Very Vanilla Sandwich Cookies
Makes about 2 dozen cookies sandwiches.  Adapted from Pure Vanilla by Shauna Sever.
For the printable, click here.

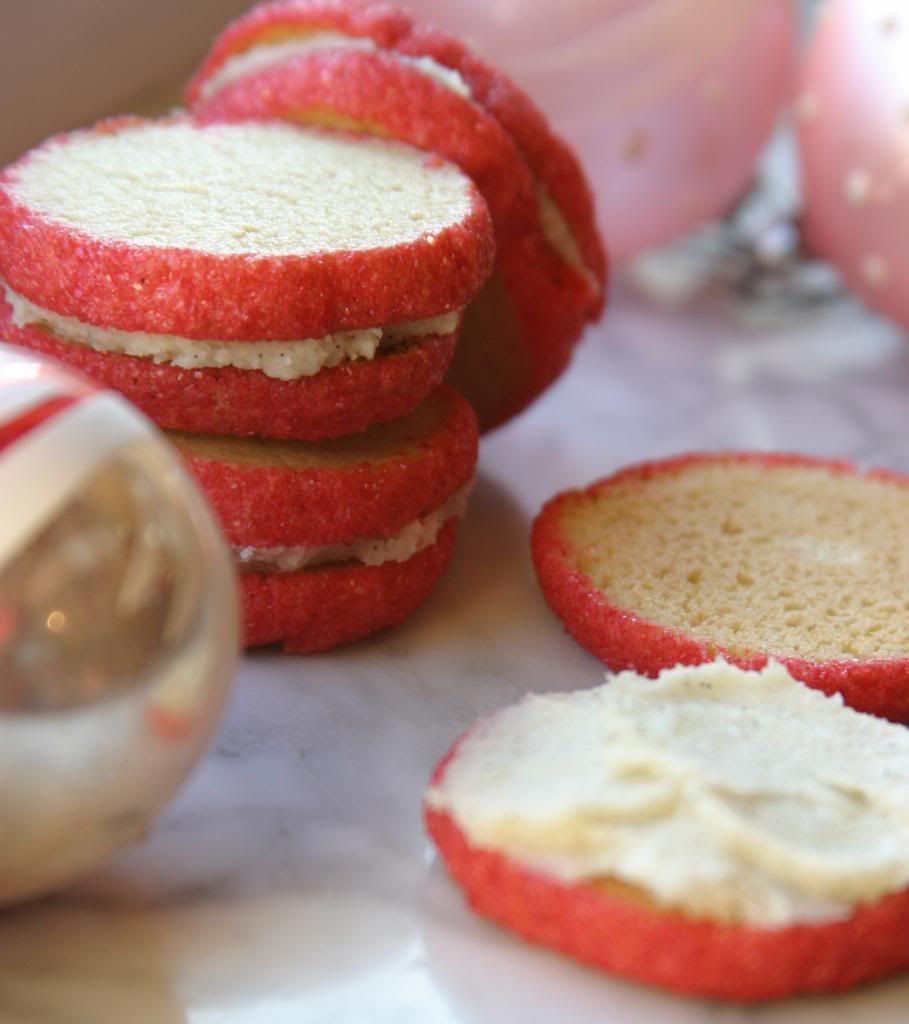
These cookies are just about the most perfect bite of vanilla ever.  Tender and crisp shortbread-like cookies sandwiched around a light vanilla butter cream- what's not to like?  You can keep the cookies plain and simple or jazz them up by rolling the edges in colored sugar before refrigerating the dough.  I think the sparkly version is perfect for a holiday party, personally.  I didn't do much to change to original cookie because it's so darn good.  I added pinch of cardamom for just a bit of depth to the cookie and swapped out the white chocolate filling (I am just not a fan of white chocolate) for a simple butter cream.  The cookies are the perfect thing to keep in the freezer for when you want to slice off and bake just a few, as even without the creamy filling they're quite good.

Another note, since moving to Germany I have not purchased a stand mixer.  I bought an inexpensive hand mixer and have used that occasionally, but the majority of the baking I have done has been completely by hand.  I swear my right arm muscles have never been as strong.  I will give directions for these cookies using a stand mixer but you can get them whipped up using even the weakest of hand mixers or the power of your own biceps.

For the cookies:
3/4 cup (1 1/2 sticks) butter, at room temperature
1/2 cup granulated sugar
1 tbs vanilla extract
1 large egg plus 1 egg yolk
2 cups all purpose flour
1/4 tsp baking soda
1/4 tsp cardamom

For the vanilla bean butter cream:
4 tbs butter at room temperature
1 vanilla bean
1 1/2 cups powdered sugar
1/4 cup granulated sugar
2 tsp vanilla extract

Optional: colored sanding sugar for decorating

In the bowl of a stand mixer with the paddle attachment, beat the butter, sugar and vanilla on medium speed until light and fluffy, about 2 minutes.  Add the egg and egg yolk and beat until well blended.  Reduce the speed to low and stir in the flour, baking soda and cardamom until the dry ingredients are thoroughly incorporated.

Turn the dough out onto a lightly floured work surface and divide it in half.  Roll each half into a log about 8 inches long and 1 1/2 inches in diameter.  If you are dressing up the edges in colored sugar, pour about 1/4 cup sugar onto a piece of waxed paper or flat platter.  Roll the dough logs in the sugar to coat the outside.  Wrap each log in wax or parchment paper and refrigerate until firm, 1-2 hours (you can freeze the dough for up to 6 months at this point as well).

When you're ready to bake the cookies preheat your oven to 350 degrees.  Line 2 baking sheets with parchment or a silicone liner.

Slice the dough into 1/4 inch rounds and place the cookies about 1 inch apart on the baking sheets.  Bake until the cookies are firm and the edges just begin to turn golden, about 12-15 minutes.  Let the cookies cool for about 2 minutes on the baking sheets and then transfer to a wire rack to cool completely.

While the cookies cool, make the vanilla butter cream.  Beat the butter for about 2 minutes until it  becomes creamy.  Slice the vanilla bean in half lengthwise.  Using the back of your knife, scrape the vanilla bean caviar from the pod.  Add the vanilla caviar to the butter along with the powdered sugar and beat the mixture on low speed.  Gradually add the granulated sugar and then the vanilla extract until fully combined, light and fluffy.

Spread a heaping teaspoon of butter cream on the bottom of one cooled cookie and then top with another cookie.  Repeat with the remaining cookies and cream  Store the filled cookies in the refrigerator in a sealed container (alternately, you can store the unfilled cookies at room temperature and the butter cream in the refrigerator until ready to fill).


Friday, October 25, 2013

Cherry & Oat Granola Bars


Last week's post was a bit extravagant, I admit.  And while I do enjoy a treat now and then its certainly not the way my family eats on a daily basis.  We're not slathering Nutella on our toast every morning and packing ourselves full of cake and cookies as many of the posts on this site might have you believe.  So I thought I'd dial it back a bit this week and show you how we really snack around here.

That's not to say that I'm offering up health food here.  But I find it's easier to cram a bunch of good-for-you stuff into my kids' snacks if there's a least a little bit of something sweet to go along with it.  They would have it no other way.  So these granola bars have a fair bit of honey in them to sweeten the deal.  But the oats, flax, pumpkin seeds and unsweetened cherries are healthy enough to make me think they're totally healthy.


I'm not one to blindly go around following food fads.  It's just not my style.  I'm sure my blog would see a jump in readership if I could call myself paleo or grain-free or vegan.  But frankly I like love bread and can't seem to figure out how on earth to make a great baguette without wheat flour.  The folks in my home enjoy honey, butter and a good steak every now again, all of which would make my vegan friends shudder in disgust (and I have some so I know whereof I speak).  Instead I do my darndest to find the best ingredients I can, raised and grown responsibly whenever possible and simply try to create food for my family that contributes to a good old-fashioned, well balanced diet. 

If my new neighbors and country-mates are any example at all, I think I'm on the right track.  I don't think I've ever come across a cuisine that centers around meat and potatoes to the near exclusion of lean proteins, veggies and fruit as the German one does.  But here's the thing- I'd also be hard pressed to find an overweight German walking around.  So I think they may be on to something.  What I've come to see is that they eat well but they also get up and move as much as possible.  They walk, run, bike and even skate everywhere possible.  And there are very few fast food restaurants or processed foods here.  It's an eating philosophy I can get behind and what I'm hoping to emulate as I cook for my own family.  It's reasonable, easy and pretty much the way I cook anyway.

These granola bars are but one (really, really tasty) part of the strategy.


Cherry & Oat Granola Bars
Makes 12 to 16 bars depending on how you cut them.  Adapted from Good to the Grain: Baking with Whole Grain Flours by Kim Boyce.
For the recipe, click here.

These granola bars are an excellent grab and go go snack.  They remind me a bit of my favorite Kashi bars- dark chocolate and cherry- but in a country that doesn't believe in selling chocolate chips (this is a very sad discovery), that's not really an option for me.  If you want to throw in some dark chocolate chips go right on ahead, I'll understand and be completely jealous.  Try to find some good quality cherries for these bars, preferably unsweetened.  I've used both sweet dried cherries and sour cherries in these bars and I favor the sour cherries because they really balance the sweet honey nicely.  But either works just as well so choose your favorite.  One final tip for making these granola bars- make sure you really get your honey up to a rapid boil otherwise it will not do a good job setting up in the oven and your bars will crumble.

4 tbs butter, plus more for the pan
2 cups of old-fashioned rolled oats (not quick oats)
1/2 cup raw pumpkin seeds
1/2 cup flaxseed meal
1/3 cup dried unsweetened cherries
1/2 cup plus 2 tbs honey
a pinch of sea salt
1 tsp vanilla extract

Preheat your oven to 325 degrees and butter a 9 x 9 inch straight sided baking pan.  Set aside.

In a pot large enough to hold and stir the two cups of oats, melt the butter over medium heat.  If you like you can take this a bit farther and cook the butter until lightly golden.  Pour in the oats and pumpkin seeds and stir for about 5 minutes until the oats have toasted and turned a couple of shades darker (using a raw oat as a comparison is useful to determine the color change as it is subtle).  Remove the pot from the heat and pour the oats and seeds into a large bowl.

Stir the flaxmeal and cherries into the oat mixture.

Using the same pot heat the honey over medium heat.  Cook the honey until it comes to a strong boil, about 5 minutes.  Let it cook for just a minute and then remove from the heat.  Stir in the salt and vanilla extract.  Pour the honey syrup over the oat mixture and stir quickly to coat.  Stir the granola mixture until every flake of oats, nuts and cherries are coated- this helps to get a good set for the bars.

Pour the granola mixture into the prepared pan.  You can lightly butter your hands and press the granola into the pan or use a silicone spatula to press it evenly and tightly into the pan.  Place the pan in the oven and bake for 25 minutes.  The bars will be shiny and sticky and the edges will be nicely golden.  Remove the bars from the oven and let cool for 10 minutes in the pan.  Cut into 12 or 16 bars and let cool completely.

The bars will keep for up to 3 days in an airtight container (I recommend wrapping them individually so that they don't stick to each other).


Wednesday, October 16, 2013

Brown Butter Nutella Krispie Treats


Sometimes you just need to have a little fun.  These, my friends, are just the sort of fun I'm talking about.

I have to confess that I am very, very late to jump on the Nutella bandwagon.  Even though I grew up living with my Italian mother and grandparents we never had the stuff around much.  Maybe it's more of a northern Italian thing so my southern Italian family just never acquired a taste for the chocolatey/hazelnutty goodness.  It's a question with no answers. 

Happily, though, I can report that in my old age I have joined the dark side and have come to appreciate this beloved treat.


It doesn't hurt that I just happen to live less than 30 minutes away from a chocolate factory that makes their own version of a chocolate and hazelnut spread.  And that I like it just a little bit better than the Italian stuff.  Before you go accusing me of blasphemy let me just note that I'm not putting down the original, I simply happen to think my local stuff is better.  The Ritter Sport chocolate company has been in the area for 100 years and is the stuff of legends around these parts.  I suppose I have more of an emotional attachment to the Ritter Sport chocolate hazelnut spread (which is called NussNugatCreme- nut nougat cream) after being introduced to it nestled within a crepe along side sliced bananas and crushed hazelnuts in the sweet little factory cafe on a rainy day.  Who wouldn't fall in love at first bite?

I was compelled to buy the half kilogram sized tub of it at the factory Shoko (Chocolate) Shop.  And that wasn't even the big one.

I've slathered the chocolate hazelnut spread on pancakes and toast and swirled it between layers of cinnamon-scented sweet dough to make the most luxurious, hangover curing sweet rolls ever.  But that tub still calls my name from the back of my fridge. Today I've used it to gussy up an old favorite, rice krispie treats.  These krispie treats are just a little fancy and a whole lot of fun.  And as Cindi Lauper sings, girls just wanna have fun.....


Brown Butter Nutella Krispie Treats
Makes 12 bars.  Embellished very slightly from Smitten Kitchen's delicious recipe.
For the printable recipe, click here.

This recipe doesn't stray too far from its humble roots.  There's a bit of extra butter that gets a few more moments in the pan to toast up the milk solids and give it a nutty edge.  And then there's that stripe of chocolate hazelnut spread tucked in between two layers of the buttery marsmallowy (can I use that as a word?) krispies.  I suppose that if that's too much effort, you could always just mix the Nutella into the melted marshmallows and skip the layering step.  These are delicious either way.

 1 stick (8 tbs or 100g) butter
1 10 oz bag marshmallows
a generous pinch of sea salt
6 cups rice krispie cereal
2/3 cup Nutella or your favorite chocolate hazelnut spread

Generously butter (or spray with nonstick spray) an 8x8 baking pan with 2 inch sides.

Warm the Nutella in a small pot or in the microwave until it melts.  Keep warm.

In a pot large enough to hold and stir the 6 cups of cereal, melt the butter of medium heat.  Once the butter melts, continue to cook it gently until the milk solids turn a light golden brown and has a nutty aroma.  Pour in the marshmallows and stir over low heat until the marshmallows have melted and the mixture is silky.  Remove the pot from the heat and stir in the salt.  Carefully mix in the krispie cereal until it is completely coated in the marshmallow mixture.

Pour half of the marshmallow coated krispies into the prepared pan.  Press it down with lightly oiled hands or wax paper so that it compacts and fills the pan in one even layer.  Reserving 1 tbs to use as a topping, pour the melted Nutella over the bottom layer of krispie treat and spread to cover.  Press the second half of marshmallow krispies over the Nutella layer using the same method as the first krispie layer.

Let the krispie treats cool and set up in the pan for 5-10 minutes.  Cut it into 12 squares and drizzle the tops with the reserved tablespoon of Nutella (rewarm if necessary before drizzling).  Serve with a big glass of milk.


Tuesday, September 17, 2013

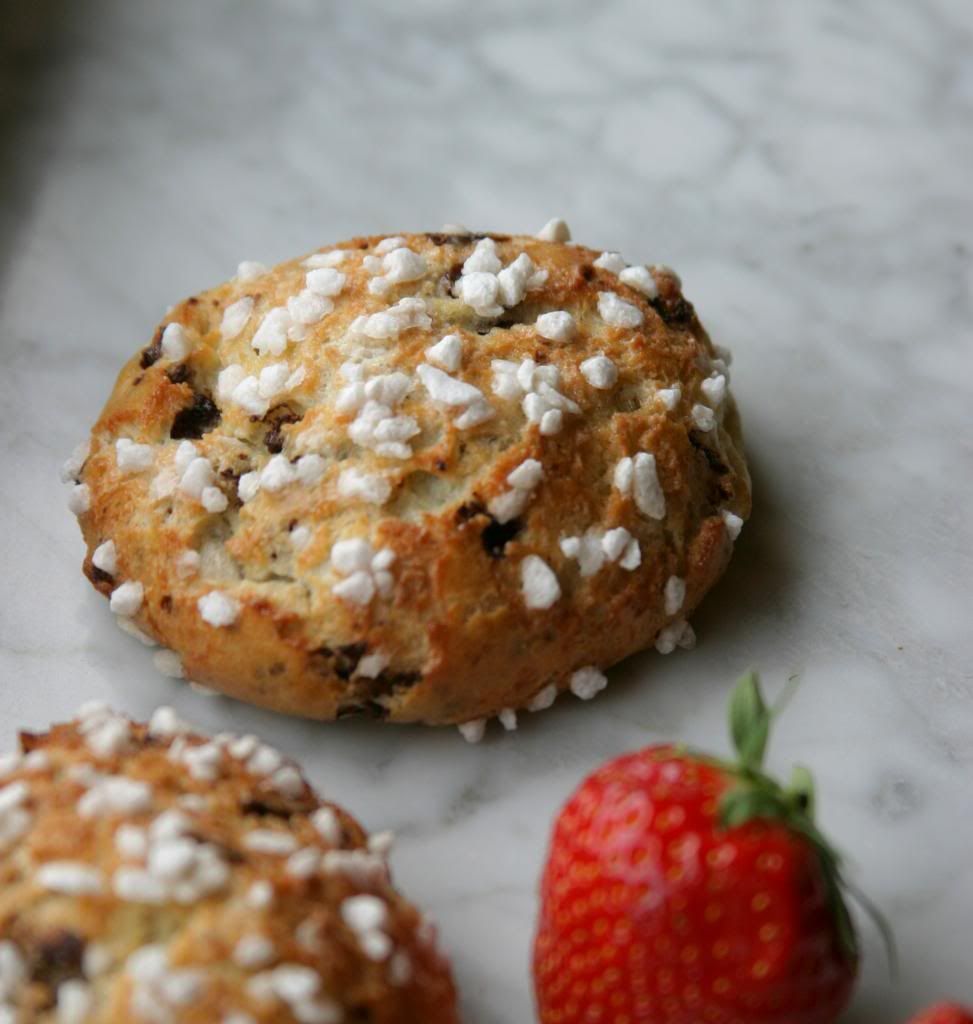
Dark Chocolate Chip Profiteroles


Another day, another birthday.  No candles for me this time around (I'm not sure there are enough in Germany for this one).  And true to how my birthdays have gone for the past, oh, 10 years or so it will be a solo one.  It would seem that the U.S. military really has a thing for sending my hubby on trips mid-September.  I can't remember the last birthday (or anniversary, which is tomorrow) that we spent together. 

Please don't think I'm complaining.  I'm not really.  I used to mind it when I was younger and a bit more selfish.  But these days a birthday doesn't have to be a big deal.  A quiet, confrontation-less, easy day is just fine by me.  A day when my boys don't bash each others heads into the ground when wrestling or throw handfuls of LEGOs at each other and meal times aren't a war of secession.  That sounds like the best gift this mama can ask for.  If my hubby is home, that just makes the day more sweet.  I know he certainly wouldn't choose to be away on a special day- that's just his job and one that I am immensely proud of him for doing. 


That does not mean the day goes by with no recognition at all.  Even if it's just a sleepy "Happy Birthday" from my boys as they roll out of bed, a text from their dad first thing in the morning, the sun breaking through the clouds for a bright crisp morning and a visit by a friend for tea and good conversation. Oh, and there must be a few sweet nibbles.  Because I'm that kind of girl.  

These sweet treats are courtesy of David Lebovitz's book The Sweet Life in Paris.  I picked it up at the Army's garrison library, where my boys and I have taken up residence several times a week looking for entertainment that isn't in German.  You mean we can borrow movies and books and video games that will  make everyone a little bit happier?  Yes please!  And the books sometimes come with recipes?  Bonus!  Thank you Mr. Lebovitz for my birthday treats-these are easy and quick and taste sooooo good.  Can a girl ask for anything more for her 37th birthday sweet 16?


Dark Chocolate Chip Profiteroles
Makes about 2 dozen puffs.  From The Sweet Life in Paris by David Lebovitz.
For the printable recipe, click here.

This really is just a simple cream puff without the cream.  I grew up on my Nana's, so it's not a stretch to imagine that I would love these.  But the dark chocolate and the pearl sugar really do take the profiteroles from ordinary to spectacular.  The dark chocolate chips are easier and easier to come by in the grocery stores these days, but if can't find them grab your favorite dark chocolate bar and get chopping.  Simply chop enough chocolate into chocolate chip sized pieces to equal the volume of the chips in the recipe.  The pearl sugar is a bit more difficult to come by,   Pear sugar is made of large, crunchy morsels of sugar that dissolve easily but do not melt when baked.  They're often used in northern European baking.  You can find them at specialty cooking stores like Sur la Table or Williams Sonoma and in the Swedish specialty section of IKEA stores (if you're lucky enough to have one nearby).  You can also find them on the King Arthur Flour website.  If that's just not going to happen for you, use the biggest sugar crystals you can find.  It won't quite be the same, but the crunch is an essential part of the charm of these puffs.


1 cup water
2 tsp sugar
6 tbs butter, cut into small pieces
1 cup all-purpose flour
4 eggs
1/2 cup dark chocolate chips
1/2 cup pearl sugar

Preheat your oven to 425 degrees and line a baking sheet with parchment paper or a non-stick liner.

In a medium sauce pot, heat the water, sugar and butter until the butter melts and the water simmers.  Remove the pot from the heat and stir in all of the flour at once.  Beat the flour into the liquid ingredients until the mixture becomes smooth and pulls away from the sides of the pan.  Let the mixture cool slightly stirring every so often (about 2-3 minutes total).  Add the eggs one at a time, making sure to fully incorporate each one before adding the next.  Let the dough cool completely before stirring in the chocolate chips.

Spoon or pipe the pastry dough into 2 tbs rounds on the prepared baking sheet spacing them evenly.  Sprinkle the tops with the pearl sugar and press it in lightly.  It will seem like way too much sugar, but trust me it is just right for the finished size of the profiteroles.  Bake for 30-35 minutes until the profiteroles are puffed and a lovely bronze color.  Cool completely on a wire rack and serve immediately.

Profiteroles are best eaten the same day they are made.  If you must keep them for longer, place them in a zip top freezer bag and freeze up to one month.  To reheat, bring the profiteroles to room temperature and then toast them lightly in a warm oven.


Wednesday, May 22, 2013

Wafer Cookies {Vanilla and Caramel Pistachio}

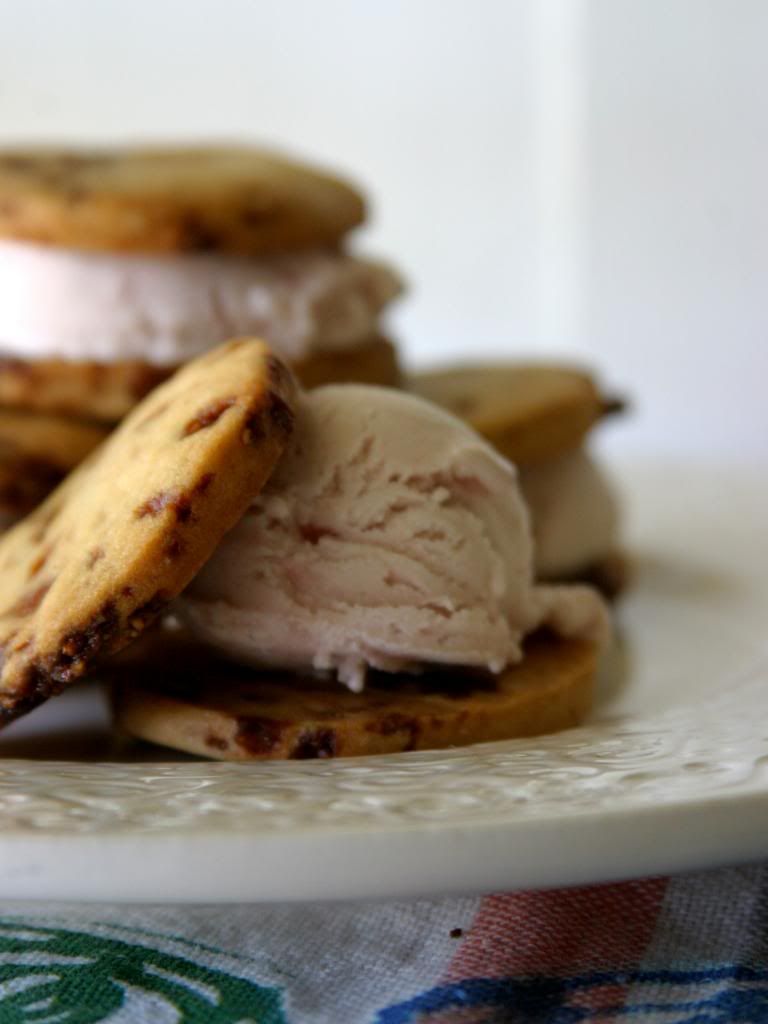
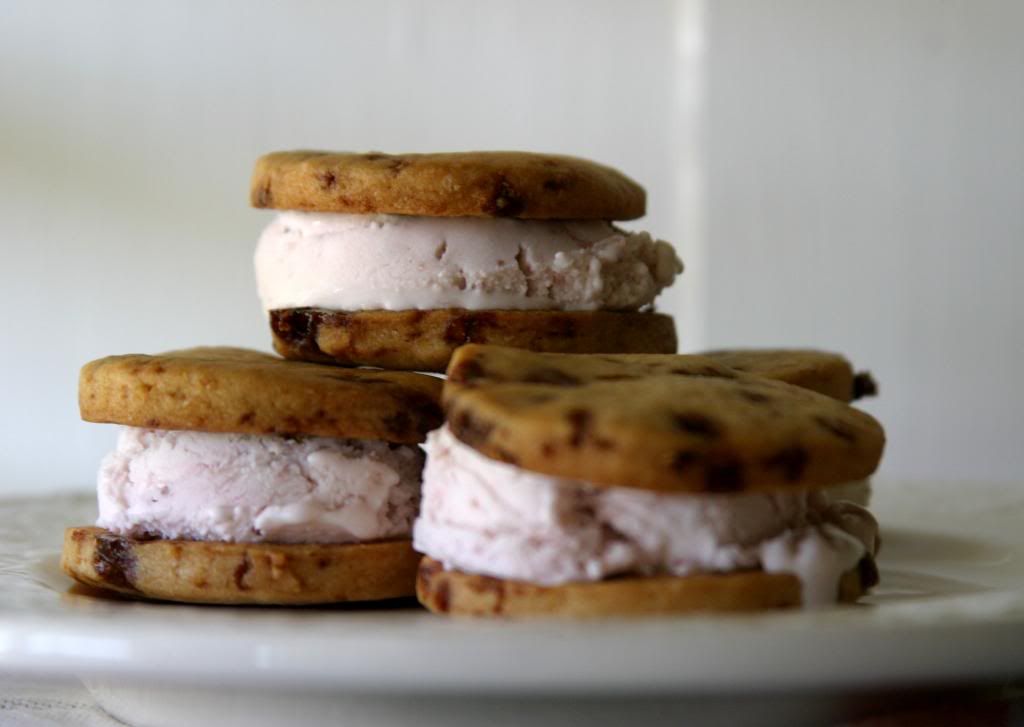
These little cookies are awesome.  And super versatile.  And did I mention awesome?  The only reason they're not sitting in my cookie jar right now is that I couldn't keep my kiddos from reaching in and grabbing one or two every couple of hours.  Oh, and then there were the dozen or so that I turned into ice cream sandwiches.  So, so, so good.  Like, the best ice cream sandwiches ever. 
The perfectly plain little vanilla wafers are my youngest son's favorite (and for my money, would be a great replacement for the store bought wafers in a cheesecake crust).  But for the rest of us, the wafers that I dressed up with some caramelized pistachios are what we're craving.  When I took those cookies and sandwiched them around a scoop of strawberry ice cream and I had a few bites of heaven.  It was a cookie epiphany.  I plan on filling up my cookie jar with these little gems over and over again.
Vanilla Wafer Cookies (Caramel Pistachio version below)
Makes 4 dozen 1 1/2 inch cookies.  From Pure Vanilla by Shauna Sever.
For the printable recipe, click here.

The simple vanilla cookies are great for nibbling with a cup of tea or milk, crushed up for the world's best cookie crust, or sandwiched around a scoop of your favorite ice cream.  Strawberry ice cream is my choice for tucking in between two of the caramel pistachio cookies.  The dough for these cookies is very soft, don't panic and try not to add too much flour as it will make the cookies tough and you'll lose the light crispy texture.

1 1/3 cup all purpose flour
1/2 tsp baking soda
6 tbs butter, room temperature
1/2 cup sugar
1 tbs vanilla extract
1 large egg white
1 tbs vegetable oil

Preheat your oven to 350 degrees.  Line 2 cookie sheets with parchment paper or silicone baking mats.

In the bowl of a stand mixer, beat together the butter, sugar and vanilla until light and fluffy.  Add the egg white and oil and continue beating until the mixture is smooth.  On low speed gradually add the flour and baking soda.  Beat until the dry ingredients are just combined.

Lay a sheet of parchment paper on a work surface.  Turn the dough onto the parchment and pat it into a disk.  Lay another sheet of parchment on top of the dough.  Roll the dough out to 1/4 inch thick.  Slide the whole thing onto a third baking sheet and freeze until the dough is firm, 10 minutes.

Using a round 1 1/2 inch cutter, cut the dough into cookies and lay 1 inch apart on the prepared baking sheets.  Place the baking sheets with the cookies in the refrigerator for 10 minutes.

Bake the cookies until the edges are lightly golden, 15-18 minutes.  Rotate the baking sheets top to bottom and back to front halfway through the baking.  Cool the cookies for 1 minute on the baking sheet and then finish cooling on a wire rack.

For the caramel pistachio version:

1/2 cup chopped pistachios
3 tbs sugar

In a medium skillet, heat the sugar over medium low heat until it has melted and turned a light caramel color.  Add the chopped pistachios and stir into the caramel.  Remove from the heat when the caramel is a medium caramel color.  Pour the caramel onto a parchment or silicone lined baking sheet.  Let the caramel cool completely (about 10 minutes).  Break the hardened caramel into small pieces.  You can do this by hand or place the caramel into a zip top bag and smash gently with a rolling pin. 

Add the broken caramel pieces to the cookie dough after beating the flour in.  Follow the instructions for rolling out and cutting the cookies from there.


Tuesday, April 23, 2013

Tea Scented Macarons with Lemon Cream

This is the post that almost wasn't.  I tried and failed the first time.  Yes, that does happen, even to someone as experienced in the kitchen as me.  I should have taken a few pictures of the mess that resulted on my baking sheets, but I was so irritated with myself that I just stuck the baking sheets in my sink and walked away.  But, as I used to say back in my teaching days, you learn as much, if not more, from your failures as you do from your successes.  And perhaps I was just as motivated to try again by the look of disappointment of my 4-year old sous chef's face when he earned that I had to throw out all of the cookies he had helped me make.  Boy, does that kid know how to get to me.
Here's the other thing that kept me trying- I knew something was wrong with that first batch and I didn't listen to my instincts.  Instead I just crossed my fingers and hoped that the macarons would turn out okay.  But if you had asked me to be truly honest, I knew they wouldn't.  And of course, I was right.  Instead of cute little cookies with the characteristic smooth tops and "feet" at the bottom, I ended up with a soupy mess coating my silicone baking mats.  There was too much egg white and I knew it right from the start.  It took me another week and a half to work up the courage to try again.  But I couldn't let it go.  It was at the back of my mind nagging at me the whole time.
Attempt number two was much more successful.  There were a few cracks and smooshed bottoms (I think I should have let them bake for another minute or two), but over all I was delighted with the result of my macaron experiment.  The inspiration came from one of my favorite drinks- the Arnold Palmer- and a more than giant lemon macaron that I actually had to cut into three pieces and share because there was no way I could eat it all by myself....okay, I totally could have eaten it but it wouldn't have been wise....

I had meant to submit these macarons for Love & Olive Oil's April kitchen challenge but after my initial failure I just couldn't get my act together on time.  No matter, I'm still glad I tried again.  And so is that little sous chef of mine, his sad face wiped away by the many macarons he swiped while I was getting together the materials to photograph them.  It's a good things he's cute.
Tea Scented Macarons with Lemon Cream
Makes enough for about 2 dozen 2 inch sandwiched macarons.  Recipes adapted from Les Petit Macarons, by Kathryn Gordon and Anne E. McBride  and Food and Wine Magazine.
For the printable recipe, click here.

I've made macarons before- there's even a recipe for chocolate macarons posted on this site.  So I'm not a stranger to them.  I thought I would try a different method this time around.  Bad idea.  After my initial failed attempt to use a "quick method" of making macarons, I thought I would do much better with a more traditional recipe.  And I was right.  I made these macarons using the French meringue method and I was happy with both the ease with which they came together and the resulting cookies.  One trick is to age the eggs.  I left mine on the counter in a bowl while I made the lemon curd and waited it for it to cool.

I used my absolute favorite tea in the world for these macarons because I had just enough left in the bottom of my tin to make the cookies but not enough to make a cup of tea.  It's a black tea called Marco Polo from France.  I think Earl Grey would be a wonderful substitute for the more expensive tea.  The lemon creme is a combination of two recipes and requires an extra step beyond making traditional lemon curd, but I think beating in the almond paste helped tame some of the tartness of the lemon.  Trust me, it's still plenty lemony.

For the Lemon Cream:

5 egg yolks
1 whole egg
1 tsp lemon zest
2/3 cup fresh lemon juice
1/4 cup plus 2 tbs honey
4 tbs butter, but into small pieces
4 oz. almond paste (not marzipan)

In a medium heavy bottomed pan, whisk together the egg yolks, egg, lemon zest, lemon juice and honey.  Cook this mixture over medium low heat, whisking constantly, until it is thickened and glossy.  Remove from the heat and stir in the butter.  Place the lemon curd in a bowl and cover the surface directly with plastic wrap.  Refrigerate until cool, at least three hours.

To finish the cream, place the almond paste in the bowl in of a mixer and beat until it is crumbled.  Add 1 cup of the cooled lemon curd to the mixer slowly and beat until combined.  Refrigerate until needed, up to one week.

For the Tea Scented Macarons:
1 1/4 cups almond flour
3/4 cups powdered sugar
2 tsp ground Earl Grey tea (use a mortar and pestle, spice grinder or small food processor to grind it very finely)
1 tbs powdered egg whites
3/4 cup sugar
1/2 cup egg whites (from 4 eggs- crack the eggs, quickly beat with a fork to break up the whites and then measure)
1/2 tsp cream of tartar

Preheat your oven to 200 degrees and line 2 baking sheets with parchment or a silicone baking sheets.

Place the almond flour, powdered sugar and tea in the bowl of a food processor.  Pulse the mixture several times to blend and grind the almonds very finely.  Pour the almond mixture into a fine-meshed sieve and sift onto a sheet of waxed paper.

In the bowl of a mixer, quickly whisk together the powdered egg whites and sugar.  Add the egg whites and cream or tartar and whisk until thoroughly combined.  Turn on the mixer and, using the whip attachment, whip the egg whites until they are thick, glossy and form stiff peaks.

Remove the bowl from the mixer and quickly fold in the almond mixture until fully incorporated.  Fill a pastry bag fitted with a half inch tip or a half inch hole cut in the tip with the macaron batter.  Pipe the batter onto the prepared baking sheets into half dollar sized mounds about 1 1/2 inches apart.  To remove any "tails" from the piping and any air bubbles, slam the baking sheets on the counter at least three times and up to six.

Bake the macarons for 15 minutes, then raise the heat to 350 degrees and continue baking the shells for 9 more minutes until the foot and edge of the cookie are firm and the shells just come off the parchment.  Slide the parchment onto a cooling rack and cool the macarons completely.

To fill, turn half of the macarons with the flat side up and pipe or spoon the lemon cream about 1/2 inch high and leaving a 1/4 edge around the cream.  Gently press another cookie on the top, flat side down.  Store in an airtight container in the refrigerator for up to 3 days.


Tuesday, April 9, 2013

Puff Pastry Baklava Bites

You wouldn't think there'd be a large Greek population in a place like the westernmost tip of the Florida panhandle.  When we lived there we called it "Lower Alabama".  Or perhaps you've heard of the "Redneck Riviera"?  Living in Pensacola in my early 20s was a lot of fun- great bars, great beach.  It was like spring break all year round.  But I definitely felt a lack of culture there (in every sense of the word).  The only real sense of diversity from the deeply Southern folks living there was a little pocket of Greek families that came out en masse once a year to celebrate their heritage.
The Greek Festival was something to look forward to- just like watching the Blue Angels fly their show over the beach or tailgating on the bridge over the water on the 4th of July.  The dancing, music and food were all good enough to make you want to spend the whole day wandering the festival in the hot Florida sun.  We even spent some time looking at the beautiful artwork in the Greek Orthodox church nearby.  The best part for me was always the food.  I love Greek food.  The feta, yogurt, oregano, juicy grilled meats....and best of all, baklava handmade by little Greek ladies from the church.  To this day, I haven't had better (and believe me, I've searched).  There's just something about all those layers of butter soaked phyllo surrounding finely ground nuts and drowned in the stickiest syrup ever that makes my heart go pitter pat.
I've made baklava before and it certainly a labor of love.  It takes patience to deal with those paper thin sheets of dough, and all that butter- oh the butter!  I had an inkling that a batch of baklava would be great with our Easter dinner this year, so I set out to make some. That's when I discovered that the box of phyllo that I thought I had in my freezer was in fact puff pastry.  I decided just to roll with it- puff pastry is just lots of buttery pastry layers which is just what I was going to do with the phyllo, right?- and these little beauties were born.  Quicker than the traditional and just close enough to the real thing to satisfy a craving.  Not too shabby.  The little Greek ladies would be proud, I think.
Puff Pastry Baklava Bites
Makes 9 generous cookies.  Syrup recipe from Warm Bread and Honey Cake, by Gaitri Pagrach-Chandra.
For the printable recipe, click here.

I've used both pistachios and walnuts when making baklava.  They are both traditional, depending on the origin of the baklava.  Pistachios tend to be more Persian and walnuts are most often used in Greek baklava.  I like both, but used pistachios for these cookies.  The other ingredient of note here is the rose water.  It isn't essential, but if you do use it you will have a syrup that has just a hint of the exotic to it.  You can't get more traditional than that.  You could use orange blossom water as well.  You'll find both in a well stocked grocery store, a good kitchen store (like Sur la Table) or a Middle Eastern market.

2 sheets puff pastry, thawed, but kept cool (use all butter pastry if possible)
1 cup finely chopped unsalted pistachios
1 tbs butter, melted
1 cup cooled sugar syrup, recipe below

Preheat your oven to 375 degrees.  Line a baking sheet with parchment paper.

Lay one sheet of puff pastry on a lightly floured work surface.  With a sharp knife or pastry cutter cut the pastry into 9 equal sized squares (in a 3 x 3 grid).  Lay the squares of pastry on the parchment lined baking sheet leaving at least one inch between them.  Sprinkle about 2 tablespoons of chopped pistachios in the center of each pastry square, leaving a 1/4 inch border around the edge.

Cut the second sheet of puff pastry in the same way as the first. Using the tip of the knife, cut a slash diagonally through the center of each pastry square, taking care not to go all the way to the corners. Lay the second pastry squares on top of the pistachio covered ones on the baking sheet, pressing a bit around the edges.  Brush the tops with the melted butter.  Place in the oven and bake for 10-12 minutes, until the tops are slightly puffed and golden.

Remove the cookies from the oven and while still hot, brush with a layer of the sugar syrup.  Let the syrup soak in completely and then brush the tops with the syrup again.  Repeat at least two more times.  Let the cookies cool completely.  They will keep for 2-3 days in an airtight container.

Sugar Syrup

1 1/4 cups sugar
3/4 cup water
1 tsp lemon juice
2-3 drops rose water

Place the sugar, water and lemon juice in a heavy bottomed saucepan over medium heat.  Bring to a boil, stirring, to dissolve the sugar.  Lower the heat to medium-low and simmer for 5 minutes.  Remove the pot from the heat and stir in the rose water.  Let the syrup cool completely before using.  It can be kept in a covered container in the refrigerator for two weeks.