Showing posts with label Breakfast. Show all posts

Friday, March 4, 2016

Orange Olive Oil Polenta Cake


I'm trying to shake off the gloomy mood around here.  Reading back over my posts as of late, I feel like I've been in a kind of funk and it shows.  So I'm purposefully taking on a decidedly more positive tone today.  Let's see how it fits, shall we?

I reconnected with an old high school friend not too long ago.  She's been through some rough stuff in her life, including some very devastating losses.  But she's the most positive person and I'm always looking forward to reading the things she posts on Facebook and scrolling past the inspirational quotes she finds on Instagram.  Yup, she's one of THOSE people.  Perpetually happy and trying to make the world a better place, one inspirational quote at a time.  We all know someone like that, don't we?  On our worst days we roll our eyes and scroll quickly past.  On our best we think, "Yes!  That's exactly how I feel!". 


A few days ago my friend posted this little gem,

"'It's impossible,' said pride.
'It's risky,' said experience.
'It's pointless,' said reason.
'Give it a try,' whispered the heart."

It's the kind of thing that's layered on top of a photo of a mountain climber or amazing landscape that I usually don't even bother looking at.  But that day I did.  I suppose I was feeling optimistic and it struck a chord with me.  You see, I had done just the thing about a week earlier.  I had put myself out there to be scrutinized and (hopefully) accepted in a role that would take my work to another level.  It was a move very far outside my comfort zone and had required an almost "close your eyes and go for it without thinking too much" sort of move to make it happen.

 
The same day that quote rolled across my screen I got the email saying that although they had enjoyed working with me in the past, there was no room at the moment for me to contribute.  Included in the email was an offer for me to do a bit of behind the scenes work in lieu of the position I was hoping for.  Which is sweet and I'm happy to do anything that will get my foot in the door, but at it's heart it was still what I had dreaded most- rejection.  It's the greatest leap of faith in yourself and your abilities to risk rejection in that way.  My leap, it seems, fell just that short of making it to the other side.

The funny thing is, I'm okay with that.  It was risky, but not impossible or pointless.  I listened to the whispers of my heart and tried.  I think that's win.  Maybe not the win that I was hoping for, but better than giving in to fear and not having tried at all.  It's what I try to teach my kids and what I aimed to instill in my students when I was still in the classroom- getting something wrong or failing is not the worst thing that can happen.  In fact, those moments teach us the best lessons about ourselves and about how to improve for the next time.  Because there will be a next time, you can be sure of it.  So this time, my aim was off a bit.  Next time? Who knows?


Orange Olive Oil Polenta Cake
Makes one 9 x 5 inch loaf.  Adapted from smitten kitchen.
For the printable recipe, click here.

I love this sort of one bowl, quick and easy cake to have around for an afternoon snack or if a friend drops by.  Wrap a sheet of parchment and pretty ribbon around one and you've got a wonderful hostess gift.  The orange (I used sweet cara cara oranges, but blood oranges or valencias would be just as at home here) gives a bright, citrus-y sweetness, the olive oil a bit of depth and the polenta adds just a hint of crunch to the bite that I find irresistible.  The polenta or corn meal that you choose will change the texture depending on how finely ground it is.  The one that I used is a nice happy medium and it suits this cake just fine.  This is a chance to break out that good olive oil you've been saving- with as much as is in the cake you will taste the difference.

1 cup (200g) cane sugar 
3 oranges
1/3 cup buttermilk or plain yogurt 
3 large eggs 
2/3 cup good quality extra virgin olive oil 
1 cup all purpose flour 
3/4 cup ground polenta or corn meal 
1 1/2 tsp baking powder
1/4 tsp baking soda 
1/2 tsp fine sea salt

Butter a 9x5 inch loaf pan and set aside.  Preheat oven to 350 degrees. 

Place the sugar in a large bowl.  Zest one of the oranges over the bowl directly into the sugar (the orange flavor in this cake is subtle, if you'd like to make it more pronounced grate the zest of a second orange into the bowl).  Rub the zest into the sugar with your fingertips to release the oils.

Remove the peel and pith of one orange (supreme the orange) by cutting off the top and bottom to reveal the fruit inside.  Then, run your knife along the curve of the orange to remove the remaining skin and pith.  Holding the orange in your hand, cut away the wedges of orange between the membranes.  Drop the orange pieces into the bowl with the sugar and zest.  Break up the segments into 1/4 inch pieces with your fingers.

Juice the remaining two oranges into a small bowl or liquid measuring cup. You should have about 1/2 cup of juice.  Stir the buttermilk into the juice then pour it into the bowl with the sugar mixture.  Stir the mixture together with a whisk.  Add the eggs and olive oil to the bowl and whisk until fully combined. 

Carefully whisk in the flour, polenta, baking powder, baking soda and salt into the wet ingredients just until incorporated.  Pour the batter into the prepared pan and place in the oven. 

Bake for 50-55 minutes.  The cake will be golden and a knife or toothpick inserted in the center will come out clean.  Cool the cake on a wire rack for 5 minutes.  Run a palette or butter knife around the edge of the pan and invert the cake onto the rack.  Cool completely (right side up).  Wrapped airtight the cake will keep for three days.


Friday, February 19, 2016

Whole Wheat Granola Muffins


Sometimes I just stand quietly in the doorway and watch my kids.  When the days seem filled with rushing around and it seems like the people in my family barely notice each other, I try to purposely stop and simply take notice. 

My baby girl is at the age where she is beginning to understand how to play by herself so she'll wander around with her stuffed animals or books talking her secret little language to herself.  She pretends to read the books and she gives her animals huge hugs and kisses complete with a loud and thrilled "MWAH!" with each kiss.  It's the sweetest thing to watch, truly, and it makes me thankful that she came along when she did to remind us all how happy we can be.  She is so blissful and genuine and full of unconditional love.  It's pretty amazing.

Then I watch my boys standing still, running, being big brothers and I am amazed all over again.  My middle guy is still so adorably snuggly in one moment and thoughtful and grown up sounding in the next.  He struggles sometimes like when he's trying to learn to read (in two languages at once but he's doing great) and I love that he still needs and wants my help.  But then he blows me away with what he knows and how fast he can do math.  He's at this perfect age and I just don't want him to get any older.  Is that possible?

Of course, if I could stop my kids aging I probably wouldn't.  Because it's so cool to get to watch them grow into real people with thoughts and feeling all their own.  My oldest son is a, gasp and moan, tween.  Did you know boys do the tween thing too?  And that they are just as moody and unpredictable as girls?  I.  Had.  No. Idea.  He's also hit the age where I'm not allowed to hug him anymore or tell him that I love him.  Or so he thinks- it hasn't stopped me yet.  Despite being stuck in this horrible hormonal no-man's-land, every once in a while a take a quick look at him and I can see this almost adult-ness about him.  The little boy roundness is all gone and there's the shadow of the man he'll grow to be.  Sort of the opposite of Peter pan, you know? I can rely on him and have thoughtful conversations with him.  Why on Earth would I want to stop that from happening?

I've found myself doing this a lot lately.  Just watching.   It makes me so grateful for the gift of these people in my life.  I think I will do it more often.  I take a lot (an understatement) of pictures of my kids.  We get to have so many adventures here that I want to capture.  But watching is different.  Instead of just taking pictures of my kids I'm actually seeing them.  And that's really all any of us want, right?  To be truly seen by the people that we love.


Whole Wheat Granola Muffins 
Makes 12 muffins. 
For the printable recipe, click here. 

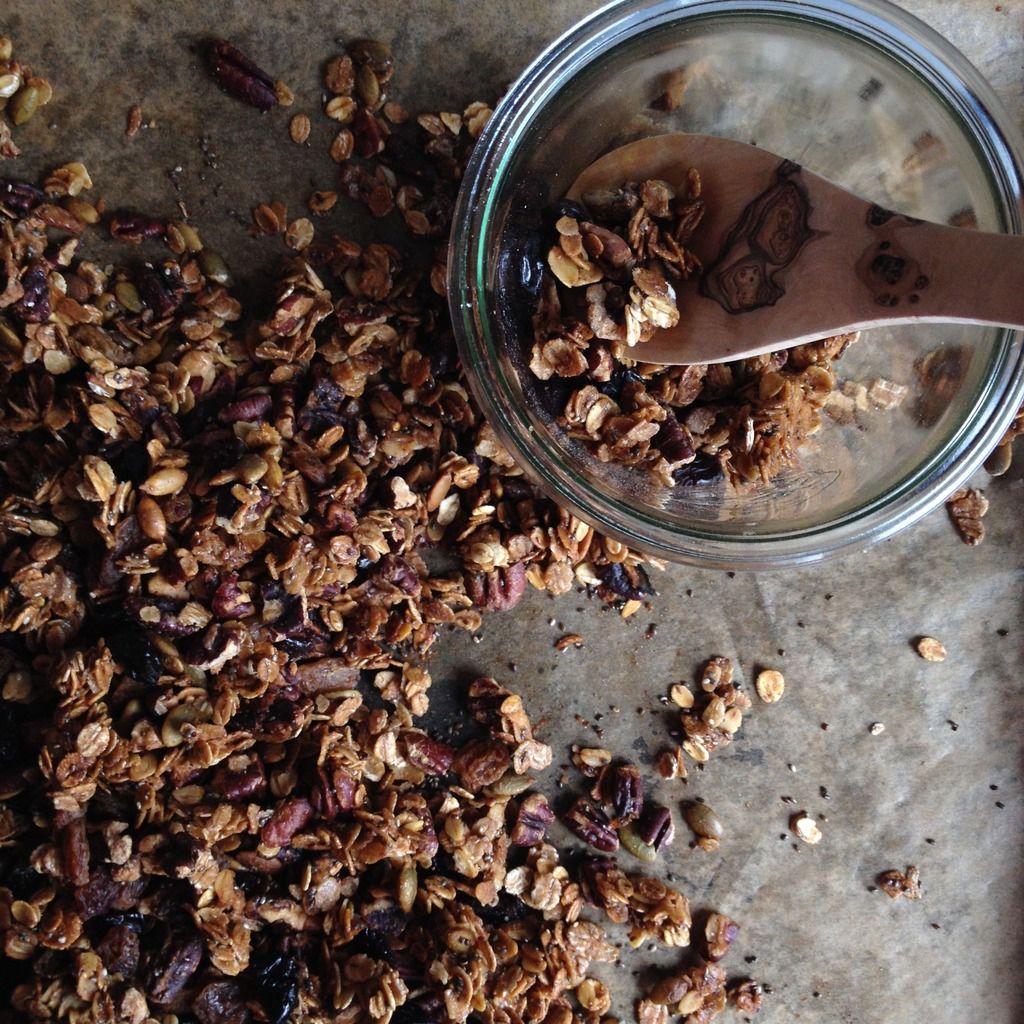
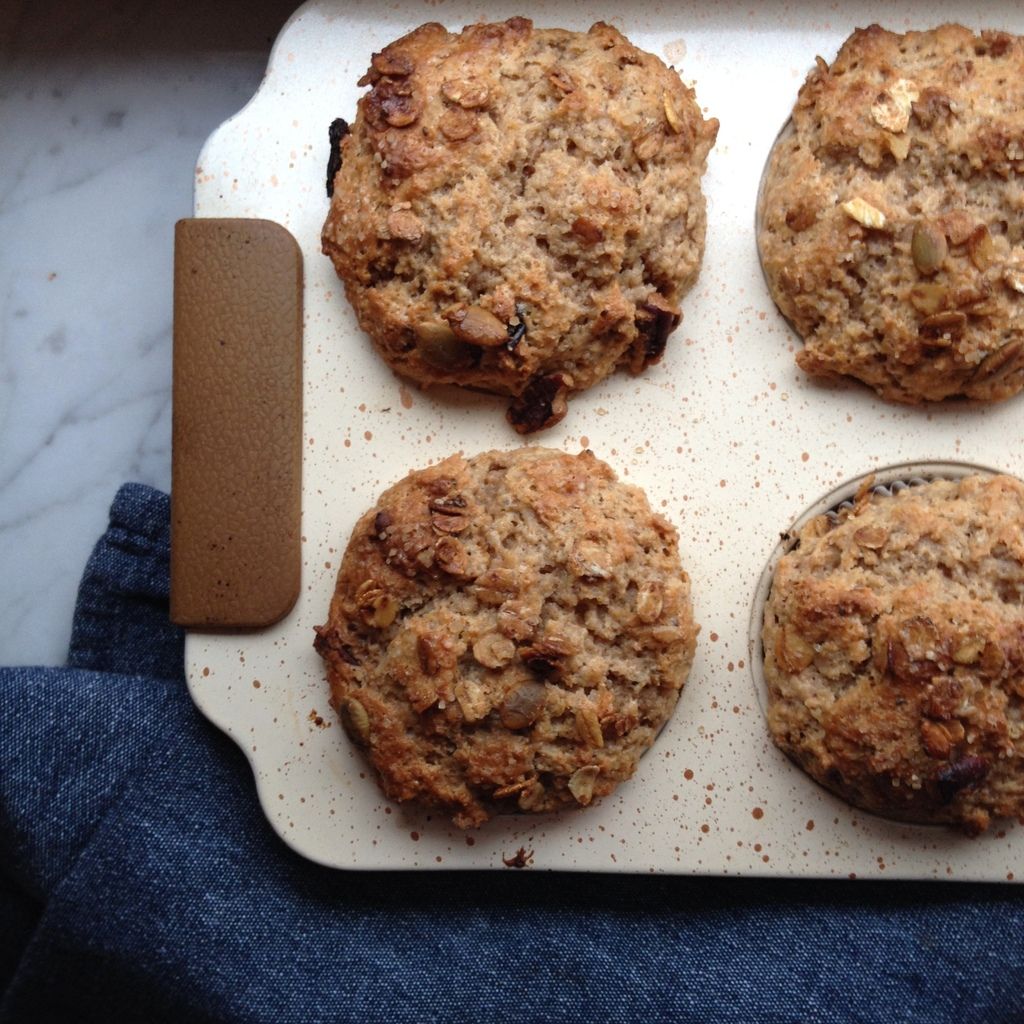
This is a very comforting muffin.  Great for the quiet moments at the start of a day.  But it has the added bonus of actually being healthy too.  Yippee!  I make my own granola and keep it in a jar on the counter, so that's what I use for my muffins.  It's a pretty simple granola- a little maple syrup, pecans and pumpkin seeds, oats and dried cherries.  It's based on a basic outline in Maggie Batista's book Food Gift Love.  You can use your favorite granola but this muffin works better with a simple granola rather than one filled with a ton of mix-ins.  In the recipe for the muffins I give a range for the milk measurement.  Every yogurt is different and you don't want one that is too runny.  But if the batter is too stiff after mixing in the lesser amount go ahead and add in the last two tablespoons.  I like to finish the muffins with a sprinkle of granola before tucking them in the oven.

1 cup whole wheat flour
1 cup all purpose flour
1 cup light brown sugar
1/2 tsp cinnamon
1 tsp baking powder
1/2 tsp baking powder
1 cup granola
1 1/3 cups Greek-style yogurt
6- 8 tbs whole milk
1/3 cup neutral flavored oil
1 tsp vanilla extract

Preheat oven to 400 F.  Line standard muffin pan with muffin cups or lightly butter.  Set aside.

In a large bowl whisk together the  flours, sugar, cinnamon, baking powder and baking soda.  Stir in the granola.

In a separate bowl mix together the yogurt, oil, vanilla and 6 tbs milk.  Gently stir the wet ingredients into the dry.  If the batter is very stiff or dry stir in the remaining two tablespoons of milk.  Divide the batter evenly among the muffin cups and sprinkle with a bit of granola or raw sugar if desired. 

Bake for 16-18 minutes.  Muffins are down when the tops are gently browned and spring back to the touch.  Cool the muffins in the pan on a wire rack.  Muffins will keep for up to three days in an airtight container but are best eaten within 24 hours.


Thursday, January 28, 2016

Apple Galette des Rois


You know, it's funny.  Life, that is.  Sometimes you cruise right through it barely noticing the change in time and day.  Just one moment into the next with your head down missing the details, the ups, the downs.  And then something unexpected stops you in your tracks and forces you to look around.

This is the story of my life as of late.  Just kind of going through the motions, each day passing pretty much the same as the rest.  Not in a bad way, but in a less-than-present sort of way.  And then two little things that don't amount to much in the grand scheme of life nearly took my breath away.  Those two little things, really not much more than a few sentences spoken both by people who know me and by those that don't, made me look deep inside and as a result of that introspection to see the world around me in a much different way.  I'm grateful.  It feels good to appreciate the people around me more fully and perhaps even take care of myself with more purpose.

Am I being a bit too cryptic for you?  If I am, you have my deepest apologies.  It's simply that I'm not quite sure what the end result of those few sentences swirling around in my mind will be.  I need a bit more time for that.  But in the meantime, I'll share a few of those words with you.  Because they made me stop and catch my breath and it's my hope that they might just do the same for someone else.

"You are brave enough.  Don't ever think otherwise."


Apple Galette des Rois
Makes 1 9-inch galette which will serve 4-6 people.  Rough puff pastry recipe from in jennie's kitchen.
For a printable version of the recipe, click here.

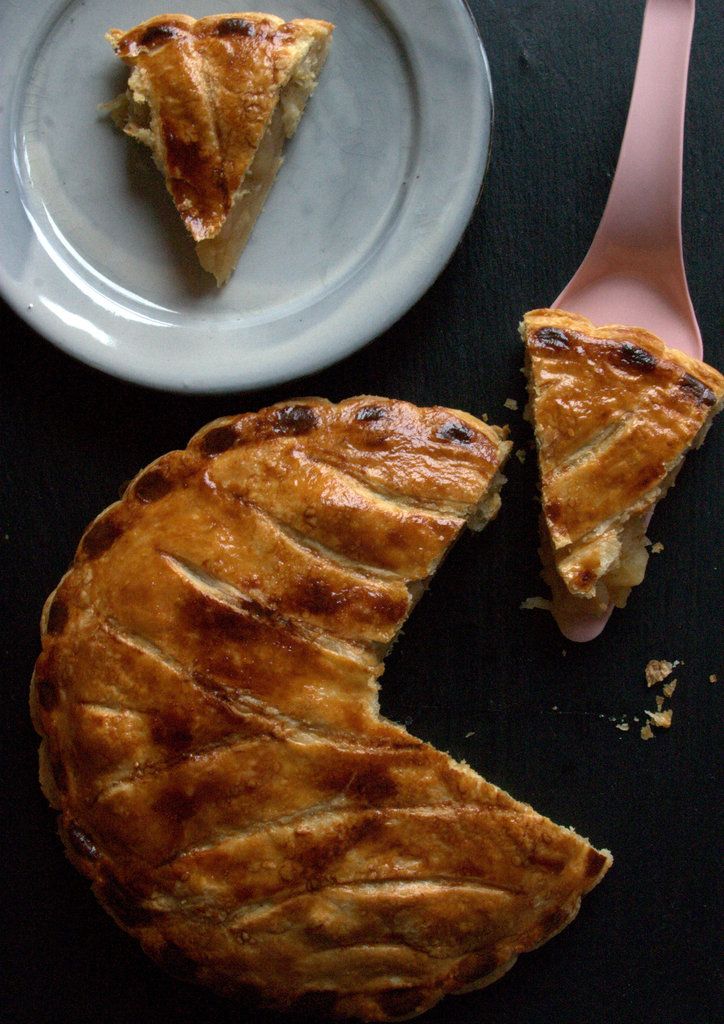
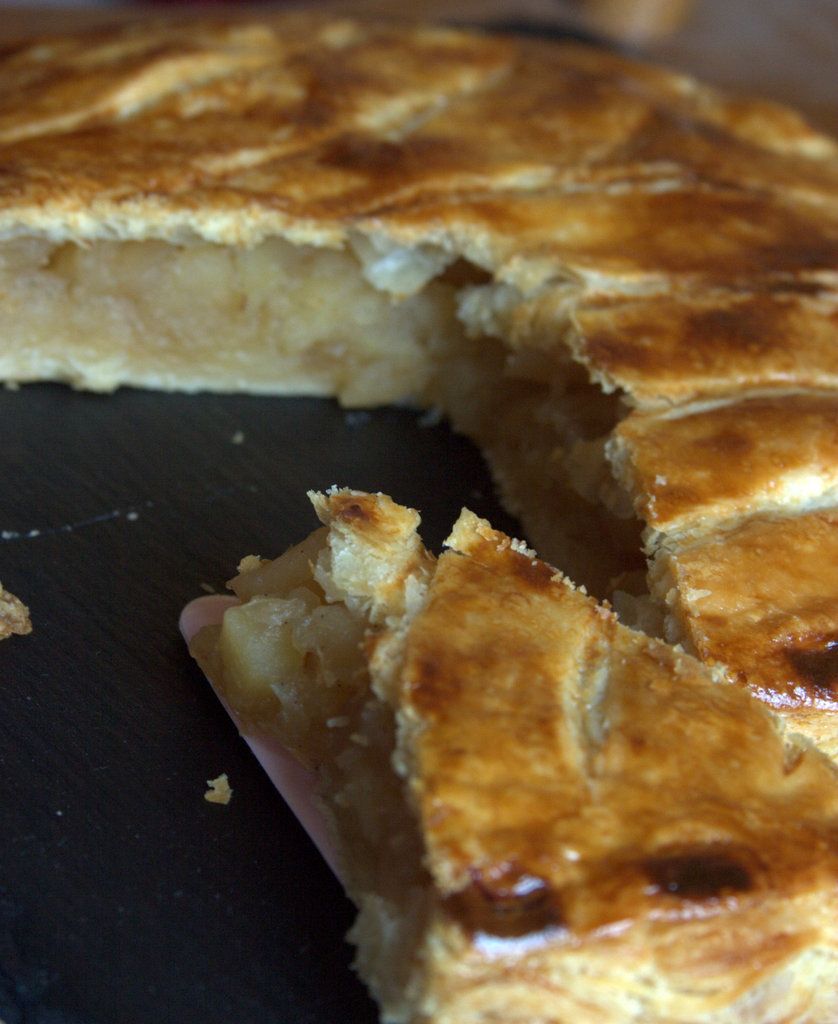
Not too long ago my sister and I were standing at the counter of a French patisserie ordering pan au chocolat (chocolate croissants) and eclairs when I noticed this beautifully bronzed pastry that I had no name for.  The two of us wondered aloud at what it could be, but were happy to buy our croissants and eclairs and be on our way without too much thought.  A couple of weeks later that same pastry appeared in my Instagram feed (from Jennifer Perillo of in jennie's kitchen) and I learned that what we had seen was called a galette des rois and it is a pastry made in France only once a year for the celebration of Epiphany. I was intrigued by the pastry and even more so when I read through Jennifer's post and saw that she had made her own puff pastry for the galette.  My visions of puff pastry were of huge blocks of butter and a long, tedious process.  Jennifer's recipe was a revelation to me.  So simple- 4 ingredients, a bit of rolling and chilling and I had puff pastry better than any I could buy in a store.  It's a game changer.  The rest of the galette process was just as simple having decided on making an apple filling instead of the usual almond one since my people aren't nut people.  In my house, this galette will be a year-round treat instead of being reserved to once a year, that's how much we love it.

Rough Puff Pastry
1 2/3 cup ( 250 g) all purpose flour
1 tsp fine sea salt
12 tbs (125 g) unsalted butter, at room temperature and cut into cubes
2/3 cup (150 mL) cold water

Place the flour and salt into a large bowl and give them a quick mix.  Toss the butter pieces into the flour and, using your finger tips, blend the butter and flour together until you have a crumbly mixture with some marble-sized pieces of butter remaining.

Stir the water into the flour-butter mixture with a wooden spoon until it just comes together into a dough.  Turn the dough out onto a lightly floured work surface and gently form it into a rectangle.  Working in one direction (left to right or top to bottom, for example) roll the dough into a long rectangle that is roughly 3 times longer than what you started with.  Fold the dough in thirds (fold one end towards the center and then fold the remaining third over the top) so that it resembles a folded letter.

Give the dough a quarter turn and repeat the process, rolling out the dough into a long rectangle and then folding it like a letter.  Wrap the dough in plastic wrap and refrigerate for 30 minutes.

Apple Filling and Finishing the Galette
1.5 lbs apples (3 medium apples), your favorite cooking apple
3 tbs light brown sugar
1/3 cup water
1 tsp vanilla bean paste or 1/2 vanilla bean, split and seeds scraped out (optional)

1 recipe rough puff pastry from above
1 egg yolk, beaten with a splash of milk

While the dough is chilling, make the filling.

Peel, core and chop the apples into 1 inch chunks.  Place the apples, brown sugar, water and vanilla bean (if using) into a medium saucepan.  Bring to a simmer over medium heat.  Cover and lower the heat to medium-low.  Cook, stirring occasionally, for about 15 minutes or until the apples are soft but haven't completely broken down (you want some texture in the filling, not applesauce).  Give the apples a light mash with a fork and set aside to cool.

Preheat your oven to 375 F (190 C).  Line a baking sheet with parchment paper.

Remove the chilled dough from the refrigerator.  Cut it in half and return one half to the refrigerator.  Place the other half on a lightly floured work surface.  Rolling in one direction again, roll from one edge to the opposite edge.  Give the dough a quarter turn and repeat the process of rolling in one direction edge to edge.  Continue giving the dough a quarter turn and rolling until the dough is just larger than an 8 inch plate or round baking pan.  Using a sharp knife, cut around the edge of the plate or pan and place the circle of dough onto the prepared baking sheet.

Spread the cooled apple filling over the dough, leaving a one inch border clear of filling all around the edge.  Remove the second half of dough from the refrigerator and roll and cut it in the same fashion as the first half.  Place the second circle of dough over the filling and gently but firmly press the edge down so that it adheres to the bottom circle.  With the tip of a sharp knife you can score a design across the top (but don't cut all the way through the dough!).  Pierce a few holes for steam to escape.  Brush the top of the dough with the egg yolk.

Bake the galette for 30-35 minutes until puffed and golden brown.  Let the galette cool and serve warm or at room, temperature.

Thursday, August 20, 2015

Lemon Zucchini Bread {Revisited}


A dear friend of mine recently sent me a text asking for a recipe I shared a few years ago in the early days of this page.  Someone had gifted her some zucchini and having tasted my version of zucchini bread once-upon-a-time she was looking to make it for herself.  The only problem was that she couldn't find the recipe anywhere on my page.  Not a trace of the delicious lemony zucchini bread popped up in any of her searches.  Curious, I did a bit of digging myself (it's my blog so of course I can find it right?)

Thursday, January 22, 2015

Blackberry Clementine Smoothie


Don't think it's escaped my notice that my posts lately have been very introspective and deep.  Maybe bordering on a little too much information for all of my dear readers.  Maybe?  I don't know but I like to think it's part of my charm and hopefully you do too.

So in that spirit,  I thought I'd offer up something much the opposite today.  Short, quick and to the point.  Sort of like the recipe I'm sharing as well.  It's fitting, don't you think?   This is the sort of thing I'm craving these days.  In the heart of winter when I can't bear the idea of another stew for dinner or bowl of oatmeal at breakfast time what I really want is something to remind me that summer really will come again.  And thankfully Mother Nature obliges by bringing forth an abundant harvest of citrus in the bleak days of January.  So I'm celebrating citrus with a bright smoothie that makes me smile and feel just a little bit closer to the warm days of July.


Blackberry Clementine Smoothie
Makes enough for 2 smaller servings or one large one.
For the printable recipe, click here.

I don't know about you but when I have a typical smoothie for breakfast I usually end up feeling hungry an hour later.  They just don't "stick".  So I've thrown in a couple of ingredients that not only increase the sticking power of this smoothie but add a few more nutrients and fiber to an already healthy breakfast.  Why not?  So in go some rolled oats and chia seeds.  I like to blitz the oats first before adding the rest of the other ingredients so that they're broken down quite a bit.  I think it helps the texture.  Otherwise this is like any other smoothie- just throw the ingredients into the blender and blend.  Perfect for any busy morning on the go.

1/4 cup rolled oats
2 tsp chia seeds
1/2 cup plain Greek yogurt
1 tsp honey
3 clementines, peeled (make sure you've got seedless ones)
3/4 cup frozen blackberries

Toss the oats into the cup of a blender and pulse a few times until they are broken down into a powder.  Add the rest of the ingredients and blend until smooth.  Serve immediately.


Sunday, December 21, 2014

Whole Wheat Cookie Butter Waffles and What I "Chairish"


We are a military family.  And that means a great many things.  There are the things you think of instantly like sacrifice, deployments, pride, love of country, transience.

Without question these things all apply to my family.  For sure we've had our share of trying times just like any other military family.  Both of our sons have spent a long periods of time without their dad at home.  That wasn't easy on the boys or their dad.  And in the meantime I had to be both mom and dad for them and hope that they weren't missing too much.  Nothing about that was simple or fun.  And just when I thought that things were going to be normal and whole when my Navy man got home from long deployments we found that there was confusion about how we all fit back together.  The boys didn't know their dad and he didn't know them.  And how did I fit in the picture now that I was needed less than I had been the days, weeks and months before?

But the thing about that struggle is that in the end, it's what makes our family as strong as it is.  It makes us appreciate each other and every day that we have together.  What a blessing that is.


One of the least appealing aspects of being a Navy spouse is all that moving around.  If I'm talking about the emotional side of things there is the loss of ever feeling rooted in a place; settled and home.  It's a game of "new and old".  My kids are the new ones in school, we have to make new friends, settle into a new house and neighborhood and start new jobs.  Then there's the old- we miss our old friends, liked the old house better or could find our way around in the old place so much better than the new one.  That's a lot to handle every few years.  There's quite a bit of wear and tear on the hearts of our military families.

But it's not just our hearts and minds that take a beating.  Our things go through just as much stress and strain with each move.  Imagine taking apart your cabinets, beds, tables and shelves every three years, packing them up and shipping them to a new home across the country.  Then there's the toys, clothes, pots and pans, TVs, books and dishware to wrap and pack into boxes.  It's a difficult life being our "stuff".  You know the saying "This is why we can't have nice things"?  Well, that's certainly true of my family and many like mine. 


When we moved to Germany last year a good deal of our most precious belongings were sent into long term storage.  I just couldn't bear the idea of my mother in law's Limoge china set being shipped on a boat and handled time and time again before it got to me a continent and ocean later.  Or my husband's beautiful wooden high chair from childhood being taken apart and the screws and bolts lost or legs broken.  In the end there were only a couple of precious family heirlooms that made the trip with us- things I just couldn't imagine not being in our home.

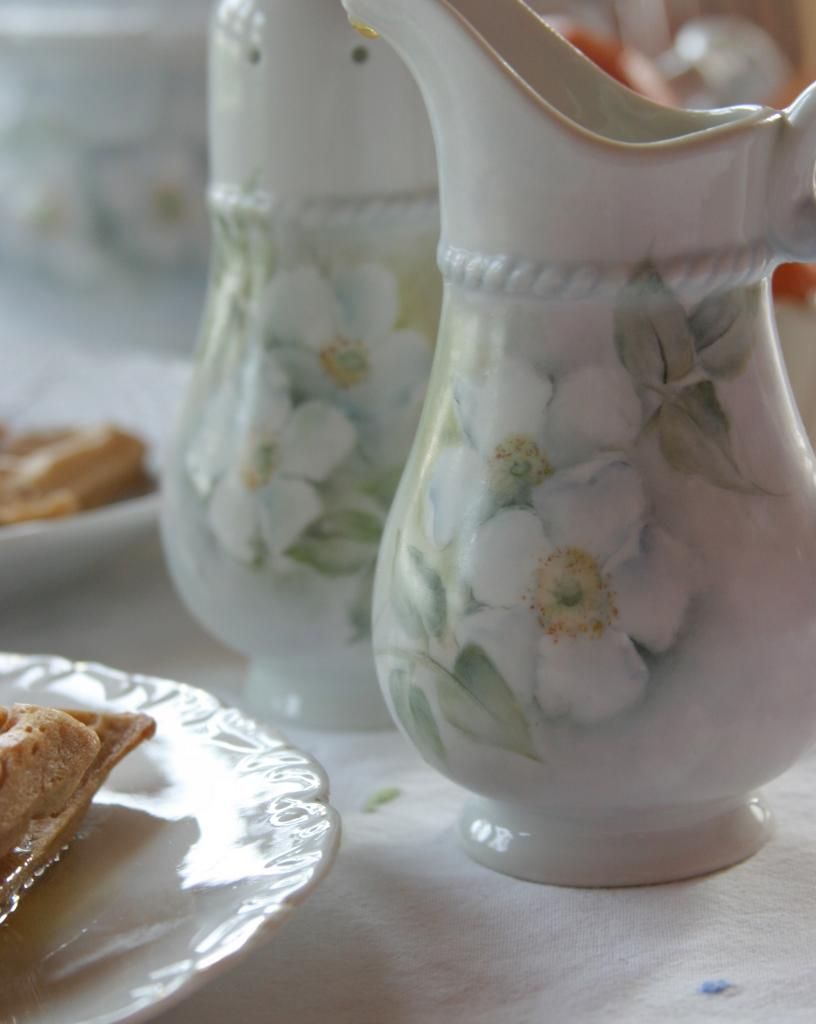
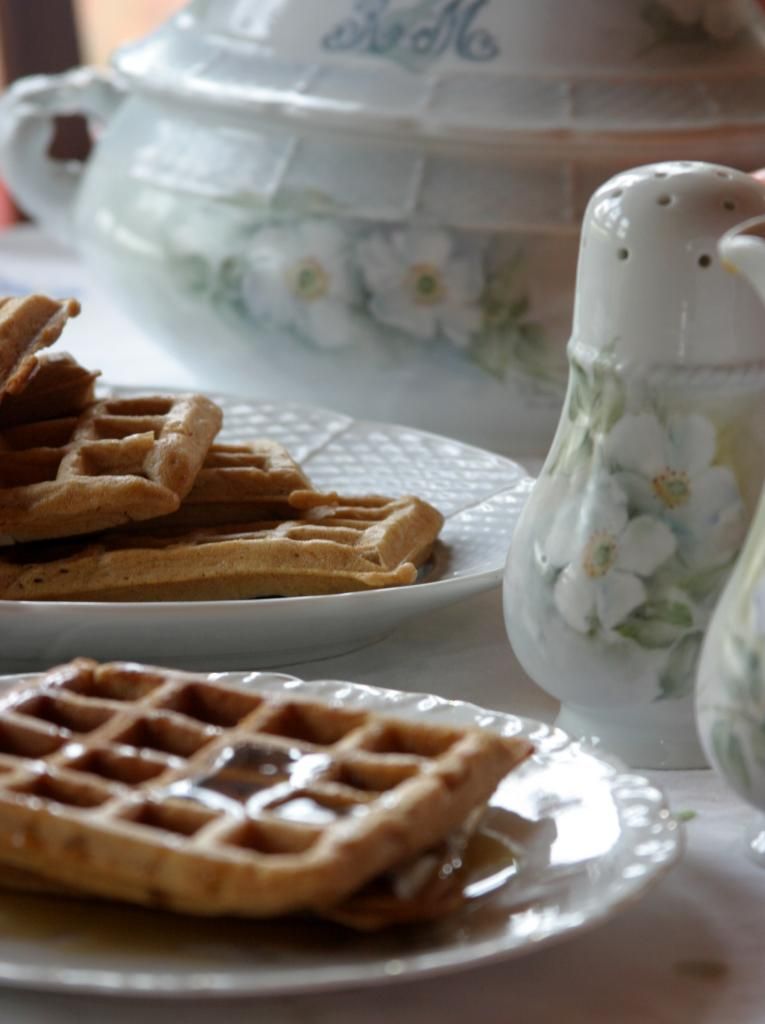
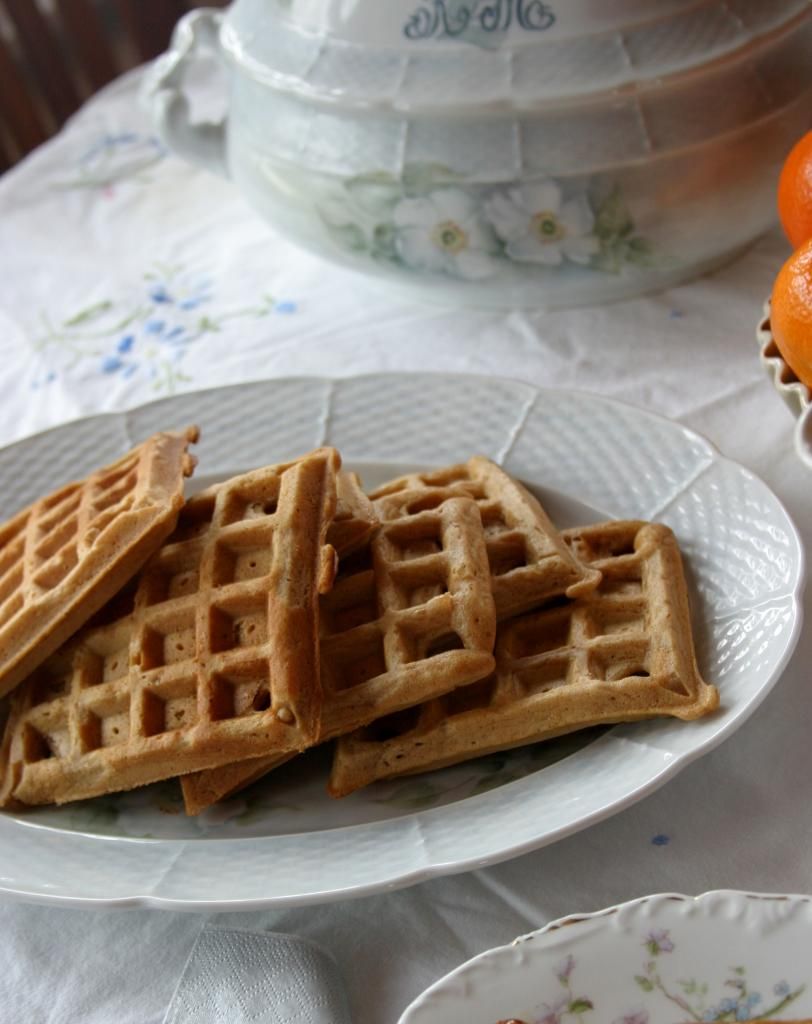
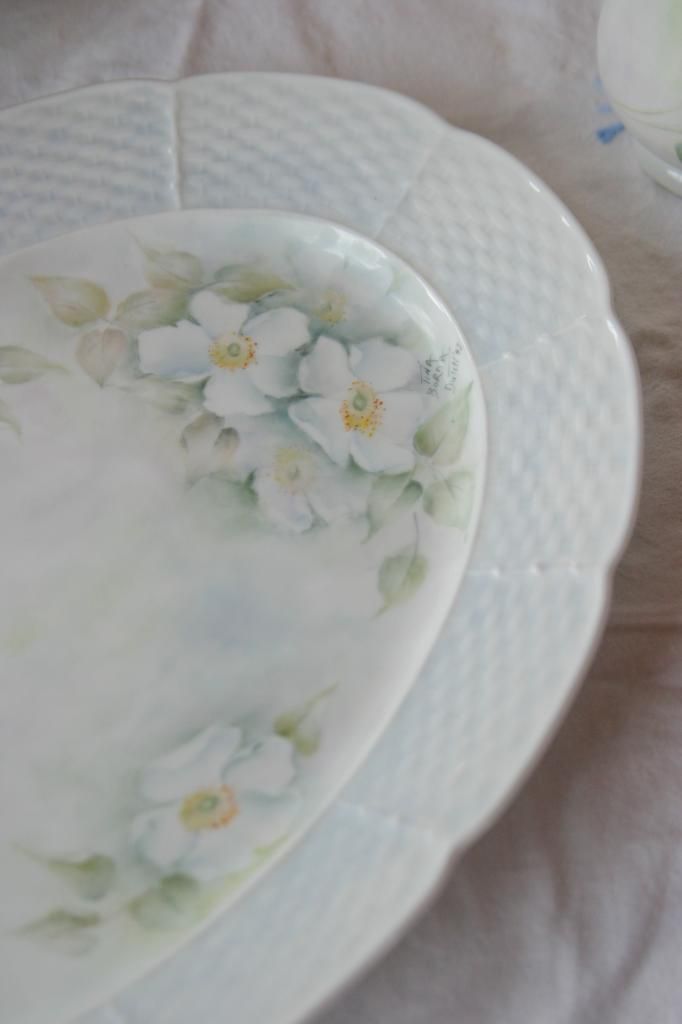
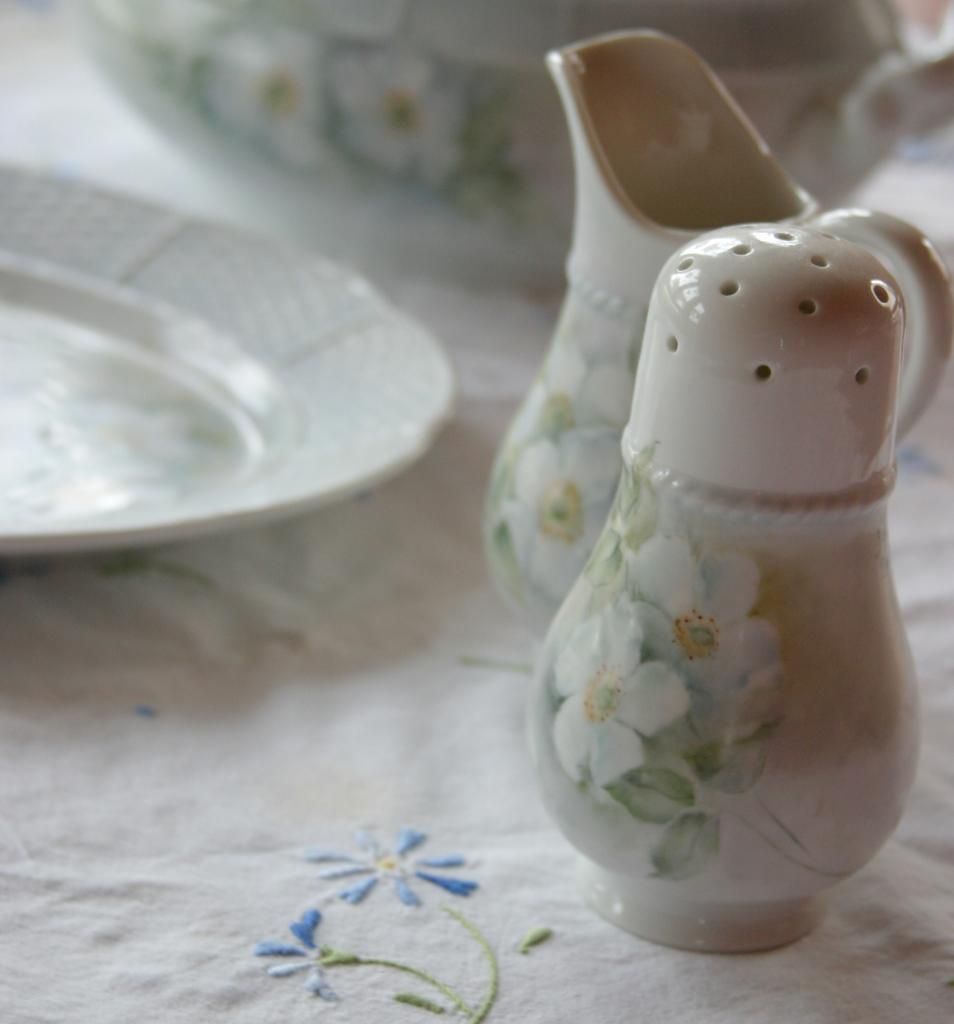
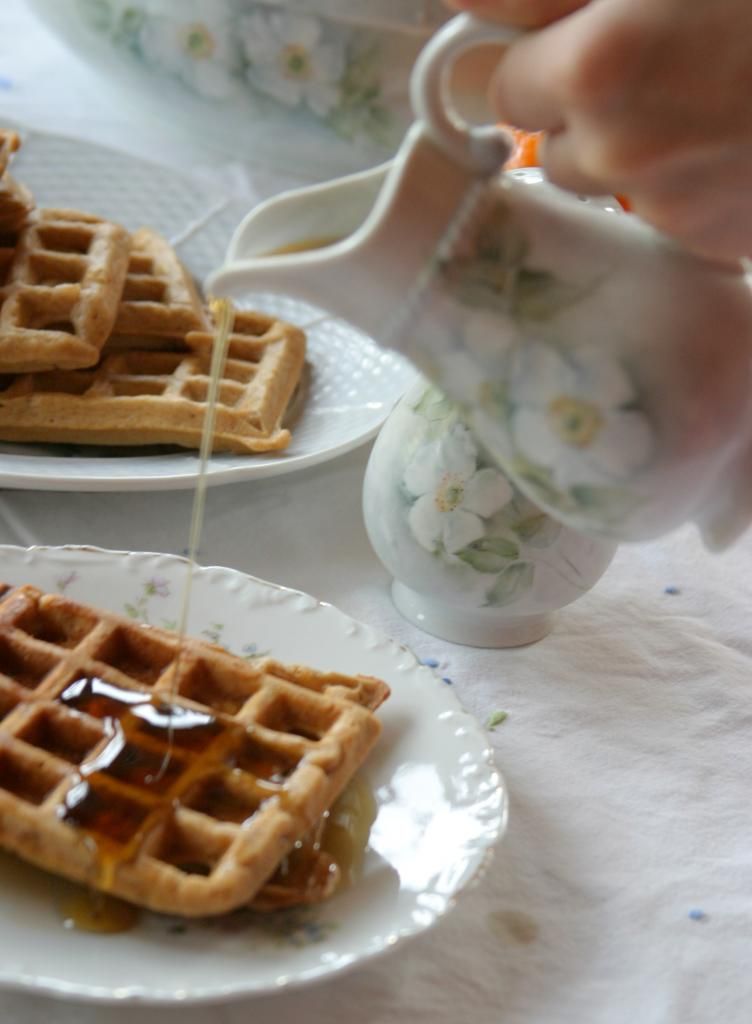
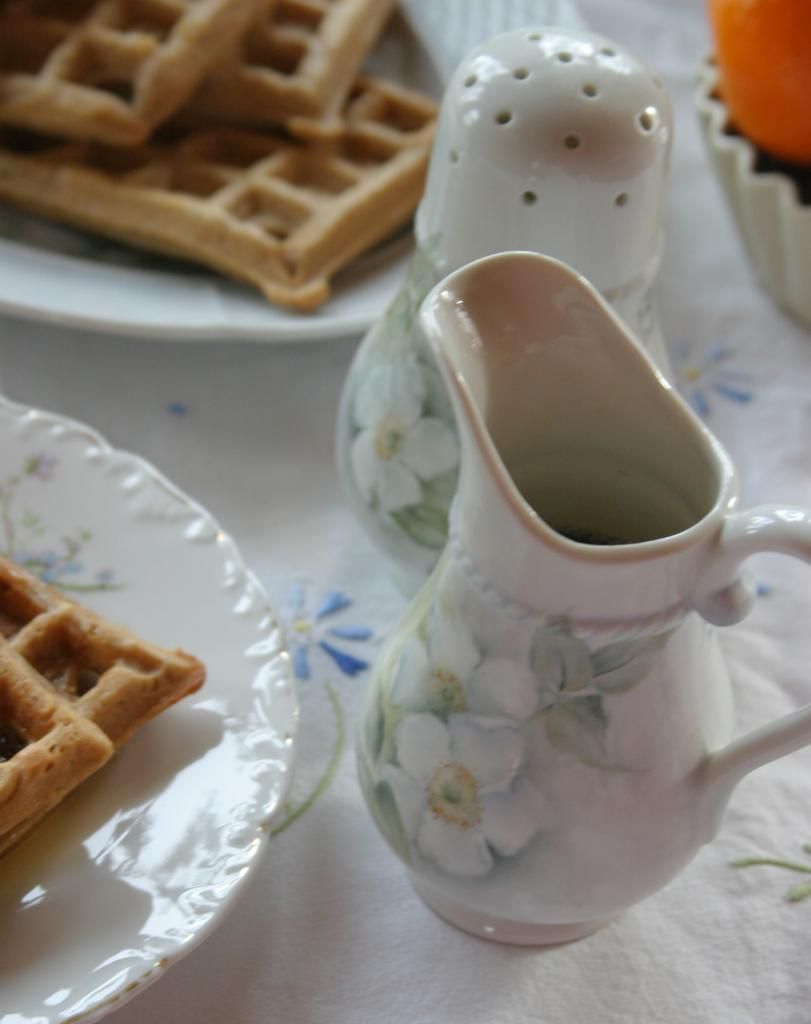
One of those things is the china set that was hand painted by my mother for my husband and me.  There are only a few pieces- a soup tureen and platter, maple syrup pitcher and powdered sugar shaker.  But they are one of the last pieces Mom painted after a long run of painting and selling china out of our home as a side business.  Not too many others in our family can say that they have a piece custom made just for them and I always look at them with pride and awe that they were made for us.  They are precious to me.  In fact I very rarely use them for fear of them breaking.  The soup tureen has never seen a drop of soup!


Not long ago I was approached by the lovely folks over at Chairish to write a post featuring a family heirloom that I "chairish" and how I showcase it in my home.  (Haven't heard of Chairish?  It's a modern day consignment shop where you can buy and sell vintage home decor, furniture and jewelry along with like-minded stylish folks all over the US)  I had to think about this one for a while not having too many of those precious items with me.  But when my eyes landed in my mother's china pieces I knew it was time to break them free from their years of sitting on a shelf in my china cabinet.

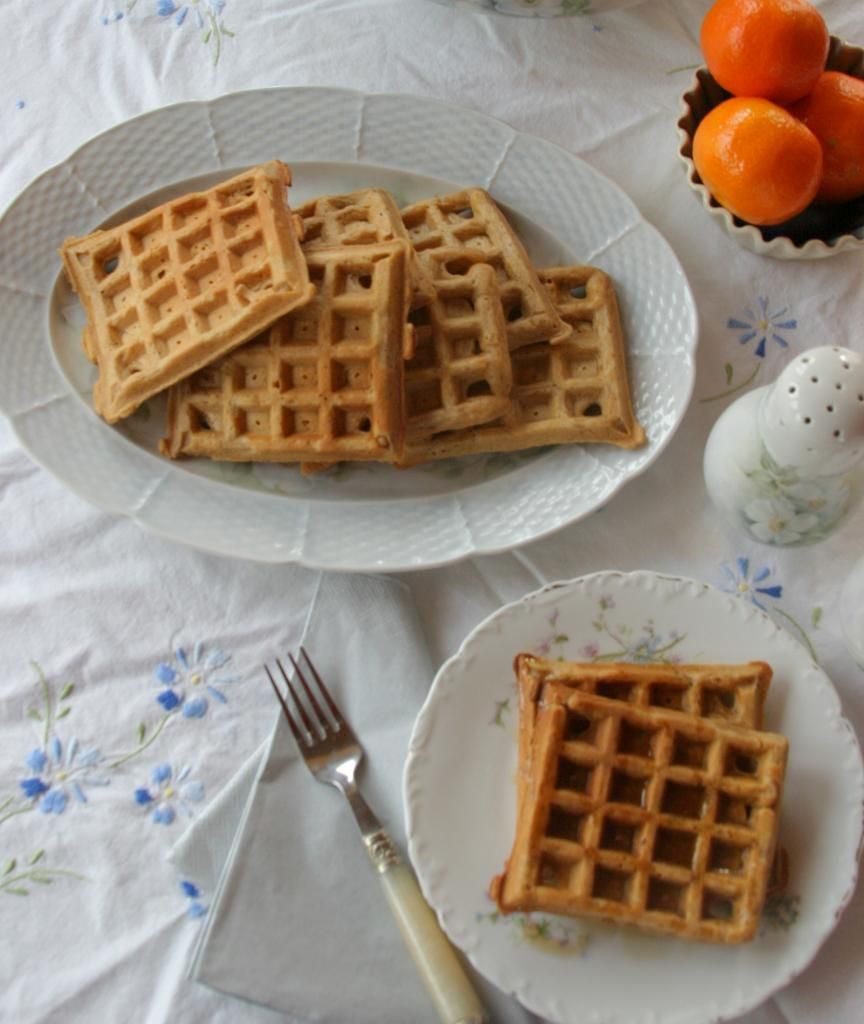
So here they are in all of their glory, serving up what will likely be Christmas breakfast for the people who I cherish most in the world- my family.  I can't think of a better reason to use the prettiest china in my cabinet.


Whole Wheat Cookie Butter Waffles
Serves 6 hungry folks or 8 regular ones.
For the printable recipe, click here.

My usual Christmas morning breakfast is gingerbread pancakes.  Having discovered the beauty that is speculoos cookie butter, I thought I'd switch it up a bit this year.  So these waffles were born.  I tried to balance the sweet cookie butter with a healthier flour, so these waffles are half whole wheat and half all purpose.  And to further bring out the buttery cookie-ness of the waffles I browned the butter that went into the batter.  Otherwise these are fairly straightforward and very easy waffles to make.  No yeast or whipping egg whites here, just mix, pour into the waffle maker and enjoy.  And if you really feel like these aren't fit for breakfast I can see absolutely no reason why you couldn't crisp up a couple of waffles and sandwich them around a scoop of ice cream.  What a treat!

5 tbs butter
1 cup whole wheat flour
1 1/4 cups all purpose flour
3/4 cup speculoos cookie butter
1 tbs brown sugar
2 eggs
2 1/4 cups milk
1/4 cup neutral flavored oil

Place the butter in a small saucepan over medium low heat.  Melt the butter and then continue cooking the butter until the  milk solids begin to turn a light golden brown (3-4 minutes longer).  Remove from heat and cool completely.

Heat your waffle maker according to manufacturer's directions.

In a large bowl stir together the cookie butter, brown sugar, eggs, milk and oil.  Add the whole wheat and all purpose flour and stir until just combined.  Stir in the cooled butter.

Spray your waffle maker with cooking spray or brush with butter.  Pour 1/4-1/3 cup of the batter into each section of the waffle maker (this will, of course, depend on your particular waffle maker and the size and shape of the waffles it makes so you may have to adjust that amount to fit your situation).  Cook according to manufacturer's instructions.  I typically find that when you no longer see stream rising from the closed waffle maker, the waffles are finished.  Keep the finished waffles on a warm platter.

Serve with warm maple syrup, butter and powdered sugar.

Leftover waffles can be wrapped in foil and placed in a zip top bag in the freezer.  They warm up nicely in a 350 degree oven or toaster and will keep for three months in the freezer.


** This post contains links to other websites, but I was in no way compensated for my efforts.  All opinions, photographs and recipes are my own.


Wednesday, October 15, 2014

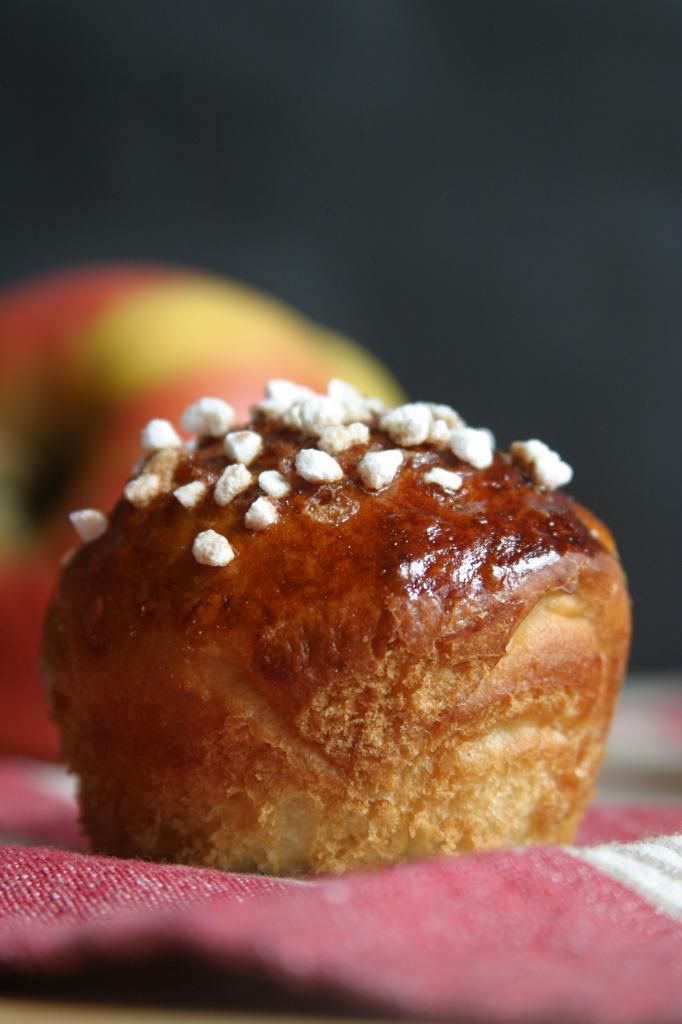
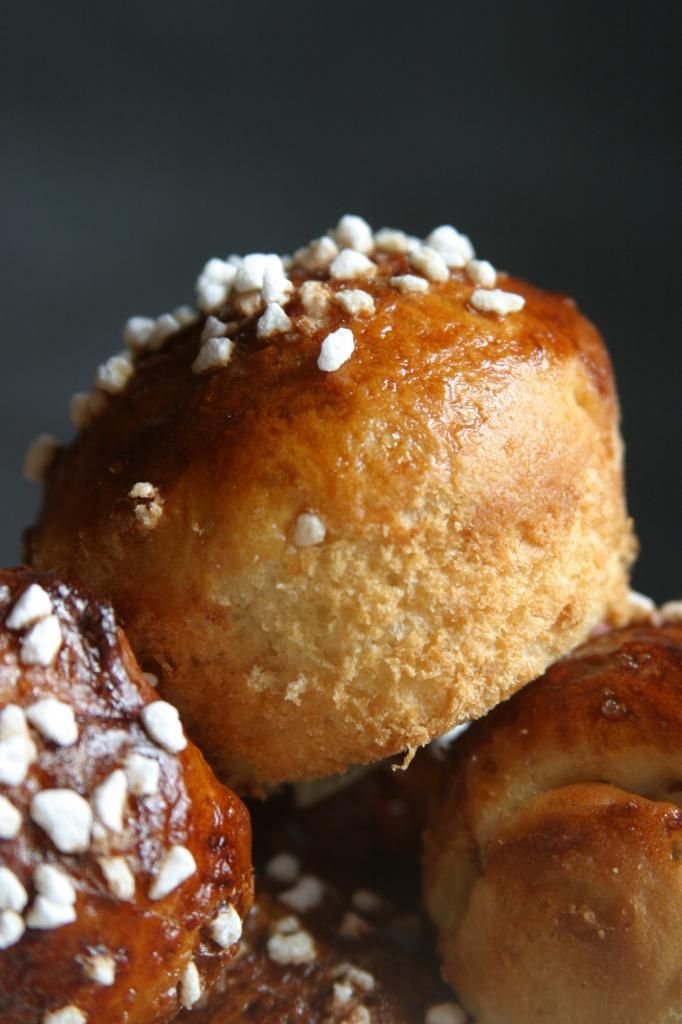
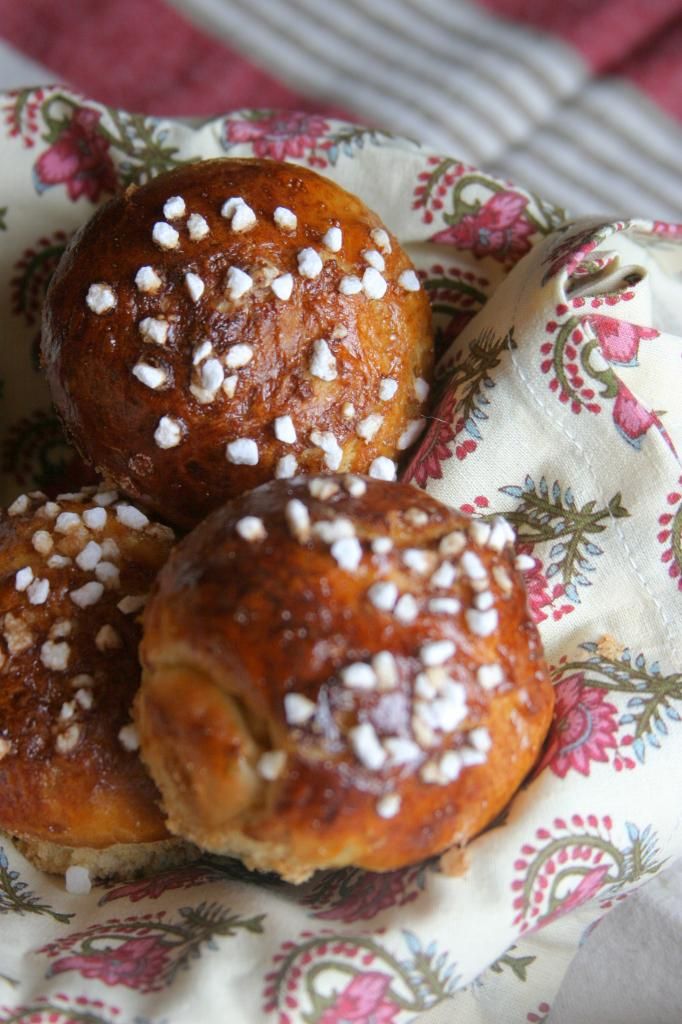
Smitten Kitchen's Apple & Honey Challah "Muffins"


My post on my personal Facebook page yesterday morning:

                "Why do I feel like I have completed some amazing feat by just getting my kids
                out the door in the morning? I'm spent."


It's funny how something so simple can resonate with so many.  I even got comments and likes from those friends I never hear from but know are lurking somewhere out there in the Facebook shadows.  As one friend put it, "You just summed up motherhood."  And now that I'm back at the beginning of the journey with our new baby girl I'm finding I'd forgotten just how much of a juggling act it can be.  Some days I feel like I am the whole circus combined into one exhausted act.  I can juggle, walk the high wire and tame the lions all in the same day.  Sometimes more than once!  Only I don't look nearly as good in a leotard as those Cirque du Soleil girls do (but oh, how I wish....).


I do have to admit, however, my juggling act isn't always the best (almost as sad as my post-baby body in the aforementioned leotard).  Sometimes those little balls just won't stay up in the air no matter how much I try.  A few fall before I can snatch them back up.  Lately one of those fallen balls is my kids' breakfast- especially on those rushed weekday mornings.  It's nearly impossible to get a healthy, warm breakfast on the table for my two bigs while simultaneously nursing or changing their baby sister who seems to always be hungry at the most inconvenient times.  So those poor boys are reduced to grabbing whatever they can pop in a toaster or pour in a bowl.  It's hard for me to watch. 


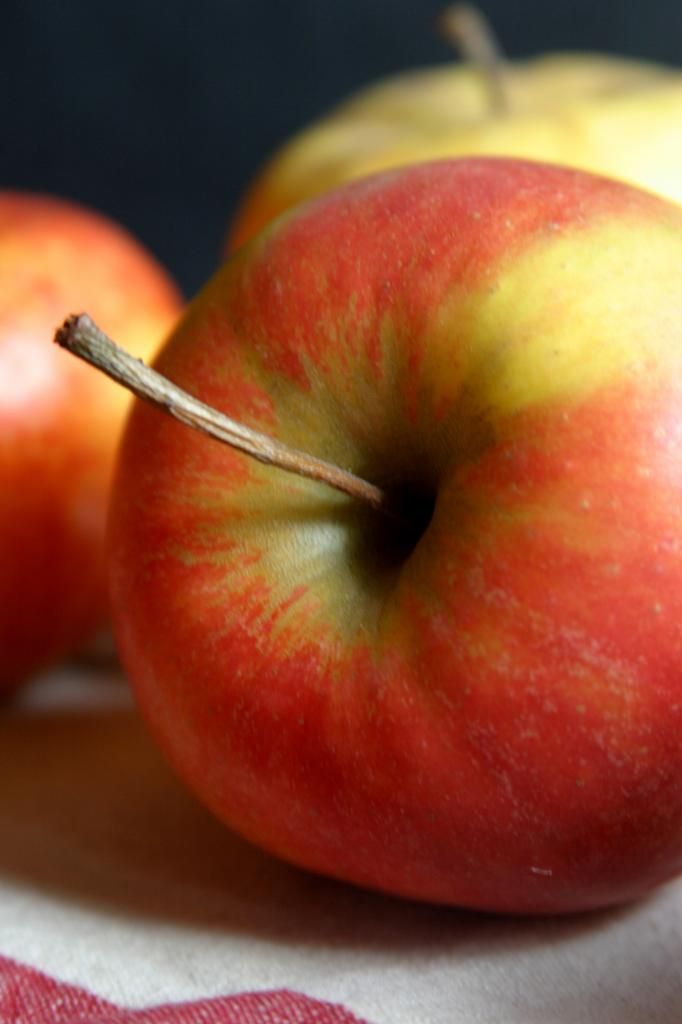
I don't have a solution for my juggling woes.  Just a few really awesome catches every now and again that make me feel like Barnum and Bailey might actually be calling me up sometime soon after all.  These sweet little "muffins" are one of them.  I took one of my favorite recipes and made it easy for my kiddos to grab in the mornings when I'm not around to help them out.  Challah is a beautiful bread enriched with eggs and honey and with the abundant apples in season right now folded right into the dough these little rolls are truly my idea of a perfect breakfast alongside a cup of cold milk.

I'm not going to give you a recipe this time around because I truly did nothing to alter the original recipe in it's brilliance.  So instead I will give you the link to Deb at Smitten Kitchen's recipe (so click here now!) and tell you that it makes 2 dozen "muffins" if you make the whole recipe.  Follow Deb's recipe until you get to the step for the braiding of the dough.  Instead of cutting the dough into 4, cut it into 24 equal pieces.  Place those pieces of dough into buttered muffin tins and continue on with the recipe as written.  I halved the recipe this time around and ended up with 12 of the most beautiful breakfast treats around.


Monday, June 2, 2014

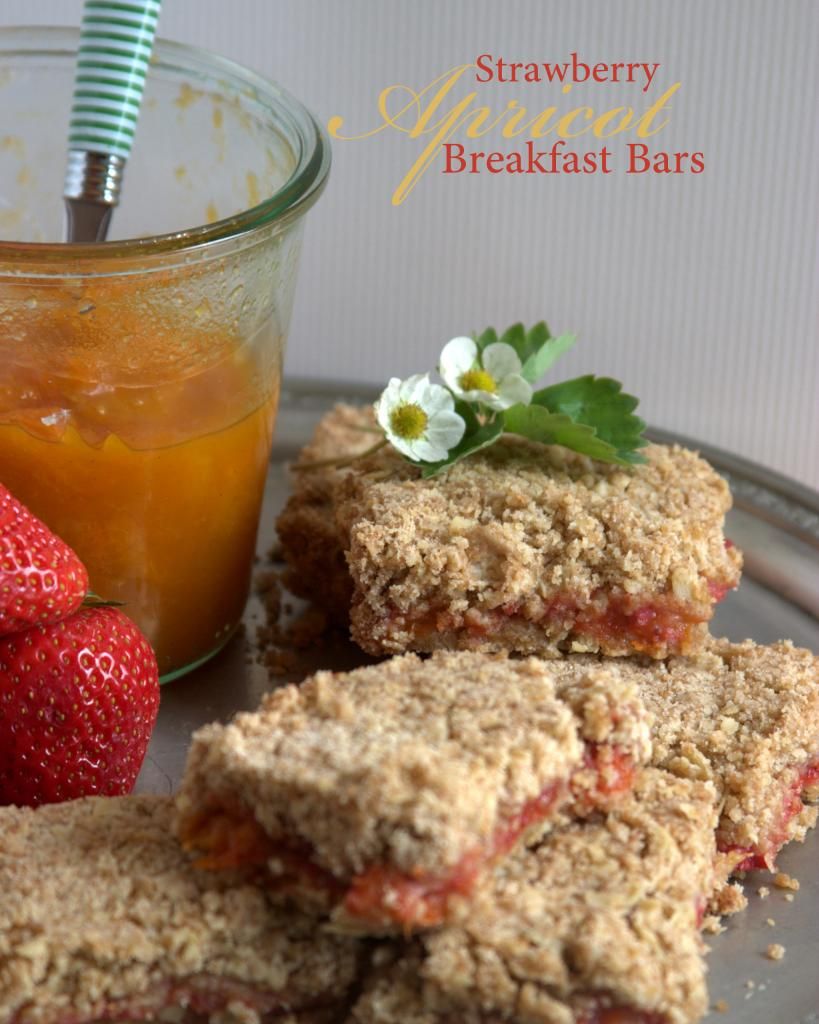
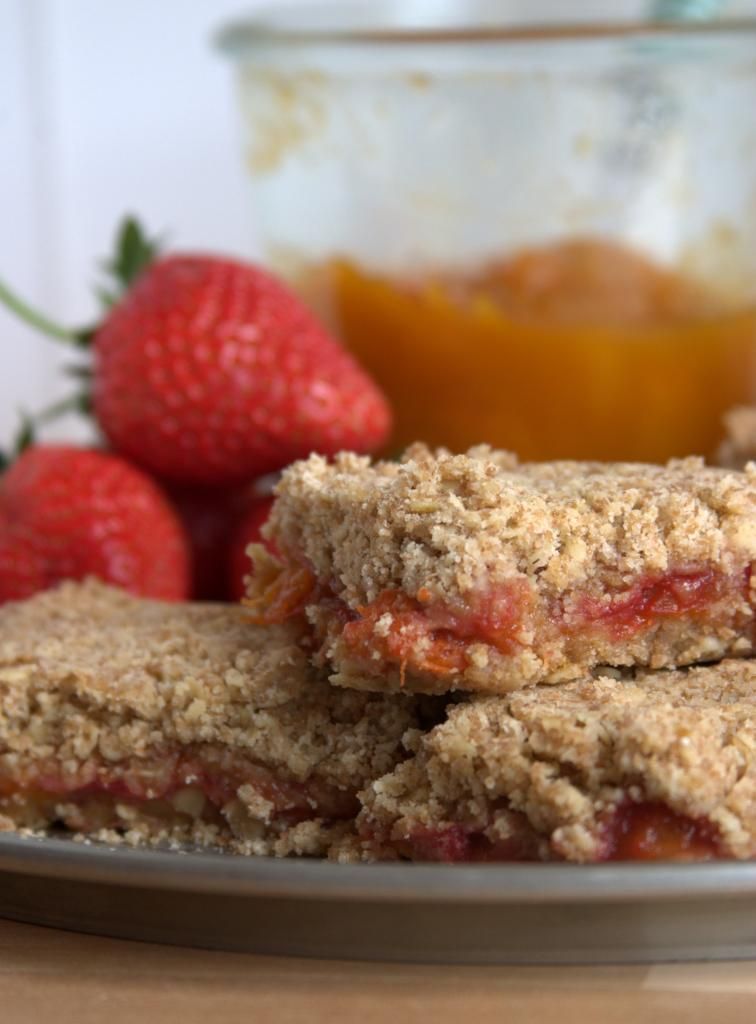
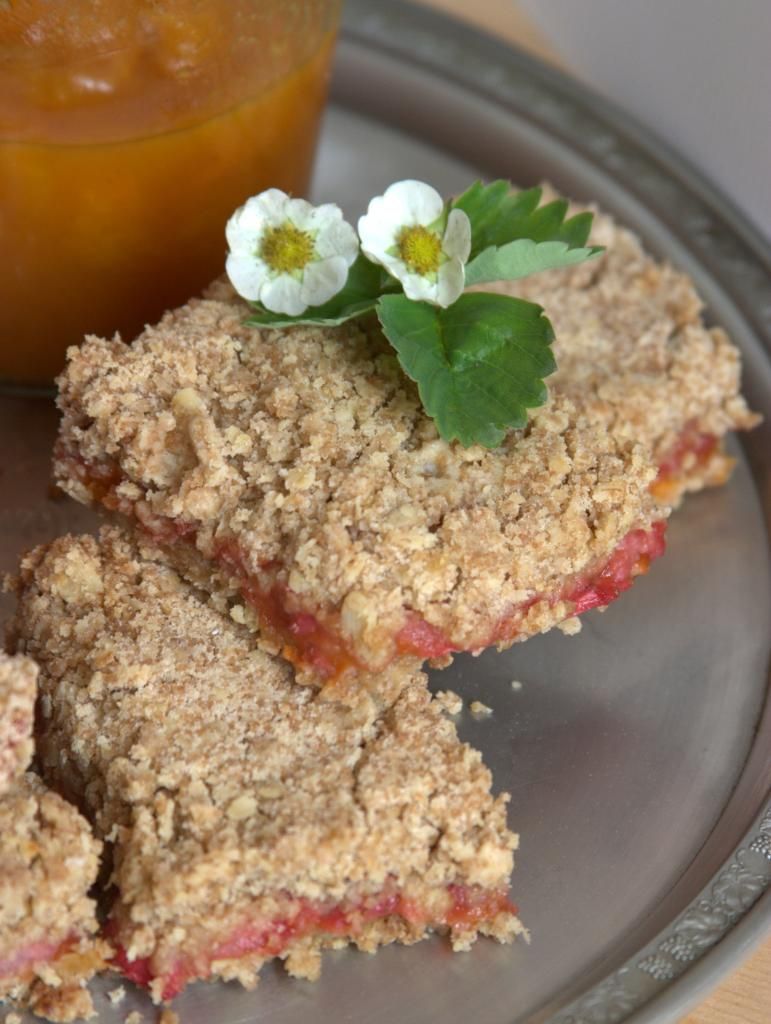
Strawberry Apricot Breakfast Bars


When I started this blog 3 years ago, I was simply trying to document my family's favorite recipes and maybe have a place to point friends to when they asked for the recipes.  I hadn't counted on enjoying it as much as I do or falling in love with food photography (even though I'm clearly still not the world's best at it).  I somehow never dreamed that it would still be going all these many posts later.


I've been going though a bit of a funk lately.  I'm going to chalk it up to being 6 months pregnant and just exhausted, both mentally and physically.  I have these moments of energy and inspiration and can cook, bake and photograph up a storm.  But they run out quickly and I'm back to  feeling blah.  So I've actually got a ton of recipes hanging out in files all edited and ready to go, but I run out of motivation when it comes to getting them out to my (tiny but loyal) following.  This recipe is one of those that's been lingering for a while, but so worthy of sharing.

The inspiration for our favorite breakfast bars was a particularly good market day a few weeks back.  Both strawberries and apricots were beginning to make their way to the market and as they are among my little guy's favorites, I brought home a whole lot of both.  The apricots were, as early season fruit often are, a bit on the tart side. So instead of eating out of hand, I turned them into a quick jam.  Coupled with a recipe from the wonderful Pioneer Woman and the few remaining strawberries I whipped the bars up.  The rest is history, as they say, and I have made these bars at the request of my kids several times since.


Strawberry Apricot Breakfast Bars
Makes 12 bars.  Recipe adapted from Pioneer Woman.
For the printable recipe, click here.

I like to throw a bit of whole wheat flour into the mix with these bars.  Maybe it's only psychological, but I feel like I making them healthier by doing so.  I eat the bars for breakfast and it makes me feel better about it.  These are simple to whip up and can be made completely by hand or in the food processor.  Feel free to change up the fruit to suit your taste.  The bars would be equally delicious for dessert served with vanilla ice cream. 

1 1/2 cup all purpose flour
1/2 cup whole wheat flour
1 cup old fashioned oats (not quick cooking)
1 cup brown sugar
1 tsp baking powder
1 tsp grated nutmeg
14 tbs butter (2 sticks minus two tablespoons), cut into small pieces
about 1 cup apricot jam
handful of strawberries, washed, hulled and sliced

Preheat your oven to 350 degrees.  Butter a 9 x 13 inch pan and set aside.

In a large bowl, whisk together all of the dry ingredients (all purpose flour through nutmeg).  Blend the butter into the flour mixture with your fingertips or a pastry blender.  You want the butter to be well blended with the largest of any remaining pieces being no bigger than a pea.  The mixture should hold together when pressed between your fingers.

Press half of the crust mixture into the prepared pan.  Spread the jam over the bottom crust, being careful not to disturb the crust below too much.  Place the strawberry slices in one even layer over the jam.  Pour the rest of the crust over the top, spread evenly and press gently into place.

Bake the bars for 35-40 minutes until the top is just lightly golden and set.  Cool completely before cutting and serving.  The bars will keep on the counter, well wrapped, for 2-3 days.


Friday, May 9, 2014

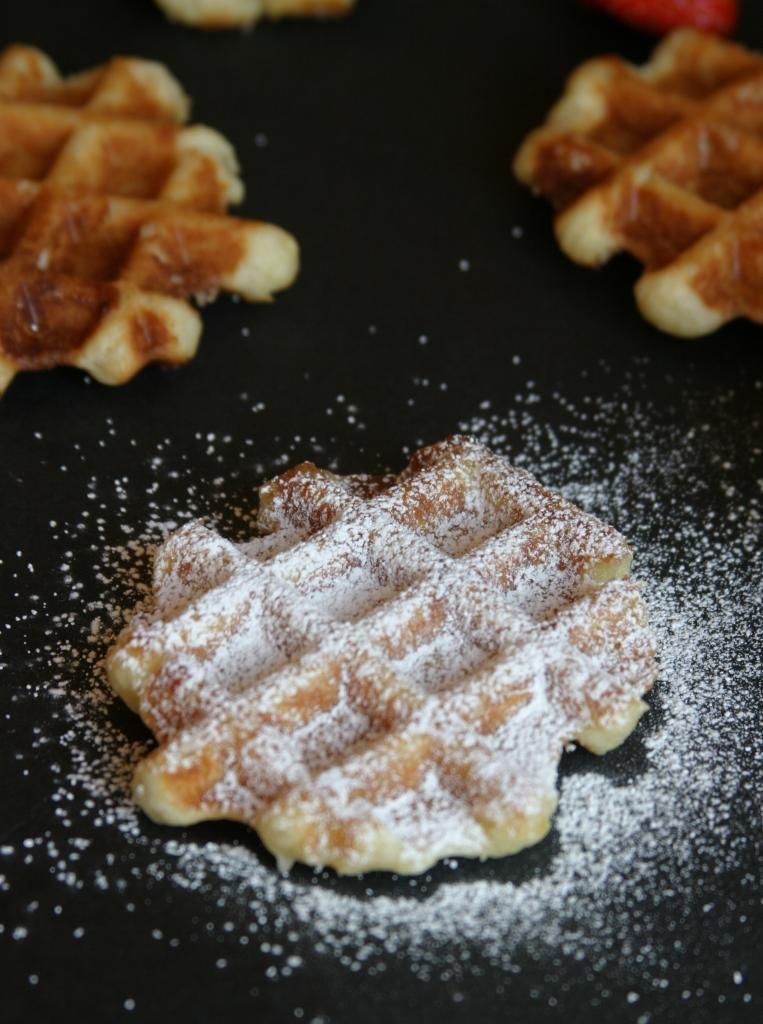
Liege-style Belgian Waffles


We've done enough traveling around Europe in the past 9 months that I feel like a seasoned tourist now.  You learn quite a bit about how to be an efficient packer, how to find the best hotel deals and where to find the best food in town by visiting 6 counties in that short amount of time.  A lot of the knowledge comes from each experience but here's my #1 little travel hint for you- ask the locals.  I always carry guidebooks with me (the Rick Steves' ones are my favorites) after having done hours of research online before heading off to our destination.  But none of that compares to the years of experience that someone who lives and works in a place can offer you.  Even if that local is wearing a hat in the shape of a giant wheel of Gouda cheese and handing out samples of said delicious cheese in the town's market square.  Trust me, he'll know the best tucked away place for a good meal that will cost you way less than anything you'll find in the touristy areas.  Don't be fooled by his silly headgear and trust that he will lead you to the best grilled cheese sandwich ever. 


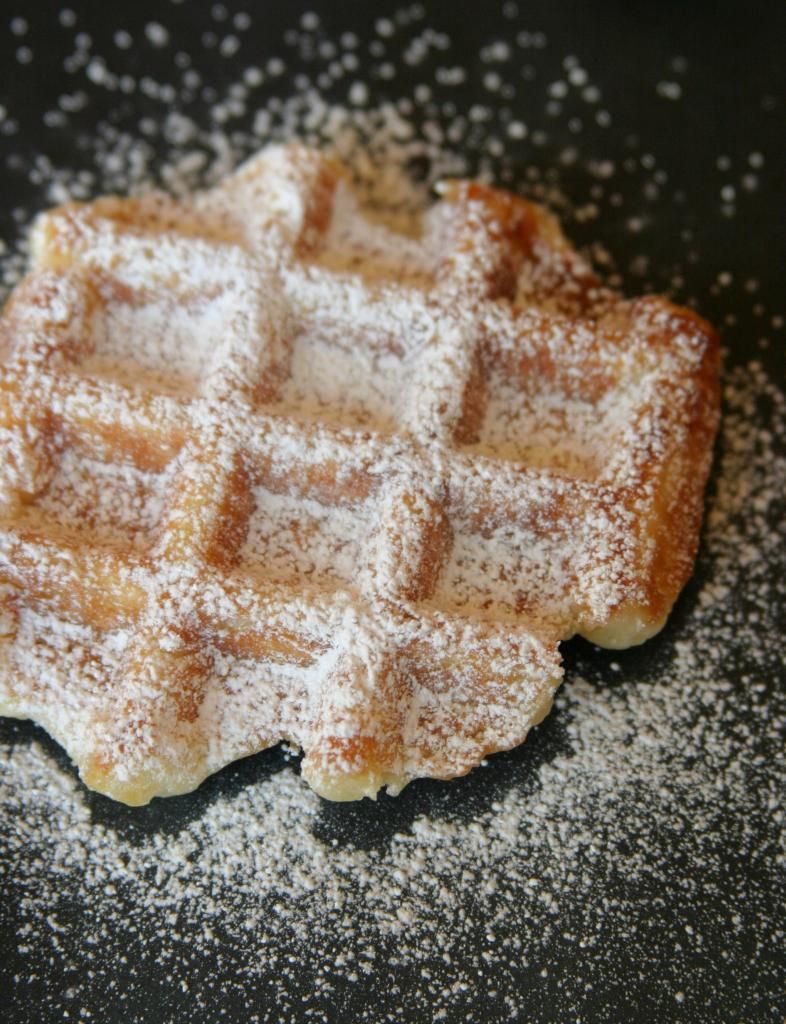
In that same vain, I have learned to take a walk just a block or two away from the big attractions in order to find the really good stuff that the locals hide from the tourists.  Case in point- the waffles trucks in Bruges.  If you're ever in Bruges and looking for a Belgian waffle (and why wouldn't you be?), don't go for any of the little waffle shops in the main tourist areas.  The waffles are not fresh and you'll spend way more for one that will only serve to disappoint you.  Instead, look for an odd little yellow van with a sarcastic and multi-lingual waffle chef serving up the best waffles I've ever eaten.  And I mean that with total sincerity.  Even my husband, who would pass by a carb loaded dessert for a slab of bacon in a heartbeat, was in love with these confections.  Most of us know Belgian waffles as the fluffy golden waffles served at brunch buffets.  But these waffles were so much more.  So much better.  Crispy on the outside and buttery tenderness on the inside with this almost-burnt-sugar-caramelly thing happening.  To die for...

I took a picture of the yellow van in case I ever have the pleasure of going back.  But in the meantime, I've worked up my own version to make at home that is oh so close.  It's just missing the magic of being in a foreign city awaiting a ride down a beautiful canal.  That will just have to remain in my memory and imagination.


Liege-style Belgian Waffles
Makes about 18 4 inch waffles.
For the printable recipe, click here.

These waffles are a two step process that I actually find to be easier than traditional waffle making.  They are a yeast based waffle which gives them a sort of malty background flavor as well as the necessary lift.  Whip the batter up the night before your big breakfast and then all you have to do is stir in the sugar in the morning and get to the waffle baking.  Speaking of the sugar, the secret to these waffles is the Liege sugar crystals you use.  They are large chunks of sugar usually called pearl sugar.  These can be tricky to find (though here in Europe it's a lot easier- in my German store they're called hagelzuker, or hail sugar).  You can get the sugar in IKEA stores or online at Amazon.  Though I have been told that coarsely breaking up sugar cubes works pretty well or even using coarse turbinado sugar comes close to the real thing.  I haven't tried those methods, but maybe they'll work for you if you can't find the pearl sugar nearby.  You can use any type of waffle maker, you don't need a Belgian waffle maker.  I use a 2 tablespoon ice cream/cookie scoop to scoop out the batter (it's like a thick cookie batter) and place it just a bit off center towards the back of the waffle iron so that it doesn't come squishing out of the front when I close the lid.

2 tsp active dry yeast (1 envelope)
1/3 cup lukewarm water
2 tbs milk
1 1/2 tbs sugar
1 tsp vanilla extract or vanilla paste
2 cups all purpose flour
1 cup room temperature butter
1/2-2/3 cups pearl sugar

** I am giving the directions assuming that you have a stand mixer.  If you don't (like me), you can do all of the mixing by hand with a sturdy wooden spoon or spatula.  It's just takes a bit of elbow grease and patience.**

In the bowl of a stand mixer stir together the yeast, water, milk and sugar.  Let this mixture stand for about 5 minutes to dissolve the yeast and start it's activation.  It should be a bit bubbly.  Stir in the vanilla.

Using the dough hook, stir in the flour on low speed until it is fully incorporated.  With the mixer on, slowly begin mixing in the butter 2 tablespoons at a time.    Remove the bowl from the mixer, cover with plastic wrap and let stand on the counter until the dough doubles in volume or refrigerate overnight.

When you are ready to bake the waffles, heat your waffle maker according to the manufacturer's directions.  Stir the pearl sugar into the waffle batter and let it sit on the counter for 15 minutes.

Scoop the batter two tablespoons at a time onto a lightly buttered waffle maker.  Close the lid and let cook for 4-5 minutes or until the waffles are golden and the center is cooked through.  Serve the waffles warm with a dusting of powdered sugar or smear of jam or Nutella.

Extra waffles can be kept in the refrigerator for a day or two in an airtight container and reheated gently in the oven or toaster.

Wednesday, April 2, 2014

Black & Blueberry Rhubarb Jam {Small Batch}


Don't you just love how little kids get so excited for their birthdays?  The week-long countdowns.  The jumping out of bed ready to get on with all the fun birthday stuff when normally you can't drag them out of bed for anything.  Running into school with a container full of mini cupcakes with all of the anticipation one little body can hold.  It's exhilarating, and sweet, and a reminder for us parents of the simple joys of childhood.

Today is my little man's 5th birthday.  There's something about 5 that just is different from all the birthdays that come before.  It's a signal that toddler-hood is over.  That little boy who would only walk down the street holding your hand is now just as willing to let it drop and go running with his big brother as he is to keep holding on to you.  There's so much more he is capable of doing on his own and he is just a little bit more fearless.  But cautious too, as he understands the world around him the tiniest bit more than he did a year ago.  It's enough to make this Mama both proud and a little bit sad too.


I hope there will never come a day when my little guy won't want to snuggle for a few minutes before bed.  Or run up to me at random moments and hug me ferociously.  Or want to hold my hand for just a minute longer as he eyes up the kids in his new class and wonders whether they will want to play with him.  Of course, I know in my head he won't want to do all of those things for much longer even if he promises that he will give me just as many hugs and kisses when he's all grown up.  But I can hope right?  And for the time being, I will hold onto as many of those moments as I can.  Because for now he's still my little boy.


This recipe is for the birthday boy.  He's my super-picky eater.  Fussy beyond belief.  But if there's one thing I know about him, it's that I can always get him to eat a pb&j sandwich.  Especially if it's made with any of my home made jams (well, except for fig, but I make that one for myself anyway).  We discovered when we moved to Germany that he really enjoyed rhubarb so when rhubarb season rolled around this year I made sure to grab some as soon as I saw those beautiful pink stalks at the market.  This jam is packed with fruit and not a whole lot of sugar (plus a secret sweetener that you don't really taste but makes a huge difference to the balance of the jam).  The little guy doesn't really know anything about the balance of tart, sweet and acidic.  He just knows that it's good.  And that's all that really matters to his Mom.


Black & Blueberry Rhubarb Jam
Makes about 1 pint.
For the printable recipe, click here.

This is an incredibly simple jam to make.  I would have loved to have used fresh berries in the jam, but the seasons of the fruit don't overlap.  So I used organic frozen berries instead.  The jam doesn't suffer any in the end.  In fact, it's probably better that I didn't use fresh fruit as their out of season flavors would not have been nearly as good as the frozen berries that are picked in season and at their best.  Be sure to slice the rhubarb thinly so that you don't get any celery-like stringiness in your jam. There's really not enough jam here to can and save for later, but if you really want to, you can pack the finished jam into clean, sterilized quarter pint jars and process them in a boiling water bath for 10 minutes.  Me- I just stick the jar in the fridge and enjoy it as fast as I can.

1 cup blueberries, fresh or frozen
1 cup blackberries, fresh or frozen
2 cups thinly sliced rhubarb (from about 2 stalks)
1/2 cup pure cane sugar
1/4 cup maple syrup
juice of half a lemon

Place all ingredients except for the lemon juice in a medium, non-reactive saucepan.  Bring to a boil over medium high heat.  Let the mixture cook at a vigorous bubble for 12-15 minutes, stirring occasionally to prevent scorching, until the berries have burst and the jam is thickened.  Stir in the lemon juice and remove from the heat. Spoon the finished jam into a clean pint jar and let cool.  Cover and keep in the refrigerator for 3-4 weeks.


Thursday, March 20, 2014

Strawberry Cream Cheese Popovers


Okay, so I need some back up.  Please.  Because I can't be the only person who does this.  I know it's not possible.

Am I the only person who consistently attempts to pin the same things more than once on Pinterest?  Clearly I know what I like, so that has to be a good thing.  But I get so annoyed with myself when I see that pesky little note..."Pssst...looks like you've already pinned this..."


This time it was even worse (or more embarrassing maybe?).  I pinned this recipe TWICE IN THE SAME DAY.  Or I tried to, at the very least.  My memory has been pretty much nonexistent ever since the birth of my first child, but really?  I can't even remember something I saw earlier in the same day? 

My husband and I have this little running joke.  He says that I gave up half my brain to our oldest son, so that after that I was only working with half of what was, admittedly, a pretty good brain.  Using that same theory, half of what was left was given over to our second little man.  Which left me with only a quarter of the original.  Even if I were a genius, which I certainly was not, that's not a whole lot to work with.  I can't remember anything these days.  Now here's the thing.  We've got a third kiddo on the way (like how I slipped that one in there, didn't you?) so that poor little one is cursed with only being blessed with 1/8 of my starting brain power and I'm left with the other eighth.  We're both doomed.  I'm so sorry little one...


So here goes.  I'm giving my memory a break and just making these delicious popovers.  Twice in the same day has to mean that I really, really want to make them...

Strawberry Cream Cheese Popovers
Makes 12 muffin sized popovers or 6 standard sized popovers.  Adapted from In Sock Monkey Slippers via Jamie Oliver.
For the printable recipe, click here.

I love popovers.  They're super easy to whip up and a great vehicle for anything you'd like to drizzle into them.  They have this great hollow space inside that's crying out for honey.  I didn't do much fooling around with the original recipe.  I didn't have the goat cheese (which sounds delish and I'd still love to try it), but did have cream cheese hanging out in the fridge so I made the switch and was not disappointed with the result.  I may or may not have forgot I was halving the recipe, ehem, accidentally doubled the volume of cream cheese called for and think that's what caused my popovers to look a bit more like Mt. Vesuvius that I would have liked.  So I corrected that for you in the recipe below.  I really, really, really recommend a drizzle of honey over a warm popover with the first spring strawberries you can find.

2 cups milk
2 cups all-purpose flour
½ teaspoon baking powder
¼ teaspoon sea salt
3 eggs, at room temperature
4 ounces room temperature cream cheese
2 tablespoons honey
¾ cup fresh strawberries, diced

Preheat your oven to 450 degrees.  Lightly butter your muffin tin or popover pan.  Set aside.

In a small saucepan, heat the milk over medium heat until just warm to the touch, about 110 degrees.

Stir together the flour, baking powder and salt in a medium bowl.

In a larger bowl*, whisk the eggs quickly for a few minutes until they are foamy.  Slowly pour in the milk while still whisking.  Stir in the flour mixture until just incorporated.  It's okay if there are still a few lumps in it.

*You can also mix the batter in a blender or with a stand or electric hand mixer following the same steps.  It incredibly adaptable to whatever you have on hand.

In a small bowl, stir together the cream cheese, honey and strawberries.

Pour the batter into the prepared pans until each cup is 3/4 full.  Evenly spoon a small amount of the cream cheese mixture into the center of each cup.  Bake for 15 minutes.  Then, without opening the door, turn down the oven's temperature to 375 degrees.  Bake for an additional 15 minutes for muffin-sized popovers and 30 minutes for standard sized ones.  The finished popovers will have puffed and be golden brown on top.

Serve warm with a drizzle of honey.


Tuesday, March 4, 2014

Buttermilk Scones {A Tuesdays with Dorie Post}


I have a serious obsession with, no, addiction to scones.  They are ones of my all time favorite breakfast foods.  And that's saying something because I absolutely love breakfast.  Especially when I get to linger over a great spread with friends or (on really special days) the quiet of my child-free home after dropping my kids off at school. There's just something about the light of the morning, a good book, a cup of steaming tea and warm, flaky scones that makes my day start in just the perfect way.


My favorite scones have always been ones made with a copious amount of butter and cream.  I've made versions with Meyer lemon, chocolate chunks, and even pumpkin.  They always turn out just the way I like them- light and fluffy with plenty of rich flavor.  So when these scones turned up in the Tuesdays with Dorie schedule I was a bit skeptical.  How well would buttermilk do the job of replacing cream?  Would the scones be too much like biscuits and not enough like the scones that I love?

I am now officially a convert.

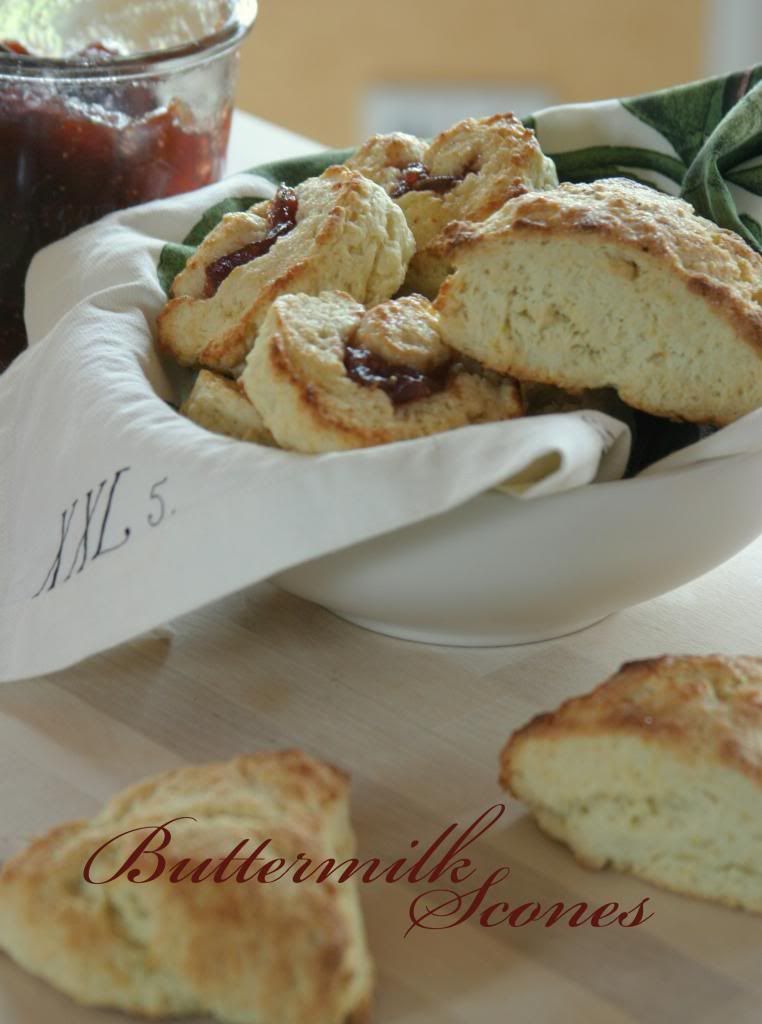
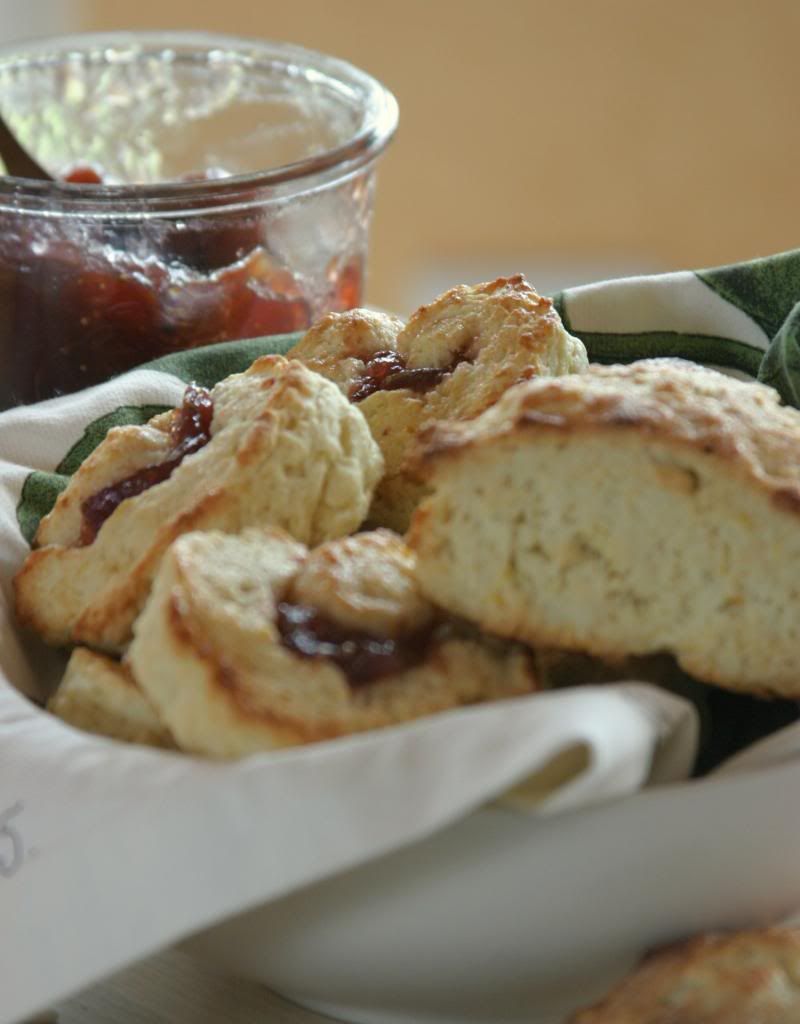
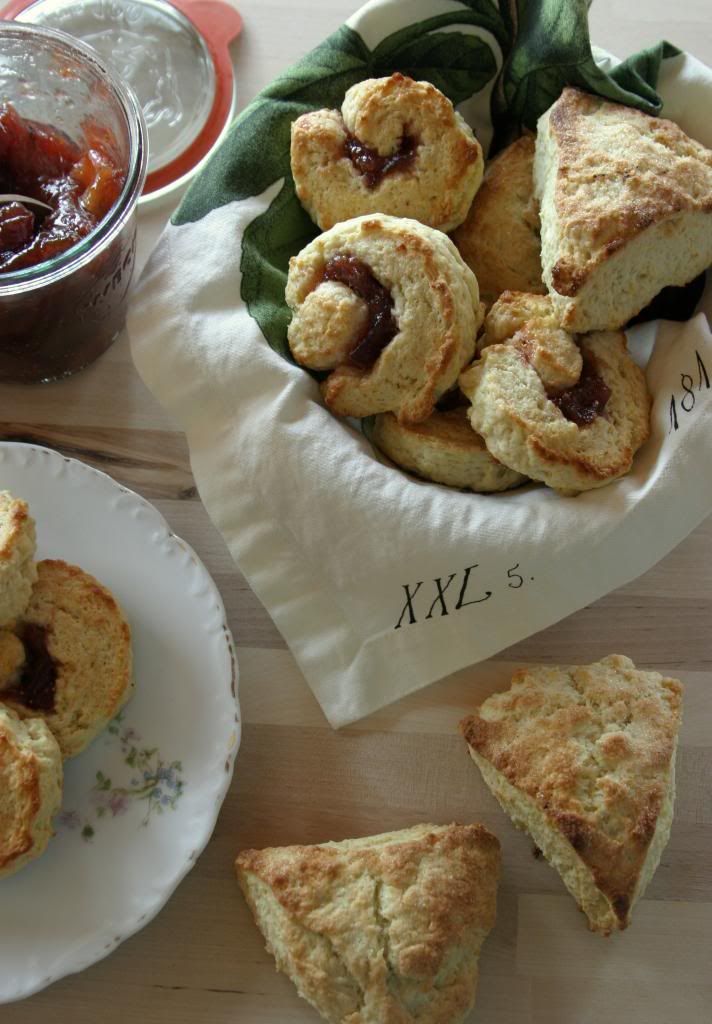
These buttermilk scones were every bit as good as the cream based scones that I usually make.  And I just loved the idea of creating the jam-filled pinwheel shaped scones.  They were absolutely delicious, if a bit messy to fill and cut.  I filled mine with home made fig jam, but I'm positive the scones would be just as wonderful with any berry flavored jam or even lemon curd (Oh!  Now there's a great idea I just came up with.).

Can't wait to see what other wonderful variations my fellow bloggers came up with?  Check them all out on the Tuesdays with Dorie page!


Buttermilk Scones
Makes 1 dozen triangle shaped scones or 24 spiral ones.  Recipe from Baking with Julia, edited by Dorie Greenspan.
For the printable recipe, click here.

I rarely ever follow a recipe exactly, but found little need to make any changes with this one.  I did cut back on the butter needed to brush the tops (I only used about half of what the original called for).  This recipe makes quite a few scones- directions for freezing uneaten scones are at the end.  If I were to make these again, and I'm sure I will, I would probably halve to recipe.

3 cups all-purpose flour
1/3 cup sugar
2 1/2 tsp baking powder
1/2 tsp baking soda
3/4 tsp salt
1 1/2 sticks unsalted cold butter (6 ounces), cut into small pieces
1 cup buttermilk 
1 tbs grated orange zest or lemon zest
 

2 tbs. unsalted butter, melted, for brushing
1/4 cup sugar, for dusting the tops

(If making the spiral scones)

4 tablespoons jam or jelly, and/or 4 tablespoons diced or small dried fruit, such as currants, raisins, apricots, or figs


Position the oven racks to divide the oven into thirds and preheat the oven to 425°F.

In a medium bowl, stir the flour, sugar, baking powder, baking soda, and salt together with a fork. Add the cold butter pieces and, using your fingertips (the first choice), a pastry blender, or two knives, work the butter into the dry ingredients until the mixture resembles coarse cornmeal.  It's OK if some largish pieces of butter remain-they'll add to the scones' flakiness.

Pour in 1 cup buttermilk, toss in the zest, and mix with the fork only until the ingredients are just moistened--you'll have a soft dough with a rough look. (If the dough looks dry, add another tablespoon of buttermilk.) Gather the dough into a ball, pressing it gently so that it holds together, turn it out onto a lightly floured work surface, and knead it very briefly--a dozen turns should do it. Cut the dough in half.

TO MAKE TRIANGULAR-SHAPED SCONES, roll one piece of dough into a 1/2-inch-thick circle that is about 7 inches across. Brush the dough with half of the melted butter, sprinkle with 2 tablespoons of the sugar, and cut the circle into 6 triangles. Place the scones on a parchment lined baking sheet and set aside while you roll out the rest of the dough.

TO MAKE ROLLED SCONES, roll one piece of dough into a strip that is 12 inches long and 1/2 inch thick (the piece will not be very wide). Spread the strip with half of the melted butter and dust with half of the sugar. If you want to spread the roll with jam and/or sprinkle it with dried fruits, now's the time to do so; leave a narrow border on a long edge bare. Roll the strip up from a long side like a jelly roll; pinch the seam closed and turn the roll seam side down. Cut the roll in half and cut each piece into six 1-inch-wide roll-ups. Place the rolled scones cut side down on a parchment lined baking sheet, leaving a little space between each one. Repeat with the remaining dough.
 

Bake the scones for 10 to 12 minutes, until both the tops and bottoms are golden. Transfer the scones to a rack to cool slightly. These are best served warm but are just fine at room temperature.

If you're not going to eat the scones the day they are made, wrap them
airtight and freeze; they'll stay fresh for a month. To serve, defrost the scones at room temperature in their wrappers, then unwrap and reheat on a baking sheet for 5 minutes in a 350°F oven.

Friday, January 31, 2014

Baked Yeast Doughnuts with Blood Orange Glaze


Those hands.  Those sweet little boy fingers.  I've used my little man's hands a few times in photos for this blog and the results are always so captivating to me.  I don't know that you can get any more pure than little hands helping shape dough or adding ingredients to a bowl.  They just want to help- be in the mix- and it's always a joyful experience.  The photos are some of my all-time favorites because they capture such important yet small moments. 

But they're no longer the chubby little toddler hands, dimpled and clumsy, that used to love holding onto my index finger as we walked along together.  These hands have more slender, sure and independent fingers than they did even a few months ago.  Fingers that hesitate a moment before gabbing onto my hand as we walk home from school.  They now wield scissors with abandon and accuracy (for better or worse) and would much rather stack LEGOs than help his mom in the kitchen.


Here's the thing, though.  The little guy is still just 4 years old so there are times when he wants to be considered a "big boy" like his 9 year old brother, and times when he's still, blessedly, just a little boy.  He likes to twist his hair between his fingers (and gets mad if it gets cut too short to be "twirled") and stick his first two fingers in his mouth when tired.  Signs that my sweet little mama's boy is still in there somewhere despite his desire to grow up as quickly as he can.

When he agreed to actually stand still for three minutes and help me take photos of these sweet little doughnuts, I grabbed my camera as fast as I could.  I know those moments of patience for me and my desires are going to come less and less frequently as he grows up and I want to capture as many of them as I can.  Besides, it's really hard to get a four year old to stand still with a handful of warm, sweet-glazed doughnuts.  (Full disclosure, it would be just as hard to get me to stand still with these babies in my hand too.) 


Baked Yeast Doughnuts with Blood Orange Glaze
Makes about 3 dozen 2 1/2 inch round doughnuts.
For the printable recipe, click here.

These doughnuts are based on the sugar and spice doughnuts I made about a year ago.  They are wonderfully tender and delicious and just as good as their fried counterparts.  I like to make them small because, sadly, they don't keep too well after baking.  The small ones just seem to go faster than big doughnuts.  My guess is that it's just too easy to pop one in your mouth as you walk through the kitchen so everyone is tempted to grab one on the go.

1 egg
1/4 cup sugar
1 cup milk, heated to 115 degrees
1 tbs active dry yeast
2 tsp freshly grated orange zest
2 1/2 cup to 3 1/2 cup all-purpose flour
1/4 cup room temperature butter, cut into cubes

1 1/2 cups powdered sugar

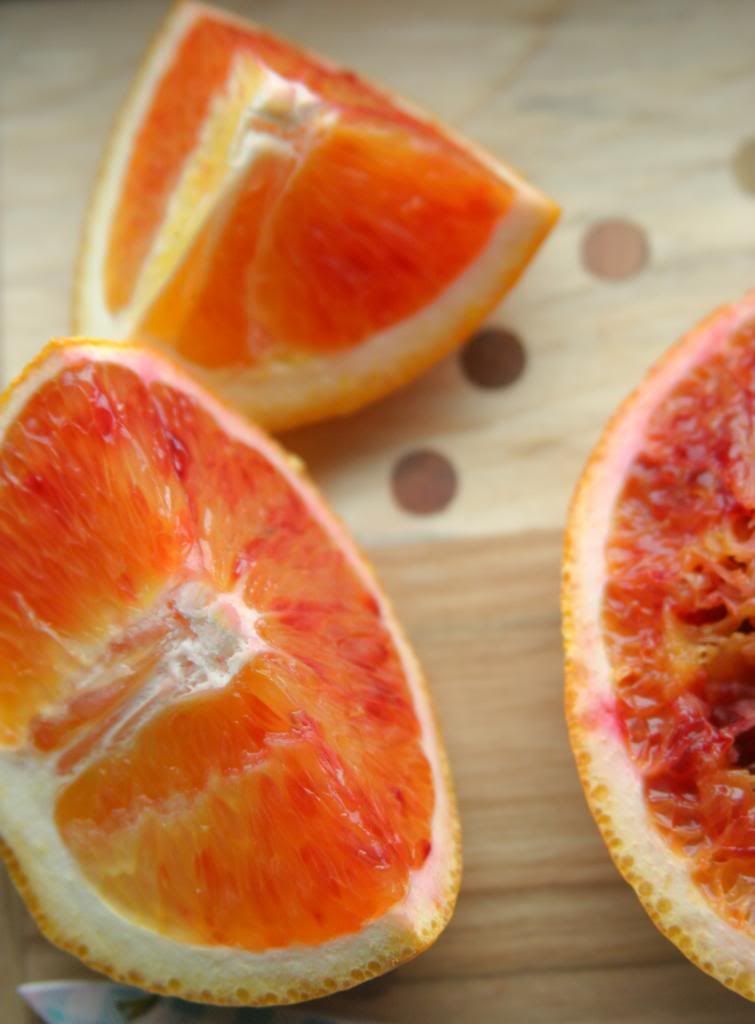
3-4 tbs fresh blood orange juice


In the bowl of a mixer fitted with the paddle attachment, beat the egg and sugar together until the sugar dissolves.  Add the milk, vanilla, zest and yeast and mix on medium speed until blended.  Add 2 cups of the flour a 1/2 cup at a time with the mixer on low speed.  Beat until the dough is thick and begins to pull away from the sides of the bowl.

Switch to the dough hook.  With the mixer on medium add the chunks of butter one piece at a time, beating until no large chunks of butter are left, 3-5 minutes.  Reduce the speed to low and add additional flour, 1/2 cup at a time, until the dough gathers around the hook and comes cleanly off the sides of the bowl.  You want a soft, moist but not overly sticky dough.


***You can also do all of this by hand in a large bowl.  Follow the same steps simply using a wooden spoon to do the mixing.  Do the final mixing with your hands if it becomes too difficult to use the spoon***


Lightly butter a large bowl and turn the dough into the bowl.  Cover with plastic wrap and let the dough rise in the refrigerator overnight (or, if making right away, place the bowl in a warm spot and let the dough double in volume, about 1 hour). 

When you are ready to bake the doughnuts, pull the dough from the refrigerator (or from your bowl on the counter) and roll it out on a lightly floured work surface to 1/2 inch thick.  Using a round 2 1/2 inch cutter, cut the doughnuts out.  Place the doughnuts on a parchment lined baking sheet at least 1 inch apart from each other.  Cover with a kitchen towel and let rise in a warm spot for 30-35 minutes for refrigerated dough and 15-20 minutes for room temperature dough, until nearly doubled in size. Preheat the oven to 400 degrees while the doughnuts rise.

Bake the doughnuts for 5-8 minutes until they are lightly golden. While they are baking, mix the powdered sugar and 3 tbs of the blood orange juice in a shallow bowl.  Add any additional juice in small amounts until you have a smooth, spreadable glaze.  When the doughnuts come out of the oven, immediately dip or drizzle the baked doughnuts with the glaze.  The doughnuts are best eaten right away.

Monday, January 6, 2014

Kumquat Preserves


In the midst of a dark, gray winter here is a burst of color worth savoring. 

Maybe your winter hasn't been as dark or gray as it has been in my neck of the woods.  I am totally jealous if that's the case (I'm talking to you my Southern California friends!).  Perhaps you love that sort of wintery weather.  I'm not judging, but it's just not my thing.  Nine years in the Pacific North West cured me of any love for the constant dreariness of a rainy winter. 

My family and I took a break from the gray and found a snowy paradise at the top of a glacier in Switzerland last week.  The cloudless blue sky and perfect white of the ice and snow were just the thing to refresh and recharge me for the new year.


Back at my town market for the first time in a couple of weeks I noticed a definite change in the produce available.  The citrus is starting to make its way into Germany from Italy and Spain.  Tables covered in Italian lemons and clementines stacked in tight pyramids, stems and leaves poking through here and there.  It was a beautiful sight to see.  I'm hoping to find something new and fabulous that I've never seen before- like the summer and fall that brought currants, gooseberries and quince.  What sort of new tastes will the winter bring?  I can't wait.

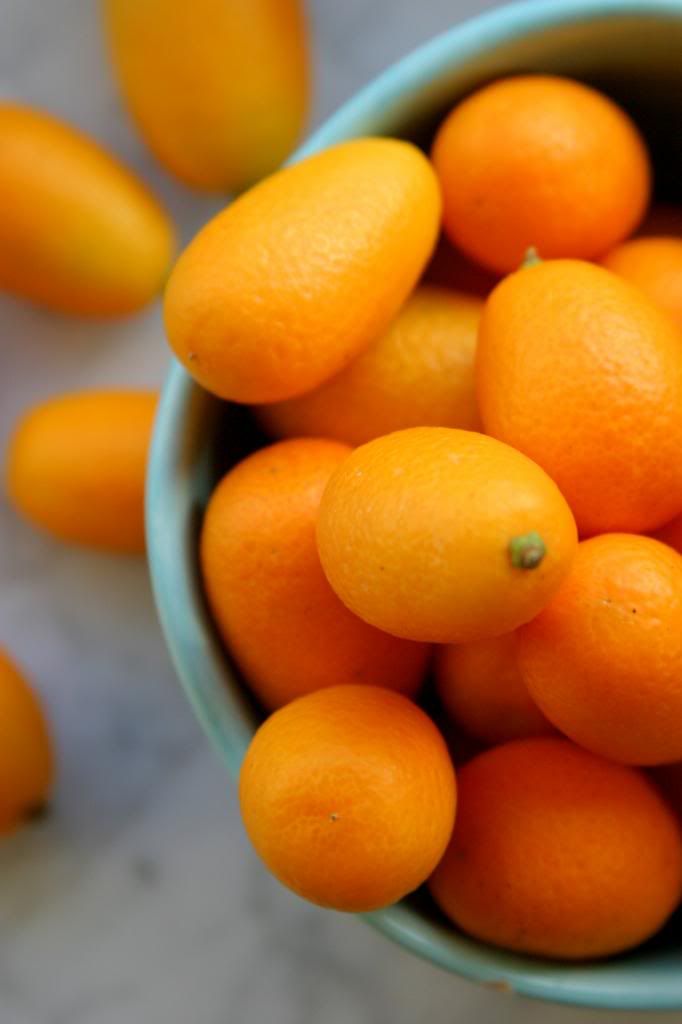
In the meantime, here's a little taste of brightness to start things off.  Not new to me, but a harbinger of things to come.  I hope you can find kumquats near you because they are one of a kind with their sweet, tangy skins and slightly bitter flesh.  You can pop them in your mouth whole, cook slices until they're sweet and candied or make this wonderful small batch preserve.  I first tried them in California and with every taste I imagine sitting out in my old backyard with the warm sun on my face and the scent of the citrus blossoms in the breeze.


Kumquat Preserves
Makes about 1 pint.  Recipe from Food in Jars.
For the printable recipe, click here.

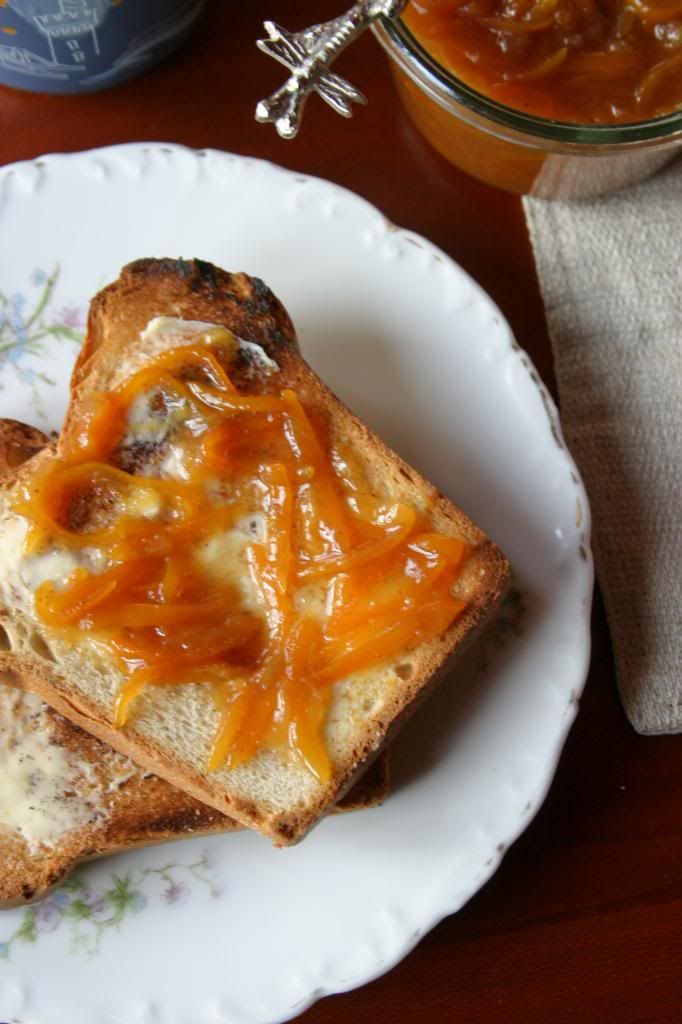
This is a simple way to dive into small batch jam making.  You can make one small recipe and not have to mess around with sterilization, canning pots or boiling lids.  This recipe makes just enough to fill two half pint jars- one to keep and one to give to your favorite neighbor.  The preserves are perfect spread on buttered toast or spooned over vanilla ice cream.

1 lb kumquats
2 cups water
1 1/4 cup sugar

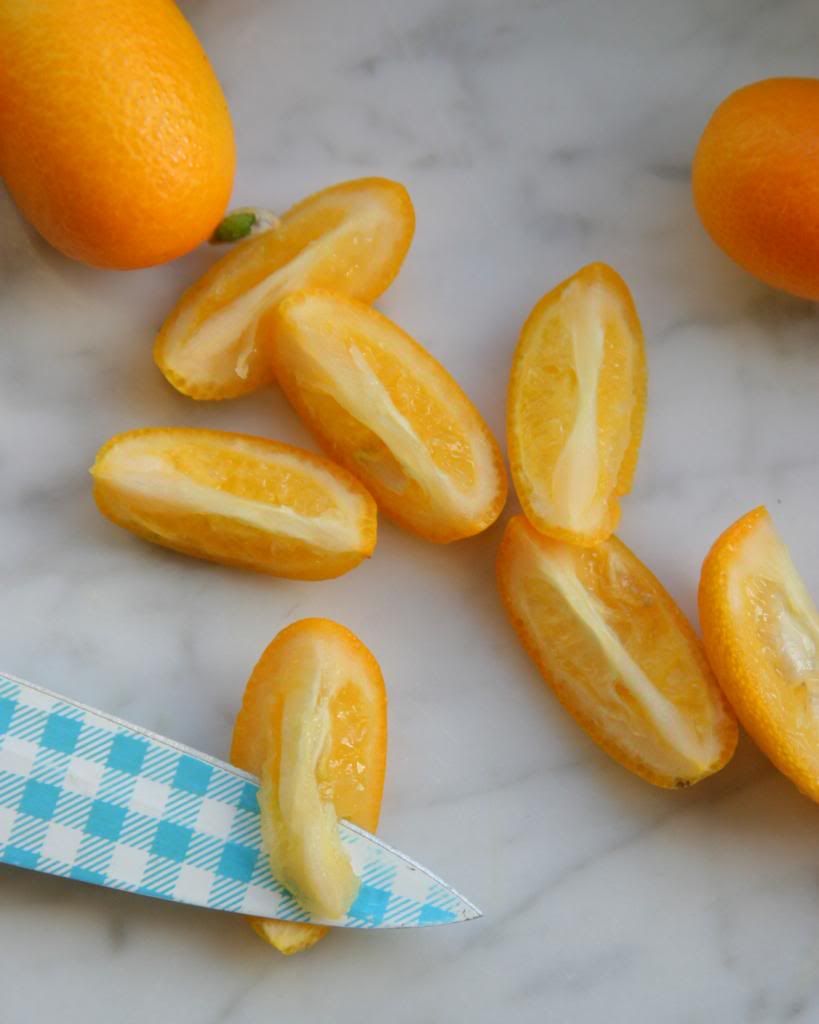
Wash the kumquats well.  Quarter each and with the tip of a sharp knife remove the seeds and the inner membrane.  Reserve the seeds and membranes.  Slice the remaining skins and pulp into thin slivers.

Place the sliced kumquats, water and sugar into a large pot.  Wrap the reserved seeds and membranes in a square of cheesecloth and tie the bundle with the corners of the fabric or with kitchen twine.  Place the bundle in the pot (the seeds and membranes are pectin rich and will thicken the preserves).  Bring the mixture to a boil over medium high heat.  Cook for about 20 minutes or until the preserves are thickened and the temperature reaches 220 degrees on an instant read thermometer.

Pour the preserves into 2 half pint jars and refrigerate.


Tuesday, October 29, 2013

Pumpkin Scones


There are some days when I can see the eye rolls from my husband and sons even when my back is turned.  Another new recipe?  Can't we just have something we KNOW we like for dinner tonight?  Just once this week, please?

I don't mean to experiment on my family so much.  Or, at least, I don't start out intending to turn them into dinner-time guinea pigs but that's how it ends up most days.  I can't help it.  I see so many possibilities when I stand in front of the produce section and butcher case.  And most of those possibilities are not meals that have landed on my table in the past.  Why limit myself to what I've already tasted and tried?


But there's something to be said for the familiar.  And we all know it.  It's the reason comfort food exists.  And the reason why so many of those dishes we turn to when we need a break or a lift are the same ones time and time again.  We know exactly what we're getting when we reach for our favorite chicken noodle soup, mac and cheese or peanut butter sandwich.  It's always the same and there's comfort in that.
Back in the US (when I needed a few minutes of quiet to myself) I'd sneak off to my nearest Starbucks, order a chai tea and pumpkin scone and find a cozy table in the corner.  It's one of my favorite indulgences and one that I desperately miss living in Germany.  I know it seems silly.  I'm in Europe for goodness sake and there's a bakery on almost every corner!  Why on Earth would I miss the ultra-commercialized tea and scone when I could have so much better.  But that's the thing.  What I can get here may be better (and most assuredly is in most cases), but it's just not the same.  And even in the midst of my giddy joy in finding something new to try at the market or finding something fabulously different in a bake shop window I still miss the familiar from time to time.


Pumpkin Scones
Makes 9 3-inch scones.
For the recipe, click here.

This is a pretty simple scone to make and is based on my favorite cream scone recipe with a few modifications.  The dough is pretty wet, but isn't too difficult to work with.  Just give your counter a good dusting with flour and you're in business.  These scones make missing America  just a little less difficult, but even if you have a Starbucks nearby knowing how to make our own is still a good thing.

2 1/2 cups all purpose flour
3 tbs brown sugar
1/2 tsp cinnamon
1/4 tsp ground ginger
a pinch of ground cloves
1 tbs baking powder
6 tbs cold butter, cut into small pieces
1/2 cup heavy cream, plus 1 tbs
1/3 cup pure pumpkin puree (not pumpkin pie mix!)
6 tbs honey
1 large egg

For the glaze:
1/2 cup powdered sugar
1/4 tsp cinnamon
1/8 tsp ground ginger
enough cream to create a drizzle-able consistency (1 to 2 tbs)

Preheat your oven to 400 degrees.  Line a baking sheet with parchment or a non-stick liner.

In a large bowl whisk together the flour, brown sugar, spices and baking powder.  Using your finger tips, a pastry blender or two butter knifes cut the butter into the flour mixture until the pieces resemble the size of peas.

In a separate bowl stir together 1/2 cup of heavy cream, the pumpkin, honey and egg.  Add all but 1/4 cup of the cream mixture to the dry ingredients and using your hands or a wooden spoon gently stir.  If the dough will not hold together when pressed add half of the remaining cream mixture.  Give the dough a few more turns in the bowl, adding the rest of the cream mixture as necessary to create a soft and slightly sticky but not overly wet dough.  Turn the dough out onto a well floured counter.  Gently pat the dough together into a ball and then pat the ball into a 9 by 9 inch square.  You can use a biscuit cutter to make 3 inch round scones or using a knife cut the scones into triangles.  I like to cut my dough into 9 square scones.  Place the scones on the prepared baking sheet and brush the tops with the remaining heavy cream.  Bake for 12-15 minutes or until the scones no longer feel wet to the touch and the edges have gone golden.

Let the scones rest on the baking sheet for 5 minutes then remove to cool completely on a wire rack.  In the meantime, make the glaze by stirring together the powdered sugar, spices and 1 tbs of the heavy cream.  If the glaze is too thick to spread or drizzle stir in up to another tbs of cream.  When the scones have cooled completely, drizzle them with the glaze and give them a few minutes for the glaze to set up.

The scones will keep for 2-3 days if kept in an airtight container.