Showing posts with label Winter. Show all posts

Friday, March 4, 2016

Orange Olive Oil Polenta Cake


I'm trying to shake off the gloomy mood around here.  Reading back over my posts as of late, I feel like I've been in a kind of funk and it shows.  So I'm purposefully taking on a decidedly more positive tone today.  Let's see how it fits, shall we?

I reconnected with an old high school friend not too long ago.  She's been through some rough stuff in her life, including some very devastating losses.  But she's the most positive person and I'm always looking forward to reading the things she posts on Facebook and scrolling past the inspirational quotes she finds on Instagram.  Yup, she's one of THOSE people.  Perpetually happy and trying to make the world a better place, one inspirational quote at a time.  We all know someone like that, don't we?  On our worst days we roll our eyes and scroll quickly past.  On our best we think, "Yes!  That's exactly how I feel!". 


A few days ago my friend posted this little gem,

"'It's impossible,' said pride.
'It's risky,' said experience.
'It's pointless,' said reason.
'Give it a try,' whispered the heart."

It's the kind of thing that's layered on top of a photo of a mountain climber or amazing landscape that I usually don't even bother looking at.  But that day I did.  I suppose I was feeling optimistic and it struck a chord with me.  You see, I had done just the thing about a week earlier.  I had put myself out there to be scrutinized and (hopefully) accepted in a role that would take my work to another level.  It was a move very far outside my comfort zone and had required an almost "close your eyes and go for it without thinking too much" sort of move to make it happen.

 
The same day that quote rolled across my screen I got the email saying that although they had enjoyed working with me in the past, there was no room at the moment for me to contribute.  Included in the email was an offer for me to do a bit of behind the scenes work in lieu of the position I was hoping for.  Which is sweet and I'm happy to do anything that will get my foot in the door, but at it's heart it was still what I had dreaded most- rejection.  It's the greatest leap of faith in yourself and your abilities to risk rejection in that way.  My leap, it seems, fell just that short of making it to the other side.

The funny thing is, I'm okay with that.  It was risky, but not impossible or pointless.  I listened to the whispers of my heart and tried.  I think that's win.  Maybe not the win that I was hoping for, but better than giving in to fear and not having tried at all.  It's what I try to teach my kids and what I aimed to instill in my students when I was still in the classroom- getting something wrong or failing is not the worst thing that can happen.  In fact, those moments teach us the best lessons about ourselves and about how to improve for the next time.  Because there will be a next time, you can be sure of it.  So this time, my aim was off a bit.  Next time? Who knows?


Orange Olive Oil Polenta Cake
Makes one 9 x 5 inch loaf.  Adapted from smitten kitchen.
For the printable recipe, click here.

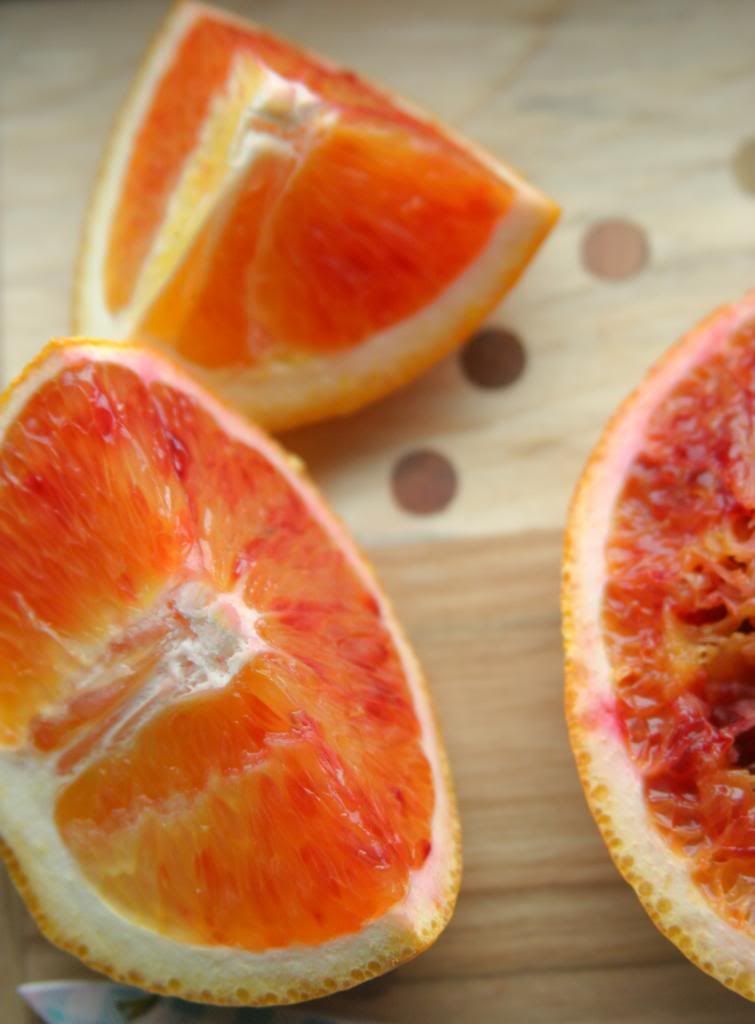
I love this sort of one bowl, quick and easy cake to have around for an afternoon snack or if a friend drops by.  Wrap a sheet of parchment and pretty ribbon around one and you've got a wonderful hostess gift.  The orange (I used sweet cara cara oranges, but blood oranges or valencias would be just as at home here) gives a bright, citrus-y sweetness, the olive oil a bit of depth and the polenta adds just a hint of crunch to the bite that I find irresistible.  The polenta or corn meal that you choose will change the texture depending on how finely ground it is.  The one that I used is a nice happy medium and it suits this cake just fine.  This is a chance to break out that good olive oil you've been saving- with as much as is in the cake you will taste the difference.

1 cup (200g) cane sugar 
3 oranges
1/3 cup buttermilk or plain yogurt 
3 large eggs 
2/3 cup good quality extra virgin olive oil 
1 cup all purpose flour 
3/4 cup ground polenta or corn meal 
1 1/2 tsp baking powder
1/4 tsp baking soda 
1/2 tsp fine sea salt

Butter a 9x5 inch loaf pan and set aside.  Preheat oven to 350 degrees. 

Place the sugar in a large bowl.  Zest one of the oranges over the bowl directly into the sugar (the orange flavor in this cake is subtle, if you'd like to make it more pronounced grate the zest of a second orange into the bowl).  Rub the zest into the sugar with your fingertips to release the oils.

Remove the peel and pith of one orange (supreme the orange) by cutting off the top and bottom to reveal the fruit inside.  Then, run your knife along the curve of the orange to remove the remaining skin and pith.  Holding the orange in your hand, cut away the wedges of orange between the membranes.  Drop the orange pieces into the bowl with the sugar and zest.  Break up the segments into 1/4 inch pieces with your fingers.

Juice the remaining two oranges into a small bowl or liquid measuring cup. You should have about 1/2 cup of juice.  Stir the buttermilk into the juice then pour it into the bowl with the sugar mixture.  Stir the mixture together with a whisk.  Add the eggs and olive oil to the bowl and whisk until fully combined. 

Carefully whisk in the flour, polenta, baking powder, baking soda and salt into the wet ingredients just until incorporated.  Pour the batter into the prepared pan and place in the oven. 

Bake for 50-55 minutes.  The cake will be golden and a knife or toothpick inserted in the center will come out clean.  Cool the cake on a wire rack for 5 minutes.  Run a palette or butter knife around the edge of the pan and invert the cake onto the rack.  Cool completely (right side up).  Wrapped airtight the cake will keep for three days.


Thursday, January 28, 2016

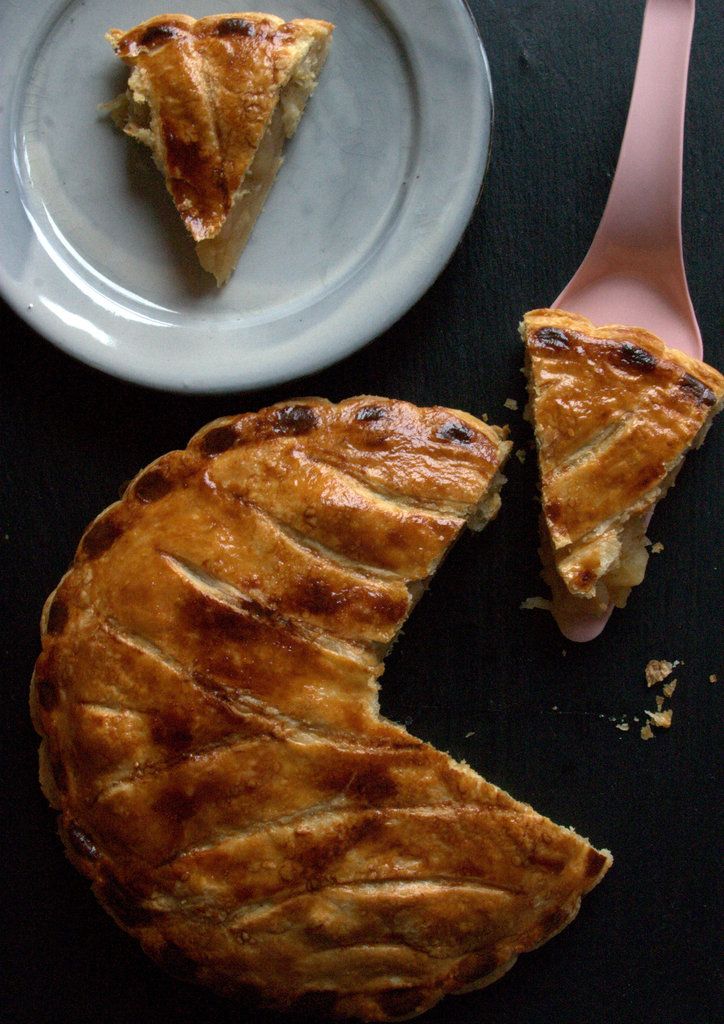
Apple Galette des Rois


You know, it's funny.  Life, that is.  Sometimes you cruise right through it barely noticing the change in time and day.  Just one moment into the next with your head down missing the details, the ups, the downs.  And then something unexpected stops you in your tracks and forces you to look around.

This is the story of my life as of late.  Just kind of going through the motions, each day passing pretty much the same as the rest.  Not in a bad way, but in a less-than-present sort of way.  And then two little things that don't amount to much in the grand scheme of life nearly took my breath away.  Those two little things, really not much more than a few sentences spoken both by people who know me and by those that don't, made me look deep inside and as a result of that introspection to see the world around me in a much different way.  I'm grateful.  It feels good to appreciate the people around me more fully and perhaps even take care of myself with more purpose.

Am I being a bit too cryptic for you?  If I am, you have my deepest apologies.  It's simply that I'm not quite sure what the end result of those few sentences swirling around in my mind will be.  I need a bit more time for that.  But in the meantime, I'll share a few of those words with you.  Because they made me stop and catch my breath and it's my hope that they might just do the same for someone else.

"You are brave enough.  Don't ever think otherwise."


Apple Galette des Rois
Makes 1 9-inch galette which will serve 4-6 people.  Rough puff pastry recipe from in jennie's kitchen.
For a printable version of the recipe, click here.

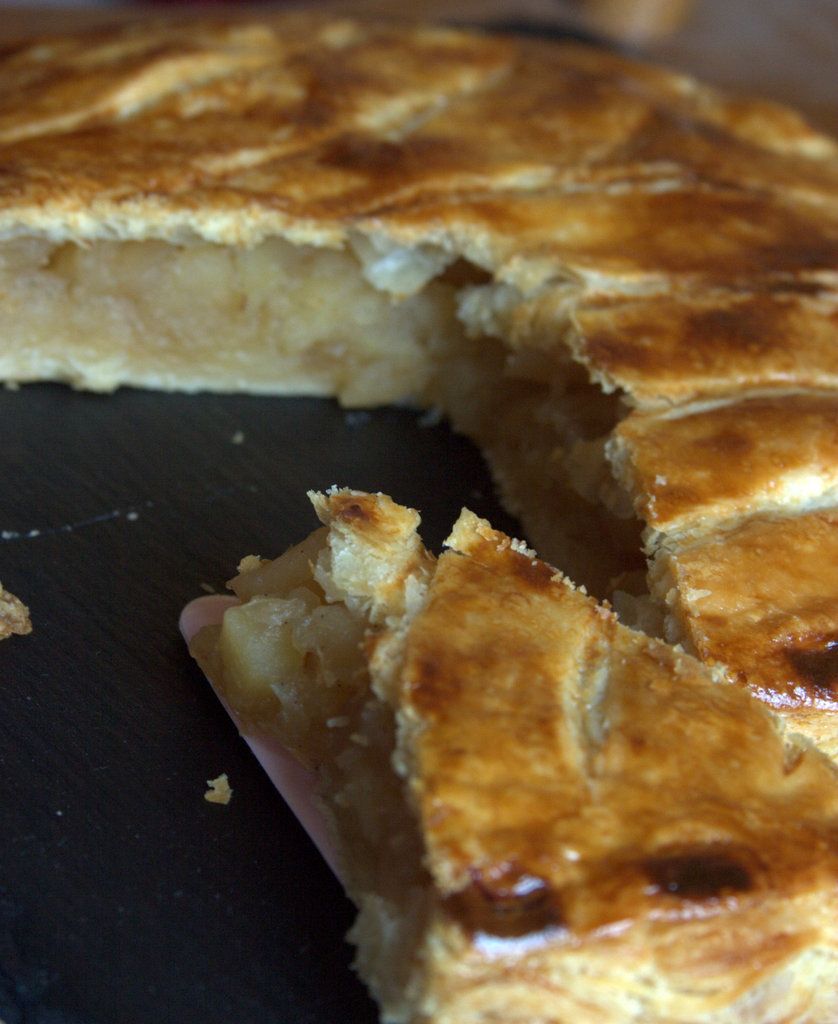
Not too long ago my sister and I were standing at the counter of a French patisserie ordering pan au chocolat (chocolate croissants) and eclairs when I noticed this beautifully bronzed pastry that I had no name for.  The two of us wondered aloud at what it could be, but were happy to buy our croissants and eclairs and be on our way without too much thought.  A couple of weeks later that same pastry appeared in my Instagram feed (from Jennifer Perillo of in jennie's kitchen) and I learned that what we had seen was called a galette des rois and it is a pastry made in France only once a year for the celebration of Epiphany. I was intrigued by the pastry and even more so when I read through Jennifer's post and saw that she had made her own puff pastry for the galette.  My visions of puff pastry were of huge blocks of butter and a long, tedious process.  Jennifer's recipe was a revelation to me.  So simple- 4 ingredients, a bit of rolling and chilling and I had puff pastry better than any I could buy in a store.  It's a game changer.  The rest of the galette process was just as simple having decided on making an apple filling instead of the usual almond one since my people aren't nut people.  In my house, this galette will be a year-round treat instead of being reserved to once a year, that's how much we love it.

Rough Puff Pastry
1 2/3 cup ( 250 g) all purpose flour
1 tsp fine sea salt
12 tbs (125 g) unsalted butter, at room temperature and cut into cubes
2/3 cup (150 mL) cold water

Place the flour and salt into a large bowl and give them a quick mix.  Toss the butter pieces into the flour and, using your finger tips, blend the butter and flour together until you have a crumbly mixture with some marble-sized pieces of butter remaining.

Stir the water into the flour-butter mixture with a wooden spoon until it just comes together into a dough.  Turn the dough out onto a lightly floured work surface and gently form it into a rectangle.  Working in one direction (left to right or top to bottom, for example) roll the dough into a long rectangle that is roughly 3 times longer than what you started with.  Fold the dough in thirds (fold one end towards the center and then fold the remaining third over the top) so that it resembles a folded letter.

Give the dough a quarter turn and repeat the process, rolling out the dough into a long rectangle and then folding it like a letter.  Wrap the dough in plastic wrap and refrigerate for 30 minutes.

Apple Filling and Finishing the Galette
1.5 lbs apples (3 medium apples), your favorite cooking apple
3 tbs light brown sugar
1/3 cup water
1 tsp vanilla bean paste or 1/2 vanilla bean, split and seeds scraped out (optional)

1 recipe rough puff pastry from above
1 egg yolk, beaten with a splash of milk

While the dough is chilling, make the filling.

Peel, core and chop the apples into 1 inch chunks.  Place the apples, brown sugar, water and vanilla bean (if using) into a medium saucepan.  Bring to a simmer over medium heat.  Cover and lower the heat to medium-low.  Cook, stirring occasionally, for about 15 minutes or until the apples are soft but haven't completely broken down (you want some texture in the filling, not applesauce).  Give the apples a light mash with a fork and set aside to cool.

Preheat your oven to 375 F (190 C).  Line a baking sheet with parchment paper.

Remove the chilled dough from the refrigerator.  Cut it in half and return one half to the refrigerator.  Place the other half on a lightly floured work surface.  Rolling in one direction again, roll from one edge to the opposite edge.  Give the dough a quarter turn and repeat the process of rolling in one direction edge to edge.  Continue giving the dough a quarter turn and rolling until the dough is just larger than an 8 inch plate or round baking pan.  Using a sharp knife, cut around the edge of the plate or pan and place the circle of dough onto the prepared baking sheet.

Spread the cooled apple filling over the dough, leaving a one inch border clear of filling all around the edge.  Remove the second half of dough from the refrigerator and roll and cut it in the same fashion as the first half.  Place the second circle of dough over the filling and gently but firmly press the edge down so that it adheres to the bottom circle.  With the tip of a sharp knife you can score a design across the top (but don't cut all the way through the dough!).  Pierce a few holes for steam to escape.  Brush the top of the dough with the egg yolk.

Bake the galette for 30-35 minutes until puffed and golden brown.  Let the galette cool and serve warm or at room, temperature.

Friday, February 13, 2015

Honeyed Blood Orange Curd


When I lay my baby girl down on her changing table she breaks into a fit of giggles and many times the giggles turn into a full on hearty, belly laugh that doesn't stop until we're done.  I can't imagine for the life of me what is so funny about diaper changes, truly.  But whatever she imagines causes this moment of pure joy that is so infectious, no matter what my mood is I can't help but join in the merriment.  It's such pure and unadulterated happiness, so simple and sweet with nothing held back.  Those are the moments that make my Mama heart sing.


It got me thinking about moments like that in my own life.  There are plenty of memories from my childhood and silliness with my sister, unforgettable moments with my best friend from high school and my college roommates, sledding (zooming!) down a 7km Swiss road with my then 4 year old son in the blindingly fresh snow.  But what I've come to realize, sadly, is that the scales are tipped in favor of childhood.  As we get older there are fewer and fewer instances of that sort of joy.  We are either too busy to notice the moments that could spark the laughter or are too self conscious to let ourselves go the way a small child would. 


So I've vowed to myself to join in with my my sweet girl when she gets giggly.  I want to tip the scale back in the other direction.  Because joy shouldn't be limited by age. 


Honeyed Blood Orange Curd
Makes about 1 pint
For the printable recipe, click here.

This curd is really quite lovely, sweet without being overly cloying.  It's not quite as tart as a lemon curd because the blood orange is a beautifully fragrant and sweet citrus.  I hold back on the sweetener (honey in this case) to keep the orange flavor at the forefront and keep the curd from getting too sweet.  It makes a great spread for biscuits and scones, a dip for berries (if you can find any quality ones in the same season as the oranges) and fills pastries beautifully.  In this case, I made small pavlovas (a sort of flat-ish meringue) that I filled with a scoop of curd.  The result was a taste that brought me back to the days of running after the ice cream truck on a hot summer afternoon as a kid.  Talk about joy!  The curd and pavlova combination is a sophisticated dessert that is unfussy and easy to make and reminiscent of a cloud-like creamsicle.  Childhood joy for an adult palate- perfect.  The meringue recipe is not mine, so I will simply give you the link (though I use lemon juice in place of the vinegar and add a smidge more vanilla) to the recipe from The Kitchn.  Any way you use it, this blood orange curd is quite something else.

Zest of 1 blood orange
1 cup freshly squeezed blood orange juice (3-4 oranges)
1/4 cup mild flavored honey (this is a perfect time to use orange or citrus blossom honey)
2 large eggs
2 egg yolks
4 tbs unsalted butter, room temperature
1/8 tsp fine sea salt

In a small saucepan, bring the orange juice to a simmer over medium heat.  Continue to simmer the juice until it has reduced by half.  Remove from the heat and let it cool to room temperature.

Add the zest, honey, eggs, egg yolks, butter and salt to the saucepan and whisk to combine.  Place the pan over medium low heat.  Cook, stirring continuously with a heat proof spatula until the curd begins to thicken.  Take care to get into the corners of the pot with the spatula.  The curd is ready to ready to remove from the heat when it is thick and glossy and coats the spatula.  Remove from the heat and cool completely.  Refrigerate in a covered container until ready to use.

The curd will keep for a week in the refrigerator.


Thursday, January 22, 2015

Blackberry Clementine Smoothie


Don't think it's escaped my notice that my posts lately have been very introspective and deep.  Maybe bordering on a little too much information for all of my dear readers.  Maybe?  I don't know but I like to think it's part of my charm and hopefully you do too.

So in that spirit,  I thought I'd offer up something much the opposite today.  Short, quick and to the point.  Sort of like the recipe I'm sharing as well.  It's fitting, don't you think?   This is the sort of thing I'm craving these days.  In the heart of winter when I can't bear the idea of another stew for dinner or bowl of oatmeal at breakfast time what I really want is something to remind me that summer really will come again.  And thankfully Mother Nature obliges by bringing forth an abundant harvest of citrus in the bleak days of January.  So I'm celebrating citrus with a bright smoothie that makes me smile and feel just a little bit closer to the warm days of July.


Blackberry Clementine Smoothie
Makes enough for 2 smaller servings or one large one.
For the printable recipe, click here.

I don't know about you but when I have a typical smoothie for breakfast I usually end up feeling hungry an hour later.  They just don't "stick".  So I've thrown in a couple of ingredients that not only increase the sticking power of this smoothie but add a few more nutrients and fiber to an already healthy breakfast.  Why not?  So in go some rolled oats and chia seeds.  I like to blitz the oats first before adding the rest of the other ingredients so that they're broken down quite a bit.  I think it helps the texture.  Otherwise this is like any other smoothie- just throw the ingredients into the blender and blend.  Perfect for any busy morning on the go.

1/4 cup rolled oats
2 tsp chia seeds
1/2 cup plain Greek yogurt
1 tsp honey
3 clementines, peeled (make sure you've got seedless ones)
3/4 cup frozen blackberries

Toss the oats into the cup of a blender and pulse a few times until they are broken down into a powder.  Add the rest of the ingredients and blend until smooth.  Serve immediately.


Friday, December 12, 2014

Just a Little Thing...A New Book and My Favorite Christmas Cookie Ever

A year of work has finally come to an end.....


After a lot of recipe collecting and bugging my Mom for her instructions for my favorite childhood treats, writing, editing, photographing and a few extra pounds from, ehem, taste testing.....this labor of love is finally finished.  It's just a little thing- 18 recipes that represent the collective kitchen wisdom of three generations of my family bound together into one sweet book.  My Mom and I worked together to make this book before some of these recipes disappeared forever without being written down.  My original intention was to give copies as gifts for my family, but I got so many requests for a copy from friends far and wide that I decided to self publish the book and offer it for sale.

So if you head on over to Blurb, you'll find My Mother's Kitchen for sale in a few different formats.  You can grab a hard or soft cover 7x7 inch book or download an ebook for your iphone or iPad.  I'd be honored if you were fond enough of me or my recipes to purchase yourself a copy.  Thrilled and humbled beyond belief as well.


I thought I'd give you a little taste of what's in the book today.  In keeping with the current theme of European cookies, here's my favorite Italian cookie.  We always called them dardeeds because that's how my Nana pronounced it, but I have since come to find out that the actual name for this cookie is turdilli.  I'm sticking with dardeeds, but you can call them whatever you like.  Maybe call them delicious.  Turdilli are definitely a regional secret from Calabria- most people have never seen or heard of them.  I aim to change that right now.


Turdilli {or Dardeeds}

Makes a mountain of cookies.  Divide the recipe by 3 for a more reasonable amount.
For the printable of this recipe, click here. 


3 cups neutral flavored oil           
2 cups dry red wine               
1 cup whiskey               
11 1/2 cups + 1 tbs all purpose flour       
8 1/2 cups semolina flour           
2 tsp sugar               
3 eggs                   
½ tsp ground cinnamon
1 tbs ground clove


Neutral flavored oil for frying
2 cinnamon sticks
12 whole cloves, divided
 2 lbs. honey
1/4 cup sugar


Place the oil, wine and whiskey in a large pot.  Bring to a boil over medium heat.  Boil for just a couple of minutes to burn off the alcohol.  Remove from the stove and cool.

In a large mixing bowl stir together the flour, semolina, sugar, ground cloves and ground cinnamon.  Pour in the cooled liquid ingredients and the 3 eggs.  Mix until you have a cohesive, sturdy dough. 

In a large pot, pour enough oil to fill the pot about three inches deep.  Place the cinnamon sticks and 7 cloves into the oil.  Insert a candy thermometer into the pot.  Heat over medium until the oil reaches 350 degrees.


In the meantime, cut small sections of dough (keep the rest of the dough in a covered bowl) and form ropes about the diameter of your thumb. Cut into ¾ to 1” pieces and roll them on a fork or a wooden board used to roll cavatelli/gnocchi. Fry the dardeeds in batches, turning gently once, until golden.  Let cool.

Rub the sides of a bowl large enough to hold all the finished dardeeds with half a lemon.  Place the honey in a pot large enough to hold all the dardeeds. Add the remain cloves to the honey. Mix the sugar and flour together and add it to the honey also. Warm the mixture to just above a simmer but not quite boiling.  Add the dardeeds and toss gently until they are all coated well. Remove from heat and turn out into the prepared bowl. Keep covered with foil.


Tuesday, December 9, 2014

German Gingerbread {Lebkuchen}


This past week my youngest son's school had a Christmas party.  Families were invited and we grilled bratwurst over fire pits in the school yard, had hot punch and shared Christmas sweets.  If this seems like an idyllic German setting, let me set the record straight.  It was dark at 4:00 pm, 37 degrees out and mistily foggy.  It was a GREAT idea and I was super excited for it, but the reality was not so wonderful.  Let's just say we only lasted as long as it took my oldest to grill his bratwurst (which took way longer than his patience held out, truly) and have a few cookies.


I brought cookies to the celebration (of course).  I was excited and just a bit nervous to bring these particular cookies.  We had spent the weekend before exploring the Christmas markets in Munich and Salzburg and I fell in love with the cookie booths in both the German and Austrian cities. It's THE cookie around these parts.  And everyone's mom or grandma has their own way of making lebkuchen that is the "best" or "only" way to do it.  I think I went to one booth at the market in Salzburg that had 10 different versions for sale.  Some were studded with candies fruit, some dressed up with a chocolate coat and more plain versions decorated with almonds.  After all the tastings (purely for scientific reasons, of course) my favorites were lightly sweet and mildly spicy with a simple glaze and chewy middle.

The big question was- would my American version of everyone's favorite go over with the teachers and family's at my son's school.  I breathed a huge sigh of relief when I popped in the morning after the big grill out and the teacher gave me a big thumbs up while snacking on the leftover cookies.  Phew!  I'm so glad because I just love this cookie and having others feel the same way just feels so good.


German Gingerbread {Lebkuchen}
Makes about 3 dozen 3 inch cookies.
For the printable recipe, click here.

This recipe is the result of quite a bit of research into traditional lebkuchen recipes.  There were so many ways I could have gone, but I think after much tinkering I came up with my ideal version.  A few notes.  First, many lebkuchen recipes require long resting times either before or after baking to produce a more mature flavor.  I suppose that would work, but I found that an overnight rest in the fridge before baking was just right for my tastebuds.  Feel free to let the dough rest up to three days if you fancy a stronger spiciness.  Second, though I loved the snowflake cookie cutter that I used when making the cookies for this photo, I probably wouldn't use it again.  The spiky parts of the cookie baked much more quickly than I would have liked and I missed the chewy center that is the hallmark of the lebkuchen.  I think the angel shape was perfect, but if you really want to go traditional most lebkuchen that I saw in the markets were round.  If you find the cookies drying out as you keep them on your counter, take a cue from the Germans and place a slice of apple in your cookie jar to keep your lebkuchen fresh.

1/2 cup honey
2/3 cup packed brown sugar
1 large egg
2 1/2 cups all purpose flour
1/2 cup almond flour

1 tbs cocoa powder
1/2 tsp baking soda
1 tsp cinnamon
1/2 tsp ground cloves
1/2 tsp ground ginger
1/4 tsp ground cardamom
1/2 tsp fresh lemon zest

1/2 cup sifted powdered sugar
2 tsp water

In a large bowl beat the honey, brown sugar and egg together.  Add the dry ingredients and carefully stir then into the wet ingredients until they are fully incorporated.  Cover the bowl and refrigerate the dough overnight and up to 3 days.
When ready to bake the cookies, preheat your oven to 350 degrees and line a cookie sheet with parchment.  Roll the dough out on a lightly floured surface (it can be a bit sticky) to 1/4 inch thick.  Cut shapes using a cookie cutter between 2 and 3 inches in diameter.  Place cookies on the prepared cookie sheet with a couple of inches between each cookie.  Bake one sheet at a time for 5-7 minutes.  You want the cookies to puff in the center and get just the lightest of golden on the edges but NOT browned.  If you let the cookies bake until browned they will be hard and lose their chewy middle.  Let the cookies cool for a couple of minutes to make them easier to handle before transferring them to a wire rack to cool completely.

Continue rolling and cutting cookies until you are out of dough (scraps can be rerolled a few times before it gets tough).

Meanwhile, mix together the powdered sugar and water to get a thin glaze.  When the cookies are completely cooled, brush them with the glaze.  Give the glaze a few minutes to set before serving.

Cookies will keep in an airtight container for 3 days on the counter.


Friday, January 31, 2014

Baked Yeast Doughnuts with Blood Orange Glaze


Those hands.  Those sweet little boy fingers.  I've used my little man's hands a few times in photos for this blog and the results are always so captivating to me.  I don't know that you can get any more pure than little hands helping shape dough or adding ingredients to a bowl.  They just want to help- be in the mix- and it's always a joyful experience.  The photos are some of my all-time favorites because they capture such important yet small moments. 

But they're no longer the chubby little toddler hands, dimpled and clumsy, that used to love holding onto my index finger as we walked along together.  These hands have more slender, sure and independent fingers than they did even a few months ago.  Fingers that hesitate a moment before gabbing onto my hand as we walk home from school.  They now wield scissors with abandon and accuracy (for better or worse) and would much rather stack LEGOs than help his mom in the kitchen.


Here's the thing, though.  The little guy is still just 4 years old so there are times when he wants to be considered a "big boy" like his 9 year old brother, and times when he's still, blessedly, just a little boy.  He likes to twist his hair between his fingers (and gets mad if it gets cut too short to be "twirled") and stick his first two fingers in his mouth when tired.  Signs that my sweet little mama's boy is still in there somewhere despite his desire to grow up as quickly as he can.

When he agreed to actually stand still for three minutes and help me take photos of these sweet little doughnuts, I grabbed my camera as fast as I could.  I know those moments of patience for me and my desires are going to come less and less frequently as he grows up and I want to capture as many of them as I can.  Besides, it's really hard to get a four year old to stand still with a handful of warm, sweet-glazed doughnuts.  (Full disclosure, it would be just as hard to get me to stand still with these babies in my hand too.) 


Baked Yeast Doughnuts with Blood Orange Glaze
Makes about 3 dozen 2 1/2 inch round doughnuts.
For the printable recipe, click here.

These doughnuts are based on the sugar and spice doughnuts I made about a year ago.  They are wonderfully tender and delicious and just as good as their fried counterparts.  I like to make them small because, sadly, they don't keep too well after baking.  The small ones just seem to go faster than big doughnuts.  My guess is that it's just too easy to pop one in your mouth as you walk through the kitchen so everyone is tempted to grab one on the go.

1 egg
1/4 cup sugar
1 cup milk, heated to 115 degrees
1 tbs active dry yeast
2 tsp freshly grated orange zest
2 1/2 cup to 3 1/2 cup all-purpose flour
1/4 cup room temperature butter, cut into cubes

1 1/2 cups powdered sugar

3-4 tbs fresh blood orange juice


In the bowl of a mixer fitted with the paddle attachment, beat the egg and sugar together until the sugar dissolves.  Add the milk, vanilla, zest and yeast and mix on medium speed until blended.  Add 2 cups of the flour a 1/2 cup at a time with the mixer on low speed.  Beat until the dough is thick and begins to pull away from the sides of the bowl.

Switch to the dough hook.  With the mixer on medium add the chunks of butter one piece at a time, beating until no large chunks of butter are left, 3-5 minutes.  Reduce the speed to low and add additional flour, 1/2 cup at a time, until the dough gathers around the hook and comes cleanly off the sides of the bowl.  You want a soft, moist but not overly sticky dough.


***You can also do all of this by hand in a large bowl.  Follow the same steps simply using a wooden spoon to do the mixing.  Do the final mixing with your hands if it becomes too difficult to use the spoon***


Lightly butter a large bowl and turn the dough into the bowl.  Cover with plastic wrap and let the dough rise in the refrigerator overnight (or, if making right away, place the bowl in a warm spot and let the dough double in volume, about 1 hour). 

When you are ready to bake the doughnuts, pull the dough from the refrigerator (or from your bowl on the counter) and roll it out on a lightly floured work surface to 1/2 inch thick.  Using a round 2 1/2 inch cutter, cut the doughnuts out.  Place the doughnuts on a parchment lined baking sheet at least 1 inch apart from each other.  Cover with a kitchen towel and let rise in a warm spot for 30-35 minutes for refrigerated dough and 15-20 minutes for room temperature dough, until nearly doubled in size. Preheat the oven to 400 degrees while the doughnuts rise.

Bake the doughnuts for 5-8 minutes until they are lightly golden. While they are baking, mix the powdered sugar and 3 tbs of the blood orange juice in a shallow bowl.  Add any additional juice in small amounts until you have a smooth, spreadable glaze.  When the doughnuts come out of the oven, immediately dip or drizzle the baked doughnuts with the glaze.  The doughnuts are best eaten right away.

Monday, January 6, 2014

Kumquat Preserves


In the midst of a dark, gray winter here is a burst of color worth savoring. 

Maybe your winter hasn't been as dark or gray as it has been in my neck of the woods.  I am totally jealous if that's the case (I'm talking to you my Southern California friends!).  Perhaps you love that sort of wintery weather.  I'm not judging, but it's just not my thing.  Nine years in the Pacific North West cured me of any love for the constant dreariness of a rainy winter. 

My family and I took a break from the gray and found a snowy paradise at the top of a glacier in Switzerland last week.  The cloudless blue sky and perfect white of the ice and snow were just the thing to refresh and recharge me for the new year.


Back at my town market for the first time in a couple of weeks I noticed a definite change in the produce available.  The citrus is starting to make its way into Germany from Italy and Spain.  Tables covered in Italian lemons and clementines stacked in tight pyramids, stems and leaves poking through here and there.  It was a beautiful sight to see.  I'm hoping to find something new and fabulous that I've never seen before- like the summer and fall that brought currants, gooseberries and quince.  What sort of new tastes will the winter bring?  I can't wait.

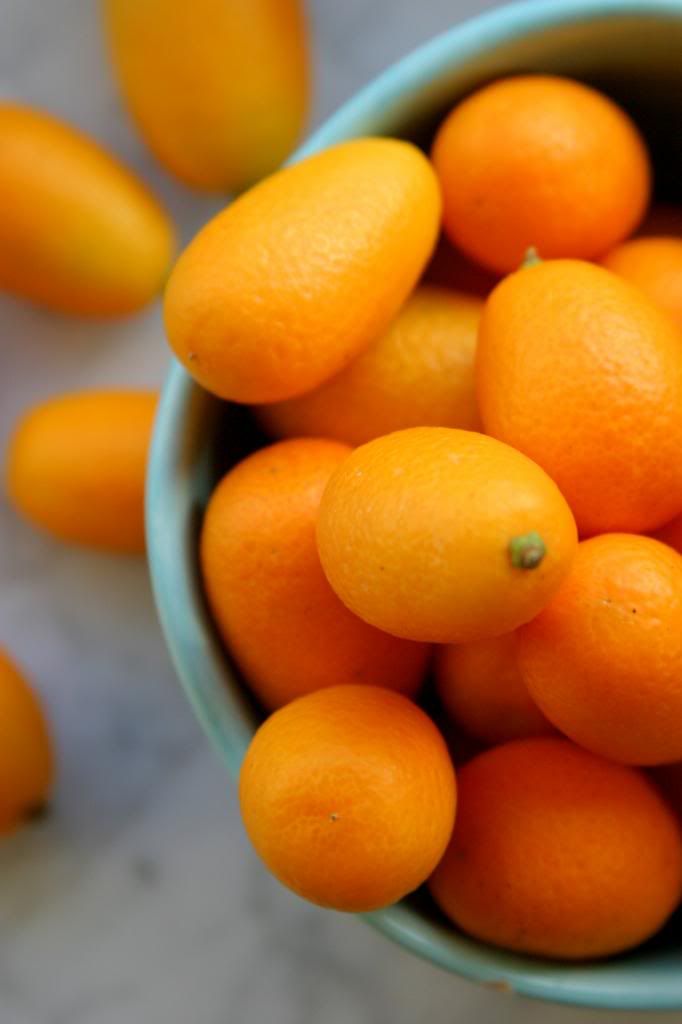
In the meantime, here's a little taste of brightness to start things off.  Not new to me, but a harbinger of things to come.  I hope you can find kumquats near you because they are one of a kind with their sweet, tangy skins and slightly bitter flesh.  You can pop them in your mouth whole, cook slices until they're sweet and candied or make this wonderful small batch preserve.  I first tried them in California and with every taste I imagine sitting out in my old backyard with the warm sun on my face and the scent of the citrus blossoms in the breeze.


Kumquat Preserves
Makes about 1 pint.  Recipe from Food in Jars.
For the printable recipe, click here.

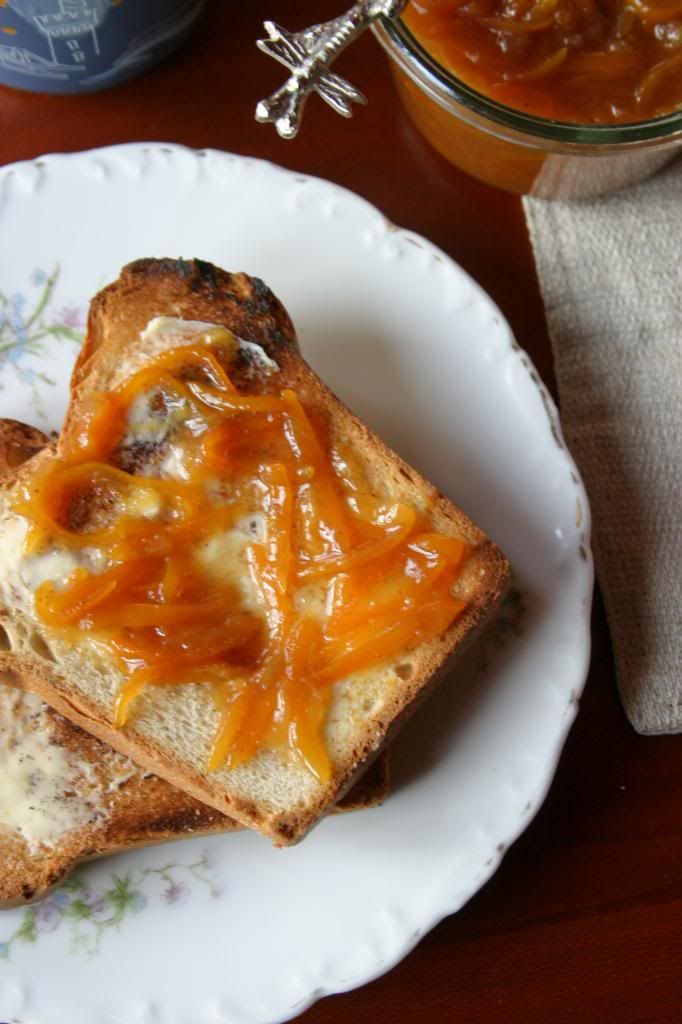
This is a simple way to dive into small batch jam making.  You can make one small recipe and not have to mess around with sterilization, canning pots or boiling lids.  This recipe makes just enough to fill two half pint jars- one to keep and one to give to your favorite neighbor.  The preserves are perfect spread on buttered toast or spooned over vanilla ice cream.

1 lb kumquats
2 cups water
1 1/4 cup sugar

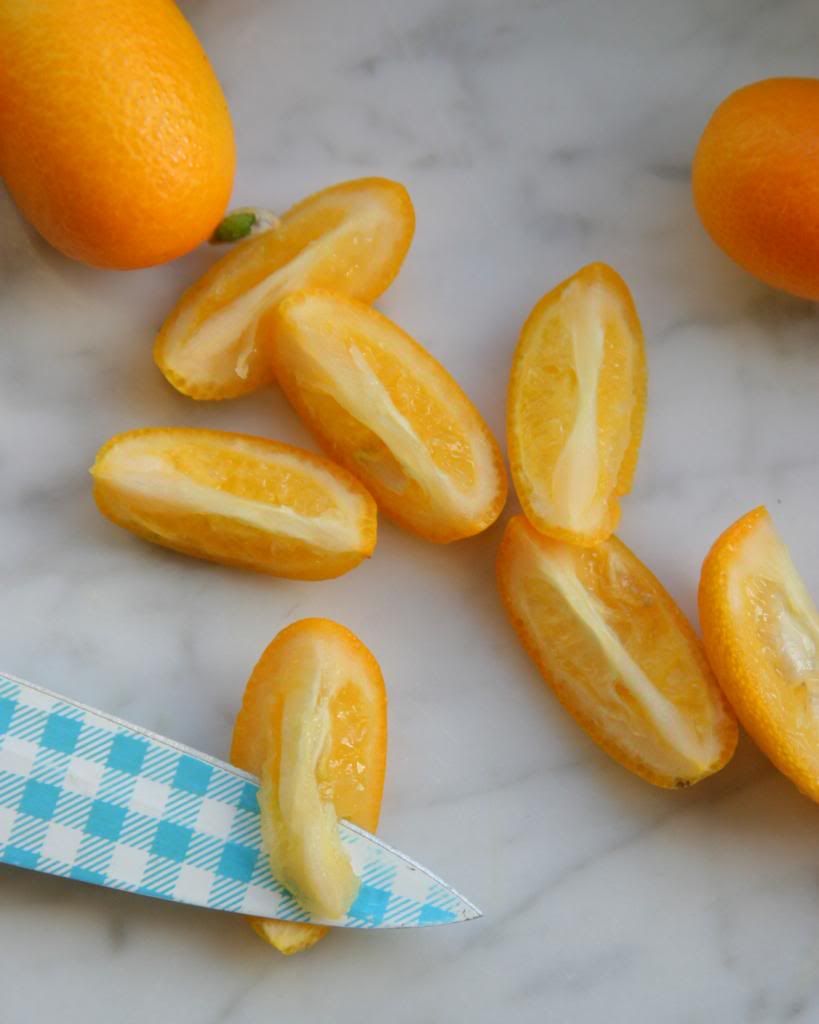
Wash the kumquats well.  Quarter each and with the tip of a sharp knife remove the seeds and the inner membrane.  Reserve the seeds and membranes.  Slice the remaining skins and pulp into thin slivers.

Place the sliced kumquats, water and sugar into a large pot.  Wrap the reserved seeds and membranes in a square of cheesecloth and tie the bundle with the corners of the fabric or with kitchen twine.  Place the bundle in the pot (the seeds and membranes are pectin rich and will thicken the preserves).  Bring the mixture to a boil over medium high heat.  Cook for about 20 minutes or until the preserves are thickened and the temperature reaches 220 degrees on an instant read thermometer.

Pour the preserves into 2 half pint jars and refrigerate.


Tuesday, December 17, 2013

Spelt (or Whole Wheat) Gingersnap Cookies {Tuesdays with Dorie}


This morning as I was dropping off my little one at school I caught a glimpse of another Mom who must be much more on top of things than I am.  She was carry a little bundle of cookies all bagged up and be-ribboned to give to teachers as gifts.  And it dawned on me- Christmas is in just one week.  I've only got three more days to pull together something tasty and sweet for my boys' teachers. 

How did that happen?  Didn't I just implore good old St. Nick to gift me with a bit more time? 


My plan was to bake up a few batches of tried and true cookies- including my favorite chai spiced chocolate crinkle cookies and maybe some pizzelles- to gift to teachers and neighbors.  We've got a cookie swap coming up in a few days as well and the there's Operation Cookie Drop, which the USO organizes to drop off cookies to soldiers, sailors and airmen who are stuck standing watch on Christmas Eve and Christmas day.  In other words, I think I'll be up to my eyeballs in cookies for the next few days.  Thanks to my hubby, who gave me my Christmas present (a new Kitchen Aid mixer!) early, I think I'm up to the task.  The only question is which other cookies I want to include in my treat bags?

I think these little cookies may just make the cut.  I already have a favorite molasses cookie- from Cooks Illustrated- so I wasn't too sure about these, but I gave them a shot anyway.  Unlike most other cookie recipes, this one only makes about a dozen cookies.  I kind of like that.  There are just enough cookies to satisfy without making so many that you can't stand them anymore by the time you finish them off.  They're chewy, warmly spiced and couldn't be any more Christmas-y if they tried.

 
It's been forever since I posted a Tuesdays with Dorie recipe and I missed the fun group of bloggers that I get to bake along with.  That international move just completely got in the way.  And then, of course, I had to figure out how to get by in this tiny kitchen of mine and how to find what I need in the German grocery stores.  Just like everything else lately, I'm a bit behind and still trying to play catch up.  But I'm slowly getting there and this is the first step in getting back to normal (or at least my new normal).  I'm going to include the recipe because I made a few changes.  And here's the link to find everyone else's version of these tasty little cookies.

Spelt (or Whole Wheat) Gingersnap Cookies
Makes about 1 dozen cookies.  Adapted from Baking with Julia, edited by Dorie Greenspan.  Recipe by David Blom.
Click here for the printable.

I love that the ingredients list for these cookies is relatively short and the process is fairly simple and straightforward.  I did feel the need to tweak it just a bit though.  The first batch I made was strictly by the books.  I found that for being called a gingersnap, the original didn't seem to have a whole lot of ginger or snap to it.  So I upped the amount of spice a bit and added cloves.  I liked the first batch, but felt my second lived up to its name more fully.  I also swapped out the all purpose flour for spelt flour.  Mostly because it was at the front of my cabinet, but also because I knew I could hide it easily from my family in an already deeply colored dough.  I quite enjoyed the depth that it cave the cookie.  If you can't find spelt, you can certainly use whole wheat or all purpose flour.


1/4 cup sugar
3 tbs unsulfured molasses
2 tbs butter at room temperature
1/2 tsp ground ginger
1/4 tsp cinnamon
1/8 tsp ground cloves
1/8 tsp baking soda
1 1/2 tbs water
3/4 cup spelt (or whole wheat) flour

To glaze the cookies, you'll need 1 tbs molasses and 1 tbs water.

In the bowl of a mixer fitted with the paddle attachment (or a bowl suitable for use with a hand mixer) place the sugar, molasses, butter spices and baking soda.  Mix on medium speed until the butter is whipped and creamy and all of the ingredients fully incorporated.  This should take about 2 minutes.  Slowly mix in the baking soda and flour until you have a soft dough, about 1 minute more.

Wrap the dough in plastic wrap, shaping it into a rough square or rectangle.  Place the dough into the refrigerator until it firms up, 2 to 3 hours (or freeze for 45 minutes).

When ready to bake the cookies, remove the dough from the refrigerator and preheat your oven to 325 degrees.  Line 2 baking sheets with parchment paper or a nonstick silicone liner.

Generously flour your work surface and rolling pin as the dough is quite sticky.  Roll the dough out into a rectangle between 1/8 and 1/4 inch thick.  Using a 2 inch cookie cutter dipped in flour, cut out cookies from the dough.  Place them on the baking sheets with just a bit of room between them- they spread very little if at all.  You can re-roll the scraps and cut out more cookies.  If the dough is too soft, place it back into the refrigerator or freezer until it firms up a bit.

Mix the glaze and brush it on the unbaked cookies.  Don't be too generous with the glaze, it can make the cookies a bit soggy.  Bake the cookies for about 6 minutes.  They will puff up and become just a bit firm (they will fall back down when cooling).  Cool the cookies on the baking sheet for about a minute before removing them to finish cooling on a wire rack.  The cookies will keep for up to 4 days in a well sealed container.


Friday, December 13, 2013

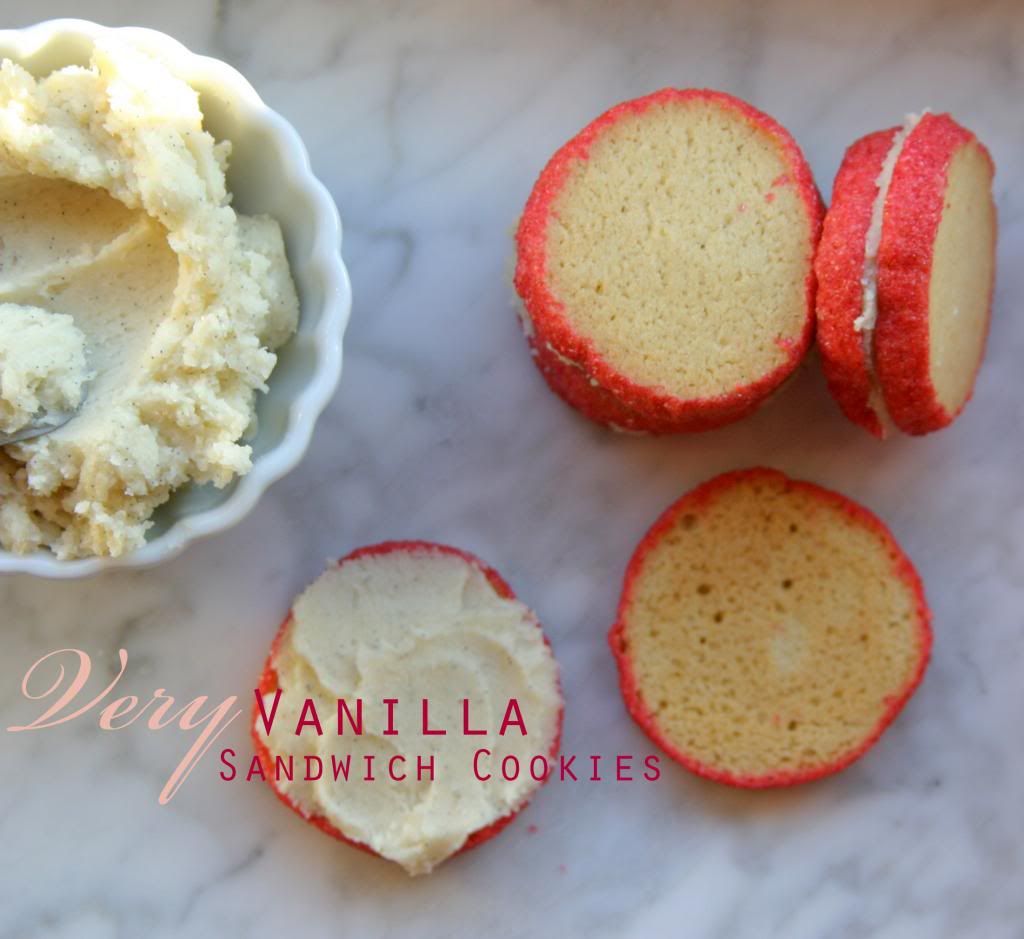
Very Vanilla Sandwich Cookies


I feel like I'm just playing catch up lately.  We came back from Rome and flew straight back into the rush of life, but I'm not so sure I was ready.   Maybe I'm still in a food coma from all the pasta I ate on vacation and with the rush of the holidays and my oldest's (ninth!) birthday I feel like December is whizzing by at world record speed.  I need everything to Slow.  The.  Heck.  Down.  Already!

Seriously.  I'd like to actually enjoy the holiday season without feeling like I'm three steps behind at every turn.  I know I'm not alone in this feeling, right?  Can we write a big letter to Santa asking him to just slow the Earth turning for the next 14 days.  We can all sign the letter so that it looks super official.  We'll just ask for the world to go a little teensy bit slower so we can all have a few more minutes each day.  I promise I don't need anything else this year except this little wish for a bit more time.  Is that too much?  You're all with me, aren't you?


I don't know if Santa will come through for me, so in the meantime I'm trying desperately to dig myself out of a mountain of Christmas presents and shipping boxes that need to make their way back to the States (probably not in time, I'm so sorry family!) and cards that I have every intention of signing, addressing and sending today.  But instead I'm blogging so you can guess how much progress I'll be making on the gift and card projects.  Oh and baking.  There's that too.

Peanut butter chocolate chip cookies for my oldest to share with his class for his birthday.  Dark chocolate and cherry pannettone for me to share with my friends on the drive for a mini-girls weekend at the Cologne Christmas market a few hours away.  And cookies for my little one's class advent get together (that's what they do here in Germany- Advent, not Christmas).  For this party we were asked to bring something from our cultural heritage.  I decided to go with a very American sugar cookie jazzed up a bit.  I was nervous about these cookies because they're a bit sweeter than European tastes generally go for, but they were (thankfully) a hit. 

Now I just have to decide what cookies to bring to the office cookie swap next week.  Oh, and get working on that letter to Santa.  I really only need a few more minutes.


Very Vanilla Sandwich Cookies
Makes about 2 dozen cookies sandwiches.  Adapted from Pure Vanilla by Shauna Sever.
For the printable, click here.

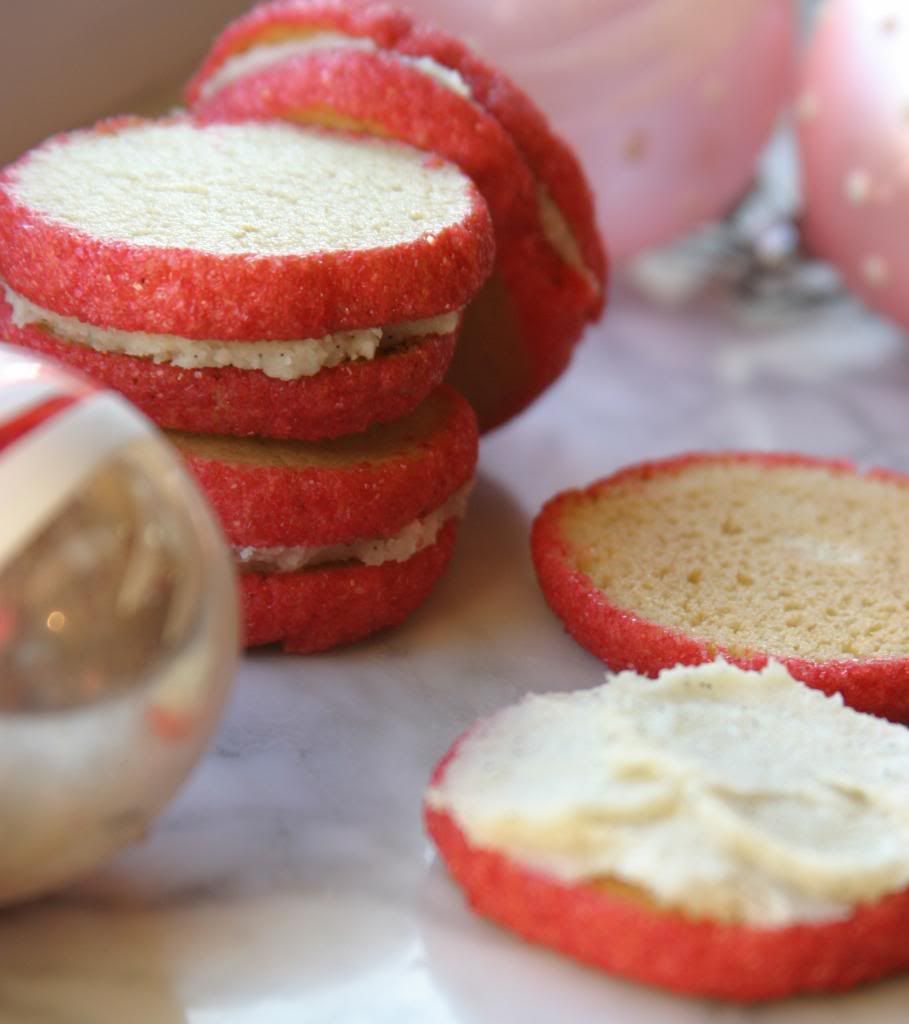
These cookies are just about the most perfect bite of vanilla ever.  Tender and crisp shortbread-like cookies sandwiched around a light vanilla butter cream- what's not to like?  You can keep the cookies plain and simple or jazz them up by rolling the edges in colored sugar before refrigerating the dough.  I think the sparkly version is perfect for a holiday party, personally.  I didn't do much to change to original cookie because it's so darn good.  I added pinch of cardamom for just a bit of depth to the cookie and swapped out the white chocolate filling (I am just not a fan of white chocolate) for a simple butter cream.  The cookies are the perfect thing to keep in the freezer for when you want to slice off and bake just a few, as even without the creamy filling they're quite good.

Another note, since moving to Germany I have not purchased a stand mixer.  I bought an inexpensive hand mixer and have used that occasionally, but the majority of the baking I have done has been completely by hand.  I swear my right arm muscles have never been as strong.  I will give directions for these cookies using a stand mixer but you can get them whipped up using even the weakest of hand mixers or the power of your own biceps.

For the cookies:
3/4 cup (1 1/2 sticks) butter, at room temperature
1/2 cup granulated sugar
1 tbs vanilla extract
1 large egg plus 1 egg yolk
2 cups all purpose flour
1/4 tsp baking soda
1/4 tsp cardamom

For the vanilla bean butter cream:
4 tbs butter at room temperature
1 vanilla bean
1 1/2 cups powdered sugar
1/4 cup granulated sugar
2 tsp vanilla extract

Optional: colored sanding sugar for decorating

In the bowl of a stand mixer with the paddle attachment, beat the butter, sugar and vanilla on medium speed until light and fluffy, about 2 minutes.  Add the egg and egg yolk and beat until well blended.  Reduce the speed to low and stir in the flour, baking soda and cardamom until the dry ingredients are thoroughly incorporated.

Turn the dough out onto a lightly floured work surface and divide it in half.  Roll each half into a log about 8 inches long and 1 1/2 inches in diameter.  If you are dressing up the edges in colored sugar, pour about 1/4 cup sugar onto a piece of waxed paper or flat platter.  Roll the dough logs in the sugar to coat the outside.  Wrap each log in wax or parchment paper and refrigerate until firm, 1-2 hours (you can freeze the dough for up to 6 months at this point as well).

When you're ready to bake the cookies preheat your oven to 350 degrees.  Line 2 baking sheets with parchment or a silicone liner.

Slice the dough into 1/4 inch rounds and place the cookies about 1 inch apart on the baking sheets.  Bake until the cookies are firm and the edges just begin to turn golden, about 12-15 minutes.  Let the cookies cool for about 2 minutes on the baking sheets and then transfer to a wire rack to cool completely.

While the cookies cool, make the vanilla butter cream.  Beat the butter for about 2 minutes until it  becomes creamy.  Slice the vanilla bean in half lengthwise.  Using the back of your knife, scrape the vanilla bean caviar from the pod.  Add the vanilla caviar to the butter along with the powdered sugar and beat the mixture on low speed.  Gradually add the granulated sugar and then the vanilla extract until fully combined, light and fluffy.

Spread a heaping teaspoon of butter cream on the bottom of one cooled cookie and then top with another cookie.  Repeat with the remaining cookies and cream  Store the filled cookies in the refrigerator in a sealed container (alternately, you can store the unfilled cookies at room temperature and the butter cream in the refrigerator until ready to fill).


Monday, November 11, 2013

Spiced Apple Glühwein


I've been restless lately.  Antsy, if you will.  Germany is a great place to be, but I haven't found my "thing" here yet.  You know that thing that I mean.  It's the one that gets you out of bed in the morning and makes you excited for the day that's to come.  I'm not sure how I want to spend my time- what would be the most valuable way to spend the hours I have free during the day.  Do I want to volunteer on the base?  Take German language courses?  Work on my fitness or simply explore the area and work on my photography?  Not knowing what to do with my time means I usually end up roaming around doing not much of anything.  That's about the least fulfilling way to spend my time and it's been incredibly frustrating.


What I've been up to lately in my journey to find a purpose, my "thing" if you will, is planning several upcoming family getaways.  At the very least it's a nice distraction.  We've done quite a bit of traveling around Germany and it's been wonderful to see the culture and history of the country we're living in.  But my restless spirit is in need of more.  This past weekend was the start of that "more"  for me.  Hours of scouring the internet and pouring through travel books led to a whirlwind trip to Alsace, France. 


We spent the weekend gazing up at the most stunning Cathedrals and searching out castles and sunset views of the Alsatian wine country.  It was incredibly beautiful.  I gazed in the window of every boulangerie and patisserie we passed.  The kugelhopf that Alsace is known for was featured in every shop.  There were half timbered houses lining the streets and canals in an area of the town of Strasbourg called "Petite France".  Here we wandered around and found flea markets and food vendors lining the sidewalks.  I scored the best fromage blanc with cinnamon and plums at a stall right next to live geese and ducks for sale.  Seriously?  I suppose the French take fresh food very seriously.

As we drove home last night through the first snowfall in the Black Forest (can you get more fabulously cliche than that?), I felt renewed.  I have a few souvenirs in my wine cellar and additions to my pottery collection, but the best thing that I brought back was a peace that I think will last until the next big adventure.  In the meantime, I have a Thanksgiving feast for all of our American friends to whip up and a trip to Rome to plan.  I'm so looking forward to a little bit of home as well as the newest city to conquer.  I guess finding my "thing:" can wait just a little longer.


Spiced Apple Glühwein
Serves 4-6 people.  Adapted from a traditional German recipe.
For the printable recipe, click here.

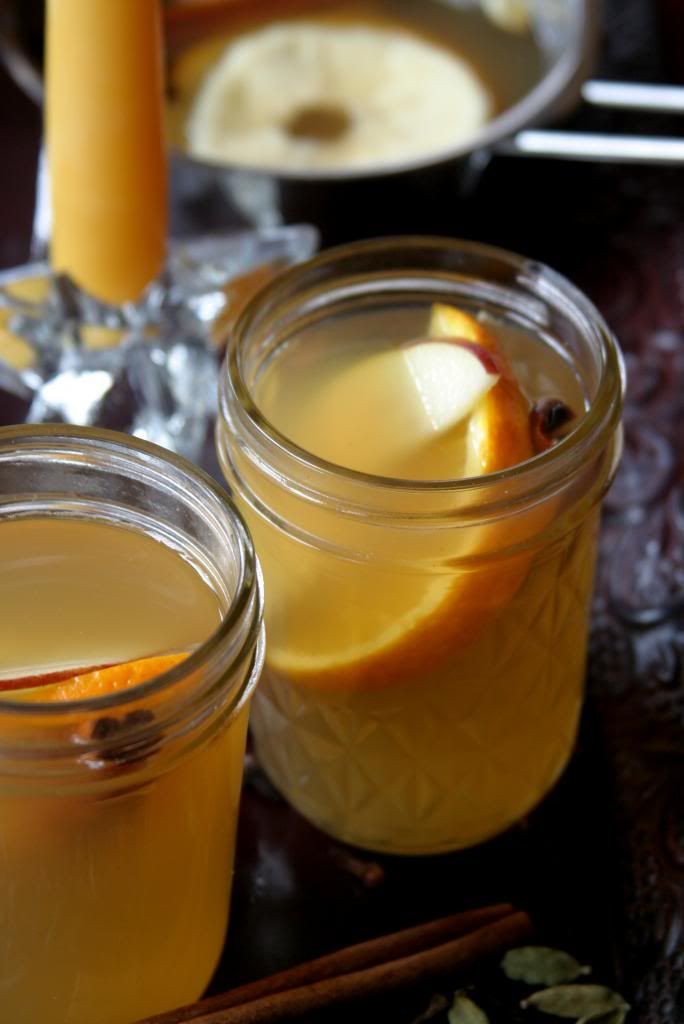
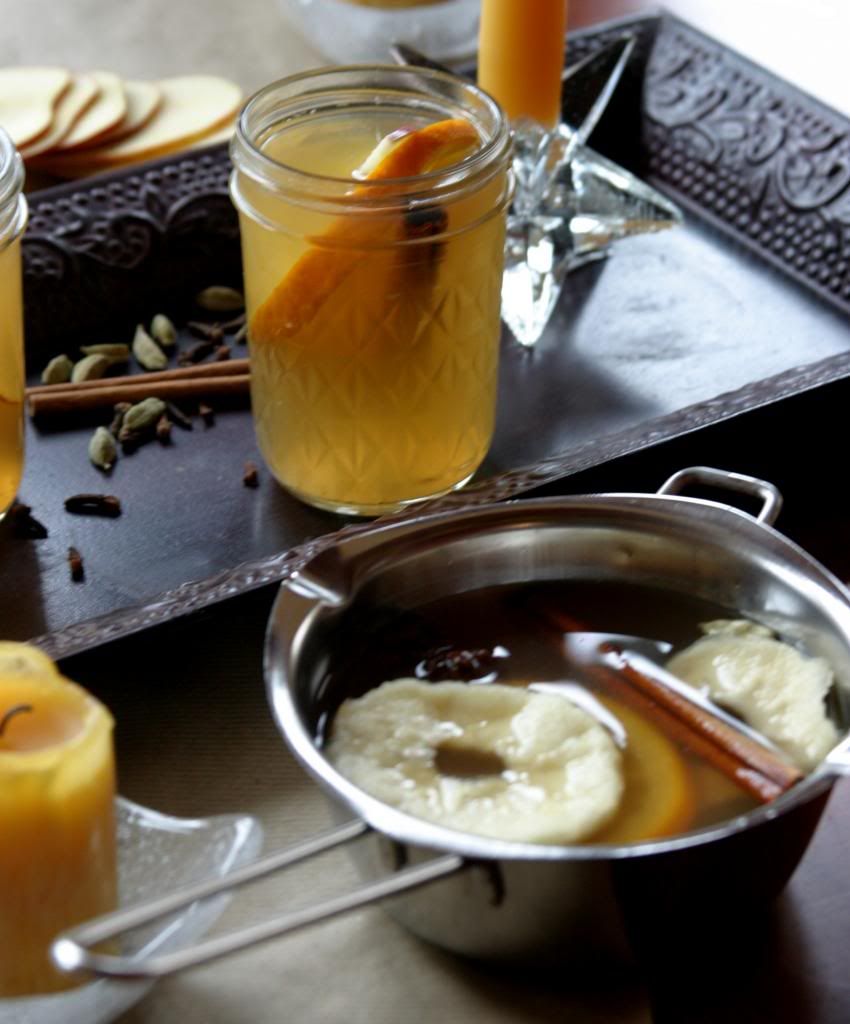
As the winter kicks into gear here in Europe, this is the sort of warm drink that you can find in every Christmas market, crepe shop and corner restaurant.  Whether you call it mulled wine, vin chaud or glühwein the constants are warm wine and wintery spices. What else goes in is up to you.  I like the traditional red wine but sometimes it can be too sweet and heavy.  This white wine version is light and lightly spiced- perfect for sipping with a house full of friends and family on a chilly Thanksgiving afternoon or after a few hours of raking leaves in the yard.  You can let it simmer on the lowest setting on your stove top or pour it in a slow cooker set to low and leave it on the counter for everyone to sample.  When I made my version pictured here I put the whole spices straight into the pot with the juice and wine.  I think I would have liked a bit more of the spice flavor to come through so I am suggesting that you toast the spices until fragrant before stirring them into the wine.  The recipe below reflects this change. 

1 bottle of dry white wine such as a Pinot Gris, Sauvingon Blanc, or Viognier
1 cup of unsweetened apple juice (preferably fresh pressed and unfiltered if you can get it)
3 tbs raw or turbinado sugar
1 orange sliced into thin rounds
8 slices of dried apple
3 cinnamon sticks
5 whole cardamom pods
1 star anise
8 cloves
thinly sliced apple for serving

In a medium pot stir together the wine, apple juice, sugar, orange slices and dried apple.  In a separate small, dry pan toast the spices over medium low heat for just a minute or two.  You'll know they are ready when the spices become very fragrant.  Stir the spices into the rest of the ingredients.  Heat the glühwein over low heat for at least 15 minutes before serving.  Serve each cup with a slice of apple (and a cinnamon stick if you wish).


Monday, October 7, 2013

Red Lentil and Tomato Soup


This soup has been haunting me for two years.  It's one of my absolute favorites and I think I have made and photographed it at least three times in an attempt to share it with you.  Not a single photograph has ever been worthy of posting.  Seriously.  Not.  One.  Ever.

Until today.  {Insert me jumping up and down clapping in glee here!}  I've come to the conclusion that my photography woes with regards to this soup have been due to three factors.  First, it's taken me forever to really feel comfortable with my camera skills, capturing the light in an attractive way and food styling abilities.  I think I may be at the point where I've gotten the hang of it. Or maybe I just got lucky on this one.  For today, at least, I'm not going to question it because it means I finally have some decent photos to share with you.


Second, I don't often plan what recipes I'm going to make and when I'm going to make them.  That sort of leaves me at the mercy of whatever lighting I have on the day I decide to whip up a batch of something new.  In the case of this soup I seem to only make it on rainy and cloudy days when I can't squeeze out enough light to make even the prettiest cake or cookie look edible, let alone a humble soup.  But really the biggest problem I've been having is that fact that, let's face it, the soup is not the most attractive color.  Some things are just really hard to make look enticing in a photo and the mustard-like color of the lentils just is not very photogenic. 

But by golly, I think I've finally managed to make it look like it's something you might want to eat.  And thank goodness because it really is an awesome soup.  Thank you pretty German morning light from my big back windows.  Thank you Anthropologie for the sweet little napkin that makes all of my food look awesome against it and IKEA for the rolling kitchen cart that helps me find just the right spot to take my pictures.  And thanks to you- my faithful readers- for having the patience and fortitude to stick it out with me through the oddly colored and poorly focused photos of my past with the hope that I may just find my stride and finally deliver on a soup that took me two years to get right.


Red Lentil and Tomato Soup
Makes 4-6 servings of soup. Slightly finessed from Fine Cooking.
For the printable recipe, click here.

This soup is pretty darn perfect for my family's taste, but it is infinitely adaptable.  My husband, ever the carnivore, likes a bit of shredded chicken or turkey stirred into his bowl.  The greens add a really nice slightly bitter note to the soup, but are certainly not necessary and the soup is quite good without them.  If you choose to use them, you can throw in whatever you have in your fridge.  I've used kale, spinach, swiss chard and even bok choy with equal success.  And you can go totally vegetarian (even vegan!) by using vegetable stock as your liquid.  The possibilities here are endless.  The real key is the red lentils, which I would not substitute with any other sort of lentil as they cook differently.  You can find them in many grocery stores these days so seek them out near the rest of the dry legumes and grains in your local store.

1 medium onion, chopped finely
1 large carrot, peeled and diced
1 stalk celery, diced
1 tsp curry powder or garaham masala
1 tsp dried cumin
1/2 tsp smoked paprika
1 pinch cayenne pepper (to taste)
a generous pinch of sea or kosher salt
1 14 oz. can diced tomatoes in the juices (fire roasted are my favorite to use in this soup)
4 cups home made or low sodium chicken stock (to go vegetarian, use vegetable stock)
1 cup dried red lentils
2 tbs chopped sun dried or slow roasted tomatoes
1 heaping cup chopped bitter greens such as kale, swiss chard, or mustard greens

Heat 2 tbs olive oil in a large saucepan (3 qt) over medium heat.  Add the onions and cook, stirring, until they have softened and become translucent (about 5 minutes).  Add the carrots, celery, curry powder, cumin and smoked paprika and stir for about 1 minute or until the spices toast and become very fragrant.  Add the salt, stock, tomatoes and their juices, and lentils to the pot.  Stir continuously until the soup comes to a boil so that the lentils do not stick and form clumps.  Once the soup reaches a boil, turn the heat down to medium low and simmer uncovered for about 45 minutes or until the carrots and lentils have softened.  Add the sun dried tomatoes and greens and cook for another 4-5 minutes to soften the greens.  Taste for seasoning and add salt as needed.  Serve immediately.

The soup will keep for several days in the refrigerator, though the lentils will soak up much of the liquid.  Simply add a bit or water or stock when you reheat it.  You can also freeze the soup for up to three months.


Tuesday, October 1, 2013

Marmalade French Yogurt Cake


Here's the thing about European kitchens- they're small.  And I don't mean just the square footage.  Every single thing in my kitchen seems to be made for smaller people.  Or people who don't eat.  Or cook.  Or bake. 

I knew it going into the move and did what I thought was my best to prepare myself- including leaving a good 1/3 of my gear behind knowing I wouldn't be able to fit it anywhere.  But the reality of a situation is often times far beyond what you anticipate.  Perhaps I'm a spoiled American girl used to her super-sized appliances.  Sigh.  Unpacking the last of my kitchen boxes yesterday made me realize how "American" my expectations still are.  I simply have to learn to eat and shop like the Europeans who I know must eat because I constantly see them toting around their shopping baskets to and from the markets.  I just don't know how they fit all their groceries into their kitchens.  Maybe I need to do some spying into my neighbors' cabinets and fridges.  It may help me gain some valuable insight into how to survive the next three years with my sanity intact.


I would guess that a basic rule of European kitchens is not to waste anything.  Space is not wasted nor are the supplies packed into the tiny cupboards and fridges.  In the spirit of wasting nothing (including the giant container of Greek yogurt that I bought without thinking about just where on Earth I was going to store said huge tub), I came up with this cake.  The idea was borne from both my frustration over not having anywhere to store my yogurt and from a wonderful find at the bottom of a box I was unpacking- a jar of marmalade from my former life as an Etsy jam seller.  Full disclosure: I don't like marmalade at all.  I'm not a fan of the bitter notes of citrus peel.  But there was no way I was letting this one go unused.  It was the last of a batch that was made from the gorgeous trees in my California backyard, a mix of orange, honey tangerine and Meyer lemon.  Not only is the jar getting close to it's expiration date, the nostalgia was just too much for me to ignore.

I've made a cake paring citrus with olive oil before and I enjoyed the combination.  This time around I decided that I wanted something a bit more simple.  Seeing as how I have no mixer or room for several bowls on my counter, any recipe that makes use of a single bowl and a spatula is just about perfect for me these days.  It's light, moist and not too sweet.  In other words, a cake tailor made for tea time, breakfast or a midnight snack that is just as good the day it's made as it is three days later.  Even my kiddos, professed marmalade haters just like me, LOVE this cake.  I still have 2/3 of a jar left of my precious marmalade and that giant tub of yogurt shoved into a corner of my tiny fridge.  Which means that I have just enough to honor my little one's request for more cake!


Marmalade French Yogurt Cake
Makes 1 standard sized loaf.  Adapted from Bon Apetit Magazine.
For the printable recipe, click here.

This is the sort of cake you can throw together at the drop of a hat, requires no special skills or equipment, and makes you seem like a baking genius.  Who could ask for anything more?  I used non-fat Greek yogurt and a full bodied olive oil for my cake and it turned out beautifully moist and light in flavor.  It's one of those "use what you have" sort of recipes.  One caveat-be sure to use a good quality marmalade as its flavor will make all of the difference.  This cake will last for several days wrapped well or for a few months in the freezer.

1 1/2 cups all-purpose flour
2/3 cup sugar
2 tsp baking powder
2 large eggs
1/4 cup marmalade
2/3 cup Greek yogurt
1/3 cup olive oil

Preheat your oven to 350 degrees and butter and flour a standard sized loaf pan (or spray with non-stick spray).

In a large bowl whisk together the flour, sugar and baking powder.  Stir in the eggs, marmalade, yogurt and olive oil.  Pour the batter into the prepared pan and even out the the top.  Sprinkle 1 tsp sugar over the top.  Bake the cake for 45-50 minutes or until a toothpick inserted into the center comes out with moist crumbs clinging to it but free of wet batter.  Cool the cake in the pan until it is just warm to the touch, then remove the cake from the pan and place it on a wire rack to finish cooling. 


Tuesday, February 26, 2013

Spicy Pork, Potato and Pepper Stew

There are some foods that are just more photogenic than others, let's face it.  I'm pretty sure I've got my cookies, cakes and salads down pat by now.  They always look pretty, even if the picture isn't perfect.  I'm admittedly a novice photographer.  I don't know the technical terms for any of the things my camera can do.  I just shoot by intuition and quite a lot of practice and bad photos along the way.  I think I'm getting better.

After almost two years of blogging I have finally found the perfect window so taking a better picture in good lighting is now possible in my house in the dead of winter (of course, it helps that we've just now gotten around to getting the construction materials from projects around the house out of there so I can actually go into it).  Summer photos are easier as the light through my big kitchen window is quite bright in both the morning and afternoon, but winter and spring have continued to be a struggle.  I'm never completely satisfied with the final result.  Until now.  It's a been a long, slow learning curve for me.  But I think I can finally begin to say that the photographs I present here are starting to represent the real me.

But that learning curve has resulted in many, many recipes that will never be shared with you because the food just doesn't look right.  I find meats the hardest to shoot- I just can't make them look appetizing.  And there's a spicy lentil soup that my family just adores that always looks too weirdly orange and lumpy to show off.  Stews and chilis fit in the "tricky to photograph well" category as well.  But maybe, just maybe, I'm getting somewhere with my photography.  Because I think I've actually got a couple decent shots to go with a wonderful recipe that I'm relieved I can share.  A stew worthy of a good picture, two pictures even, that I am proud to share with you, my friends.
Spicy Pork, Potato and Pepper Stew
Serves 4-6 people.  Inspired by the stews in the Feb/March issue of Fine Cooking.
For the printable recipe, click here.

There's a bit of spicy in this stew from a hint of chipotle chili powder and some roasted green chilis.  I found it to be just right and not overwhelmingly hot, and my 8 year old son agreed and heat-hating husband agreed with me.  Feel free to add or subtract a bit of heat to your liking however.  I confess to using jarred roasted peppers in my stew.  I decided that in a stew with this many ingredients and length of cooking time that roasting my own would really be unnecessary.  I'm glad I didn't go through the trouble of the extra step because I perfectly satisfied with the flavor of the jarred peppers.  You could certainly roast your own if you want to, but it is not essential.

3 lbs boneless pork shoulder or Boston butt, trimmed of excess fat and cut into 1 1/2 inch cubes
3 tbs vegetable oil
1 medium onion, coarsely chopped
1 medium carrot, coarsely chopped
2 medium celery stalks, coarsely chopped
3 cloves garlic, chopped finely
1 tsp dried oregano
1 tsp ground cumin
1 tsp chipotle chili powder
1 tbs chopped roasted green (or hatch) chilis
1 12 oz beer, I used a dark lager
2 1/2 cups low sodium chicken broth
1 1/2 cups water
1 lb (about 2 medium) yukon gold or red skinned potatoes, peeled and cut into 1 inch cubes
4 medium shallots, quartered
2 roasted red peppers, cut into 1 inch pieces
1/4 cup chopped cilantro
salt and pepper to taste
lime wedges, for serving

In a large Dutch oven or other heavy duty pot, heat the oil until shimmering.  Add about 1/3 of the pork in a single layer and brown well on 3-4 sides.  Remove the meat and repeat the browning process two more times with the remaining 2/3 of the pork. 

You need about 2 tbs of oil in the pan for the vegetables.  If you need more add it now.  Once hot, add the onions, carrots, celery and a pinch of salt and pepper and cook over medium heat until they begin to soften, about 5 minutes.  Stir and scrape the bottom of the pot often.  Add the garlic, oregano, cumin, chili powder and green chilis to the pot and stir until fragrant, just one minute.

Add the beer to the pot and scrape up any browned bits from the bottom.  Raise the heat to medium high and simmer until the beer is reduced by half, about 5 minutes.  Add the chicken broth and water  and bring to a simmer.  Return the meat to the pot along with any juices that have accumulated.  Lower the heat to maintain a constant simmer.  Place the lid on the pot and simmer for 30 minutes.

Add the potatoes and shallots to the pot after the first 30 minutes of simmering.  Replace the lid and continue to cook for another 30-45 minutes.  At that point, add in the roasted red peppers.  Replace the lid and continue cooking for 30-45 minutes or until the pork is very tender and all the vegetables have cooked through.  Stir in the cilantro and remove from the heat.  Serve warm with a wedge of lime.