Showing posts with label Cookbook. Show all posts

Friday, March 18, 2016

Saint Joseph's Cakes {Nana's Recipe}


A few years ago my mom sent my sister and I a message asking us what recipes we'd really love to have from when we were kids that she and our grandmother had made for us.  We sent back a whole list of recipes, things that we rarely make ourselves and some that have become staples, that were the day to day must haves from our childhoods.  There were pasta and bread recipe requests as well as the cakes and cookies that were the highlights of family meals and celebrations.  Clearly, Mom had a plan to do something with this list of favorites.  But I think life got in the way and she was never able to do what she had hoped to.

Fast forward a year and I was growing weary of asking Mom for the same recipes over and over again (Why did I not write that down?  Where did that one go in the latest move?).  Plus, I was pregnant with my third baby and eager to get family recipes all in one place so that I could pass them on to my children.  So I made a determined effort to get all of the important baking recipes from my Mom and she and I collaborated in putting together a collection of recipes and stories in one book.  When we made our list of recipes to include, there were some that were absolutely non-negotiable.  Mostly these were the recipes from my Nana that came from Italy and would be completely lost of we didn't make the effort to write them down now.  This "cake" was one of them.

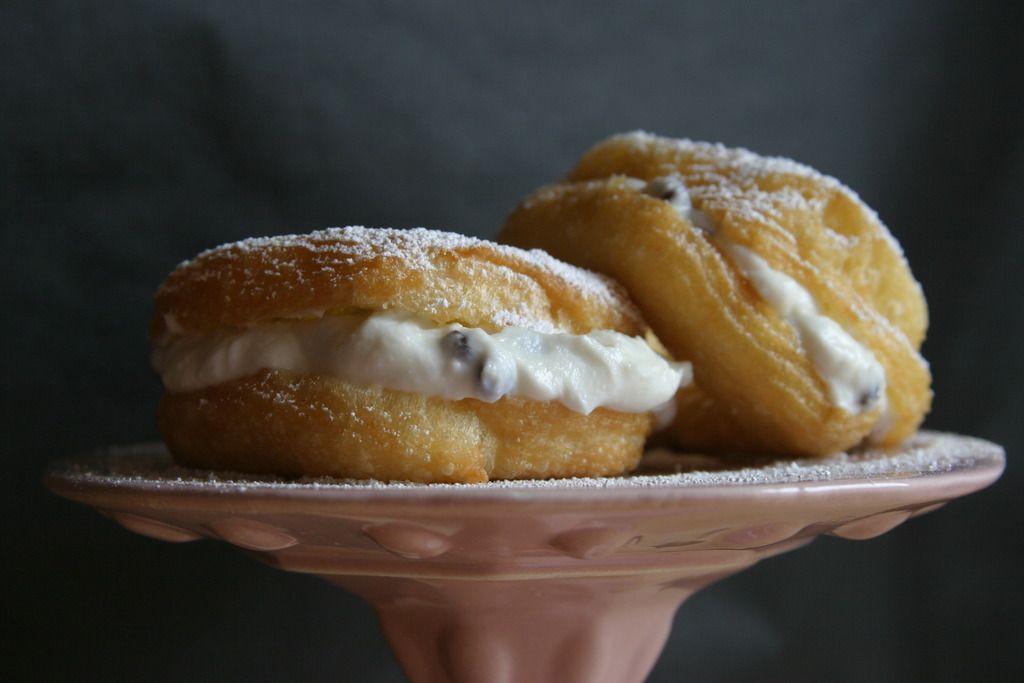
Nana made these cakes every year for St. Joseph's Day, a holiday that is celebrated in her Italian home region on March 19 every year.  They were one of my absolute favorites growing up- a sort of doughnut/French cruller stuffed full with sweet ricotta and chocolate chips.  It was one of the first that I made on my own for my college roommates and even for my students every year when I was teaching.  Now my own children love them and ask for them from time to time.  There was no way that I was going to leave this treat out of our collection.  I did a bit of streamlining of the ricotta filling recipe, but other than that this recipe is all Nana.  I wouldn't have it any other way.


Saint Joseph's Cakes
Makes at least one dozen 3 inch cakes.
For the printable recipe, click here.

These pretty little cakes are very much like a fried cream puff.  Keeping that in mind, they don't do too well after about a day.  So plan to eat them or share them all the day they are made.  Don't fill them until you are ready to serve or they will become too soggy.  The filling is the same as you would use to fill a cannoli so any leftover can be used to fill bought cannoli shells or even baked cream puffs (or if you are like me, straight off the spoon standing in front of the fridge).

½ cup neutral-flavored oil                                   
1 cup water                     
Salt
1 cup pastry (or all-purpose) flour
1 tbs sugar    
4 large eggs                                           
½ tsp each grated lemon and orange rind

Also: Neutral-flavored oil for frying
Chocolate Chip Ricotta Cream (recipe follows)
Powdered sugar for dusting the tops

 Cut several squares of parchment paper into 4 inch squares.

Combine oil, salt, and water in a saucepan. Bring to a boil. Add flour all at once and mix well with a wooden spoon until the dough leaves the side of pan. Remove from the stove and let it cool off a little.  Add eggs, one at a time, mixing well after each addition. Add sugar, grated peels and mix well again.

Heat oil in a large pan that’s about 4 or 5 inches deep.  Fill a large pastry bag fitted with a large star tip with the mixture. On each square of parchment paper, pipe out a 3” circle of dough. When the oil starts to shimmer on the surface drop the parchment with the dough circles into the oil. The paper will come off in a few seconds and you can remove it. Fry until golden brown, flip, and fry until the other side is golden. Let cool completely.

Slice in half and fill with chocolate chip ricotta cream.  Dust with powdered sugar.

Chocolate Chip Ricotta Cream
2 3/4 cup ricotta
3/4 cup powdered sugar
1/4 cup mini chocolate chips
1 tsp vanilla extract
1 tsp finely grated orange zest
1/2 tsp fresh orange juice

Line a fine mesh sieve with a layer of cheesecloth and place over a bowl.  Put the ricotta into the sieve and place the whole thing into the refrigerator to drain overnight (covered with plastic wrap).

In a large bowl, whip the drained ricotta and powdered sugar with a wooden spoon or spatula until fluffy.  Beat in the chocolate chips, vanilla, orange zest and juice.  Refrigerate, covered, at least one hour or until ready to use.


Friday, February 19, 2016

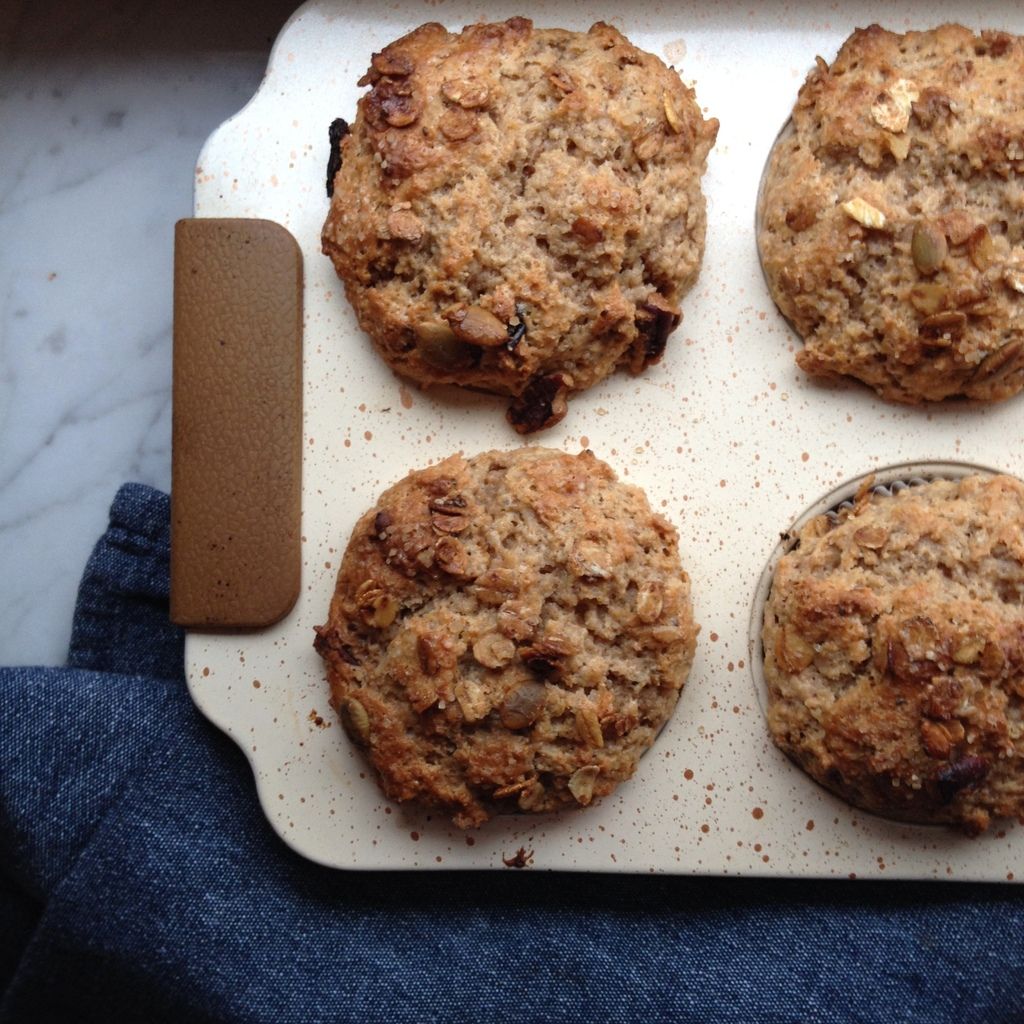
Whole Wheat Granola Muffins


Sometimes I just stand quietly in the doorway and watch my kids.  When the days seem filled with rushing around and it seems like the people in my family barely notice each other, I try to purposely stop and simply take notice. 

My baby girl is at the age where she is beginning to understand how to play by herself so she'll wander around with her stuffed animals or books talking her secret little language to herself.  She pretends to read the books and she gives her animals huge hugs and kisses complete with a loud and thrilled "MWAH!" with each kiss.  It's the sweetest thing to watch, truly, and it makes me thankful that she came along when she did to remind us all how happy we can be.  She is so blissful and genuine and full of unconditional love.  It's pretty amazing.

Then I watch my boys standing still, running, being big brothers and I am amazed all over again.  My middle guy is still so adorably snuggly in one moment and thoughtful and grown up sounding in the next.  He struggles sometimes like when he's trying to learn to read (in two languages at once but he's doing great) and I love that he still needs and wants my help.  But then he blows me away with what he knows and how fast he can do math.  He's at this perfect age and I just don't want him to get any older.  Is that possible?

Of course, if I could stop my kids aging I probably wouldn't.  Because it's so cool to get to watch them grow into real people with thoughts and feeling all their own.  My oldest son is a, gasp and moan, tween.  Did you know boys do the tween thing too?  And that they are just as moody and unpredictable as girls?  I.  Had.  No. Idea.  He's also hit the age where I'm not allowed to hug him anymore or tell him that I love him.  Or so he thinks- it hasn't stopped me yet.  Despite being stuck in this horrible hormonal no-man's-land, every once in a while a take a quick look at him and I can see this almost adult-ness about him.  The little boy roundness is all gone and there's the shadow of the man he'll grow to be.  Sort of the opposite of Peter pan, you know? I can rely on him and have thoughtful conversations with him.  Why on Earth would I want to stop that from happening?

I've found myself doing this a lot lately.  Just watching.   It makes me so grateful for the gift of these people in my life.  I think I will do it more often.  I take a lot (an understatement) of pictures of my kids.  We get to have so many adventures here that I want to capture.  But watching is different.  Instead of just taking pictures of my kids I'm actually seeing them.  And that's really all any of us want, right?  To be truly seen by the people that we love.


Whole Wheat Granola Muffins 
Makes 12 muffins. 
For the printable recipe, click here. 

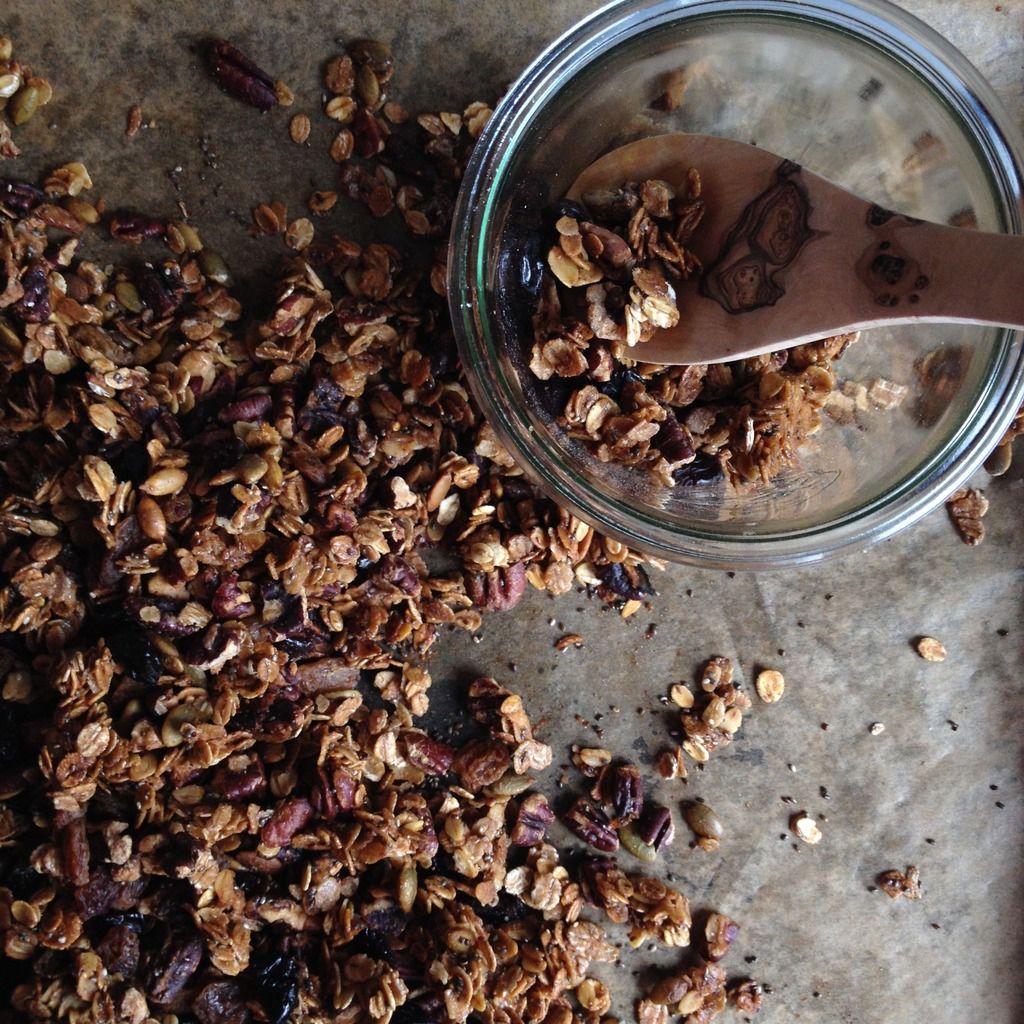
This is a very comforting muffin.  Great for the quiet moments at the start of a day.  But it has the added bonus of actually being healthy too.  Yippee!  I make my own granola and keep it in a jar on the counter, so that's what I use for my muffins.  It's a pretty simple granola- a little maple syrup, pecans and pumpkin seeds, oats and dried cherries.  It's based on a basic outline in Maggie Batista's book Food Gift Love.  You can use your favorite granola but this muffin works better with a simple granola rather than one filled with a ton of mix-ins.  In the recipe for the muffins I give a range for the milk measurement.  Every yogurt is different and you don't want one that is too runny.  But if the batter is too stiff after mixing in the lesser amount go ahead and add in the last two tablespoons.  I like to finish the muffins with a sprinkle of granola before tucking them in the oven.

1 cup whole wheat flour
1 cup all purpose flour
1 cup light brown sugar
1/2 tsp cinnamon
1 tsp baking powder
1/2 tsp baking powder
1 cup granola
1 1/3 cups Greek-style yogurt
6- 8 tbs whole milk
1/3 cup neutral flavored oil
1 tsp vanilla extract

Preheat oven to 400 F.  Line standard muffin pan with muffin cups or lightly butter.  Set aside.

In a large bowl whisk together the  flours, sugar, cinnamon, baking powder and baking soda.  Stir in the granola.

In a separate bowl mix together the yogurt, oil, vanilla and 6 tbs milk.  Gently stir the wet ingredients into the dry.  If the batter is very stiff or dry stir in the remaining two tablespoons of milk.  Divide the batter evenly among the muffin cups and sprinkle with a bit of granola or raw sugar if desired. 

Bake for 16-18 minutes.  Muffins are down when the tops are gently browned and spring back to the touch.  Cool the muffins in the pan on a wire rack.  Muffins will keep for up to three days in an airtight container but are best eaten within 24 hours.


Tuesday, October 27, 2015

Mom's Chocolate Pear Upside Down Cake


Tradition [truh-dish-uh n] noun : 1. the handing down of information, beliefs, and customs by word of mouth or by example from one generation to another without written instruction 2. characteristic manner, method, or style


I've been struggling with this post, which is why it has taken so long to arrive in this space.  I keep sitting down to write and coming up blank.  I love this recipe, I love its origins and what it has become.  So what's the problem?  And what does that have to do with the definition of tradition that I wrote above?  Both valid questions.


The thing is, I really don't know.  I can guess, sure, but it's not clear to me yet what the block is about.  Too many things to list here, I suppose- maybe in a future post.  Probably all boiling down to life, kids, responsibilities.  You know, the stuff that distracts from really living fully.  Buuuuut...... I try not to make this blog a personal diary so much as an exploration of the thoughts that run though my day with enough frequency to make them relevant.  It's not a true confessions page though.  So lets keep it lighter, shall we?  

In the meantime I'm trying to overcome my blogging block by going back to my roots.  Which always leads me to my Mom.  Hence the nod to tradition referenced earlier.  The cake I'm offering up today is one of those cakes that I can remember her making since I was a small child.  She grabbed the recipe from a magazine long ago and it was one of those total 70s recipes.  Canned fruit, maraschino cherries, you know the kind.  She did away with the cherries from the start but pretty much stuck to the recipe otherwise.  I thought I might take it a step further (and kick tradition to the curb, if you will) and modernize it just a bit more.  So gone is the can of sugar-laden fruit; replaced instead by gently poached pears who's poaching liquid is also used to make the caramel-ly goodness that is characteristic of an upside down cake.  It's a nod to tradition without being strictly traditional.  And maybe just the thing to kick my blogging butt out of its funk.


Chocolate Pear Upside Down Cake
Makes 1 8x8 inch square or 9 inch round cake.
For the printable recipe, click here.

This update of my Mom's classic is enhanced with poached pears but its still a simple cake at heart.  If you don't have time to poach your own pears, by all means use pears canned in their juices (not in syrup!).  The recipe has pecans in the ingredient list but you won't see them in my photos because my little family doesn't appreciate them.  So I guess they're optional but really great if you have them.

For the pear topping:                   
1/4 cup (4 tbs) unsalted butter           
1/2 cup packed brown sugar               
2 tbs pear poaching liquid                

4 poached pear halves (recipe to follow)                       
1/4 cup coarsely chopped pecans           
                       

For the cake:
1 1/4 cup sugar    


1 1/2 cups all purpose flour                        
1/4 cup cocoa powder
1/2 tsp baking soda
1/2 tsp salt
10 tbs softened butter
1 tsp vanilla extract
2 eggs
1/2 cup buttermilk

Preheat oven to 350 degrees.

Melt the 1/4 cup of butter and pour it into a 9 inch square cake pan.  Drizzle the corn syrup over the butter and then sprinkle the brown sugar in the pan. 

Cut the pear halves into 4 equal portion lengthwise and arrange the pieces in a sunburst pattern over the mixture in the baking pan.  Sprinkle the chopped pecans around the pears.

Sift together the flour, cocoa powder, baking soda and salt.  Set aside.

In a large mixing bowl (fitted to a stand mixer or with a handheld mixer with beaters attached), beat together the butter, sugar and vanilla until light and fluffy.  Add the eggs one at a time, beating fully between additions.  Add the dry ingredients alternately with the buttermilk in three additions.  Mix until thoroughly combined.

Pour the batter into the pan gently so as to disturb the pattern of the pears as little as possible.  Bake for 45-55 minutes, until a toothpick inserted into the center of the cake comes out clean of batter or very wet crumbs.  Cool the cake for about 5 minutes and then run a knife around the edges of the pan to loosen.  Invert the cake onto a serving platter.  Cut into squares.


Poached Pears
2 ripe but still firm pears
1 quart water
1/2 cup honey

Stir the water and honey together in a 2 quart pot.  Bring the mixture to a boil over a medium heat.  In the meantime, peel, quarter and core the pears.

When the water/honey mixture comes to a boil add the pears.  Turn the heat down to medium and simmer the pears for 20-25 minutes or until the tip of a sharp knife easily pierces the pears.  Remove the pears from the poaching liquid and cool making sure to reserve 2 tablespoons of the poaching liquid.

Pears can be stored in the cooled poaching liquid in the refrigerator until use.


Friday, December 12, 2014

Just a Little Thing...A New Book and My Favorite Christmas Cookie Ever

A year of work has finally come to an end.....


After a lot of recipe collecting and bugging my Mom for her instructions for my favorite childhood treats, writing, editing, photographing and a few extra pounds from, ehem, taste testing.....this labor of love is finally finished.  It's just a little thing- 18 recipes that represent the collective kitchen wisdom of three generations of my family bound together into one sweet book.  My Mom and I worked together to make this book before some of these recipes disappeared forever without being written down.  My original intention was to give copies as gifts for my family, but I got so many requests for a copy from friends far and wide that I decided to self publish the book and offer it for sale.

So if you head on over to Blurb, you'll find My Mother's Kitchen for sale in a few different formats.  You can grab a hard or soft cover 7x7 inch book or download an ebook for your iphone or iPad.  I'd be honored if you were fond enough of me or my recipes to purchase yourself a copy.  Thrilled and humbled beyond belief as well.


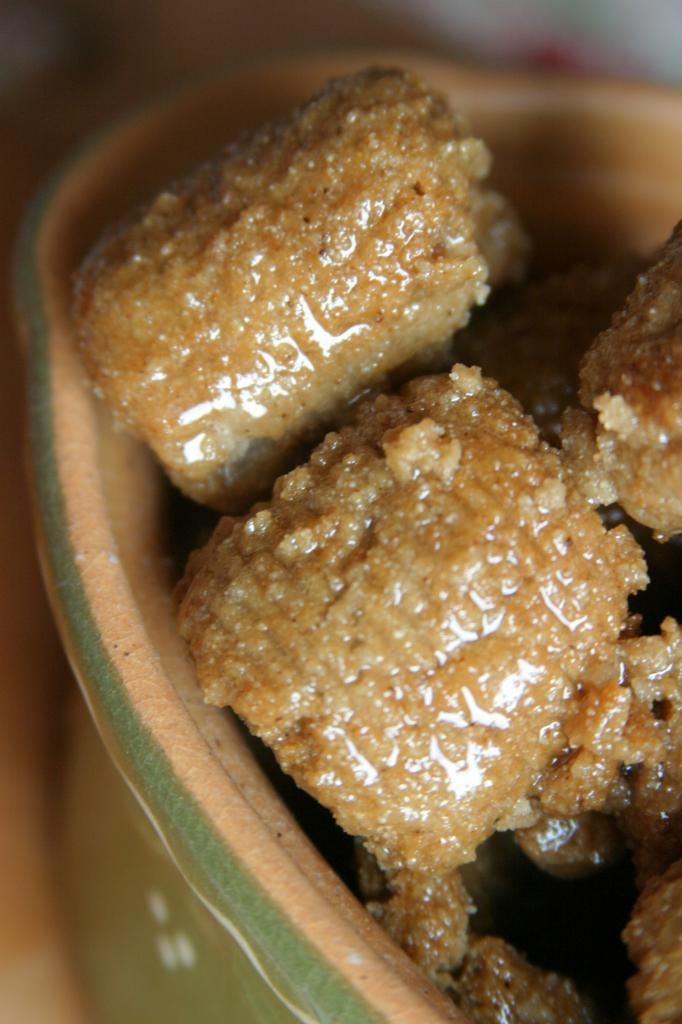
I thought I'd give you a little taste of what's in the book today.  In keeping with the current theme of European cookies, here's my favorite Italian cookie.  We always called them dardeeds because that's how my Nana pronounced it, but I have since come to find out that the actual name for this cookie is turdilli.  I'm sticking with dardeeds, but you can call them whatever you like.  Maybe call them delicious.  Turdilli are definitely a regional secret from Calabria- most people have never seen or heard of them.  I aim to change that right now.


Turdilli {or Dardeeds}

Makes a mountain of cookies.  Divide the recipe by 3 for a more reasonable amount.
For the printable of this recipe, click here. 


3 cups neutral flavored oil           
2 cups dry red wine               
1 cup whiskey               
11 1/2 cups + 1 tbs all purpose flour       
8 1/2 cups semolina flour           
2 tsp sugar               
3 eggs                   
½ tsp ground cinnamon
1 tbs ground clove


Neutral flavored oil for frying
2 cinnamon sticks
12 whole cloves, divided
 2 lbs. honey
1/4 cup sugar


Place the oil, wine and whiskey in a large pot.  Bring to a boil over medium heat.  Boil for just a couple of minutes to burn off the alcohol.  Remove from the stove and cool.

In a large mixing bowl stir together the flour, semolina, sugar, ground cloves and ground cinnamon.  Pour in the cooled liquid ingredients and the 3 eggs.  Mix until you have a cohesive, sturdy dough. 

In a large pot, pour enough oil to fill the pot about three inches deep.  Place the cinnamon sticks and 7 cloves into the oil.  Insert a candy thermometer into the pot.  Heat over medium until the oil reaches 350 degrees.


In the meantime, cut small sections of dough (keep the rest of the dough in a covered bowl) and form ropes about the diameter of your thumb. Cut into ¾ to 1” pieces and roll them on a fork or a wooden board used to roll cavatelli/gnocchi. Fry the dardeeds in batches, turning gently once, until golden.  Let cool.

Rub the sides of a bowl large enough to hold all the finished dardeeds with half a lemon.  Place the honey in a pot large enough to hold all the dardeeds. Add the remain cloves to the honey. Mix the sugar and flour together and add it to the honey also. Warm the mixture to just above a simmer but not quite boiling.  Add the dardeeds and toss gently until they are all coated well. Remove from heat and turn out into the prepared bowl. Keep covered with foil.