Showing posts with label Fruit. Show all posts

Friday, March 4, 2016

Orange Olive Oil Polenta Cake


I'm trying to shake off the gloomy mood around here.  Reading back over my posts as of late, I feel like I've been in a kind of funk and it shows.  So I'm purposefully taking on a decidedly more positive tone today.  Let's see how it fits, shall we?

I reconnected with an old high school friend not too long ago.  She's been through some rough stuff in her life, including some very devastating losses.  But she's the most positive person and I'm always looking forward to reading the things she posts on Facebook and scrolling past the inspirational quotes she finds on Instagram.  Yup, she's one of THOSE people.  Perpetually happy and trying to make the world a better place, one inspirational quote at a time.  We all know someone like that, don't we?  On our worst days we roll our eyes and scroll quickly past.  On our best we think, "Yes!  That's exactly how I feel!". 


A few days ago my friend posted this little gem,

"'It's impossible,' said pride.
'It's risky,' said experience.
'It's pointless,' said reason.
'Give it a try,' whispered the heart."

It's the kind of thing that's layered on top of a photo of a mountain climber or amazing landscape that I usually don't even bother looking at.  But that day I did.  I suppose I was feeling optimistic and it struck a chord with me.  You see, I had done just the thing about a week earlier.  I had put myself out there to be scrutinized and (hopefully) accepted in a role that would take my work to another level.  It was a move very far outside my comfort zone and had required an almost "close your eyes and go for it without thinking too much" sort of move to make it happen.

 
The same day that quote rolled across my screen I got the email saying that although they had enjoyed working with me in the past, there was no room at the moment for me to contribute.  Included in the email was an offer for me to do a bit of behind the scenes work in lieu of the position I was hoping for.  Which is sweet and I'm happy to do anything that will get my foot in the door, but at it's heart it was still what I had dreaded most- rejection.  It's the greatest leap of faith in yourself and your abilities to risk rejection in that way.  My leap, it seems, fell just that short of making it to the other side.

The funny thing is, I'm okay with that.  It was risky, but not impossible or pointless.  I listened to the whispers of my heart and tried.  I think that's win.  Maybe not the win that I was hoping for, but better than giving in to fear and not having tried at all.  It's what I try to teach my kids and what I aimed to instill in my students when I was still in the classroom- getting something wrong or failing is not the worst thing that can happen.  In fact, those moments teach us the best lessons about ourselves and about how to improve for the next time.  Because there will be a next time, you can be sure of it.  So this time, my aim was off a bit.  Next time? Who knows?


Orange Olive Oil Polenta Cake
Makes one 9 x 5 inch loaf.  Adapted from smitten kitchen.
For the printable recipe, click here.

I love this sort of one bowl, quick and easy cake to have around for an afternoon snack or if a friend drops by.  Wrap a sheet of parchment and pretty ribbon around one and you've got a wonderful hostess gift.  The orange (I used sweet cara cara oranges, but blood oranges or valencias would be just as at home here) gives a bright, citrus-y sweetness, the olive oil a bit of depth and the polenta adds just a hint of crunch to the bite that I find irresistible.  The polenta or corn meal that you choose will change the texture depending on how finely ground it is.  The one that I used is a nice happy medium and it suits this cake just fine.  This is a chance to break out that good olive oil you've been saving- with as much as is in the cake you will taste the difference.

1 cup (200g) cane sugar 
3 oranges
1/3 cup buttermilk or plain yogurt 
3 large eggs 
2/3 cup good quality extra virgin olive oil 
1 cup all purpose flour 
3/4 cup ground polenta or corn meal 
1 1/2 tsp baking powder
1/4 tsp baking soda 
1/2 tsp fine sea salt

Butter a 9x5 inch loaf pan and set aside.  Preheat oven to 350 degrees. 

Place the sugar in a large bowl.  Zest one of the oranges over the bowl directly into the sugar (the orange flavor in this cake is subtle, if you'd like to make it more pronounced grate the zest of a second orange into the bowl).  Rub the zest into the sugar with your fingertips to release the oils.

Remove the peel and pith of one orange (supreme the orange) by cutting off the top and bottom to reveal the fruit inside.  Then, run your knife along the curve of the orange to remove the remaining skin and pith.  Holding the orange in your hand, cut away the wedges of orange between the membranes.  Drop the orange pieces into the bowl with the sugar and zest.  Break up the segments into 1/4 inch pieces with your fingers.

Juice the remaining two oranges into a small bowl or liquid measuring cup. You should have about 1/2 cup of juice.  Stir the buttermilk into the juice then pour it into the bowl with the sugar mixture.  Stir the mixture together with a whisk.  Add the eggs and olive oil to the bowl and whisk until fully combined. 

Carefully whisk in the flour, polenta, baking powder, baking soda and salt into the wet ingredients just until incorporated.  Pour the batter into the prepared pan and place in the oven. 

Bake for 50-55 minutes.  The cake will be golden and a knife or toothpick inserted in the center will come out clean.  Cool the cake on a wire rack for 5 minutes.  Run a palette or butter knife around the edge of the pan and invert the cake onto the rack.  Cool completely (right side up).  Wrapped airtight the cake will keep for three days.


Thursday, January 28, 2016

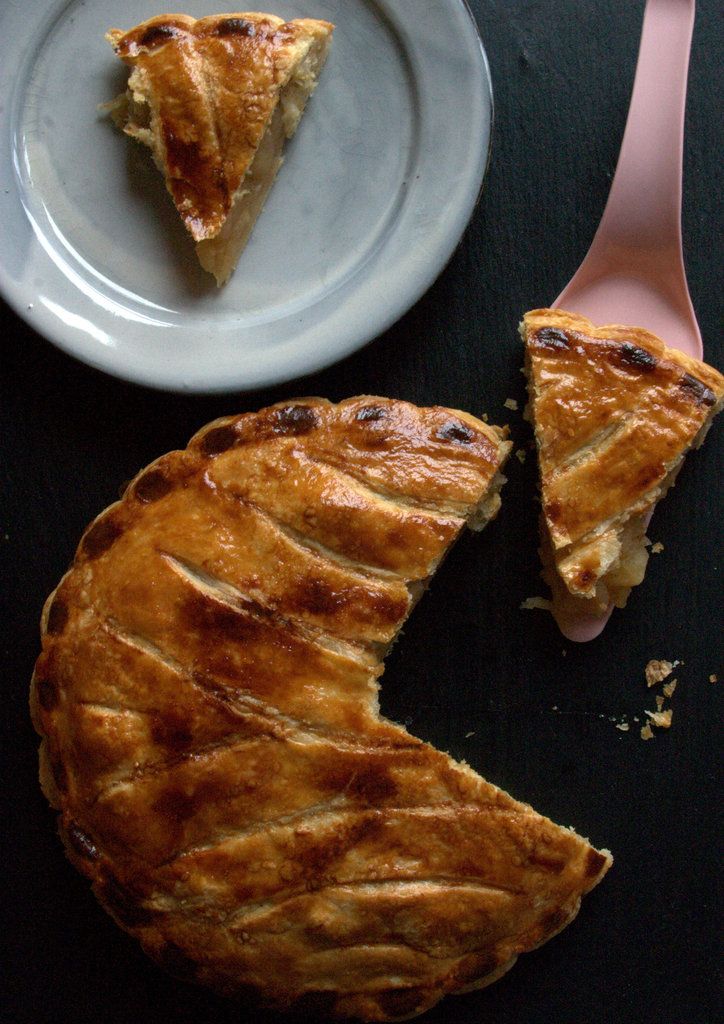
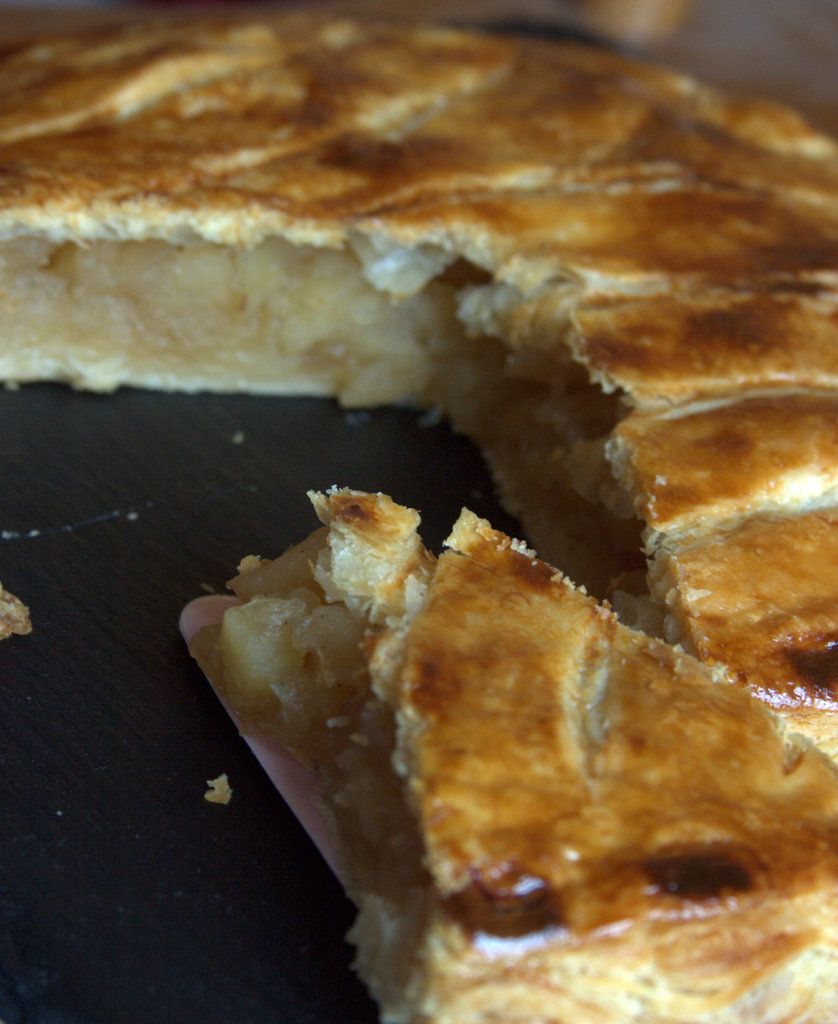
Apple Galette des Rois


You know, it's funny.  Life, that is.  Sometimes you cruise right through it barely noticing the change in time and day.  Just one moment into the next with your head down missing the details, the ups, the downs.  And then something unexpected stops you in your tracks and forces you to look around.

This is the story of my life as of late.  Just kind of going through the motions, each day passing pretty much the same as the rest.  Not in a bad way, but in a less-than-present sort of way.  And then two little things that don't amount to much in the grand scheme of life nearly took my breath away.  Those two little things, really not much more than a few sentences spoken both by people who know me and by those that don't, made me look deep inside and as a result of that introspection to see the world around me in a much different way.  I'm grateful.  It feels good to appreciate the people around me more fully and perhaps even take care of myself with more purpose.

Am I being a bit too cryptic for you?  If I am, you have my deepest apologies.  It's simply that I'm not quite sure what the end result of those few sentences swirling around in my mind will be.  I need a bit more time for that.  But in the meantime, I'll share a few of those words with you.  Because they made me stop and catch my breath and it's my hope that they might just do the same for someone else.

"You are brave enough.  Don't ever think otherwise."


Apple Galette des Rois
Makes 1 9-inch galette which will serve 4-6 people.  Rough puff pastry recipe from in jennie's kitchen.
For a printable version of the recipe, click here.

Not too long ago my sister and I were standing at the counter of a French patisserie ordering pan au chocolat (chocolate croissants) and eclairs when I noticed this beautifully bronzed pastry that I had no name for.  The two of us wondered aloud at what it could be, but were happy to buy our croissants and eclairs and be on our way without too much thought.  A couple of weeks later that same pastry appeared in my Instagram feed (from Jennifer Perillo of in jennie's kitchen) and I learned that what we had seen was called a galette des rois and it is a pastry made in France only once a year for the celebration of Epiphany. I was intrigued by the pastry and even more so when I read through Jennifer's post and saw that she had made her own puff pastry for the galette.  My visions of puff pastry were of huge blocks of butter and a long, tedious process.  Jennifer's recipe was a revelation to me.  So simple- 4 ingredients, a bit of rolling and chilling and I had puff pastry better than any I could buy in a store.  It's a game changer.  The rest of the galette process was just as simple having decided on making an apple filling instead of the usual almond one since my people aren't nut people.  In my house, this galette will be a year-round treat instead of being reserved to once a year, that's how much we love it.

Rough Puff Pastry
1 2/3 cup ( 250 g) all purpose flour
1 tsp fine sea salt
12 tbs (125 g) unsalted butter, at room temperature and cut into cubes
2/3 cup (150 mL) cold water

Place the flour and salt into a large bowl and give them a quick mix.  Toss the butter pieces into the flour and, using your finger tips, blend the butter and flour together until you have a crumbly mixture with some marble-sized pieces of butter remaining.

Stir the water into the flour-butter mixture with a wooden spoon until it just comes together into a dough.  Turn the dough out onto a lightly floured work surface and gently form it into a rectangle.  Working in one direction (left to right or top to bottom, for example) roll the dough into a long rectangle that is roughly 3 times longer than what you started with.  Fold the dough in thirds (fold one end towards the center and then fold the remaining third over the top) so that it resembles a folded letter.

Give the dough a quarter turn and repeat the process, rolling out the dough into a long rectangle and then folding it like a letter.  Wrap the dough in plastic wrap and refrigerate for 30 minutes.

Apple Filling and Finishing the Galette
1.5 lbs apples (3 medium apples), your favorite cooking apple
3 tbs light brown sugar
1/3 cup water
1 tsp vanilla bean paste or 1/2 vanilla bean, split and seeds scraped out (optional)

1 recipe rough puff pastry from above
1 egg yolk, beaten with a splash of milk

While the dough is chilling, make the filling.

Peel, core and chop the apples into 1 inch chunks.  Place the apples, brown sugar, water and vanilla bean (if using) into a medium saucepan.  Bring to a simmer over medium heat.  Cover and lower the heat to medium-low.  Cook, stirring occasionally, for about 15 minutes or until the apples are soft but haven't completely broken down (you want some texture in the filling, not applesauce).  Give the apples a light mash with a fork and set aside to cool.

Preheat your oven to 375 F (190 C).  Line a baking sheet with parchment paper.

Remove the chilled dough from the refrigerator.  Cut it in half and return one half to the refrigerator.  Place the other half on a lightly floured work surface.  Rolling in one direction again, roll from one edge to the opposite edge.  Give the dough a quarter turn and repeat the process of rolling in one direction edge to edge.  Continue giving the dough a quarter turn and rolling until the dough is just larger than an 8 inch plate or round baking pan.  Using a sharp knife, cut around the edge of the plate or pan and place the circle of dough onto the prepared baking sheet.

Spread the cooled apple filling over the dough, leaving a one inch border clear of filling all around the edge.  Remove the second half of dough from the refrigerator and roll and cut it in the same fashion as the first half.  Place the second circle of dough over the filling and gently but firmly press the edge down so that it adheres to the bottom circle.  With the tip of a sharp knife you can score a design across the top (but don't cut all the way through the dough!).  Pierce a few holes for steam to escape.  Brush the top of the dough with the egg yolk.

Bake the galette for 30-35 minutes until puffed and golden brown.  Let the galette cool and serve warm or at room, temperature.

Tuesday, October 27, 2015

Mom's Chocolate Pear Upside Down Cake


Tradition [truh-dish-uh n] noun : 1. the handing down of information, beliefs, and customs by word of mouth or by example from one generation to another without written instruction 2. characteristic manner, method, or style


I've been struggling with this post, which is why it has taken so long to arrive in this space.  I keep sitting down to write and coming up blank.  I love this recipe, I love its origins and what it has become.  So what's the problem?  And what does that have to do with the definition of tradition that I wrote above?  Both valid questions.


The thing is, I really don't know.  I can guess, sure, but it's not clear to me yet what the block is about.  Too many things to list here, I suppose- maybe in a future post.  Probably all boiling down to life, kids, responsibilities.  You know, the stuff that distracts from really living fully.  Buuuuut...... I try not to make this blog a personal diary so much as an exploration of the thoughts that run though my day with enough frequency to make them relevant.  It's not a true confessions page though.  So lets keep it lighter, shall we?  

In the meantime I'm trying to overcome my blogging block by going back to my roots.  Which always leads me to my Mom.  Hence the nod to tradition referenced earlier.  The cake I'm offering up today is one of those cakes that I can remember her making since I was a small child.  She grabbed the recipe from a magazine long ago and it was one of those total 70s recipes.  Canned fruit, maraschino cherries, you know the kind.  She did away with the cherries from the start but pretty much stuck to the recipe otherwise.  I thought I might take it a step further (and kick tradition to the curb, if you will) and modernize it just a bit more.  So gone is the can of sugar-laden fruit; replaced instead by gently poached pears who's poaching liquid is also used to make the caramel-ly goodness that is characteristic of an upside down cake.  It's a nod to tradition without being strictly traditional.  And maybe just the thing to kick my blogging butt out of its funk.


Chocolate Pear Upside Down Cake
Makes 1 8x8 inch square or 9 inch round cake.
For the printable recipe, click here.

This update of my Mom's classic is enhanced with poached pears but its still a simple cake at heart.  If you don't have time to poach your own pears, by all means use pears canned in their juices (not in syrup!).  The recipe has pecans in the ingredient list but you won't see them in my photos because my little family doesn't appreciate them.  So I guess they're optional but really great if you have them.

For the pear topping:                   
1/4 cup (4 tbs) unsalted butter           
1/2 cup packed brown sugar               
2 tbs pear poaching liquid                

4 poached pear halves (recipe to follow)                       
1/4 cup coarsely chopped pecans           
                       

For the cake:
1 1/4 cup sugar    


1 1/2 cups all purpose flour                        
1/4 cup cocoa powder
1/2 tsp baking soda
1/2 tsp salt
10 tbs softened butter
1 tsp vanilla extract
2 eggs
1/2 cup buttermilk

Preheat oven to 350 degrees.

Melt the 1/4 cup of butter and pour it into a 9 inch square cake pan.  Drizzle the corn syrup over the butter and then sprinkle the brown sugar in the pan. 

Cut the pear halves into 4 equal portion lengthwise and arrange the pieces in a sunburst pattern over the mixture in the baking pan.  Sprinkle the chopped pecans around the pears.

Sift together the flour, cocoa powder, baking soda and salt.  Set aside.

In a large mixing bowl (fitted to a stand mixer or with a handheld mixer with beaters attached), beat together the butter, sugar and vanilla until light and fluffy.  Add the eggs one at a time, beating fully between additions.  Add the dry ingredients alternately with the buttermilk in three additions.  Mix until thoroughly combined.

Pour the batter into the pan gently so as to disturb the pattern of the pears as little as possible.  Bake for 45-55 minutes, until a toothpick inserted into the center of the cake comes out clean of batter or very wet crumbs.  Cool the cake for about 5 minutes and then run a knife around the edges of the pan to loosen.  Invert the cake onto a serving platter.  Cut into squares.


Poached Pears
2 ripe but still firm pears
1 quart water
1/2 cup honey

Stir the water and honey together in a 2 quart pot.  Bring the mixture to a boil over a medium heat.  In the meantime, peel, quarter and core the pears.

When the water/honey mixture comes to a boil add the pears.  Turn the heat down to medium and simmer the pears for 20-25 minutes or until the tip of a sharp knife easily pierces the pears.  Remove the pears from the poaching liquid and cool making sure to reserve 2 tablespoons of the poaching liquid.

Pears can be stored in the cooled poaching liquid in the refrigerator until use.


Friday, October 9, 2015

Our Favorite Apple Cake


The day started out with an entirely different plan.  We were to meet up with friends on the grounds of a lovely Baroque castle for one of our favorite fall festivals.  Beautifully carved pumpkins, amazing statues and scenes created out of stacking all sorts of gourds and squash, pumpkin-centered food and record breaking giant pumpkins all in an idyllic setting.  Sounds perfect, doesn't it?  Well it would have been if not for the German national holiday and the hordes of people trying to do the very same thing we were.  As we sat in traffic and drove in circles trying to find parking I could feel my husband's frustration level rising (and kid-friendly language beginning to fail him), so I turned to him and said, "Let's get out of here".


It was such a good call. 

We ended up doing not much of anything, really.  But had a great day doing it.  Pointing the car in a direction where no other people were going we ended up driving through (and stopping to meander in) no fewer than three towns each with its own castle or medieval wall.   And each was prettier than the previous one.  In between was some beautiful countryside with fall colors all around.  At the end, we settled on a beautiful town square to have dinner in.  The evening was warm so we ate our dinner of wild game and traditional German sides out on the square watching children play and night watchmen lead tours through town to the tune of church bells.  This is German living at its best, my friends.


But my favorite part of the day wasn't the castles or the dinner.  It was the 20 minutes that we spent stopped on the side of the road picking apples from some old, forgotten trees.  The boys and their dad having fun and daring each other to go higher and get bigger apples.  The oldest climbing up on his dad's shoulders balancing just enough to reach the really big ones.  His little brother finding apples on the ground that were still worthy of picking (and eating as many of them as he could).  Their baby sister just napped and played happily as I took it all in.  Because as the boys get older I know these simple and blissful afternoons will be fewer and farther between.  Sure, I'm thrilled to have the bowls full of apples to cook and bake with but it was the experience that was more fulfilling.  No TV or video games, no forced fun.  Just two boys and their dad, laughing, climbing and enjoying each others' company.  To me, that was the true beauty of the day.


Our Favorite Apple Cake
Makes one cake.  Adapted slightly from The Great Holiday Baking Book by Beatrice Ojakangas.
For the printable recipe, click here. 

I have been making this cake for years.  The original is from a book I was gifted one Christmas from a co-worker and I've made it every fall since.  It reminds my husband of a cake that his mother used to make as a child and I think it might just be his favorite cake ever.  We have always called it Jewish Apple Cake, though I really don't know why.  I suppose growing up in a very mixed religious area of South Jersey we simply always associated the cake with our Jewish friends and the fall holiday of Rosh Hashanah.  Though it needn't be limited to just one season.  This is one of those homey, year round cakes that just makes you feel good.

3 cups all purpose flour
3 tsp baking powder
1  1/2 cups granulated sugar, divided
1/2 cup packed light brown sugar
1 cup neutral flavored oil
4 large eggs
3/4 cup fresh orange juice
2 tsp pure vanilla extract
6 medium apples (sweet, firm apples are best), peeled, cored and sliced thinly (about 4 cups finished)
1 tbs ground cinnamon

Preheat the oven to 350 degrees.  Butter a 9 or 10 inch tube pan (or 9x13 inch rectangular pan).

In a large bowl, combine the flour, baking powder, 1 cup of the granulated sugar and the brown sugar.  Stir to distribute the dry ingredients.  In a separate bowl mix together the oil, eggs, orange juice and vanilla.  Pour the wet ingredients into the bowl with the dry ingredients.  With an electric mixer or by hand beat the mixture until light and fluffy.

In another large bowl stir the apples together with the remaining 1/2 cup of granulated sugar and the cinnamon until the apples are well coated.  Place half of the apples at the bottom of the prepared pan.  Pour the batter over the apples and even it out with a spatula if necessary.  Arrange the rest of the apples over the top.

Bake for 1 hour to 1 hour and 15 minutes or until a wooden skewer inserted into the center of the cake comes out clean.  The cake will be golden on top and the apples will be tender.  Cool the cake in the pan on a wire rack for 10 minutes.  Remove the cake from the pan onto a serving dish.  If using a tube pan, loosen the cake from the pan and invert it onto a plate.  The invert the cake again onto a serving platter.  Replace any apples that might have remained in the pan and let cool completely before serving.

The cake will keep for 3 days in an airtight container at room temperature.


Thursday, September 3, 2015

Italian Plum Jam


I seem to always have plums on my mind this time of year.  Last year I made a traditional German confection with them, Zwetschgenkuchen.  The year before I started off my blogging adventure in my new home with a simple jam made from the tiniest of plums, mirabelles.  It's so easy to fall into a plum state of mind with the markets literally crowded with crates of the purple, red and golden beauties.

Friday, May 29, 2015

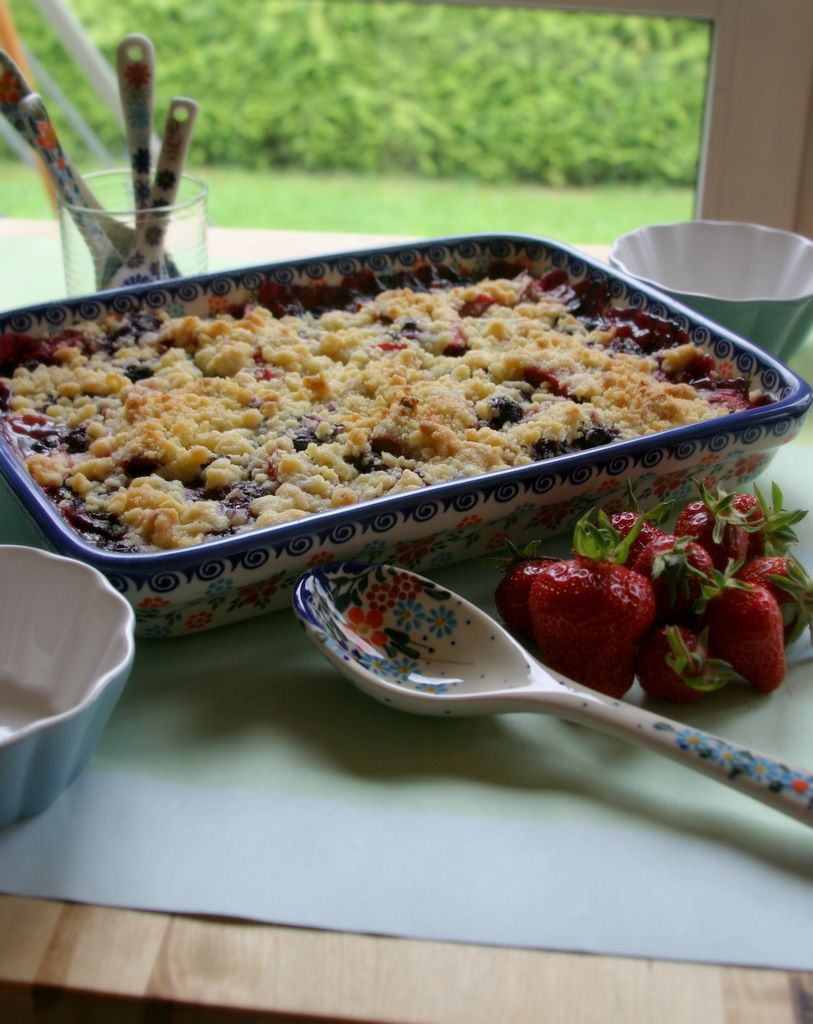
Blueberry and Rhubarb Crumble


I realized that I just missed the 4th anniversary of my little blog!  How on Earth I didn't realize it or find it important enough to mark the occasion, I do not know.  Plus I've let nearly a month go by without a post.  What, oh what, is happening here?

Thursday, March 5, 2015

Small Batch Ginger Lemon Rhubarb Jam


I'm not going to say too much today.  I just want to bask in the bright pink color of this jam.  It's gorgeous, isn't it?

I found the first rhubarb of the year at the market this past weekend and my incredibly picky middle kiddo practically begged me to buy an armload of the stalks.  He loves rhubarb, which I find amazing considering the enormous list of foods he won't eat.  So I caved and brought home a bundle of the bright pink veggie ready to do some recipe brainstorming.  So far we've done this jam and a rhubarb crostata.  Both of which have received high marks from all of my men.  And the season is just beginning. 

I'm ready for you, Spring!


Small Batch Ginger Lemon Rhubarb Jam
Inspired by a jam in the book, Jam On: The Craft of Canning Fruit, by Laena McCarthy.
Makes 1 pint.
For the printable recipe, click here.

I love the flavor combinations in this jam. It's a bit tart and the gingery background notes make it different from the typical rhubarb and strawberry offerings.  It takes just a bit of time to make because you need to macerate the rhubarb to draw out the juices, but the time commitment is well worth it.  Otherwise it's a simple, straightforward jam in a style that I prefer- low sugar and no added pectin.  The color will vary depending on the rhubarb that you have.  Mine was perfectly pink with no green so the end result is bright pink but if your rhubarb is on the greener side your jam will be darker in color.  Don't panic- it's the natural variation of the vegetable.

1 lb rhubarb (about 3 cups diced)
1 tbs fresh squeezed lemon juice
zest of 1 lemon
1 cup sugar

3 tbs water
1/3 cup sugar
1 1 inch thick slice of peeled ginger

Stir together the rhubarb, lemon juice, lemon zest and 1 cup of sugar in a medium saucepan.  Cover the pan with plastic wrap and let sit on your counter.

In the meantime, in a small saucepan stir together the water, 1/3 cup of sugar and ginger.  Place the pan over medium heat and bring to a boil.  Lower the heat and simmer for a few minutes to dissolve the sugar.  Remove from the heat and let cool completely.

When the ginger simple syrup has cooled, pour it into the saucepan containing the rhubarb mixture, stir and replace the cover.  Let the mixture sit on the counter for 2 hours.

After 2 hours remove the plastic wrap cover and the piece of ginger from the pan.  Place the rhubarb mixture on the stove over medium high heat.  Stir frequently while cooking at a low boil for about 15 minutes or until the rhubarb has broken down and the mixture is no longer watery.  Keep a watchful eye on it towards the last few minutes as you don't want the jam to scorch.  This jam has no added pectin so it will seem a little looser than a commercial jam, but that's okay.  To test if your jam has set place a metal spoon in the freezer while you cook the jam.  When you think your jam is done, place a small amount of it on the spoon and place it back in the freezer for 3 minutes (remove your pot from the heat while you wait).  When you remove the spoon from the freezer the jam should cling to the spoon and not run off when the spoon is tilted.  If it runs, place the pot back on the stove for another few minutes.

Place the completed jam in a pint jar, cover and refrigerate until cool.  The jam is best used within three weeks.  Keep refrigerated.


Friday, February 13, 2015

Honeyed Blood Orange Curd


When I lay my baby girl down on her changing table she breaks into a fit of giggles and many times the giggles turn into a full on hearty, belly laugh that doesn't stop until we're done.  I can't imagine for the life of me what is so funny about diaper changes, truly.  But whatever she imagines causes this moment of pure joy that is so infectious, no matter what my mood is I can't help but join in the merriment.  It's such pure and unadulterated happiness, so simple and sweet with nothing held back.  Those are the moments that make my Mama heart sing.


It got me thinking about moments like that in my own life.  There are plenty of memories from my childhood and silliness with my sister, unforgettable moments with my best friend from high school and my college roommates, sledding (zooming!) down a 7km Swiss road with my then 4 year old son in the blindingly fresh snow.  But what I've come to realize, sadly, is that the scales are tipped in favor of childhood.  As we get older there are fewer and fewer instances of that sort of joy.  We are either too busy to notice the moments that could spark the laughter or are too self conscious to let ourselves go the way a small child would. 


So I've vowed to myself to join in with my my sweet girl when she gets giggly.  I want to tip the scale back in the other direction.  Because joy shouldn't be limited by age. 


Honeyed Blood Orange Curd
Makes about 1 pint
For the printable recipe, click here.

This curd is really quite lovely, sweet without being overly cloying.  It's not quite as tart as a lemon curd because the blood orange is a beautifully fragrant and sweet citrus.  I hold back on the sweetener (honey in this case) to keep the orange flavor at the forefront and keep the curd from getting too sweet.  It makes a great spread for biscuits and scones, a dip for berries (if you can find any quality ones in the same season as the oranges) and fills pastries beautifully.  In this case, I made small pavlovas (a sort of flat-ish meringue) that I filled with a scoop of curd.  The result was a taste that brought me back to the days of running after the ice cream truck on a hot summer afternoon as a kid.  Talk about joy!  The curd and pavlova combination is a sophisticated dessert that is unfussy and easy to make and reminiscent of a cloud-like creamsicle.  Childhood joy for an adult palate- perfect.  The meringue recipe is not mine, so I will simply give you the link (though I use lemon juice in place of the vinegar and add a smidge more vanilla) to the recipe from The Kitchn.  Any way you use it, this blood orange curd is quite something else.

Zest of 1 blood orange
1 cup freshly squeezed blood orange juice (3-4 oranges)
1/4 cup mild flavored honey (this is a perfect time to use orange or citrus blossom honey)
2 large eggs
2 egg yolks
4 tbs unsalted butter, room temperature
1/8 tsp fine sea salt

In a small saucepan, bring the orange juice to a simmer over medium heat.  Continue to simmer the juice until it has reduced by half.  Remove from the heat and let it cool to room temperature.

Add the zest, honey, eggs, egg yolks, butter and salt to the saucepan and whisk to combine.  Place the pan over medium low heat.  Cook, stirring continuously with a heat proof spatula until the curd begins to thicken.  Take care to get into the corners of the pot with the spatula.  The curd is ready to ready to remove from the heat when it is thick and glossy and coats the spatula.  Remove from the heat and cool completely.  Refrigerate in a covered container until ready to use.

The curd will keep for a week in the refrigerator.


Thursday, January 22, 2015

Blackberry Clementine Smoothie


Don't think it's escaped my notice that my posts lately have been very introspective and deep.  Maybe bordering on a little too much information for all of my dear readers.  Maybe?  I don't know but I like to think it's part of my charm and hopefully you do too.

So in that spirit,  I thought I'd offer up something much the opposite today.  Short, quick and to the point.  Sort of like the recipe I'm sharing as well.  It's fitting, don't you think?   This is the sort of thing I'm craving these days.  In the heart of winter when I can't bear the idea of another stew for dinner or bowl of oatmeal at breakfast time what I really want is something to remind me that summer really will come again.  And thankfully Mother Nature obliges by bringing forth an abundant harvest of citrus in the bleak days of January.  So I'm celebrating citrus with a bright smoothie that makes me smile and feel just a little bit closer to the warm days of July.

Blackberry Clementine Smoothie
Makes enough for 2 smaller servings or one large one.
For the printable recipe, click here.

I don't know about you but when I have a typical smoothie for breakfast I usually end up feeling hungry an hour later.  They just don't "stick".  So I've thrown in a couple of ingredients that not only increase the sticking power of this smoothie but add a few more nutrients and fiber to an already healthy breakfast.  Why not?  So in go some rolled oats and chia seeds.  I like to blitz the oats first before adding the rest of the other ingredients so that they're broken down quite a bit.  I think it helps the texture.  Otherwise this is like any other smoothie- just throw the ingredients into the blender and blend.  Perfect for any busy morning on the go.

1/4 cup rolled oats
2 tsp chia seeds
1/2 cup plain Greek yogurt
1 tsp honey
3 clementines, peeled (make sure you've got seedless ones)
3/4 cup frozen blackberries

Toss the oats into the cup of a blender and pulse a few times until they are broken down into a powder.  Add the rest of the ingredients and blend until smooth.  Serve immediately.


Wednesday, October 15, 2014

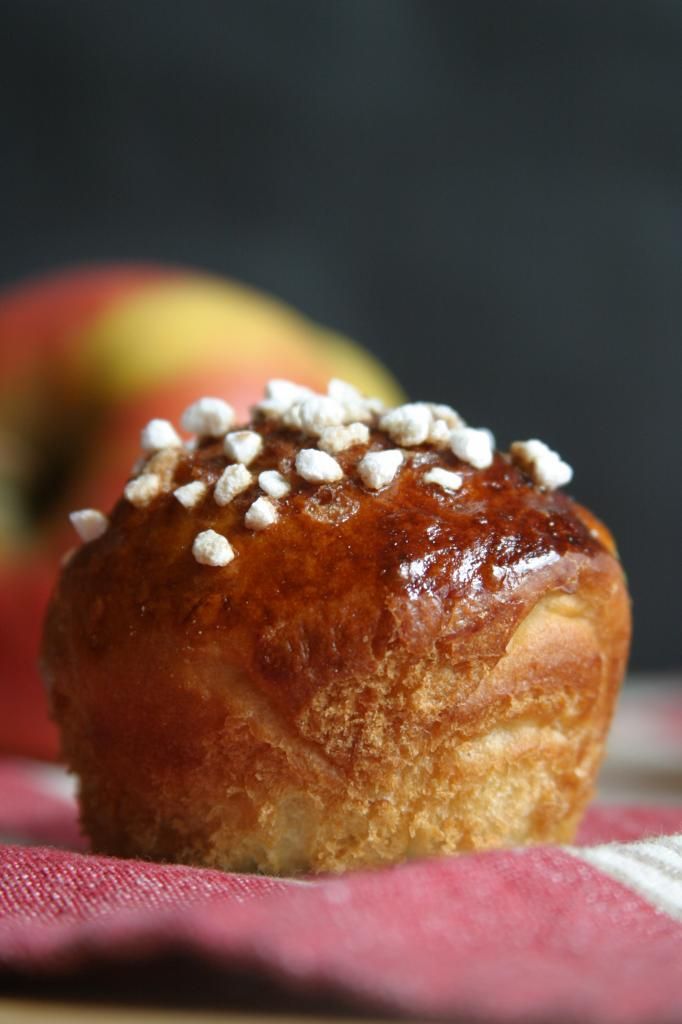
Smitten Kitchen's Apple & Honey Challah "Muffins"


My post on my personal Facebook page yesterday morning:

                "Why do I feel like I have completed some amazing feat by just getting my kids
                out the door in the morning? I'm spent."


It's funny how something so simple can resonate with so many.  I even got comments and likes from those friends I never hear from but know are lurking somewhere out there in the Facebook shadows.  As one friend put it, "You just summed up motherhood."  And now that I'm back at the beginning of the journey with our new baby girl I'm finding I'd forgotten just how much of a juggling act it can be.  Some days I feel like I am the whole circus combined into one exhausted act.  I can juggle, walk the high wire and tame the lions all in the same day.  Sometimes more than once!  Only I don't look nearly as good in a leotard as those Cirque du Soleil girls do (but oh, how I wish....).


I do have to admit, however, my juggling act isn't always the best (almost as sad as my post-baby body in the aforementioned leotard).  Sometimes those little balls just won't stay up in the air no matter how much I try.  A few fall before I can snatch them back up.  Lately one of those fallen balls is my kids' breakfast- especially on those rushed weekday mornings.  It's nearly impossible to get a healthy, warm breakfast on the table for my two bigs while simultaneously nursing or changing their baby sister who seems to always be hungry at the most inconvenient times.  So those poor boys are reduced to grabbing whatever they can pop in a toaster or pour in a bowl.  It's hard for me to watch. 


I don't have a solution for my juggling woes.  Just a few really awesome catches every now and again that make me feel like Barnum and Bailey might actually be calling me up sometime soon after all.  These sweet little "muffins" are one of them.  I took one of my favorite recipes and made it easy for my kiddos to grab in the mornings when I'm not around to help them out.  Challah is a beautiful bread enriched with eggs and honey and with the abundant apples in season right now folded right into the dough these little rolls are truly my idea of a perfect breakfast alongside a cup of cold milk.

I'm not going to give you a recipe this time around because I truly did nothing to alter the original recipe in it's brilliance.  So instead I will give you the link to Deb at Smitten Kitchen's recipe (so click here now!) and tell you that it makes 2 dozen "muffins" if you make the whole recipe.  Follow Deb's recipe until you get to the step for the braiding of the dough.  Instead of cutting the dough into 4, cut it into 24 equal pieces.  Place those pieces of dough into buttered muffin tins and continue on with the recipe as written.  I halved the recipe this time around and ended up with 12 of the most beautiful breakfast treats around.


Friday, August 15, 2014

Zwetschgenkuchen {German Plum Cake}


I'm ready.  Done.  That's all she wrote folks....

I have never been one of those women who gets all glowy in pregnancy.  I don't gush and squeal and get all excited about ultrasounds.  I'm much more matter of fact about things.  I get the medical, clinical side of things and that's what I'm comfortable with.  But you're not going to see me glowing in all of my impending mommy-ness.  That's just not me.  I'm not even really a baby person.  I don't think I've ever walked up to a stranger with a baby and gotten all gooey about the baby's cuteness.  Other people babies make me a bit uncomfortable.  I'll hold your baby if you ask, but I'm not going to be the first to volunteer.  Not even the second if I'm being really honest.


Don't get me wrong- I love my children more than I ever would have thought possible.  I loved them when they were babies and was so thrilled that each of those little people was mine.  I've just found myself more comfortable with them as they've grown older.  More at ease and like I fit in my role as a mom.  I think I hit my stride somewhere around the 2 year old mark with each of my boys.  I enjoy them and their unique personalities and I feel much more like I fit into this "Mom" skin of mine.  So I guess to me, it's no surprise that I'm sort of ready to get on with this show. And by that I mean baby #3.

It's taken me this long to get used to the idea that there will even be a baby #3.  That's funny, I know.  The reality seems to finally be hitting me and I've gone into a bit of a nesting mode.  Names are being debated.  My husband and I never seem to agree until the last second and to his credit (shhhh...don't tell him I said this....) he is the one who's come up with the winning name each time with the boys.  We've got a little over 3 weeks until baby sister comes along, we'll come up with something great.  I'm just ready...


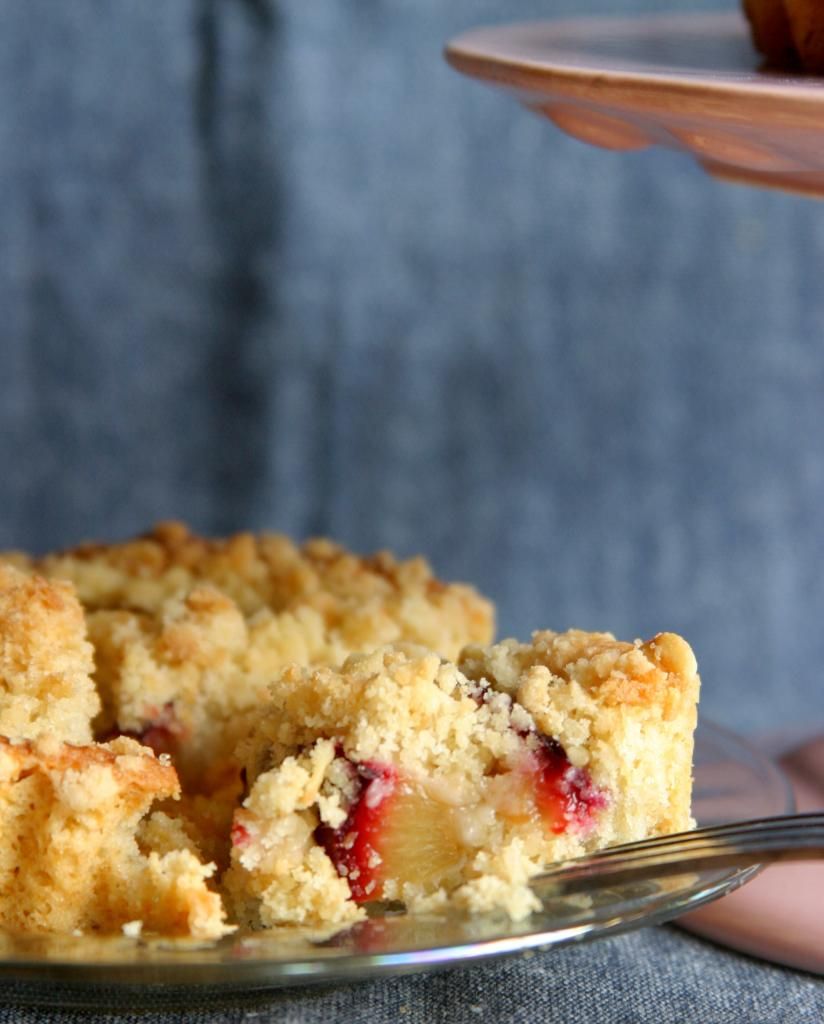
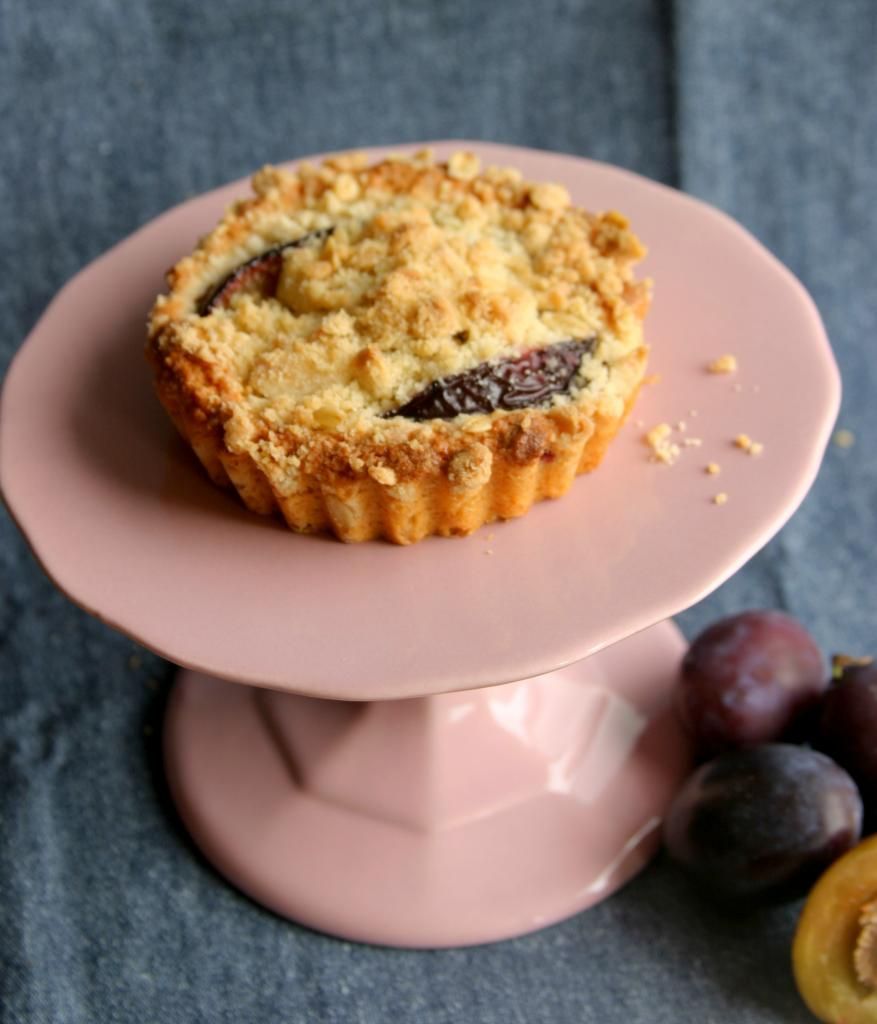
Zwetschgenkuchen
Makes 8 muffin-sized cakes.
For the printable recipe, click here.

This is one of the first treats I had here in Germany.  It's everywhere this time of year.  We're in the heart of plum season and this plum is one of two (the other being the Mirabelle) that you would typically find in the markets.  The plum to use here is called, in German, a Zwetschgen.  You might find it in the U.S. labeled as an Italian prune plum.  Damson plums would also be great in this recipe.  Of course, any plum you use will taste great so don't hesitate to try it if you can't find the ones I've used.  I did a bit of a take on the traditional in a couple of ways.  Usually this is baked as one large tart-like cake (in some parts of Germany the base is even made with a yeast dough, but not here in the south).  I've done them as mini cakes which I find get eat more quickly around my house.  And in deference to my gestational diabetes I tried to back off on the sugar and white flour.  I subbed in some oat flour in place of plain flour and I think it's really deliciously nutty.  One last note- in the photos you'll see some plum slices poking out.  I wish there had been way more!  So I'm going to write the recipe with that in mind.  If you're going to make a plum cake, you really need to taste the plum!

For the cake base:
1/4 cup plus 2 tbs sugar
5 tbs butter, room temperature
1 tsp lemon zest
1 large egg
1/2 cup plus 2 tbs oat flour (if you can't find this in the store, you can grind whole rolled oats into a powder in a food processor)
1/2 cup unbleached all purpose flour
3/4 tsp baking powder
1 tbs milk

8 Italian prune plums or Damson plums (or 6 regular plums)

For the streusel:
3 tbs cold butter
1/4 cup sugar
2/3 cup unbleached all purpose flour
2 tbs rolled oats

You can make the cake base by hand, with a food processor or mixer.  I did it in my food processor, but the steps would remain the same.  Place the sugar, butter and lemon zest in the bowl of a food processor and blend until light and fluffy and the sugar has dissolved.  Add the egg and quickly incorporate until the mixture is smooth.  Mix in the flours and baking powder and then the milk.  You will have a smooth, soft dough not unlike a cookie dough.  Refrigerate for a half hour to set the dough slightly.

In the meantime, pit and slice the plums into 6 slices (for the prune plums or Damsons, at least 8 slices for a larger plum).  Make the streusel by stirring together the sugar, flour and oats.  Using your fingertips, blend the butter into the dry ingredients until the streusel holds together in clumps and the butter in in pieces about the size of peas.

Remove the cake base dough from the refrigerator and preheat your oven to 350 degrees.  Divide the dough into 8 balls and press each ball into the bottom of a regular sized muffin cup, pressing so that the dough is even and also spread slightly up the sides of the muffin cup.  Place as many plum slices as you can fit into the muffin cup.  Repeat this procedure for each of the 8 cakes.  Divide the streusel evenly over the plums in each cup.  Bake the cakes for about 20 minutes.  The tops will be firm to the touch and the streusel a light golden color.  Cool completely before serving.


Thursday, July 31, 2014

Honey Poppyseed Salad Dressing


I've been playing a bit of a disappearing act lately.  In the words of Indigo Montoya (who doesn't love The Princess Bride?).  "Let me 'splain...No, there is too much.  Let me sum up."

The third trimester of this pregnancy has hit me hard.  Between the 90 degree days that completely sap me of any energy and the crazy humidity that comes with weeks of pouring rain and causes amazing swelling in all my joints, I've been a bit out of commission.  Then there's the incredible back pain that seems to hit somewhere around noon every day.  But the thing that's been the biggest struggle of late is trying to get my high blood sugar under control. 


If you've been a reader for a while, you will by now recognize that I have a bit of a sweet tooth.  And it's hard for me to pass up a slice of bread or croissant if one crosses my path (okay, I really mean near impossible).  How can I just ignore the breadbasket sitting on my counter?  But I know how to seek out whole grains and, fortunately, am able to make my own breads and have a whole variety to choose from at my fingertips here in Germany.  Interestingly, I've found out that I enjoy spelt quite a bit.  Testing my blood sugar 6 times a day has made me accountable for every little thing I pick up to eat and I have to think about the smallest snack I might grab.  I've been working hard at it and don't always make the right choices, but after a few weeks I think I might be getting the hang of it.  Even making changes to my diet hasn't helped, though, and I'm still struggling with what my body is failing to accomplish every day and frustrated that I now have to rely on extra insulin too.

In all honesty, even though much of my waking day is spent concentrating on the food that goes into my body (and definitely what doesn't) I haven't exactly felt that I have a lot to contribute here.  I'm too tired and fixated on little details to have much left for photographing the few things I might find exciting enough to share.  Yesterday, though, I kicked my own butt into gear and forced myself to see that it isn't necessarily the complicated baking that makes for the best post, but the food that I am actually making for myself and my loved ones.  So even in the rain I found a bit of nice light and whipped up a simple salad dressing for a very summery salad.  One that fits into my new diet, but also one I think anybody would enjoy.  So I'm sharing- and I must say that's it's nice to be back.


Honey Poppyseed Salad Dressing
Makes about 1 1/2 cups.
For the printable recipe, click here.

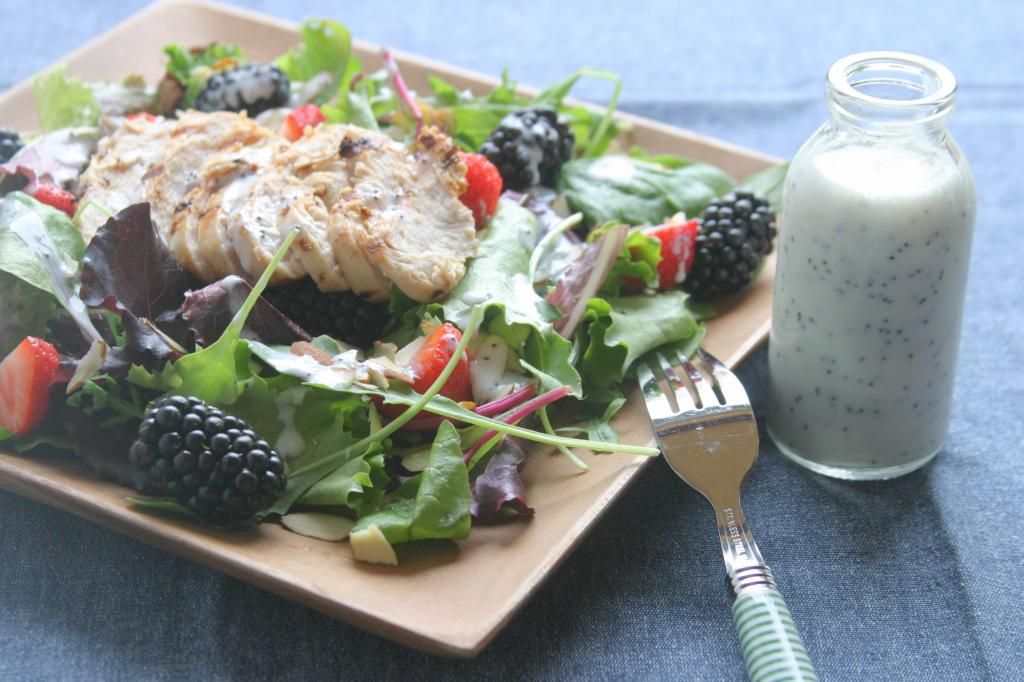
I am not giving a recipe for the salad or grilled chicken that I served with the dressing.  Mostly because they're so simple they don't really need a recipe.  I used mixed baby greens, a handful of sliced almonds and some strawberries and blackberries for the salad.  The chicken is a boneless, skinless breast that I simply marinated for about a half hour in lemon juice, lemon zest, garlic and olive oil then grilled until cooked through but still juicy.  My favorite part of the salad?  The strawberries.  I think I could have eaten them in a soup of the dressing.

1/2 cup buttermilk
1/2 cup Greek yogurt
2 tbs olive oil
2 tbs honey
1 tbs lemon juice
2 tsp poppyseeds
1 small shallot, grated on a box grater or microplane with larger holes
a pinch of sea salt

Whisk all the ingredients together in a medium bowl.  Serve chilled with your favorite salad ingredients.


Friday, June 20, 2014

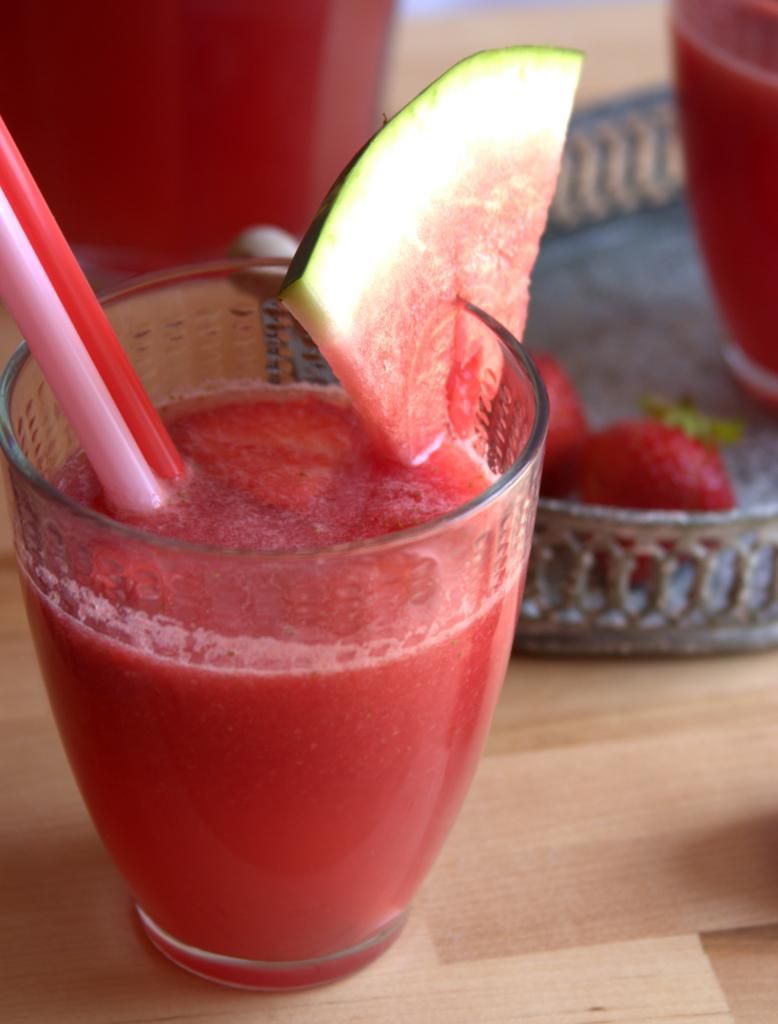
Honey-sweetened Watermelon Strawberry Agua Fresca


“Summer afternoon—summer afternoon; to me those have always been the two most beautiful words in the English language.”
-Henry James

Even though most of us have been swimming and sweating through some pretty hot weather lately, the official start of summer is this weekend.  I can't think of any other fruit that really says summer to me than the watermelon.  Thick slices being eaten in the shade of a tree or poolside with a big group of friends and family.  Picnics, BBQs, beach trips- none would be complete without an ice cold lice of watermelon.  The new "personal" seedless watermelons are great for a quick snack, but really it's those giant behemoth that evoke the most vivid impressions of summer for me, maybe because it's all we had as kids. 


If you're someone my age (AKA: a preteen girl in the mid to late-80s), you probably can't see one of those giant watermelons without picturing Jennifer Grey's character Baby in Dirty Dancing giving the least impressive response of "I carried the watermelon" when asked why she was hanging out in the dancers' part of the camp.  I guess we couldn't expect better of a girl nicknamed Baby, could we?  Luckily for her, she had some help getting past that awkward moment.  Let's all pause here to reflect on the moment we fell in love with Patrick Swayze while watching that movie...

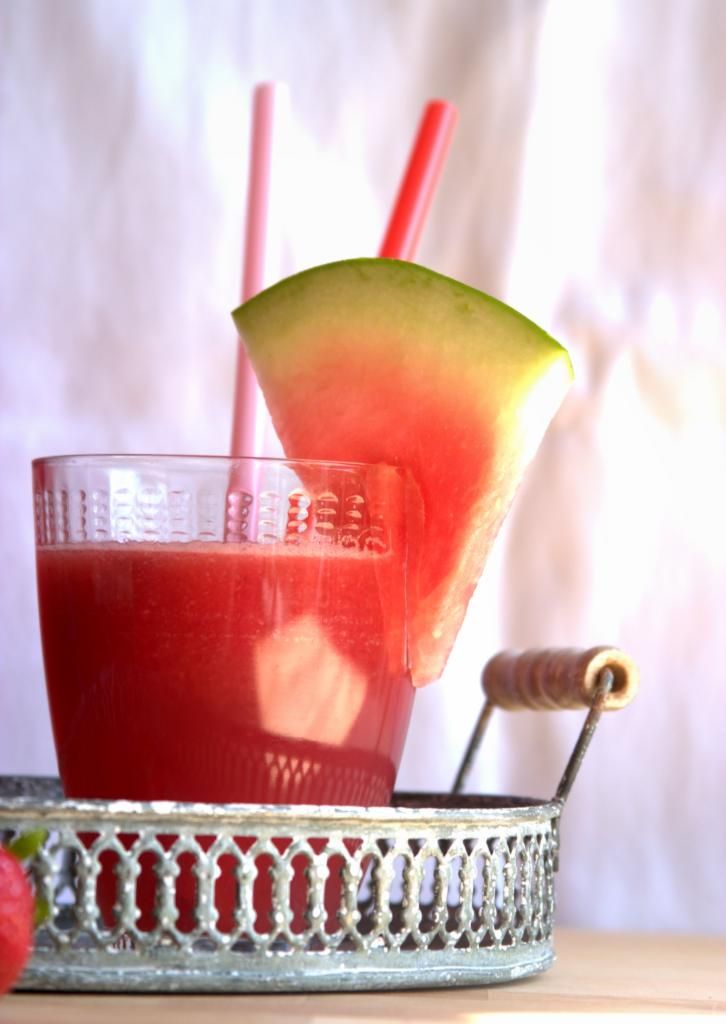
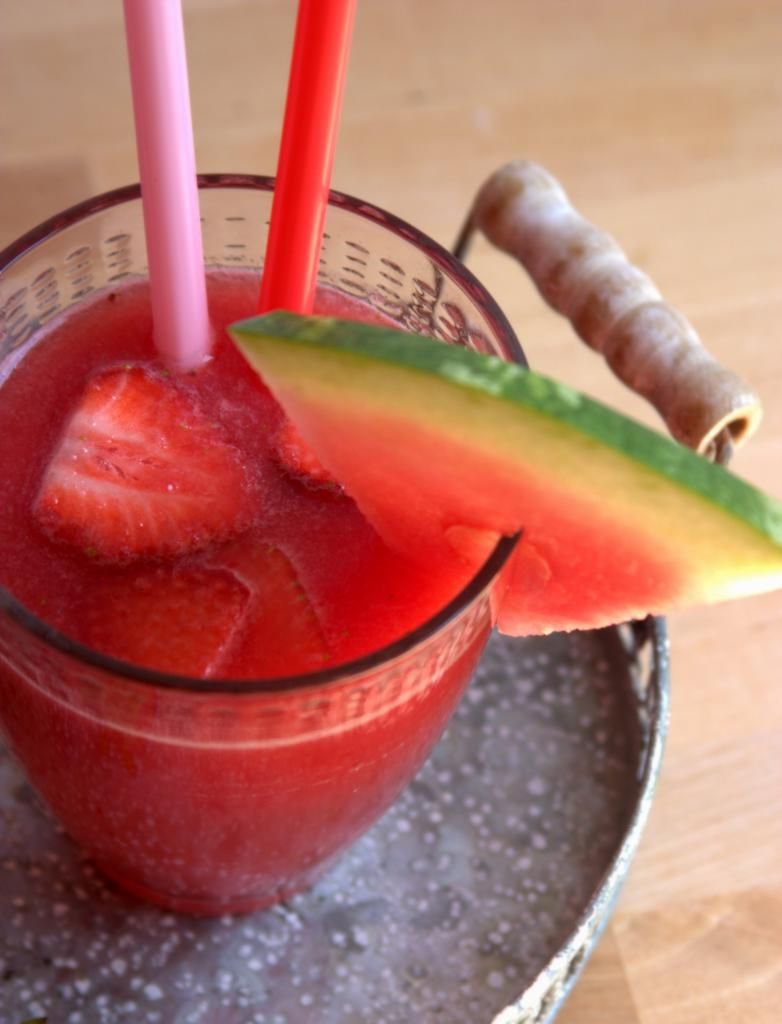
While I've got you all humming along to a great soundtrack and remembering that "Nobody puts Baby in a corner", let me introduce you to the agua fresca.  This is a simple and refreshing drink that is pretty much fruit, fruit and more fruit with perhaps a little sweetener and water mixed in for balance.  But you don't need a lot of those extras when dealing with watermelon, especially if you're lucky enough to get a perfectly ripe melon dripping with sweet juices.  It's an ideal summer afternoon refresher and if it happens to evoke a few memories of Patrick Swayze shirtless and dancing to some sultry Otis Redding, well, so much the better.


Honey-sweetened Watermelon Strawberry Agua Fresca
Makes about 2 quarts.
For the printable recipe, click here.

This recipe has become a favorite around my house this summer.  It takes almost no time at all and makes use of the giant watermelon I seem to always have taking up all the space in the fridge.  Because you're going to strain the blended fruit, there's no need to be especially vigilant about removing the seeds which is a plus in my book.  There is just a kiss of honey and a splash of lemon to brighten and balance the sweetness of the melon and strawberries.  You could go a little lighter or heavier on the honey depending on the ripeness of your fruit.  Taste them first and then decide.  The melon I used for this batch was not quite as sweet or ripe as I would have liked so I used the full amount of honey, but even that isn't very much.

1 cup water
1/4 cup light colored (and flavored) honey
1/3 cup fresh lemon juice
8 cups cubed watermelon (about 1/2 large melon)
1 cup sliced strawberries

In a small saucepan, stir together the honey and water.  Place the pan over medium heat and bring the mixture to a simmer.  Cook just long enough for the honey to dissolve, 3-4 minutes.  Remove the pan from the heat and stir in the lemon juice.  Let cool completely.

In the meantime, blend the watermelon and strawberries in a blender or food processor in batches until completely smooth.  Strain the juices through a  fine mesh sieve into a 2 quart pitcher.  Discard the seeds and pulp.  Stir the cooled honey-lemon syrup into the strained juices and chill until cold.


Thursday, June 12, 2014

Quick and Easy Stone Fruit Tart


Because sometimes you just need quick, right? 

I have to admit that I've been less than excited to get into my kitchen and bake lately.  We've had an unusual hot streak of weather around here and my kitchen has been in the 90 degree range for nearly a week now.  With no air conditioning and stores either sold on of fans or closed because of German holidays (can I tell you how over the random holidays I am?), there has been little relief.


There have been lots of popsicles and ice cream around here.  And giant wedges of watermelon, crisp and cool straight from the fridge.  We're doing what we can to make the best of the sticky (weather) situation.  But there were a few moments when I was craving something different.  Not something that would require me to stand forever in my kitchen whipping and mixing and sifting and measuring.  Not something that would need a hot oven for hours on end.  Something quick and easy and satisfying.


So I decided to slice up some fruit and make a tart.  Wait, didn't I say I didn't want tons of work and time involved in this treat?  Yup, sure did.  This is not your every day tart.  It's one I whipped up using a freezer staple- frozen puff pastry- and as few other ingredients as possible.  It's about as simple and delicious as it can get.  A couple of sliced nectarines and a handful of ripe cherries and you're in business.  Or apricots and raspberries.  Or a mix of plums.  Ooooh, that last one sounds good.....


Quick and Easy Stone Fruit Tart
Makes 2 tarts that  will serve 3 people each (6 total servings)
For the printable recipe, click here.

My goal with this tart was to make it as easy as possible.  So I didn't layer on a ton of flavors with the first one that I made.  That isn't to say that even as I sit here typing I can't think of a hundred ways to jazz the tart up- herbs, citrus zest, spices.  The options are endless and I'll suggest a few later on.  But if you just want pure, fresh fruit and a bit of buttery pastry stick to the basics.  Oh, and maybe a scoop of vanilla ice cream.

1 piece of puff pastry from the freezer (preferably all butter if you can find it), thawed according to package directions
about 3 cups sliced stone fruit (depends on the size of fruit and what type you are using- for the tarts pictured above I used 2 nectarines and about 1 1/2 cups pitted and halved cherries)
3-4 teaspoons sugar (use less if you have very ripe, sweet fruit)

Preheat your oven to 425 degrees.  Line a baking sheet with parchment paper or a nonstick silicone liner.

Toss the fruit together with the sugar in a medium bowl.  Let sit for a few minutes to get nice and juicy.  In the meantime, slice your piece of puff pastry in half and lay the 2 pieces side by side on the prepared baking sheet leaving a good inch or two between them.  Spread the fruit evenly over the puff pastry leaving about 1/2 to 3/4 inch border around the edges.  If you'd like, you can sprinkle a pinch or two of sugar around the edges to give a little extra crunch.

Bake the tarts for about 15 minutes until the edges are a golden (but not dark) brown.  Remove from the oven and let cool slightly before serving.

Suggestions for fruit combinations:
nectarines, peaches or apricots and cherries
mixed plums and pluots
peaches and raspberries
mix of yellow and white peaches

If you'd like to add in extra flavors try:
herbs such as lemon verbena or thyme
citrus zest- lime would be wonderful with any type of stone fruit
spices such as cinnamon, cardamom, ginger or nutmeg


Monday, June 2, 2014

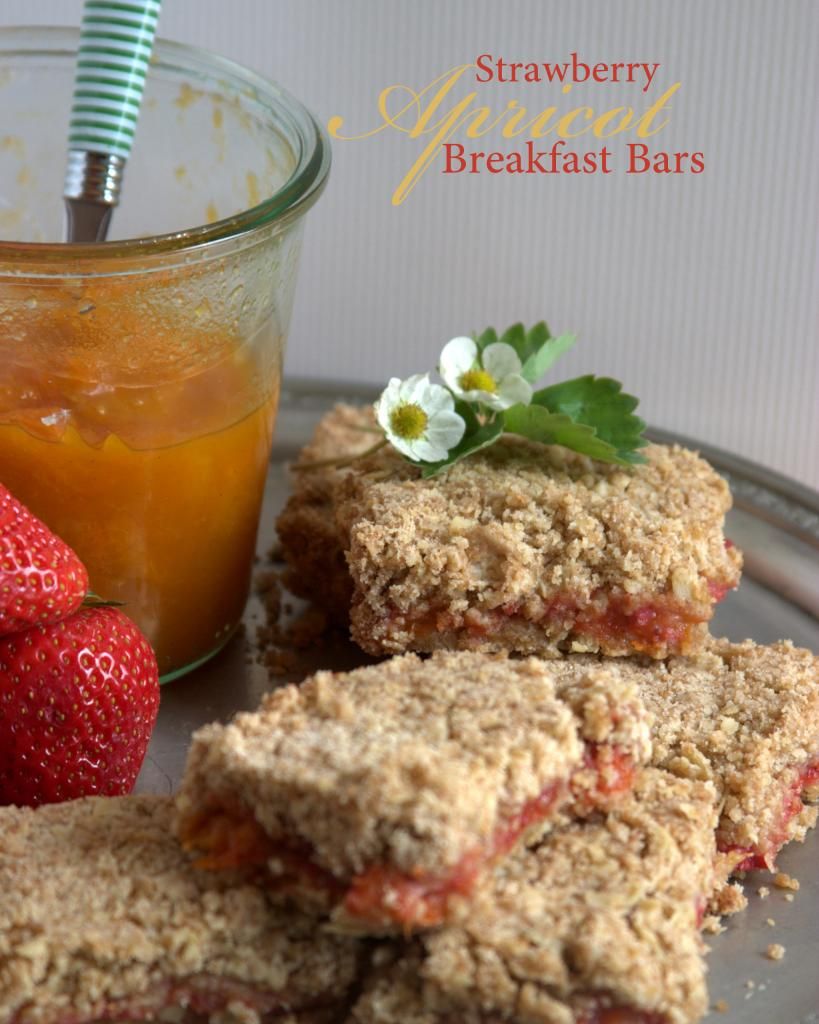
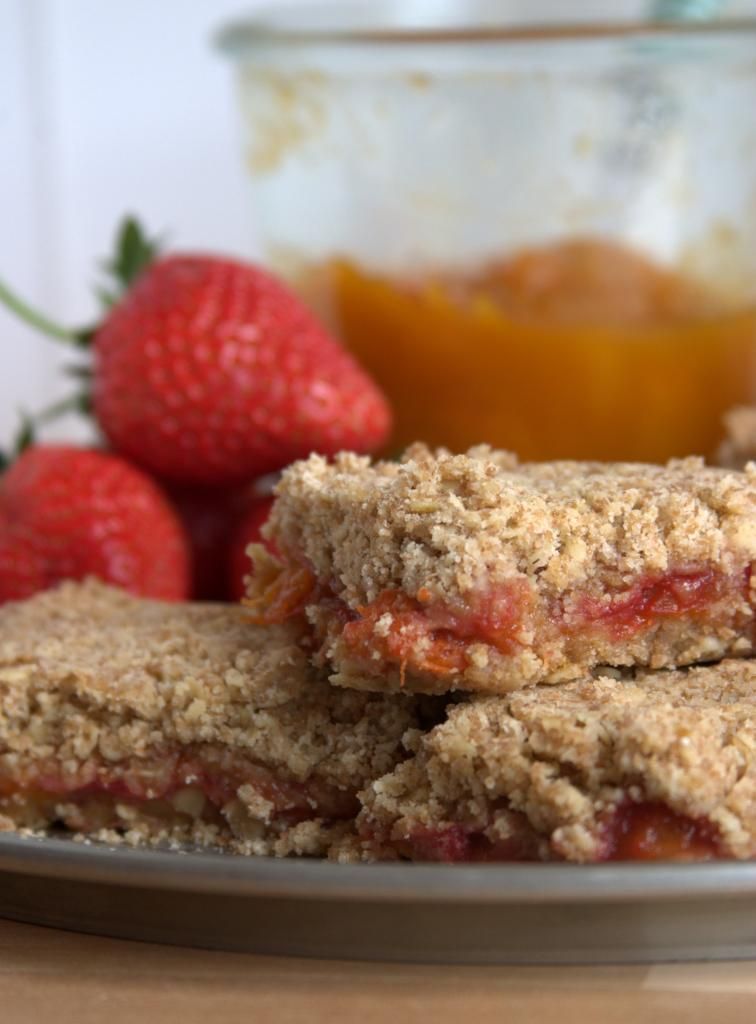
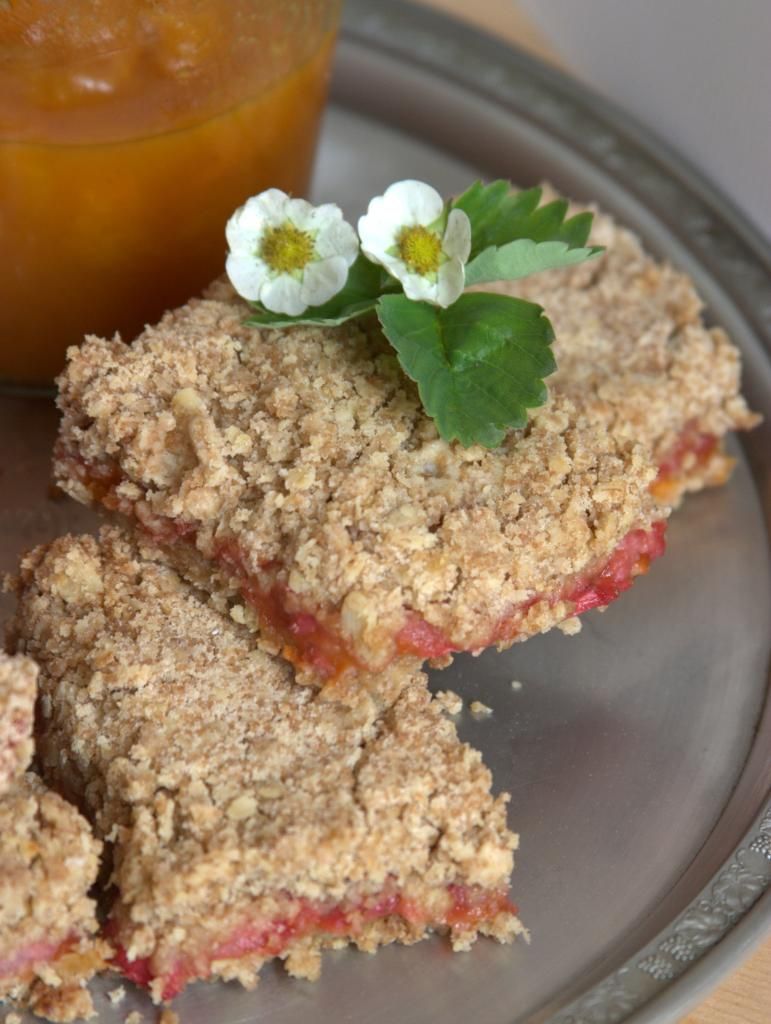
Strawberry Apricot Breakfast Bars


When I started this blog 3 years ago, I was simply trying to document my family's favorite recipes and maybe have a place to point friends to when they asked for the recipes.  I hadn't counted on enjoying it as much as I do or falling in love with food photography (even though I'm clearly still not the world's best at it).  I somehow never dreamed that it would still be going all these many posts later.


I've been going though a bit of a funk lately.  I'm going to chalk it up to being 6 months pregnant and just exhausted, both mentally and physically.  I have these moments of energy and inspiration and can cook, bake and photograph up a storm.  But they run out quickly and I'm back to  feeling blah.  So I've actually got a ton of recipes hanging out in files all edited and ready to go, but I run out of motivation when it comes to getting them out to my (tiny but loyal) following.  This recipe is one of those that's been lingering for a while, but so worthy of sharing.

The inspiration for our favorite breakfast bars was a particularly good market day a few weeks back.  Both strawberries and apricots were beginning to make their way to the market and as they are among my little guy's favorites, I brought home a whole lot of both.  The apricots were, as early season fruit often are, a bit on the tart side. So instead of eating out of hand, I turned them into a quick jam.  Coupled with a recipe from the wonderful Pioneer Woman and the few remaining strawberries I whipped the bars up.  The rest is history, as they say, and I have made these bars at the request of my kids several times since.


Strawberry Apricot Breakfast Bars
Makes 12 bars.  Recipe adapted from Pioneer Woman.
For the printable recipe, click here.

I like to throw a bit of whole wheat flour into the mix with these bars.  Maybe it's only psychological, but I feel like I making them healthier by doing so.  I eat the bars for breakfast and it makes me feel better about it.  These are simple to whip up and can be made completely by hand or in the food processor.  Feel free to change up the fruit to suit your taste.  The bars would be equally delicious for dessert served with vanilla ice cream. 

1 1/2 cup all purpose flour
1/2 cup whole wheat flour
1 cup old fashioned oats (not quick cooking)
1 cup brown sugar
1 tsp baking powder
1 tsp grated nutmeg
14 tbs butter (2 sticks minus two tablespoons), cut into small pieces
about 1 cup apricot jam
handful of strawberries, washed, hulled and sliced

Preheat your oven to 350 degrees.  Butter a 9 x 13 inch pan and set aside.

In a large bowl, whisk together all of the dry ingredients (all purpose flour through nutmeg).  Blend the butter into the flour mixture with your fingertips or a pastry blender.  You want the butter to be well blended with the largest of any remaining pieces being no bigger than a pea.  The mixture should hold together when pressed between your fingers.

Press half of the crust mixture into the prepared pan.  Spread the jam over the bottom crust, being careful not to disturb the crust below too much.  Place the strawberry slices in one even layer over the jam.  Pour the rest of the crust over the top, spread evenly and press gently into place.

Bake the bars for 35-40 minutes until the top is just lightly golden and set.  Cool completely before cutting and serving.  The bars will keep on the counter, well wrapped, for 2-3 days.

Wednesday, April 2, 2014

Black & Blueberry Rhubarb Jam {Small Batch}


Don't you just love how little kids get so excited for their birthdays?  The week-long countdowns.  The jumping out of bed ready to get on with all the fun birthday stuff when normally you can't drag them out of bed for anything.  Running into school with a container full of mini cupcakes with all of the anticipation one little body can hold.  It's exhilarating, and sweet, and a reminder for us parents of the simple joys of childhood.
Today is my little man's 5th birthday.  There's something about 5 that just is different from all the birthdays that come before.  It's a signal that toddler-hood is over.  That little boy who would only walk down the street holding your hand is now just as willing to let it drop and go running with his big brother as he is to keep holding on to you.  There's so much more he is capable of doing on his own and he is just a little bit more fearless.  But cautious too, as he understands the world around him the tiniest bit more than he did a year ago.  It's enough to make this Mama both proud and a little bit sad too.


I hope there will never come a day when my little guy won't want to snuggle for a few minutes before bed.  Or run up to me at random moments and hug me ferociously.  Or want to hold my hand for just a minute longer as he eyes up the kids in his new class and wonders whether they will want to play with him.  Of course, I know in my head he won't want to do all of those things for much longer even if he promises that he will give me just as many hugs and kisses when he's all grown up.  But I can hope right?  And for the time being, I will hold onto as many of those moments as I can.  Because for now he's still my little boy.


This recipe is for the birthday boy.  He's my super-picky eater.  Fussy beyond belief.  But if there's one thing I know about him, it's that I can always get him to eat a pb&j sandwich.  Especially if it's made with any of my home made jams (well, except for fig, but I make that one for myself anyway).  We discovered when we moved to Germany that he really enjoyed rhubarb so when rhubarb season rolled around this year I made sure to grab some as soon as I saw those beautiful pink stalks at the market.  This jam is packed with fruit and not a whole lot of sugar (plus a secret sweetener that you don't really taste but makes a huge difference to the balance of the jam).  The little guy doesn't really know anything about the balance of tart, sweet and acidic.  He just knows that it's good.  And that's all that really matters to his Mom.


Black & Blueberry Rhubarb Jam
Makes about 1 pint.
For the printable recipe, click here.

This is an incredibly simple jam to make.  I would have loved to have used fresh berries in the jam, but the seasons of the fruit don't overlap.  So I used organic frozen berries instead.  The jam doesn't suffer any in the end.  In fact, it's probably better that I didn't use fresh fruit as their out of season flavors would not have been nearly as good as the frozen berries that are picked in season and at their best.  Be sure to slice the rhubarb thinly so that you don't get any celery-like stringiness in your jam. There's really not enough jam here to can and save for later, but if you really want to, you can pack the finished jam into clean, sterilized quarter pint jars and process them in a boiling water bath for 10 minutes.  Me- I just stick the jar in the fridge and enjoy it as fast as I can.

1 cup blueberries, fresh or frozen
1 cup blackberries, fresh or frozen
2 cups thinly sliced rhubarb (from about 2 stalks)
1/2 cup pure cane sugar
1/4 cup maple syrup
juice of half a lemon

Place all ingredients except for the lemon juice in a medium, non-reactive saucepan.  Bring to a boil over medium high heat.  Let the mixture cook at a vigorous bubble for 12-15 minutes, stirring occasionally to prevent scorching, until the berries have burst and the jam is thickened.  Stir in the lemon juice and remove from the heat. Spoon the finished jam into a clean pint jar and let cool.  Cover and keep in the refrigerator for 3-4 weeks.