Showing posts with label Jams and Jellies. Show all posts

Thursday, September 3, 2015

Italian Plum Jam


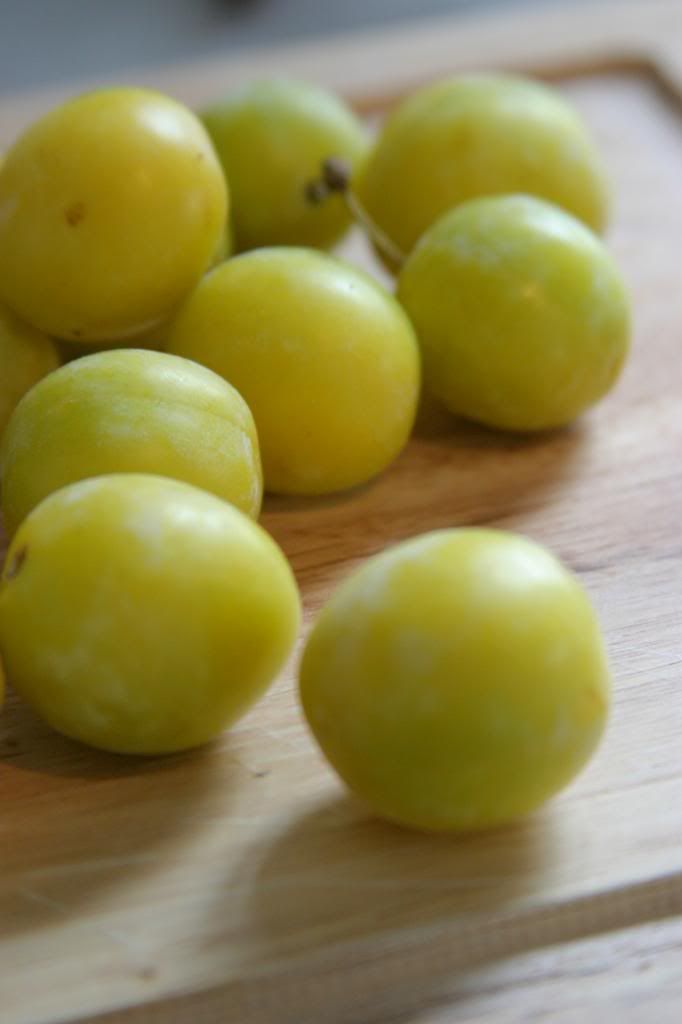
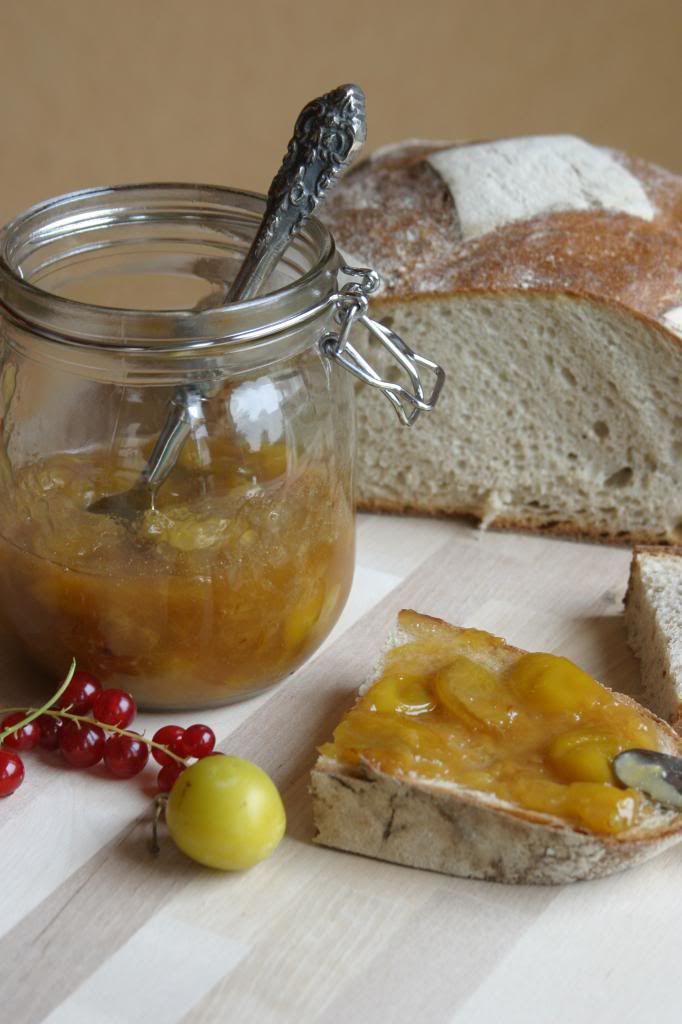
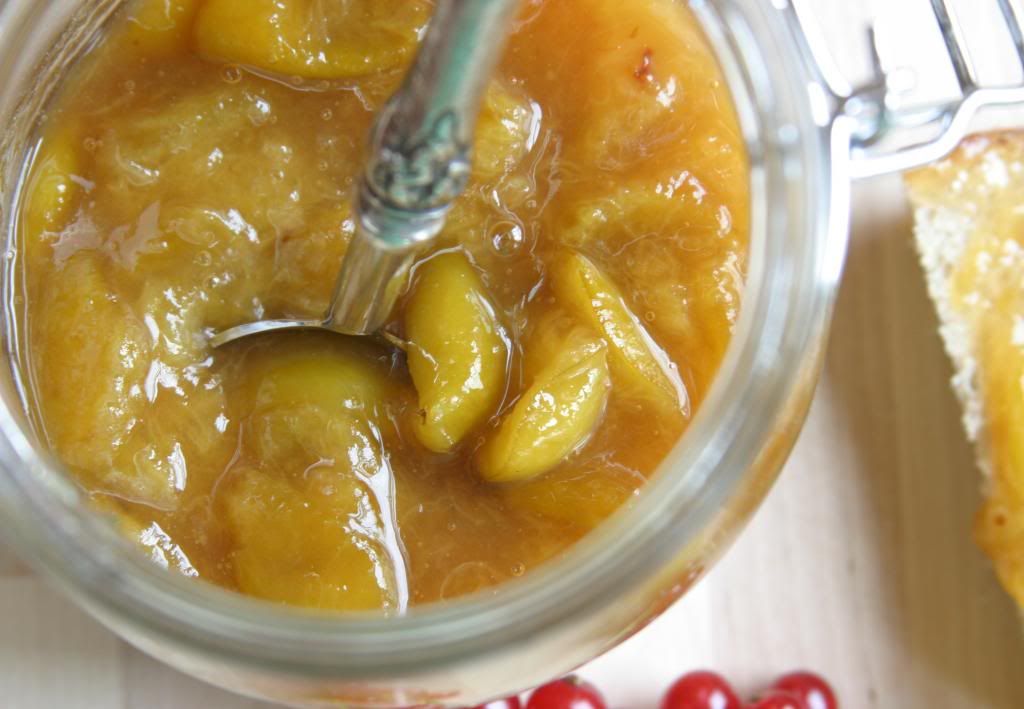
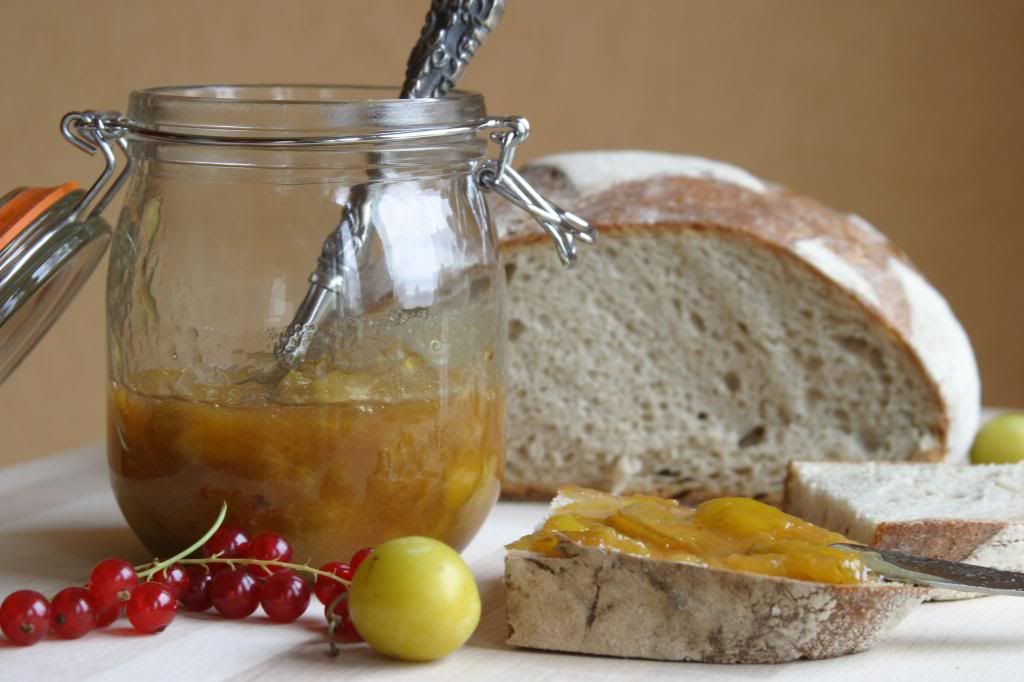
I seem to always have plums on my mind this time of year.  Last year I made a traditional German confection with them, Zwetschgenkuchen.  The year before I started off my blogging adventure in my new home with a simple jam made from the tiniest of plums, mirabelles.  It's so easy to fall into a plum state of mind with the markets literally crowded with crates of the purple, red and golden beauties.

Thursday, March 5, 2015

Small Batch Ginger Lemon Rhubarb Jam


I'm not going to say too much today.  I just want to bask in the bright pink color of this jam.  It's gorgeous, isn't it?

I found the first rhubarb of the year at the market this past weekend and my incredibly picky middle kiddo practically begged me to buy an armload of the stalks.  He loves rhubarb, which I find amazing considering the enormous list of foods he won't eat.  So I caved and brought home a bundle of the bright pink veggie ready to do some recipe brainstorming.  So far we've done this jam and a rhubarb crostata.  Both of which have received high marks from all of my men.  And the season is just beginning. 

I'm ready for you, Spring!


Small Batch Ginger Lemon Rhubarb Jam
Inspired by a jam in the book, Jam On: The Craft of Canning Fruit, by Laena McCarthy.
Makes 1 pint.
For the printable recipe, click here.

I love the flavor combinations in this jam. It's a bit tart and the gingery background notes make it different from the typical rhubarb and strawberry offerings.  It takes just a bit of time to make because you need to macerate the rhubarb to draw out the juices, but the time commitment is well worth it.  Otherwise it's a simple, straightforward jam in a style that I prefer- low sugar and no added pectin.  The color will vary depending on the rhubarb that you have.  Mine was perfectly pink with no green so the end result is bright pink but if your rhubarb is on the greener side your jam will be darker in color.  Don't panic- it's the natural variation of the vegetable.

1 lb rhubarb (about 3 cups diced)
1 tbs fresh squeezed lemon juice
zest of 1 lemon
1 cup sugar

3 tbs water
1/3 cup sugar
1 1 inch thick slice of peeled ginger

Stir together the rhubarb, lemon juice, lemon zest and 1 cup of sugar in a medium saucepan.  Cover the pan with plastic wrap and let sit on your counter.

In the meantime, in a small saucepan stir together the water, 1/3 cup of sugar and ginger.  Place the pan over medium heat and bring to a boil.  Lower the heat and simmer for a few minutes to dissolve the sugar.  Remove from the heat and let cool completely.

When the ginger simple syrup has cooled, pour it into the saucepan containing the rhubarb mixture, stir and replace the cover.  Let the mixture sit on the counter for 2 hours.

After 2 hours remove the plastic wrap cover and the piece of ginger from the pan.  Place the rhubarb mixture on the stove over medium high heat.  Stir frequently while cooking at a low boil for about 15 minutes or until the rhubarb has broken down and the mixture is no longer watery.  Keep a watchful eye on it towards the last few minutes as you don't want the jam to scorch.  This jam has no added pectin so it will seem a little looser than a commercial jam, but that's okay.  To test if your jam has set place a metal spoon in the freezer while you cook the jam.  When you think your jam is done, place a small amount of it on the spoon and place it back in the freezer for 3 minutes (remove your pot from the heat while you wait).  When you remove the spoon from the freezer the jam should cling to the spoon and not run off when the spoon is tilted.  If it runs, place the pot back on the stove for another few minutes.

Place the completed jam in a pint jar, cover and refrigerate until cool.  The jam is best used within three weeks.  Keep refrigerated.


Wednesday, April 2, 2014

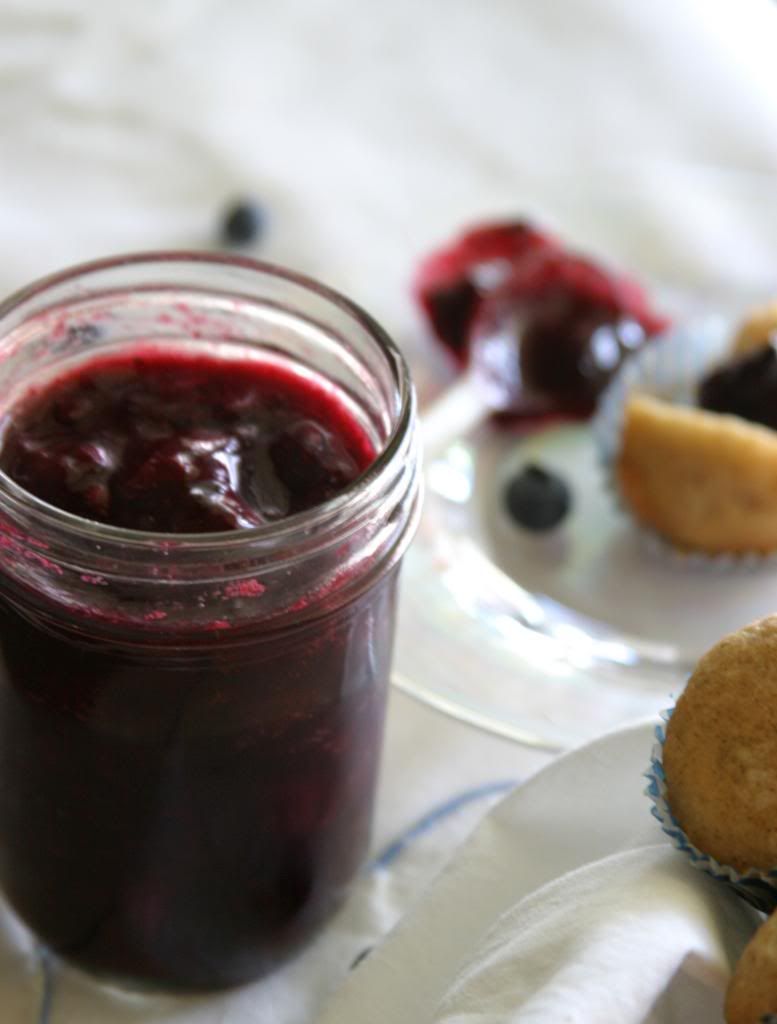
Black & Blueberry Rhubarb Jam {Small Batch}


Don't you just love how little kids get so excited for their birthdays?  The week-long countdowns.  The jumping out of bed ready to get on with all the fun birthday stuff when normally you can't drag them out of bed for anything.  Running into school with a container full of mini cupcakes with all of the anticipation one little body can hold.  It's exhilarating, and sweet, and a reminder for us parents of the simple joys of childhood.

Today is my little man's 5th birthday.  There's something about 5 that just is different from all the birthdays that come before.  It's a signal that toddler-hood is over.  That little boy who would only walk down the street holding your hand is now just as willing to let it drop and go running with his big brother as he is to keep holding on to you.  There's so much more he is capable of doing on his own and he is just a little bit more fearless.  But cautious too, as he understands the world around him the tiniest bit more than he did a year ago.  It's enough to make this Mama both proud and a little bit sad too.


I hope there will never come a day when my little guy won't want to snuggle for a few minutes before bed.  Or run up to me at random moments and hug me ferociously.  Or want to hold my hand for just a minute longer as he eyes up the kids in his new class and wonders whether they will want to play with him.  Of course, I know in my head he won't want to do all of those things for much longer even if he promises that he will give me just as many hugs and kisses when he's all grown up.  But I can hope right?  And for the time being, I will hold onto as many of those moments as I can.  Because for now he's still my little boy.


This recipe is for the birthday boy.  He's my super-picky eater.  Fussy beyond belief.  But if there's one thing I know about him, it's that I can always get him to eat a pb&j sandwich.  Especially if it's made with any of my home made jams (well, except for fig, but I make that one for myself anyway).  We discovered when we moved to Germany that he really enjoyed rhubarb so when rhubarb season rolled around this year I made sure to grab some as soon as I saw those beautiful pink stalks at the market.  This jam is packed with fruit and not a whole lot of sugar (plus a secret sweetener that you don't really taste but makes a huge difference to the balance of the jam).  The little guy doesn't really know anything about the balance of tart, sweet and acidic.  He just knows that it's good.  And that's all that really matters to his Mom.


Black & Blueberry Rhubarb Jam
Makes about 1 pint.
For the printable recipe, click here.

This is an incredibly simple jam to make.  I would have loved to have used fresh berries in the jam, but the seasons of the fruit don't overlap.  So I used organic frozen berries instead.  The jam doesn't suffer any in the end.  In fact, it's probably better that I didn't use fresh fruit as their out of season flavors would not have been nearly as good as the frozen berries that are picked in season and at their best.  Be sure to slice the rhubarb thinly so that you don't get any celery-like stringiness in your jam. There's really not enough jam here to can and save for later, but if you really want to, you can pack the finished jam into clean, sterilized quarter pint jars and process them in a boiling water bath for 10 minutes.  Me- I just stick the jar in the fridge and enjoy it as fast as I can.

1 cup blueberries, fresh or frozen
1 cup blackberries, fresh or frozen
2 cups thinly sliced rhubarb (from about 2 stalks)
1/2 cup pure cane sugar
1/4 cup maple syrup
juice of half a lemon

Place all ingredients except for the lemon juice in a medium, non-reactive saucepan.  Bring to a boil over medium high heat.  Let the mixture cook at a vigorous bubble for 12-15 minutes, stirring occasionally to prevent scorching, until the berries have burst and the jam is thickened.  Stir in the lemon juice and remove from the heat. Spoon the finished jam into a clean pint jar and let cool.  Cover and keep in the refrigerator for 3-4 weeks.


Monday, January 6, 2014

Kumquat Preserves


In the midst of a dark, gray winter here is a burst of color worth savoring. 

Maybe your winter hasn't been as dark or gray as it has been in my neck of the woods.  I am totally jealous if that's the case (I'm talking to you my Southern California friends!).  Perhaps you love that sort of wintery weather.  I'm not judging, but it's just not my thing.  Nine years in the Pacific North West cured me of any love for the constant dreariness of a rainy winter. 

My family and I took a break from the gray and found a snowy paradise at the top of a glacier in Switzerland last week.  The cloudless blue sky and perfect white of the ice and snow were just the thing to refresh and recharge me for the new year.


Back at my town market for the first time in a couple of weeks I noticed a definite change in the produce available.  The citrus is starting to make its way into Germany from Italy and Spain.  Tables covered in Italian lemons and clementines stacked in tight pyramids, stems and leaves poking through here and there.  It was a beautiful sight to see.  I'm hoping to find something new and fabulous that I've never seen before- like the summer and fall that brought currants, gooseberries and quince.  What sort of new tastes will the winter bring?  I can't wait.

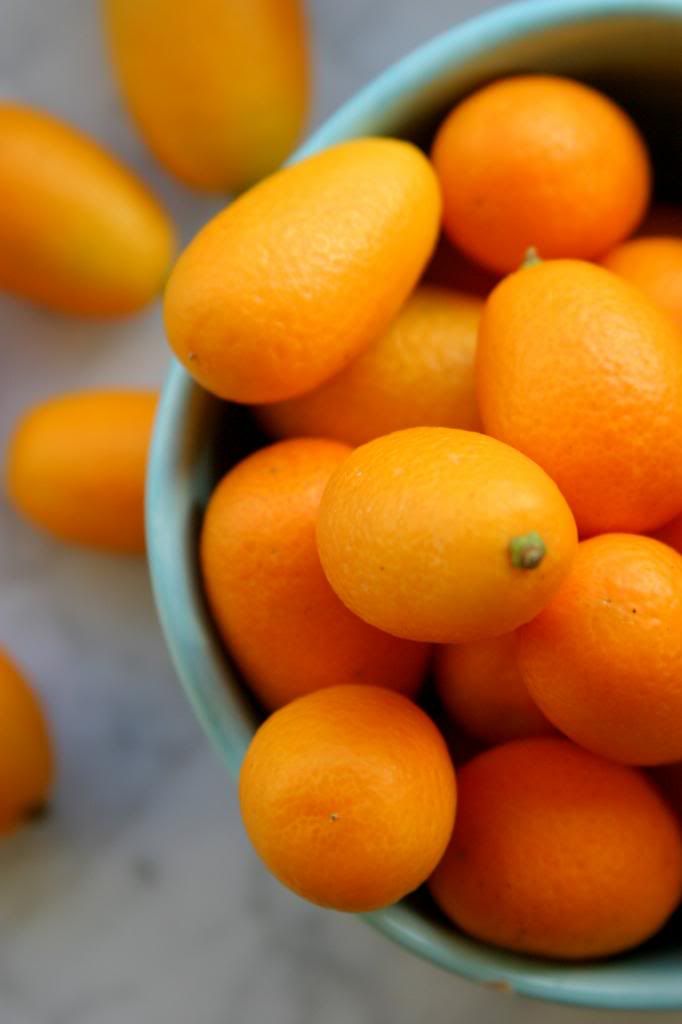
In the meantime, here's a little taste of brightness to start things off.  Not new to me, but a harbinger of things to come.  I hope you can find kumquats near you because they are one of a kind with their sweet, tangy skins and slightly bitter flesh.  You can pop them in your mouth whole, cook slices until they're sweet and candied or make this wonderful small batch preserve.  I first tried them in California and with every taste I imagine sitting out in my old backyard with the warm sun on my face and the scent of the citrus blossoms in the breeze.


Kumquat Preserves
Makes about 1 pint.  Recipe from Food in Jars.
For the printable recipe, click here.

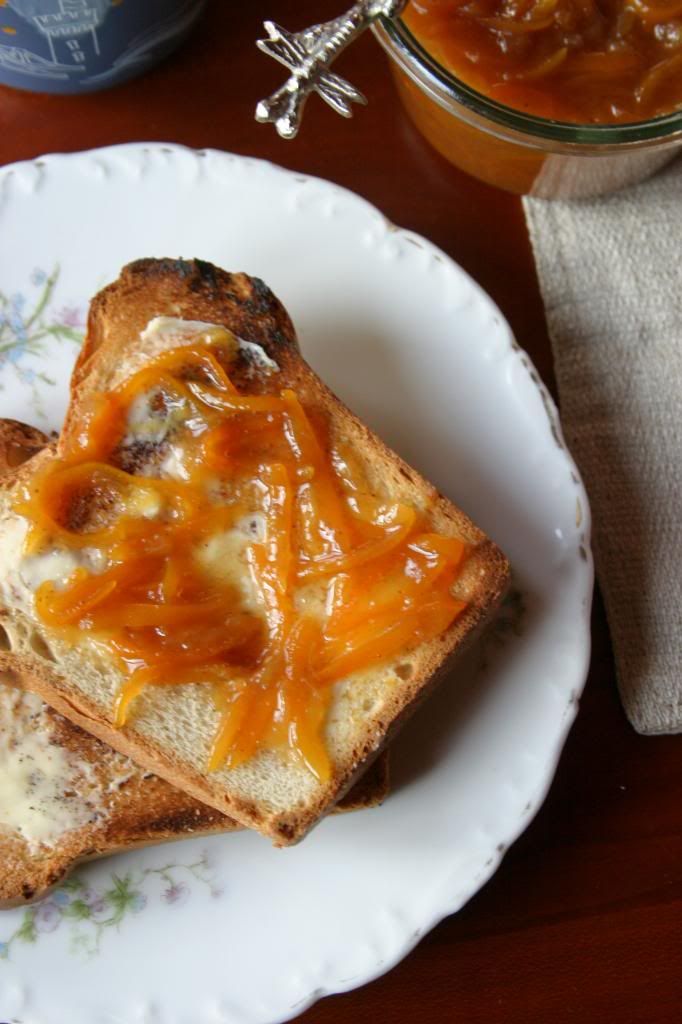
This is a simple way to dive into small batch jam making.  You can make one small recipe and not have to mess around with sterilization, canning pots or boiling lids.  This recipe makes just enough to fill two half pint jars- one to keep and one to give to your favorite neighbor.  The preserves are perfect spread on buttered toast or spooned over vanilla ice cream.

1 lb kumquats
2 cups water
1 1/4 cup sugar

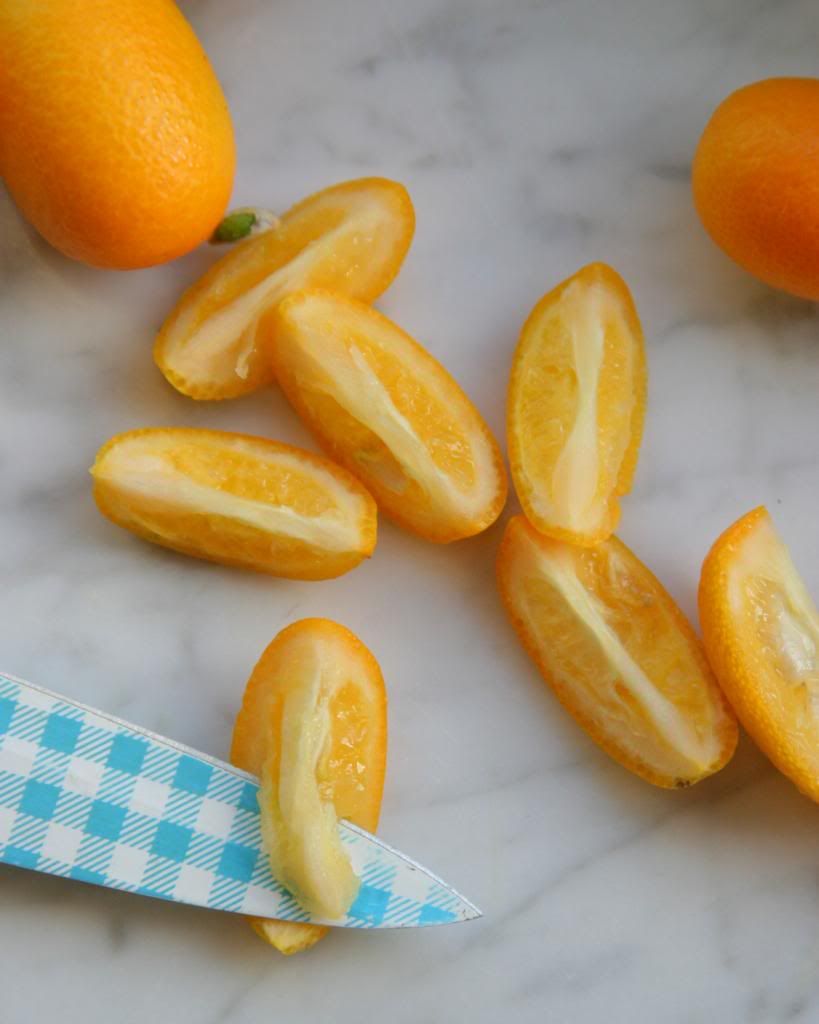
Wash the kumquats well.  Quarter each and with the tip of a sharp knife remove the seeds and the inner membrane.  Reserve the seeds and membranes.  Slice the remaining skins and pulp into thin slivers.

Place the sliced kumquats, water and sugar into a large pot.  Wrap the reserved seeds and membranes in a square of cheesecloth and tie the bundle with the corners of the fabric or with kitchen twine.  Place the bundle in the pot (the seeds and membranes are pectin rich and will thicken the preserves).  Bring the mixture to a boil over medium high heat.  Cook for about 20 minutes or until the preserves are thickened and the temperature reaches 220 degrees on an instant read thermometer.

Pour the preserves into 2 half pint jars and refrigerate.


Tuesday, October 1, 2013

Marmalade French Yogurt Cake


Here's the thing about European kitchens- they're small.  And I don't mean just the square footage.  Every single thing in my kitchen seems to be made for smaller people.  Or people who don't eat.  Or cook.  Or bake. 

I knew it going into the move and did what I thought was my best to prepare myself- including leaving a good 1/3 of my gear behind knowing I wouldn't be able to fit it anywhere.  But the reality of a situation is often times far beyond what you anticipate.  Perhaps I'm a spoiled American girl used to her super-sized appliances.  Sigh.  Unpacking the last of my kitchen boxes yesterday made me realize how "American" my expectations still are.  I simply have to learn to eat and shop like the Europeans who I know must eat because I constantly see them toting around their shopping baskets to and from the markets.  I just don't know how they fit all their groceries into their kitchens.  Maybe I need to do some spying into my neighbors' cabinets and fridges.  It may help me gain some valuable insight into how to survive the next three years with my sanity intact.


I would guess that a basic rule of European kitchens is not to waste anything.  Space is not wasted nor are the supplies packed into the tiny cupboards and fridges.  In the spirit of wasting nothing (including the giant container of Greek yogurt that I bought without thinking about just where on Earth I was going to store said huge tub), I came up with this cake.  The idea was borne from both my frustration over not having anywhere to store my yogurt and from a wonderful find at the bottom of a box I was unpacking- a jar of marmalade from my former life as an Etsy jam seller.  Full disclosure: I don't like marmalade at all.  I'm not a fan of the bitter notes of citrus peel.  But there was no way I was letting this one go unused.  It was the last of a batch that was made from the gorgeous trees in my California backyard, a mix of orange, honey tangerine and Meyer lemon.  Not only is the jar getting close to it's expiration date, the nostalgia was just too much for me to ignore.

I've made a cake paring citrus with olive oil before and I enjoyed the combination.  This time around I decided that I wanted something a bit more simple.  Seeing as how I have no mixer or room for several bowls on my counter, any recipe that makes use of a single bowl and a spatula is just about perfect for me these days.  It's light, moist and not too sweet.  In other words, a cake tailor made for tea time, breakfast or a midnight snack that is just as good the day it's made as it is three days later.  Even my kiddos, professed marmalade haters just like me, LOVE this cake.  I still have 2/3 of a jar left of my precious marmalade and that giant tub of yogurt shoved into a corner of my tiny fridge.  Which means that I have just enough to honor my little one's request for more cake!


Marmalade French Yogurt Cake
Makes 1 standard sized loaf.  Adapted from Bon Apetit Magazine.
For the printable recipe, click here.

This is the sort of cake you can throw together at the drop of a hat, requires no special skills or equipment, and makes you seem like a baking genius.  Who could ask for anything more?  I used non-fat Greek yogurt and a full bodied olive oil for my cake and it turned out beautifully moist and light in flavor.  It's one of those "use what you have" sort of recipes.  One caveat-be sure to use a good quality marmalade as its flavor will make all of the difference.  This cake will last for several days wrapped well or for a few months in the freezer.

1 1/2 cups all-purpose flour
2/3 cup sugar
2 tsp baking powder
2 large eggs
1/4 cup marmalade
2/3 cup Greek yogurt
1/3 cup olive oil

Preheat your oven to 350 degrees and butter and flour a standard sized loaf pan (or spray with non-stick spray).

In a large bowl whisk together the flour, sugar and baking powder.  Stir in the eggs, marmalade, yogurt and olive oil.  Pour the batter into the prepared pan and even out the the top.  Sprinkle 1 tsp sugar over the top.  Bake the cake for 45-50 minutes or until a toothpick inserted into the center comes out with moist crumbs clinging to it but free of wet batter.  Cool the cake in the pan until it is just warm to the touch, then remove the cake from the pan and place it on a wire rack to finish cooling. 


Wednesday, September 4, 2013

{Mirabelle} Plum Ginger Preserves

Oh.  My.  Goodness.  I don't even know how to describe how much I missed this space or how grateful I am that it has finally been returned to me.

Life post-move to Germany has been so strange and difficult and beautiful all at the same time.  I can hardly find the words to describe how completely unmoored I have felt since getting here.  And even if I did have the words, I'm not sure what language I would use to express them to you.  I have no background in German except for the little introduction to foreign languages I got in the eighth grade.  You don't want to know how long ago that was.  I do know a fair amount of Spanish and an even smaller amount of Italian, but they're of absolutely no help here.  My brain keeps reminding me that using English is the wrong way to go in conversations with the locals, but what I know in German can be counted on my fingers and toes.  Sometimes the words threaten to come out in Spanish instead.  Trust me, the fruit stand workers look at me quite strangely when I speak in my strange English/German/Spanish/Italian mix.
But I do know how to say please and thank you and I'm learning.  Honestly, the words that seem to come the easiest to me are the words associated with food.  Though I may often get the words for the numbers two and three mixed up, I have no problem at all with my fruits and veggies.  I know how to ask for an onion (Zwiebel), strawberry (Erdbeer) or tomato (Tomaten).  Beer and wine are easy (and SO good!).  So I'm starting with what I'm comfortable with and going from there.

The easiest place for me to start is jam.  While living in our hotel, we had to walk past a fruit stand every day to get to the restaurants.  I would slowly stroll by checking out the produce and have to restrain myself from buying all of the new fruits and veggies I had heard of but never seen or been able to get my hands on before.  But I had no kitchen in the hotel and the only thing I "cooked" in the month we lived there were PB&J sandwiches.  Sadly, the beautiful apricots never made it into my hands and their season has passed by.  But we're still in the heart of plum season here so when we moved from the hotel to our house, one of the first things I did was visit the thrice-weekly market in the town square and scoop up several types of beautiful plums (as well as currants and berries and veggies galore).  Some we ate while hiking to Germany's highest waterfall in the Black Forest, some got turned into a quick strudel and the rest became preserves.
{Mirabelle} Plum Ginger Preserves
Makes about 1 pint.
For the printable recipe, click here.

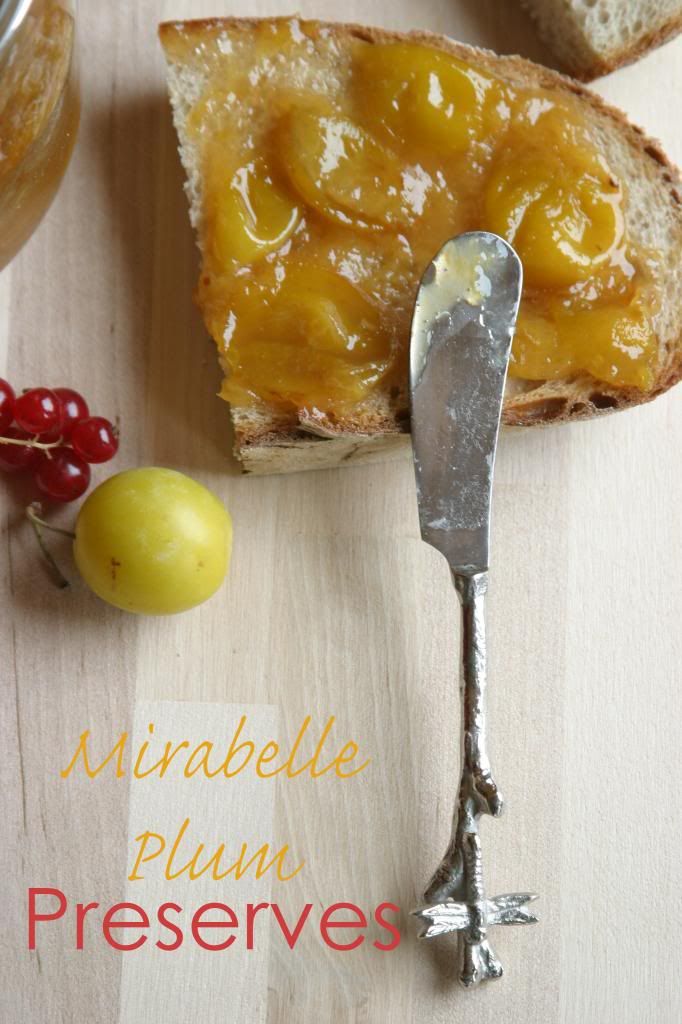
I've never seen a Mirabelle plum in the States, so these were completely new to me.  About the size of a large cherry with a tiny pit inside, they're quite lovely for snacking on.  The flavor is sweet and maybe a bit more floral than a regular plum.  If you ever do find them, please get some and try them.  In the meantime this simple preserve will work beautifully with any other type of plum you can get your hands on.  I dare say pluots or Italian plums might be even better than regular plums.  Just chop the plums into 1 inch (or so) pieces before cooking.

2 1/2 cups of pitted and chopped plums (if using Mirabelles, simply halve and pit)
1 tbs lemon juice
1/2 to 1 tsp grated fresh ginger (to taste)
1/2 cup sugar
1/2 cup honey

Combine all ingredients in a large bowl and stir to combine.  Cover and let stand at least 2 hours and up to overnight in the refrigerator.

Pour all ingredients (scraping out all the last bits of juice from the bowl) into a medium saucepan.  Bring the juices to a boil.  Cook over medium heat, stirring often, until the juices have thickened and the fruit has become translucent.  If you check the temperature of the fruit mixture with an instant read thermometer, it should read 220 degrees.  This should take about 20 minutes.  Let cool and pour into a resealable container.

The preserves will keep for two to three weeks in the refrigerator.


Tuesday, April 23, 2013

Tea Scented Macarons with Lemon Cream

This is the post that almost wasn't.  I tried and failed the first time.  Yes, that does happen, even to someone as experienced in the kitchen as me.  I should have taken a few pictures of the mess that resulted on my baking sheets, but I was so irritated with myself that I just stuck the baking sheets in my sink and walked away.  But, as I used to say back in my teaching days, you learn as much, if not more, from your failures as you do from your successes.  And perhaps I was just as motivated to try again by the look of disappointment of my 4-year old sous chef's face when he earned that I had to throw out all of the cookies he had helped me make.  Boy, does that kid know how to get to me.
Here's the other thing that kept me trying- I knew something was wrong with that first batch and I didn't listen to my instincts.  Instead I just crossed my fingers and hoped that the macarons would turn out okay.  But if you had asked me to be truly honest, I knew they wouldn't.  And of course, I was right.  Instead of cute little cookies with the characteristic smooth tops and "feet" at the bottom, I ended up with a soupy mess coating my silicone baking mats.  There was too much egg white and I knew it right from the start.  It took me another week and a half to work up the courage to try again.  But I couldn't let it go.  It was at the back of my mind nagging at me the whole time.
Attempt number two was much more successful.  There were a few cracks and smooshed bottoms (I think I should have let them bake for another minute or two), but over all I was delighted with the result of my macaron experiment.  The inspiration came from one of my favorite drinks- the Arnold Palmer- and a more than giant lemon macaron that I actually had to cut into three pieces and share because there was no way I could eat it all by myself....okay, I totally could have eaten it but it wouldn't have been wise....

I had meant to submit these macarons for Love & Olive Oil's April kitchen challenge but after my initial failure I just couldn't get my act together on time.  No matter, I'm still glad I tried again.  And so is that little sous chef of mine, his sad face wiped away by the many macarons he swiped while I was getting together the materials to photograph them.  It's a good things he's cute.
Tea Scented Macarons with Lemon Cream
Makes enough for about 2 dozen 2 inch sandwiched macarons.  Recipes adapted from Les Petit Macarons, by Kathryn Gordon and Anne E. McBride  and Food and Wine Magazine.
For the printable recipe, click here.

I've made macarons before- there's even a recipe for chocolate macarons posted on this site.  So I'm not a stranger to them.  I thought I would try a different method this time around.  Bad idea.  After my initial failed attempt to use a "quick method" of making macarons, I thought I would do much better with a more traditional recipe.  And I was right.  I made these macarons using the French meringue method and I was happy with both the ease with which they came together and the resulting cookies.  One trick is to age the eggs.  I left mine on the counter in a bowl while I made the lemon curd and waited it for it to cool.

I used my absolute favorite tea in the world for these macarons because I had just enough left in the bottom of my tin to make the cookies but not enough to make a cup of tea.  It's a black tea called Marco Polo from France.  I think Earl Grey would be a wonderful substitute for the more expensive tea.  The lemon creme is a combination of two recipes and requires an extra step beyond making traditional lemon curd, but I think beating in the almond paste helped tame some of the tartness of the lemon.  Trust me, it's still plenty lemony.

For the Lemon Cream:

5 egg yolks
1 whole egg
1 tsp lemon zest
2/3 cup fresh lemon juice
1/4 cup plus 2 tbs honey
4 tbs butter, but into small pieces
4 oz. almond paste (not marzipan)

In a medium heavy bottomed pan, whisk together the egg yolks, egg, lemon zest, lemon juice and honey.  Cook this mixture over medium low heat, whisking constantly, until it is thickened and glossy.  Remove from the heat and stir in the butter.  Place the lemon curd in a bowl and cover the surface directly with plastic wrap.  Refrigerate until cool, at least three hours.

To finish the cream, place the almond paste in the bowl in of a mixer and beat until it is crumbled.  Add 1 cup of the cooled lemon curd to the mixer slowly and beat until combined.  Refrigerate until needed, up to one week.

For the Tea Scented Macarons:
1 1/4 cups almond flour
3/4 cups powdered sugar
2 tsp ground Earl Grey tea (use a mortar and pestle, spice grinder or small food processor to grind it very finely)
1 tbs powdered egg whites
3/4 cup sugar
1/2 cup egg whites (from 4 eggs- crack the eggs, quickly beat with a fork to break up the whites and then measure)
1/2 tsp cream of tartar

Preheat your oven to 200 degrees and line 2 baking sheets with parchment or a silicone baking sheets.

Place the almond flour, powdered sugar and tea in the bowl of a food processor.  Pulse the mixture several times to blend and grind the almonds very finely.  Pour the almond mixture into a fine-meshed sieve and sift onto a sheet of waxed paper.

In the bowl of a mixer, quickly whisk together the powdered egg whites and sugar.  Add the egg whites and cream or tartar and whisk until thoroughly combined.  Turn on the mixer and, using the whip attachment, whip the egg whites until they are thick, glossy and form stiff peaks.

Remove the bowl from the mixer and quickly fold in the almond mixture until fully incorporated.  Fill a pastry bag fitted with a half inch tip or a half inch hole cut in the tip with the macaron batter.  Pipe the batter onto the prepared baking sheets into half dollar sized mounds about 1 1/2 inches apart.  To remove any "tails" from the piping and any air bubbles, slam the baking sheets on the counter at least three times and up to six.

Bake the macarons for 15 minutes, then raise the heat to 350 degrees and continue baking the shells for 9 more minutes until the foot and edge of the cookie are firm and the shells just come off the parchment.  Slide the parchment onto a cooling rack and cool the macarons completely.

To fill, turn half of the macarons with the flat side up and pipe or spoon the lemon cream about 1/2 inch high and leaving a 1/4 edge around the cream.  Gently press another cookie on the top, flat side down.  Store in an airtight container in the refrigerator for up to 3 days.


Tuesday, April 16, 2013

Chamomile Berry Preserves

It started with the simplest of things- a cucumber plant that went out of control. I had the brilliant idea to make pickles.  So I invited a couple of friends over to help slice, measure, sterilize and seal a dozen jars of the best pickles I have ever had on a burger.  We shared the jars and some good conversation that afternoon.  By the end of it, my friends and I had caught the bug.

A couple of weeks later the call was made again.  This time, jam was on the agenda.  We spiced the tiny plums from backyard trees, made curd from tart grapefruit (also of the backyard variety) and experimented with cantaloupes and vanilla.  That last one had so much potential that I couldn't help myself but try it again with a less assertive melon and quite a bit less sugar.  The result was like the nectar of the Gods.  I was hooked- on canning, preserving, jamming, and pickling anything I could put in a jar.
I was so hooked, I ended up turning my obsession into a business a mere two months later.  You can check it out by scrolling down to the little Etsy shop announcement over on the right sidebar.  It's over there waiting for you and I think you'll like it.  Go ahead, I don't mind if you leave for a few minutes to check out my wares (and those of my super-talented-ceramic-artist of a sister!).  You know you want to.

Are you back?  Great!  Because I have a new favorite jam that I'd like to share with you.  Okay, so every new jam is my favorite.  But it's really, really good.  It's a bit tart, a bit sweet with a lightly honeyed floral flavor balancing it all out.  Exactly what I love in a jam.  And just what you should be looking for in one too.  None of that flat, one note supermarket stuff.  And a whole lot less expensive that the boutique stuff the good folks at Williams Sonoma would like to sell to you.  And as a bonus, it makes use of an infused simple syrup that will show up in another recipe later this week (and perhaps an Arnold Palmer on my dining room table later this week at dinner, sorry you'll have to make your own).
Chamomile Berry Preserves
Makes about 1 pint. 
For the printable recipe, click here.

This is a simple jam- no pectin and no canning bath.  It is meant to make a small batch to enjoy right away.  The only unusual ingredient is the chamomile simple syrup.  I had the great fortune to find a bundle of organic fresh chamomile flowers in my CSA box a few weeks ago.  So I made an infused simple syrup that I have used to sweeten and flavor a few different sweets since.  If you can't find the flowers at your favorite farmer's market, you can easily use chamomile tea to make the infusion (assuming the dried flowers are the only ingredient).  If you can't find the flowers or tea, try using maple syrup to sweeten the preserves.

1 generous pound mixed berries ( I used blueberries and strawberries in a 1:2 ratio)
1 tbs lemon juice
2 tbs chamomile simple syrup*

Stem and chop the strawberries coarsely.  Place in a large bowl with the blueberries. Stir in the lemon juice and chamomile simple syrup.  Lightly mash the blueberries.  Let the mixture sit on the counter for 30-60 minutes to allow the berries to release their juices.

Place the berry mixture in a medium heavy bottomed pot over medium high heat.  Bring the mixture to a boil and allow it to cook over the same heat for 10-15 minutes.  The bubbles will change from loose small bubbles to large bubbles that take longer to pop.  You can test the done-ness of the preserves by using an instant read thermometer (it is done at 220 degrees) or by placing a metal spoon in the freezer.  Dip the frozen spoon in the jam, if the jam is still loose and runny after a minute or two on the spoon, it is not ready.  If the jam is thick and does not run easily, it is finished.  Place the finished jam in a clean jar, cover and refrigerate until cool.  It will keep for several weeks.

I love this jam on toast with butter or simple lemon muffins, but it also pairs well with softer cheeses like my favorite Humbolt Fog and makes a great topping for ice cream or yogurt.

*Chamomile simple syrup- Place 3/4 cup sugar and 1 1/2 cups water into a small saucepan.  Bring to a boil and stir to dissolve the sugar.  Turn off the heat and stir in the flowers of 1 bunch chamomile (or two chamomile tea bags).  Allow the mixture to steep until cool.  Strain the flowers out and place the syrup into a lidded container.  It will keep in the refrigerator for two weeks.


Monday, February 11, 2013

Strawberry Brioche Sweet Rolls

This recipe is my Valentine to my two sweet sons.  It's hard to write about my boys without sounding too cliche, but I will say this:  I never imagined that I could love anyone as completely and unconditionally as I do them.

They are both so different from each other that already, at 3 and 8 years old, my relationship with each is unique.  My oldest is the quiet, polite, introspective one.  He is bright, thoughtful and speaks in ways that are well beyond his 8 years.  He is so much like me that I understand him on a deeper level than anyone else on the Earth.  He doesn't understand how important that is yet, but as he grows up, I have a feeling we will have many conversations without even speaking to each other.  I'm not not sure if he'll come to appreciate it or not, but I hope that he will.  His little brother, on the other hand, is cut of an entirely different cloth alltogether.  He is outspoken, tough, controlling and stubborn, in other words exactly like his father.  But I have found that he is also capable of such immense love and loyalty that are borne from the same passion which he devotes to battling for his way.And his laugh is the best one I have ever heard.
We get to spend so much time together as a threesome while my husband is off working in faraway places that I often think it's incredibly unfair to him.  I get to know my boys, nurture them, laugh with them and spend all of the important moments with them and he has to miss quite a bit of it.  I can only hope that as they get older they will understand why he was away and how much he loves them and misses them.  And in the meantime, I fill both roles of mother and father and love my boys as much as possible for both of us. 
Strawberry Brioche Sweet Rolls
Makes 9 rolls.  Brioche recipe from The Pie and Pastry Bible by Rose Levy Beranbaum.
For the printable recipe, click here.

This is certainly not an everyday recipe.  It is the sort of thing we have around my house on a special day or for a treat.  It's a bit involved and requires at least a day to make, but is worth every ounce of patience you put into it.  I suggest making the dough the day before you want to serve the rolls, unless you want them for dessert.  The brioche is from an impeccable source and is the sort of soft and fragrantly buttery pastry I'd expect from a Parisian patisserie.  The strawberries are found in two places- the jam that is baked in between the layers of brioche and in the cream cheese frosting.  It's indulgent, to be sure, but it's not for everyday and as Julia Child said, “Everything in moderation... including moderation.”. 

2 1/2 tbs warm water
3 tbs sugar
1 1/2 tsp (1 packet) instant yeast
1 1/2 to 2 cups unbleached all purpose or bread flour
3 large eggs, room temperature
8 tbs butter, very soft

2/3 cup home made* or best quality strawberry jam

4 ounces cream cheese, room temperature
8 tbs butter, room temperature
2 cups powdered sugar
1 tsp vanilla extract
2 tsp strawberry jam

*one of my strawberry jam recipes is below, though I used orange instead of lime for these rolls

Give your yeast a kick start by combining the yeast, water and 1/2 tsp of the sugar in a small bowl.  This is called proofing.  Set the bowl aside for 10-15 minutes, until it is full of bubbles.

In a large mixing bowl, whisk together 1/3 cup of the flour and 1 of the eggs.  Add the yeast mixture and whisk until smooth.  Sprinkle the remaining flour (to equal 1 1/2 cups total, including the prevously added 1/3 cup) over the top of the mixture, but do not mix it in.  Cover the bowl with plastic wrap and set it in a warm, draft free spot for 1 1/2 to 2 hours.  You will see cracks emerge in the flour and the spongy yeast mixture expanding underneath.

When you are ready to complete making the dough, whisk together the remaining sugar and eggs in a small bowl.  Add this to your sponge mixture and beat with the paddle attachment of a stand mixer on medium speed (you could do this by hand, but you'd need some strong biceps!).  Beat for about 5 minutes or until the dough is smooth, shiny and begins to clean the sides of the bowl.  You may need to add more flour to accomplish this, but do so in increments of 1 tbs at a time.  I actually found that I needed a bit more than the upper range of 2 cups to get a nice smooth dough.  Increase the speed to medium high and incorporate the butter 1 tbs at a time.  The dough will be very soft and elastic.

Turn the dough out into a buttered bowl and cover with plastic wrap.  Let it rise until doubled in volume, 1 1/2 to 2 hours.  When the first rise is complete, turn the dough out onto a lightly floured work surface.  Gently press it into a rectangle and then fold the dough into thirds like a letter.  Press it out again into a rectangle and repeat the fold.  Wrap the dough tightly in plastic wrap and then place in a zip top bag.  Refrigerate for at least 1 hour or up to overnight. 

Remove the dough from the refrigerator and roll it on a lightly floured surface into a rectangle roughly 12 by 14 inches.  Spread the 2/3 cup jam over the dough, leaving a 1/2 inch border around the edges free of jam.  Roll the dough into a log from the long side.  Cut the log into three pieces and each of those into thirds.  Place the rolls into a buttered 8x8 inch baking dish.  You can leave the rolls out for their final rise at this point or refrigerate them overnight.  In either case, cover with plastic wrap.  Whenever you choose to let them rise, set them in a warm spot until roughly doubled in bulk, 30-45 minutes if already warm or up to 1 hour if straight from the fridge.

Preheat your oven to 375 degrees while the rolls rise.  When the rolls have risen, bake them in your preheated oven for 15-20 minutes.  The edges will become golden.

While the sweet rolls bake, make the frosting.  In the bowl of a stand mixer or with a hand mixer, beat together the cream cheese and butter on medium speed until smooth.  Add the powdered sugar and beat until light and fluffy.  Add the vanilla and jam and beat just until incorporated.  Spread over the warm sweet rolls and serve.

The rolls will keep, wrapped airtight, up to 2 days at room temperature.

*Strawberry Lime Jam
1 quart of strawberries (about 4 cups chopped)
1 cup sugar
zest and juice from 2 limes

Put the chopped strawberries and sugar in a large bowl.  Cover and let macerate in the refrigerator for at least 2 hours or up to 12.

Place the strawberries and all the accumulated juices into a medium sauce pot.  Add the lime zest and juice.  Over medium heat, bring the mixture to a boil then lower the heat so that the mixture is at a constant simmer.  Cook the berries until an instant read thermometer placed in the mixture reaches 220 degrees.  This will take about 20-25 minutes.   Pour into a pint jar, cover and let cool.  Refrigerate the jam for up to three weeks.


Tuesday, June 26, 2012

Honey Vanilla Peach Butter

I have actually spent most of my life as a peach hater.  I never understood those people who talked about the best part of summer being the ripe peaches eaten out-of-hand as the juices dripped down their chins.  Maybe it was the fuzzy skins that turned me off.  It wasn't the big pit you had to eat around- I absolutely love plums.  They smelled fine enough, I guess, so it wasn't that.  Other than the color (which I confess I found slightly odd), I really have no idea why I didn't like peaches.  Maybe because my sister liked them and I couldn't possible liked something that she did, right?  I know we all have a sister (or brother) like that.  Oh, and I vaguely remember some incident in my high school cafeteria when a cup of peaches became a flying projectile and I was the target.  Blech!
I'm not going to count my college days, when fuzzy navels were my drink of choice for a while.  I'll chalk that up to poor taste and having very little money to spend on good wine and beer.  Besides, peach schnapps doesn't really taste much like peaches does it?
I can't really say that I had some epiphany moment when the beauty of a ripe peach became something I couldn't live without.  Maybe I've just grown into it.  Perhaps it's because I no longer feel the need to be the complete opposite of my sister (who I've also grown to love and appreciate).  I've certainly gotten over walking around high school for a day smelling like canned peaches.  I think.

I suppose being part of a  CSA who's organizer is a stone fruit farmer hasn't hurt.  These past two summers I've gotten to know and appreciate many types of stone fruit- the aprium, nectarine, peaches (both yellow and white, round and flat) and my absolute favorite- the pluot.  Last summer, when an abundance of peaches overwhelmed my countertop, I made peach salsa.  This year the 10 lbs of peaches I got became beautiful jars of honey vanilla peach butter and a lively and spicy peach BBQ sauce.
Honey Vanilla Peach Butter
Makes 2 pints.  Adapted, only slightly, from Nutmeg Nanny's recipe.
For a printable version, click here.

Feel free to play with the amount of sugar and honey to suit your taste and the ripeness of your peaches.  Mine were almost overripe, so I held back on adding more sugar.  You can preserve the peach butter by boiling the jars in a hot water bath for 10 minutes or simply refrigerate the jars when the peach butter has cooled.

5 lbs ripe peaches (about 12), peeled, pitted and coarsely chopped
1/3 cup water
1 cup sugar
1/2 cup honey
1 vanilla bean

In a large, heavy bottomed pot, combine the peaches and water.  Bring the mixture to a simmer and cook for about 15 minutes.  The peaches should be very, very soft.  Blend the peaches until smooth in batches and return them to the pot or blend in the pot with an immersion blender.

Add the sugar and honey to the pot.  Split the vanilla bean in half and with the back of your knife, scrape the seeds from the pod.  Add the seeds to the peach mixture and stir in the pod as well.  Bring the mixture to a boil, then turn the heat down to medium low and simmer.  Cook the peach butter, stirring often so that the bottom doesn't scorch, until very thick (about 25-30 minutes).  Remove the vanilla pod.  You can rinse and dry the pod and add it to a jar of sugar to make vanilla scented sugar (great in tea!).  Spoon the hot peach butter into two very clean pint jars and either can or refrigerate according to the directions above.  Once opened, the butter will keep in the refrigerator for several weeks.

Serve the peach butter over anything breakfast-y such as waffles, pancakes, toast or scones.

Tuesday, May 15, 2012

Blueberry Apricot Jam- My Very First Post Revisited

I started my blog a year ago next week.  And it has been a fun journey for the past 12 months.  I had no idea what I was doing when I started this, I just knew that I had a desire to share my adventures in food and hope that somebody out there would be interested enough to read about them.

My pictures were terrible- actually my first couple of posts didn't even have photos- and it took me a while to find "my voice".  I was comfortable sharing about my food, but not so much about myself.  Throughout the past 97 posts (97!!  Wow!), I've learned how to just be me.  I'm interesting enough.  My thoughts are good enough.  And the food speaks for itself. That's a pretty amazing realization.
I'm getting there, learning more about myself and to trust my instincts as I go.  While my camera remains a decent little point and shoot and not the wonderful DSLR that I hope to one day have, I think I've learned quite a bit about how to photograph food and make it look good enough to want to grab from the screen and eat.  There's still a long way to go though and I'd love to take a food styling workshop or two (hubby, are you reading this?...) to learn how to take the best shots that I can.  In the meantime, I'll just keep plugging away.

I'm a long way from the polished and professional looking blogs that I adore.  I don't have a following of zillions of foodies or a book in the works and I haven't been published in any magazines.  You know what?  I'm okay with that.  I know I have a few dedicated readers who enjoy following along in my journey and some wonderful friends and family who encourage me to keep it up.  I've discovered that that's enough for me.  In fact, it's just right.  This blog may be small and unassuming, but it's mine and it makes me happy.  What else could a girl ask for?
I've been thinking a lot about starting fresh and new beginnings lately.  So I decided to go back to the beginning- literally- of my blog and start fresh.  My first post was an aprium vanilla jam.  Those apriums landed in my CSA box again last week and my first instinct was to make that same vanilla jam from a year ago.  But I'm a year older and a year wiser than I was then, so I decided not to go the same route.  This is a bit less subtle of a jam than the original, with fresh blueberries stirred in.  The vanilla jam was warm and ethereal and this jam is the complete opposite.  It's sweet and tart and wonderful- and just as good slathered on a piece of toast as it is warmed and served over ice cream.  I love it- well actually, I love both of them!
Blueberry Apricot Jam
Adapted from The New Preserves, by Anne V. Nelson.
For a printable version, click here.

Makes 4 half-pint jars.

2 lbs apricots (you could also use apriums, peaches or nectarines), about 10, pitted and chopped
1 1/2 cups (about a pint and a half) blueberries
2 cups sugar
2 tbs lemon juice
1 tbs butter

Place all the ingredients except the butter into a large saucepan.  Stir to coat the fruit in the sugar and let sit for 15-20 minutes. Add the butter to the pan. Turn the heat to medium high and let the mixture come to a boil.  Reduce the heat to medium and keep the mixture at a vigorous simmer, stirring frequently.

The mixture will begin to gel in about 20-25 minutes.  For a very scientific method of determining readiness, use an instant read thermometer.  A finished jam will reach 220 degrees.  I went the non-scientific route and tested my jam with a spoon.  Dip a metal spoon into the jam and then tilt it onto its side.  The jam should slide off the spoon in one sheet and not several drips. Carefully fill four half pint jars with the hot jam.

Here's where you have some choices.  I attempted to process my jars in a hot water bath.  Following proper protocol, I boiled them away for 10 minutes.  Alas, my lids didn't seal.  So into the fridge they went.  One jar went to a friend and one to my son's teacher.  The other two are tucked away for sandwiches and the aforemetioned ice cream topping.  If you'd like to try processing your jars, check out the wonderful blog Food in Jars.  You'll find all kinds of great tips and links there.  If not, just stick your jars in the fridge like I did and eat them up or give them away within a few weeks.