I seem to always have plums on my mind this time of year. Last year I made a traditional German confection with them, Zwetschgenkuchen. The year before I started off my blogging adventure in my new home with a simple jam made from the tiniest of plums, mirabelles. It's so easy to fall into a plum state of mind with the markets literally crowded with crates of the purple, red and golden beauties.
Showing posts with label Summer. Show all posts
Thursday, September 3, 2015
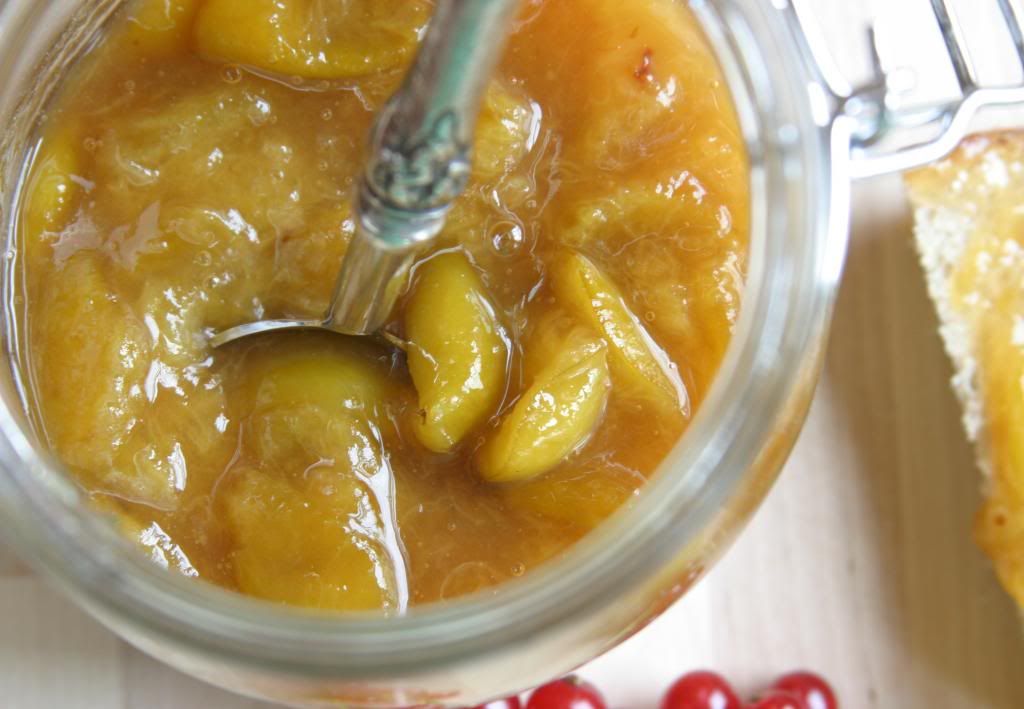
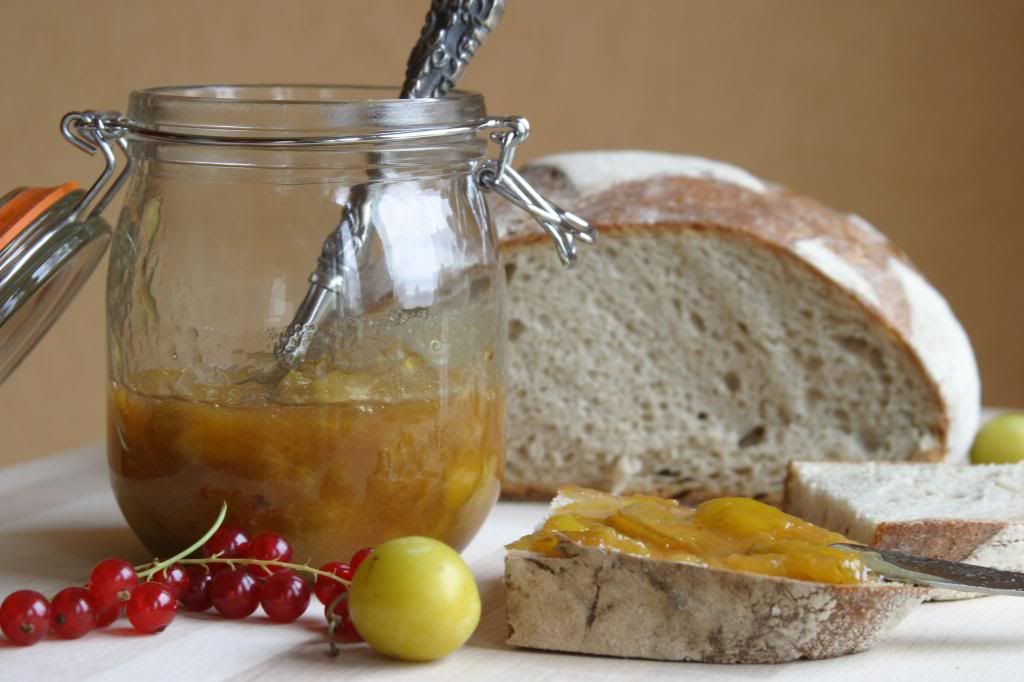
Italian Plum Jam
I seem to always have plums on my mind this time of year. Last year I made a traditional German confection with them, Zwetschgenkuchen. The year before I started off my blogging adventure in my new home with a simple jam made from the tiniest of plums, mirabelles. It's so easy to fall into a plum state of mind with the markets literally crowded with crates of the purple, red and golden beauties.
Thursday, August 20, 2015
Lemon Zucchini Bread {Revisited}
A dear friend of mine recently sent me a text asking for a recipe I shared a few years ago in the early days of this page. Someone had gifted her some zucchini and having tasted my version of zucchini bread once-upon-a-time she was looking to make it for herself. The only problem was that she couldn't find the recipe anywhere on my page. Not a trace of the delicious lemony zucchini bread popped up in any of her searches. Curious, I did a bit of digging myself (it's my blog so of course I can find it right?)
Thursday, July 30, 2015
Friday, May 29, 2015
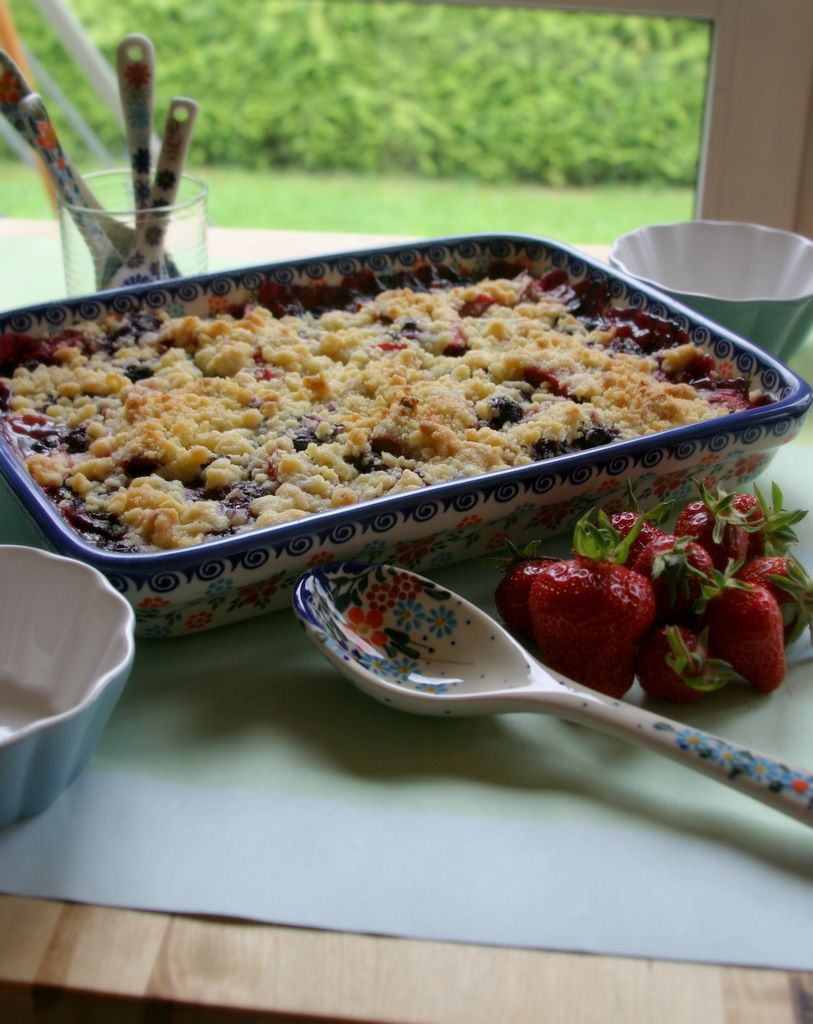
Blueberry and Rhubarb Crumble
I realized that I just missed the 4th anniversary of my little blog! How on Earth I didn't realize it or find it important enough to mark the occasion, I do not know. Plus I've let nearly a month go by without a post. What, oh what, is happening here?
Thursday, July 31, 2014
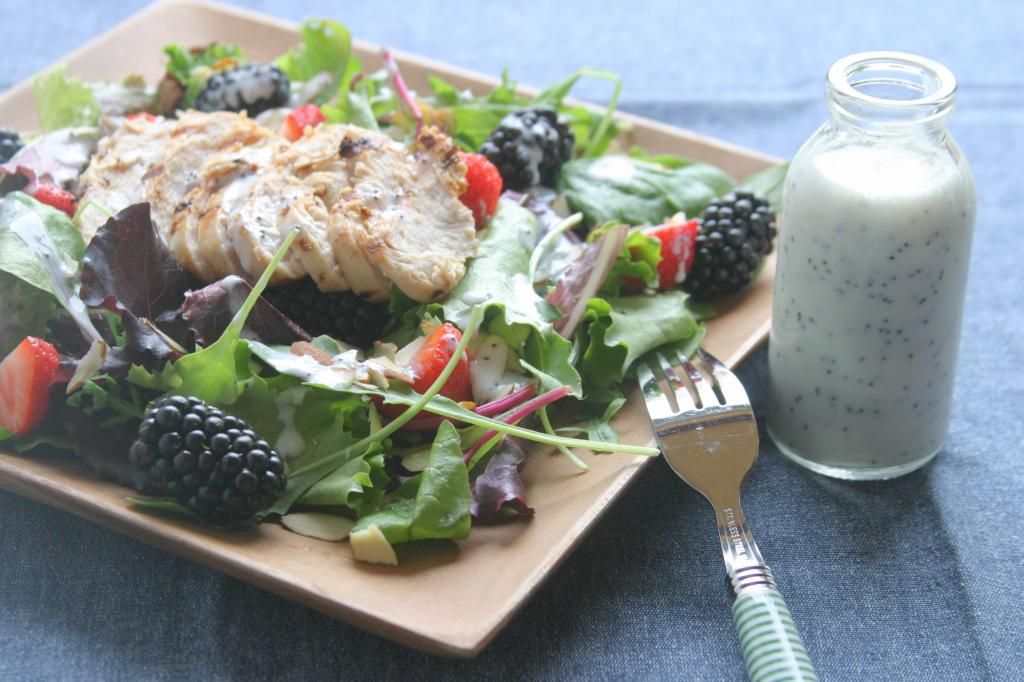
Honey Poppyseed Salad Dressing
I've been playing a bit of a disappearing act lately. In the words of Indigo Montoya (who doesn't love The Princess Bride?). "Let me 'splain...No, there is too much. Let me sum up."
The third trimester of this pregnancy has hit me hard. Between the 90 degree days that completely sap me of any energy and the crazy humidity that comes with weeks of pouring rain and causes amazing swelling in all my joints, I've been a bit out of commission. Then there's the incredible back pain that seems to hit somewhere around noon every day. But the thing that's been the biggest struggle of late is trying to get my high blood sugar under control.
If you've been a reader for a while, you will by now recognize that I have a bit of a sweet tooth. And it's hard for me to pass up a slice of bread or croissant if one crosses my path (okay, I really mean near impossible). How can I just ignore the breadbasket sitting on my counter? But I know how to seek out whole grains and, fortunately, am able to make my own breads and have a whole variety to choose from at my fingertips here in Germany. Interestingly, I've found out that I enjoy spelt quite a bit. Testing my blood sugar 6 times a day has made me accountable for every little thing I pick up to eat and I have to think about the smallest snack I might grab. I've been working hard at it and don't always make the right choices, but after a few weeks I think I might be getting the hang of it. Even making changes to my diet hasn't helped, though, and I'm still struggling with what my body is failing to accomplish every day and frustrated that I now have to rely on extra insulin too.
In all honesty, even though much of my waking day is spent concentrating on the food that goes into my body (and definitely what doesn't) I haven't exactly felt that I have a lot to contribute here. I'm too tired and fixated on little details to have much left for photographing the few things I might find exciting enough to share. Yesterday, though, I kicked my own butt into gear and forced myself to see that it isn't necessarily the complicated baking that makes for the best post, but the food that I am actually making for myself and my loved ones. So even in the rain I found a bit of nice light and whipped up a simple salad dressing for a very summery salad. One that fits into my new diet, but also one I think anybody would enjoy. So I'm sharing- and I must say that's it's nice to be back.
Honey Poppyseed Salad Dressing
Makes about 1 1/2 cups.
For the printable recipe, click here.
I am not giving a recipe for the salad or grilled chicken that I served with the dressing. Mostly because they're so simple they don't really need a recipe. I used mixed baby greens, a handful of sliced almonds and some strawberries and blackberries for the salad. The chicken is a boneless, skinless breast that I simply marinated for about a half hour in lemon juice, lemon zest, garlic and olive oil then grilled until cooked through but still juicy. My favorite part of the salad? The strawberries. I think I could have eaten them in a soup of the dressing.
1/2 cup buttermilk
1/2 cup Greek yogurt
2 tbs olive oil
2 tbs honey
1 tbs lemon juice
2 tsp poppyseeds
1 small shallot, grated on a box grater or microplane with larger holes
a pinch of sea salt
Whisk all the ingredients together in a medium bowl. Serve chilled with your favorite salad ingredients.
Thursday, July 10, 2014
Mint Tea
I've gotten a lot of inspiration from our travels around Europe. My job as we prepare for our trips is to research the area we will be visiting. I look up all there is to see and do at our destination. My husband calls me "our travel agent", a role I am happy to fill. It's really fun to hunt around for information- I read the guidebooks, ask around for experienced travelers to the area and sift through the multitudes of websites available to me to try to get to know an area before we get there. I usually end up making a huge list that I know we will never get to complete, but I'd rather have lots of options so that we can choose what to do based on our mood at the moment.
Sometimes my lists include food options- places that people online rave about perhaps or somewhere that I've read about in a review that seems to serve the most traditional foods in the area. But most often we simply wing it. We ask the locals or wander the streets until something just seems right- usually it's a little place just off the main square that is full of locals. Both my husband and I really enjoy seeking out the traditional foods of a place. It's not only a way to taste the local foods, it's also a peek into the culture of the people. And that's the best part for me. You really get to know someone (or a whole group of folks) by what is found on the menus.
It's been a few months since we visited The Netherlands but a few shining food moments still linger in my memory. The cheese is an easy one- any place that can put together entire towns based on the cheese industry is my kind of place. Gouda and Edam are just a couple of notable examples. The other dish (of sorts) that I noticed at every restaurant we ate or drank at was a simple tea. Europeans might be known for their love of coffee, but the Dutch seem to have an equal fondness for tea. But not the sort of dried black teas that they brought back from their exploration of the Indian continent. I noticed quite a lot of people lounging after their meals with glasses of hot mint tea. Very Moroccan inspired, if you ask me. And certainly memorable.
So in the face of a huge bounty of mint from my garden and very few ideas as to what to do with it all, I called up my memory of the Dutch after dinner drink and set out to make my own mint tea. Of several varieties of mint I have growing, I chose a Moroccan variety. It just seemed a natural fit. Moroccan mint is very peppermint-like, but a bit sharper (zingy would be a good description). And with just a touch of honey and hot water, it makes a wonderful tea. With each sip I am brought back to the canals, tulips and wonderful city atmosphere of Delft and Haarlem.
Mint Tea
Serves from one to many.
For a printable recipe, click here.
There really is no recipe for this tea. It's so simple. I'll give you a suggested amount to have per cup of tea, but it's ultimately up to you and your dinner guests. If you have the access to several mint varieties, try them out to see what you like best. I like pineapple mint, which is sweeter than traditional mint and has the aroma of pineapple, as well as the Moroccan variety. I used a very mild blossom honey (from Slovenia!) to gently sweeten the tea and not compete too much with the mint flavor. The glasses that I prefer for the tea are smaller juice sized ones.
Per glass:
1-2 sprigs of mint, rinsed
1/2-1 tsp light-flavored honey
hot, but not boiling, water
Place the sprigs of mint into the glass. Pour the hot water over the tea and then stir in the honey to taste. Let the tea steep for 4-5 minutes.
Friday, June 20, 2014
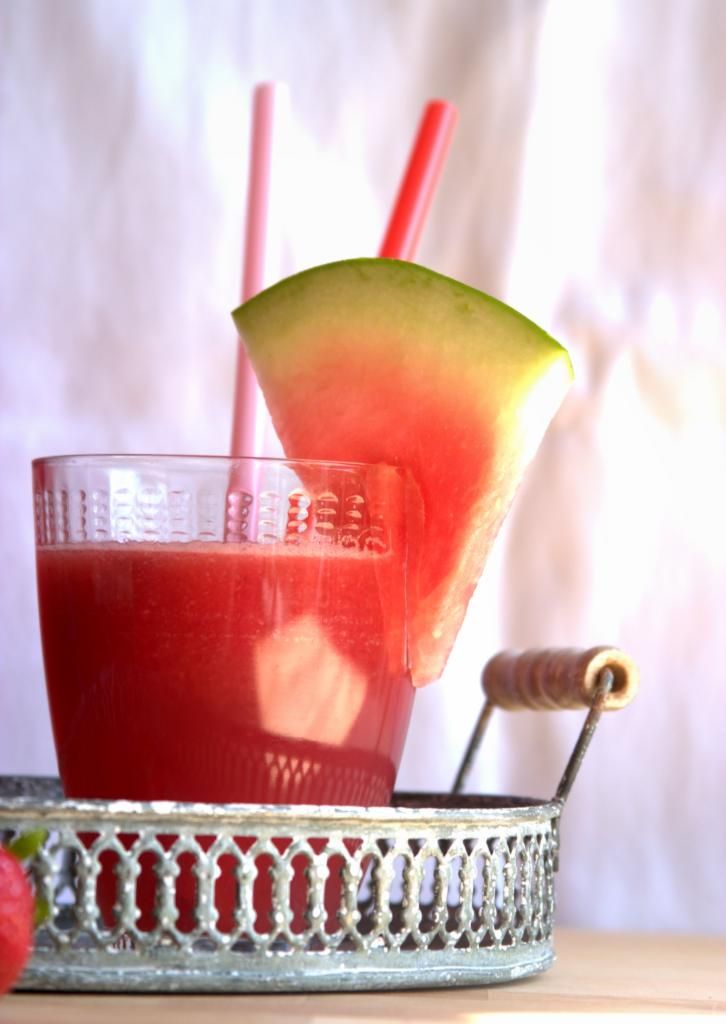
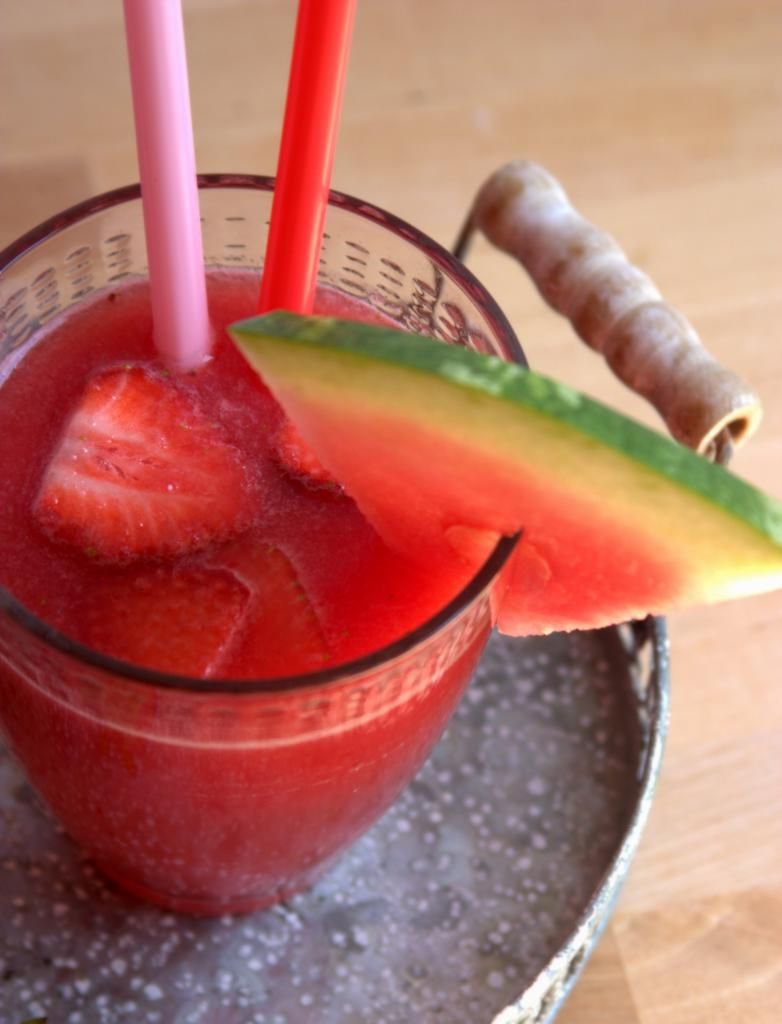
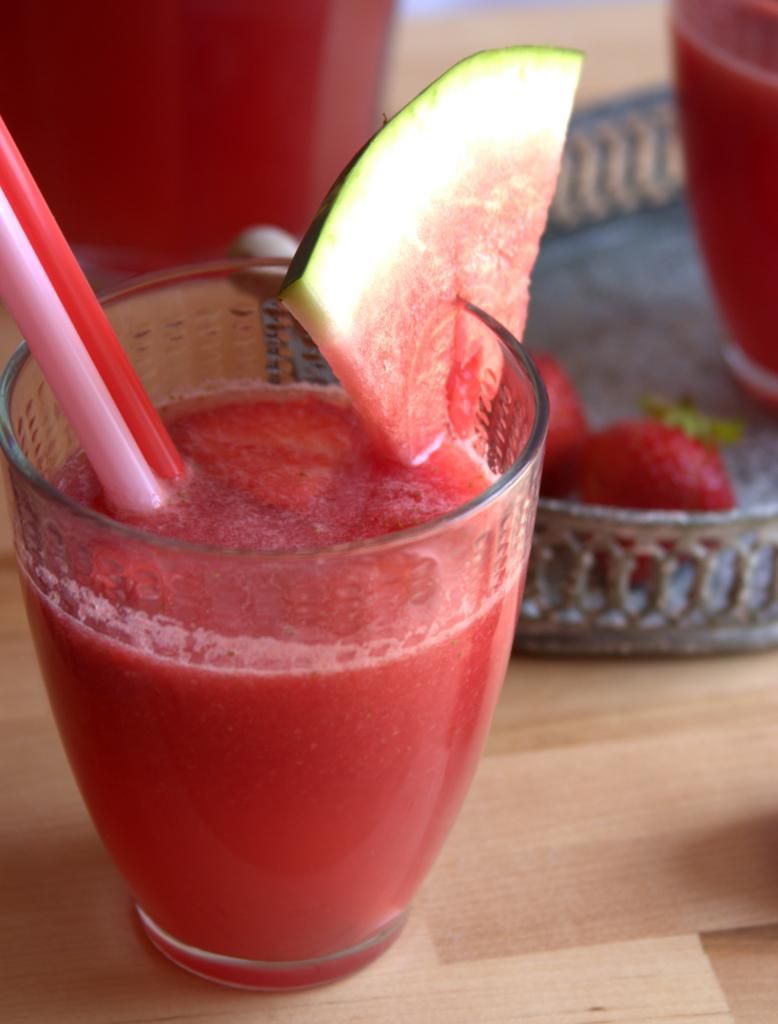
Honey-sweetened Watermelon Strawberry Agua Fresca
“Summer afternoon—summer afternoon; to me those have always been the two most beautiful words in the English language.”
-Henry James
Even though most of us have been swimming and sweating through some pretty hot weather lately, the official start of summer is this weekend. I can't think of any other fruit that really says summer to me than the watermelon. Thick slices being eaten in the shade of a tree or poolside with a big group of friends and family. Picnics, BBQs, beach trips- none would be complete without an ice cold lice of watermelon. The new "personal" seedless watermelons are great for a quick snack, but really it's those giant behemoth that evoke the most vivid impressions of summer for me, maybe because it's all we had as kids.
If you're someone my age (AKA: a preteen girl in the mid to late-80s), you probably can't see one of those giant watermelons without picturing Jennifer Grey's character Baby in Dirty Dancing giving the least impressive response of "I carried the watermelon" when asked why she was hanging out in the dancers' part of the camp. I guess we couldn't expect better of a girl nicknamed Baby, could we? Luckily for her, she had some help getting past that awkward moment. Let's all pause here to reflect on the moment we fell in love with Patrick Swayze while watching that movie...
While I've got you all humming along to a great soundtrack and remembering that "Nobody puts Baby in a corner", let me introduce you to the agua fresca. This is a simple and refreshing drink that is pretty much fruit, fruit and more fruit with perhaps a little sweetener and water mixed in for balance. But you don't need a lot of those extras when dealing with watermelon, especially if you're lucky enough to get a perfectly ripe melon dripping with sweet juices. It's an ideal summer afternoon refresher and if it happens to evoke a few memories of Patrick Swayze shirtless and dancing to some sultry Otis Redding, well, so much the better.
Honey-sweetened Watermelon Strawberry Agua Fresca
Makes about 2 quarts.
For the printable recipe, click here.
This recipe has become a favorite around my house this summer. It takes almost no time at all and makes use of the giant watermelon I seem to always have taking up all the space in the fridge. Because you're going to strain the blended fruit, there's no need to be especially vigilant about removing the seeds which is a plus in my book. There is just a kiss of honey and a splash of lemon to brighten and balance the sweetness of the melon and strawberries. You could go a little lighter or heavier on the honey depending on the ripeness of your fruit. Taste them first and then decide. The melon I used for this batch was not quite as sweet or ripe as I would have liked so I used the full amount of honey, but even that isn't very much.
1 cup water
1/4 cup light colored (and flavored) honey
1/3 cup fresh lemon juice
8 cups cubed watermelon (about 1/2 large melon)
1 cup sliced strawberries
In a small saucepan, stir together the honey and water. Place the pan over medium heat and bring the mixture to a simmer. Cook just long enough for the honey to dissolve, 3-4 minutes. Remove the pan from the heat and stir in the lemon juice. Let cool completely.
In the meantime, blend the watermelon and strawberries in a blender or food processor in batches until completely smooth. Strain the juices through a fine mesh sieve into a 2 quart pitcher. Discard the seeds and pulp. Stir the cooled honey-lemon syrup into the strained juices and chill until cold.
Thursday, June 12, 2014
Quick and Easy Stone Fruit Tart
Because sometimes you just need quick, right?
I have to admit that I've been less than excited to get into my kitchen and bake lately. We've had an unusual hot streak of weather around here and my kitchen has been in the 90 degree range for nearly a week now. With no air conditioning and stores either sold on of fans or closed because of German holidays (can I tell you how over the random holidays I am?), there has been little relief.
There have been lots of popsicles and ice cream around here. And giant wedges of watermelon, crisp and cool straight from the fridge. We're doing what we can to make the best of the sticky (weather) situation. But there were a few moments when I was craving something different. Not something that would require me to stand forever in my kitchen whipping and mixing and sifting and measuring. Not something that would need a hot oven for hours on end. Something quick and easy and satisfying.
So I decided to slice up some fruit and make a tart. Wait, didn't I say I didn't want tons of work and time involved in this treat? Yup, sure did. This is not your every day tart. It's one I whipped up using a freezer staple- frozen puff pastry- and as few other ingredients as possible. It's about as simple and delicious as it can get. A couple of sliced nectarines and a handful of ripe cherries and you're in business. Or apricots and raspberries. Or a mix of plums. Ooooh, that last one sounds good.....
Quick and Easy Stone Fruit Tart
Makes 2 tarts that will serve 3 people each (6 total servings)
For the printable recipe, click here.
My goal with this tart was to make it as easy as possible. So I didn't layer on a ton of flavors with the first one that I made. That isn't to say that even as I sit here typing I can't think of a hundred ways to jazz the tart up- herbs, citrus zest, spices. The options are endless and I'll suggest a few later on. But if you just want pure, fresh fruit and a bit of buttery pastry stick to the basics. Oh, and maybe a scoop of vanilla ice cream.
1 piece of puff pastry from the freezer (preferably all butter if you can find it), thawed according to package directions
about 3 cups sliced stone fruit (depends on the size of fruit and what type you are using- for the tarts pictured above I used 2 nectarines and about 1 1/2 cups pitted and halved cherries)
3-4 teaspoons sugar (use less if you have very ripe, sweet fruit)
Preheat your oven to 425 degrees. Line a baking sheet with parchment paper or a nonstick silicone liner.
Toss the fruit together with the sugar in a medium bowl. Let sit for a few minutes to get nice and juicy. In the meantime, slice your piece of puff pastry in half and lay the 2 pieces side by side on the prepared baking sheet leaving a good inch or two between them. Spread the fruit evenly over the puff pastry leaving about 1/2 to 3/4 inch border around the edges. If you'd like, you can sprinkle a pinch or two of sugar around the edges to give a little extra crunch.
Bake the tarts for about 15 minutes until the edges are a golden (but not dark) brown. Remove from the oven and let cool slightly before serving.
Suggestions for fruit combinations:
nectarines, peaches or apricots and cherries
mixed plums and pluots
peaches and raspberries
mix of yellow and white peaches
If you'd like to add in extra flavors try:
herbs such as lemon verbena or thyme
citrus zest- lime would be wonderful with any type of stone fruit
spices such as cinnamon, cardamom, ginger or nutmeg
Wednesday, September 4, 2013
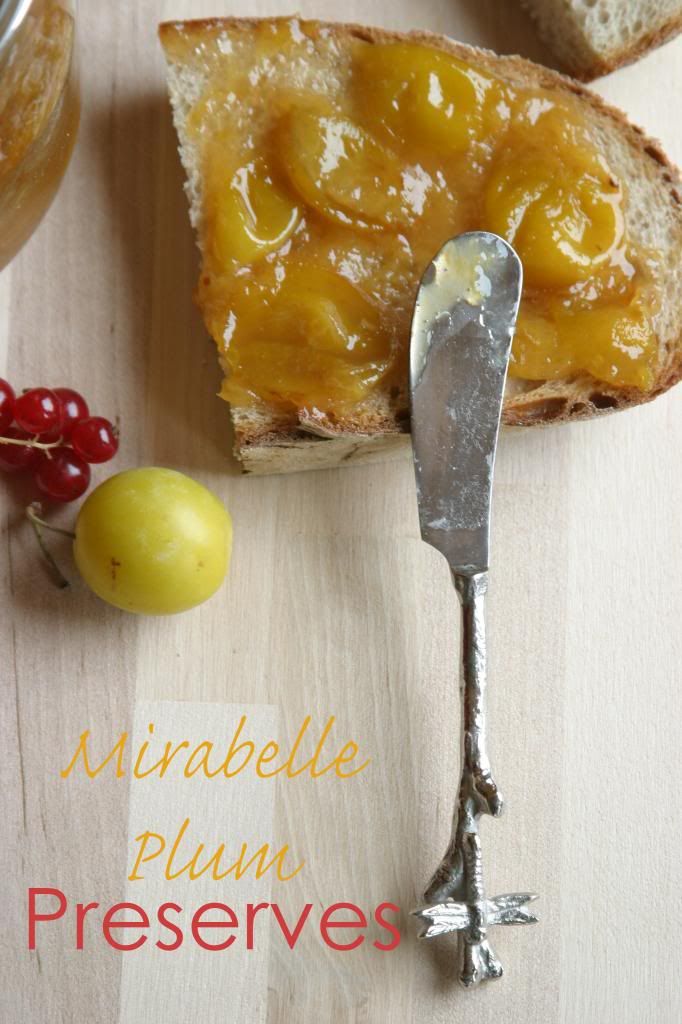
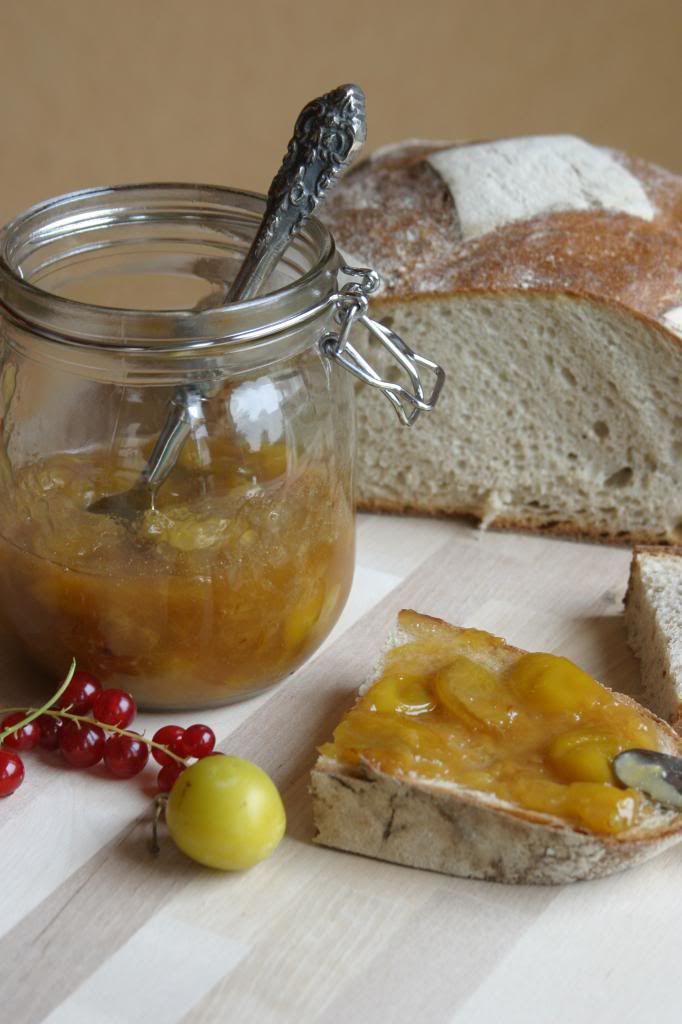
{Mirabelle} Plum Ginger Preserves
Oh. My. Goodness. I don't even know how to describe how much I missed this space or how grateful I am that it has finally been returned to me.
Life post-move to Germany has been so strange and difficult and beautiful all at the same time. I can hardly find the words to describe how completely unmoored I have felt since getting here. And even if I did have the words, I'm not sure what language I would use to express them to you. I have no background in German except for the little introduction to foreign languages I got in the eighth grade. You don't want to know how long ago that was. I do know a fair amount of Spanish and an even smaller amount of Italian, but they're of absolutely no help here. My brain keeps reminding me that using English is the wrong way to go in conversations with the locals, but what I know in German can be counted on my fingers and toes. Sometimes the words threaten to come out in Spanish instead. Trust me, the fruit stand workers look at me quite strangely when I speak in my strange English/German/Spanish/Italian mix.
But I do know how to say please and thank you and I'm learning. Honestly, the words that seem to come the easiest to me are the words associated with food. Though I may often get the words for the numbers two and three mixed up, I have no problem at all with my fruits and veggies. I know how to ask for an onion (Zwiebel), strawberry (Erdbeer) or tomato (Tomaten). Beer and wine are easy (and SO good!). So I'm starting with what I'm comfortable with and going from there.
The easiest place for me to start is jam. While living in our hotel, we had to walk past a fruit stand every day to get to the restaurants. I would slowly stroll by checking out the produce and have to restrain myself from buying all of the new fruits and veggies I had heard of but never seen or been able to get my hands on before. But I had no kitchen in the hotel and the only thing I "cooked" in the month we lived there were PB&J sandwiches. Sadly, the beautiful apricots never made it into my hands and their season has passed by. But we're still in the heart of plum season here so when we moved from the hotel to our house, one of the first things I did was visit the thrice-weekly market in the town square and scoop up several types of beautiful plums (as well as currants and berries and veggies galore). Some we ate while hiking to Germany's highest waterfall in the Black Forest, some got turned into a quick strudel and the rest became preserves.
{Mirabelle} Plum Ginger Preserves
Makes about 1 pint.
For the printable recipe, click here.
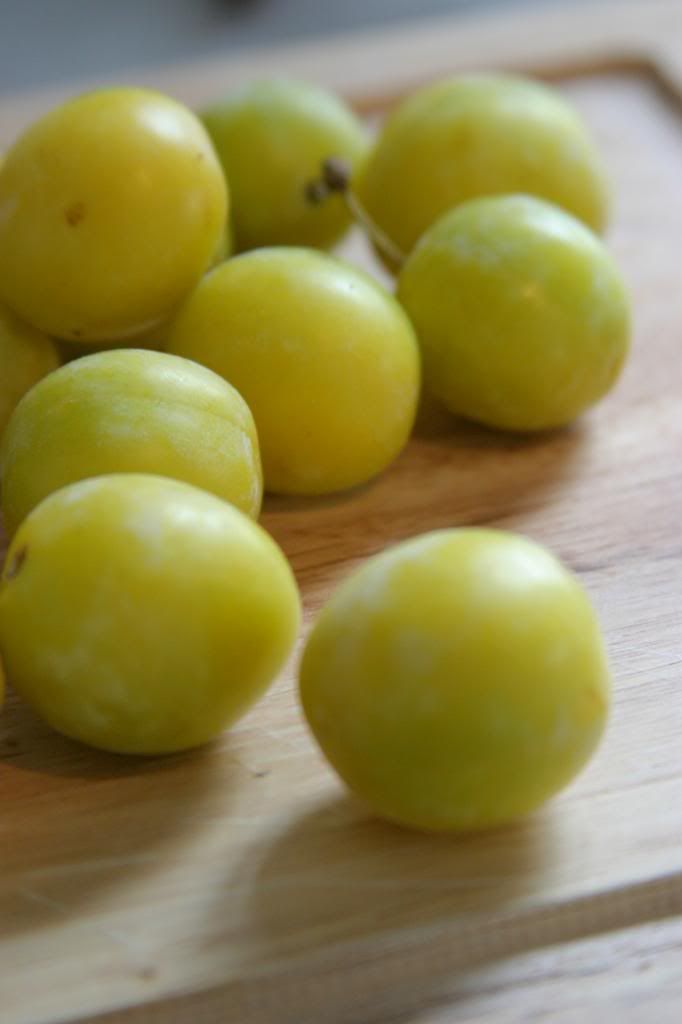
I've never seen a Mirabelle plum in the States, so these were completely new to me. About the size of a large cherry with a tiny pit inside, they're quite lovely for snacking on. The flavor is sweet and maybe a bit more floral than a regular plum. If you ever do find them, please get some and try them. In the meantime this simple preserve will work beautifully with any other type of plum you can get your hands on. I dare say pluots or Italian plums might be even better than regular plums. Just chop the plums into 1 inch (or so) pieces before cooking.
2 1/2 cups of pitted and chopped plums (if using Mirabelles, simply halve and pit)
1 tbs lemon juice
1/2 to 1 tsp grated fresh ginger (to taste)
1/2 cup sugar
1/2 cup honey
Combine all ingredients in a large bowl and stir to combine. Cover and let stand at least 2 hours and up to overnight in the refrigerator.
Pour all ingredients (scraping out all the last bits of juice from the bowl) into a medium saucepan. Bring the juices to a boil. Cook over medium heat, stirring often, until the juices have thickened and the fruit has become translucent. If you check the temperature of the fruit mixture with an instant read thermometer, it should read 220 degrees. This should take about 20 minutes. Let cool and pour into a resealable container.
The preserves will keep for two to three weeks in the refrigerator.
Life post-move to Germany has been so strange and difficult and beautiful all at the same time. I can hardly find the words to describe how completely unmoored I have felt since getting here. And even if I did have the words, I'm not sure what language I would use to express them to you. I have no background in German except for the little introduction to foreign languages I got in the eighth grade. You don't want to know how long ago that was. I do know a fair amount of Spanish and an even smaller amount of Italian, but they're of absolutely no help here. My brain keeps reminding me that using English is the wrong way to go in conversations with the locals, but what I know in German can be counted on my fingers and toes. Sometimes the words threaten to come out in Spanish instead. Trust me, the fruit stand workers look at me quite strangely when I speak in my strange English/German/Spanish/Italian mix.
But I do know how to say please and thank you and I'm learning. Honestly, the words that seem to come the easiest to me are the words associated with food. Though I may often get the words for the numbers two and three mixed up, I have no problem at all with my fruits and veggies. I know how to ask for an onion (Zwiebel), strawberry (Erdbeer) or tomato (Tomaten). Beer and wine are easy (and SO good!). So I'm starting with what I'm comfortable with and going from there.
The easiest place for me to start is jam. While living in our hotel, we had to walk past a fruit stand every day to get to the restaurants. I would slowly stroll by checking out the produce and have to restrain myself from buying all of the new fruits and veggies I had heard of but never seen or been able to get my hands on before. But I had no kitchen in the hotel and the only thing I "cooked" in the month we lived there were PB&J sandwiches. Sadly, the beautiful apricots never made it into my hands and their season has passed by. But we're still in the heart of plum season here so when we moved from the hotel to our house, one of the first things I did was visit the thrice-weekly market in the town square and scoop up several types of beautiful plums (as well as currants and berries and veggies galore). Some we ate while hiking to Germany's highest waterfall in the Black Forest, some got turned into a quick strudel and the rest became preserves.
{Mirabelle} Plum Ginger Preserves
Makes about 1 pint.
For the printable recipe, click here.
I've never seen a Mirabelle plum in the States, so these were completely new to me. About the size of a large cherry with a tiny pit inside, they're quite lovely for snacking on. The flavor is sweet and maybe a bit more floral than a regular plum. If you ever do find them, please get some and try them. In the meantime this simple preserve will work beautifully with any other type of plum you can get your hands on. I dare say pluots or Italian plums might be even better than regular plums. Just chop the plums into 1 inch (or so) pieces before cooking.
2 1/2 cups of pitted and chopped plums (if using Mirabelles, simply halve and pit)
1 tbs lemon juice
1/2 to 1 tsp grated fresh ginger (to taste)
1/2 cup sugar
1/2 cup honey
Combine all ingredients in a large bowl and stir to combine. Cover and let stand at least 2 hours and up to overnight in the refrigerator.
Pour all ingredients (scraping out all the last bits of juice from the bowl) into a medium saucepan. Bring the juices to a boil. Cook over medium heat, stirring often, until the juices have thickened and the fruit has become translucent. If you check the temperature of the fruit mixture with an instant read thermometer, it should read 220 degrees. This should take about 20 minutes. Let cool and pour into a resealable container.
The preserves will keep for two to three weeks in the refrigerator.
Monday, July 15, 2013
Watermelon, Cucumber, Arugula and Feta Salad with Lime Vinaigrette
So you can take the girl out of her home and kitchen, but apparently you can't take the food blogger out of the girl. I thought I wasn't going to have anything to say or share for quite a while with this move. But I was sooo wrong. It started with a suggestion from my mom, continued through a dinner out with my family and ended up as an obsession. This recipe was one that I just couldn't shake the need to attempt on my own.
And when I spend my free moments (miraculously I do have those- 5 hours on a plane, many long wait times for cars and shuttles, the evening hours where quiet is necessary because I'm sharing a room with my sleeping children...) trying to memorize the ingredients and work out the ratios of a salad I had for dinner one night on the road, it becomes more and more of an obsession. I just needed the opportunity to take it from my memory to the plate.
I was admittedly a skeptic when I first heard about this whole watermelon and feta combination. It just seemed odd in a way that I couldn't quite work out. But the rest of the food world didn't share my opinion and I had been seeing similar salads all over the blogs and Pinterest. When my mom mentioned the salad to me not that long ago, I gave her that look of "really?" but thought if she liked it, maybe I was missing something.
Fast forward to a dinner out with my family and the salad from that dinner that I've recreated here. It was mind blowing to me how perfectly balanced the watermelon and feta were. So this is what I had been missing all along! I will never doubt my mother or all of those other foodies out there again (ok, I still haven't been sold on the idea of Brussels sprouts yet, no matter how much bacon goes along with it). But this salad is my new favorite and I offer my thanks to whomever put these unlikely ingredients together in the first place. You are a genius.
Watermelon, Cucumber, Arugula and Feta Salad with Lime Vinaigrette
Serves 6
For the printable recipe, click here.
I did my best to measure the ingredients in the vinaigrette, but the salad is one that you can throw together so that it tastes good to you. I've given a rough estimate of ingredients below, but feel free to amend them to your liking.
2 large handfuls of baby arugula
1 small seedless watermelon cut into 1 inch cubes (about 5 cups)
2 medium cucumbers, halved and sliced 1/2 inch thick (about 2 cups)
2-3 ounces feta cheese, crumbled
Zest and juice of 1 large lime (about 1 tsp zest and 3 tbs juice)
6 tbs olive oil
2 tsp honey
Salt and pepper to taste
Lay the arugula on a serving platter and top with the watermelon, cucumbers and feta.
Make the vinaigrette by whisking together the lime zest and juice, olive oil and honey. Add a pinch of salt and crack of pepper to taste. Drizzle the vinaigrette over the salad and serve immediately.
Tuesday, June 25, 2013
Blueberry Lemon Lavender Scones
I think that if I have to say goodbye for a little while, it might as well be with a recipe for one of my favorite breakfast treats- scones. Since goodbyes can be so terribly difficult, a treat to go with them may help to ease the blow just a bit.
And the goodbyes have already started. My boys and I have already said goodbye to our next door neighbors who won't return from vacation before we hop aboard a plane bound for Germany. It was sweet to watch the awkward hug between my 8 year old son and their 10 year old daughter and the huge bear hugs between my little one and his best 14 year old buddy. They are the closest to sisters my boys will ever have, as well as having been the best playmates, babysitters, and calming influences a mom could ask for. I know we will never have neighbors like this sweet family again though I am certain we are all better for having met them and gotten to know each other. So while I am heartbroken to be leaving, I am also grateful for having had the opportunity to become neighbors and friends.
And the goodbyes will continue for the next couple of weeks. We have planned gatherings with work friends- a beach party that is sure to be at the top of the list for favorite evenings here in SoCal. There are sleepovers where the presence of my oldest has been requested. I think the reality of the situation is just hitting his friends and they can't seem to get enough play time in before we go. I am grateful for the distraction- hopefully there won't be enough time for sadness and tears. I know there will be some, and it probably won't hit us until we're sitting in a hotel somewhere in Stuttgart and the adrenaline from the pre-move festivities and trip begins to wear off. That's when it will sink in that we have to start over from scratch and I will begin to truly miss all that we have left behind. Until then, all I can do is make the best of what little time we have left here.
I will miss this space too. I have no idea what lies ahead for my blog. I simply know that, for now, my posts will be few and far between as I travel to my new home and set up shop in a foreign place. You'll see me pop in from time to time. Perhaps I will have a recipe from the road (a little something I've stumbled upon that I just couldn't wait to share) or maybe with some photographs of highlights from the trip or can't-be-missed sights in my new home. I really don't know when, but I will be back. That much I can promise.
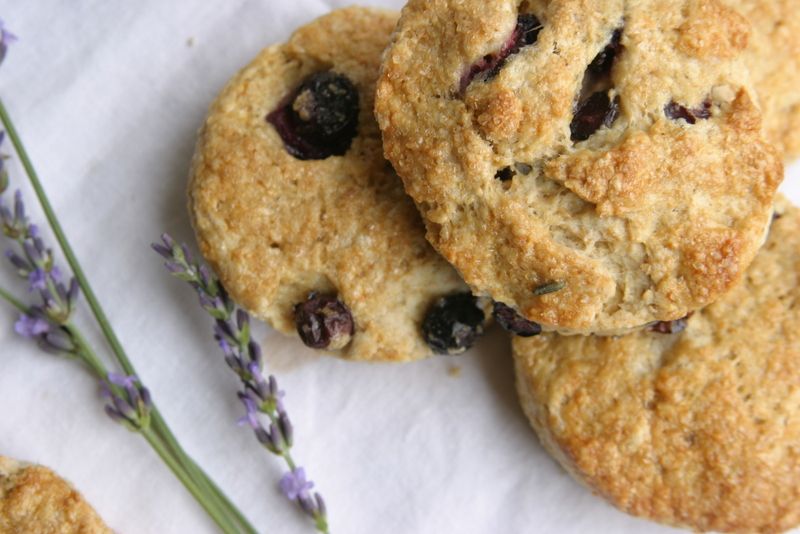
Blueberry Lemon Lavender Scones
Makes 10 to 12 scones. Adapted from Joy the Baker.
For the printable recipe, click here.
It's taken me a while and several experimental tries to enjoy lavender in cooking. It's a very "in" ingredient right now. I see it all over the place, from flavoring cocktails to baked goods. For my taste, its one of those ingredients for which a little goes a long way. Too much and you end up with something that has a decidedly soapy flavor. I'm not sure anyone would enjoy that. But I have found that if used with a gentle hand, lavender compliments the flavors of lemon and berries very well. In these scones the flavor is subtle but discernible, just exactly as it should be.
2 cups all-purpose flour
1 cup white whole wheat flour or whole wheat pastry flour
1/3 cup sugar
1 tbs fresh, food-grade lavender or 2 tsp dried lavender
2 1/2 tsp baking powder
1/2 tsp baking soda
3/4 cup cold butter, cut into small cubes
1 egg, lightly beaten
zest of 1 lemon (about 2 tsp)
3/4 cup buttermilk
1 cup fresh or frozen blueberries (if frozen, do not thaw)
1 beaten egg and sugar for brushing the tops and sprinkling
Preheat your oven to 400 degrees and line a baking sheet with parchment.
In a large bowl, stir together the flour, sugar, lavender, baking powder and baking soda. With a pastry cutter or your fingers, cut in the butter until the pieces are the size of peas (though having a few pieces a bit smaller is perfectly acceptable).
In a separate bowl, whisk together the egg, lemon zest and buttermilk. Gently stir this mixture into the dry ingredients until you have a soft dough that just holds together. Carefully stir in the blueberries.
Turn the dough out onto a lightly floured work surface and gently knead it together a few times. Pat it down to a 1 inch thickness. Using a 2 inch round cutter, cut the dough into circles or cut into 2x2 inch squares with a knife. Place the scones about 2 inches apart on the prepared baking sheet. Gather any scraps and reshape to the 1 inch thickness. Cut scones from the remaining dough. Brush the tops with the beaten egg and sprinkle with sugar.
Bake the scones for 15-18 minutes or until golden brown on top. Serve warm. The scones will keep for a day or two in an airtight container, but they will be at their best when fresh out of the oven.
And the goodbyes have already started. My boys and I have already said goodbye to our next door neighbors who won't return from vacation before we hop aboard a plane bound for Germany. It was sweet to watch the awkward hug between my 8 year old son and their 10 year old daughter and the huge bear hugs between my little one and his best 14 year old buddy. They are the closest to sisters my boys will ever have, as well as having been the best playmates, babysitters, and calming influences a mom could ask for. I know we will never have neighbors like this sweet family again though I am certain we are all better for having met them and gotten to know each other. So while I am heartbroken to be leaving, I am also grateful for having had the opportunity to become neighbors and friends.
And the goodbyes will continue for the next couple of weeks. We have planned gatherings with work friends- a beach party that is sure to be at the top of the list for favorite evenings here in SoCal. There are sleepovers where the presence of my oldest has been requested. I think the reality of the situation is just hitting his friends and they can't seem to get enough play time in before we go. I am grateful for the distraction- hopefully there won't be enough time for sadness and tears. I know there will be some, and it probably won't hit us until we're sitting in a hotel somewhere in Stuttgart and the adrenaline from the pre-move festivities and trip begins to wear off. That's when it will sink in that we have to start over from scratch and I will begin to truly miss all that we have left behind. Until then, all I can do is make the best of what little time we have left here.
I will miss this space too. I have no idea what lies ahead for my blog. I simply know that, for now, my posts will be few and far between as I travel to my new home and set up shop in a foreign place. You'll see me pop in from time to time. Perhaps I will have a recipe from the road (a little something I've stumbled upon that I just couldn't wait to share) or maybe with some photographs of highlights from the trip or can't-be-missed sights in my new home. I really don't know when, but I will be back. That much I can promise.
Blueberry Lemon Lavender Scones
Makes 10 to 12 scones. Adapted from Joy the Baker.
For the printable recipe, click here.
It's taken me a while and several experimental tries to enjoy lavender in cooking. It's a very "in" ingredient right now. I see it all over the place, from flavoring cocktails to baked goods. For my taste, its one of those ingredients for which a little goes a long way. Too much and you end up with something that has a decidedly soapy flavor. I'm not sure anyone would enjoy that. But I have found that if used with a gentle hand, lavender compliments the flavors of lemon and berries very well. In these scones the flavor is subtle but discernible, just exactly as it should be.
2 cups all-purpose flour
1 cup white whole wheat flour or whole wheat pastry flour
1/3 cup sugar
1 tbs fresh, food-grade lavender or 2 tsp dried lavender
2 1/2 tsp baking powder
1/2 tsp baking soda
3/4 cup cold butter, cut into small cubes
1 egg, lightly beaten
zest of 1 lemon (about 2 tsp)
3/4 cup buttermilk
1 cup fresh or frozen blueberries (if frozen, do not thaw)
1 beaten egg and sugar for brushing the tops and sprinkling
Preheat your oven to 400 degrees and line a baking sheet with parchment.
In a large bowl, stir together the flour, sugar, lavender, baking powder and baking soda. With a pastry cutter or your fingers, cut in the butter until the pieces are the size of peas (though having a few pieces a bit smaller is perfectly acceptable).
In a separate bowl, whisk together the egg, lemon zest and buttermilk. Gently stir this mixture into the dry ingredients until you have a soft dough that just holds together. Carefully stir in the blueberries.
Turn the dough out onto a lightly floured work surface and gently knead it together a few times. Pat it down to a 1 inch thickness. Using a 2 inch round cutter, cut the dough into circles or cut into 2x2 inch squares with a knife. Place the scones about 2 inches apart on the prepared baking sheet. Gather any scraps and reshape to the 1 inch thickness. Cut scones from the remaining dough. Brush the tops with the beaten egg and sprinkle with sugar.
Bake the scones for 15-18 minutes or until golden brown on top. Serve warm. The scones will keep for a day or two in an airtight container, but they will be at their best when fresh out of the oven.
Monday, June 17, 2013
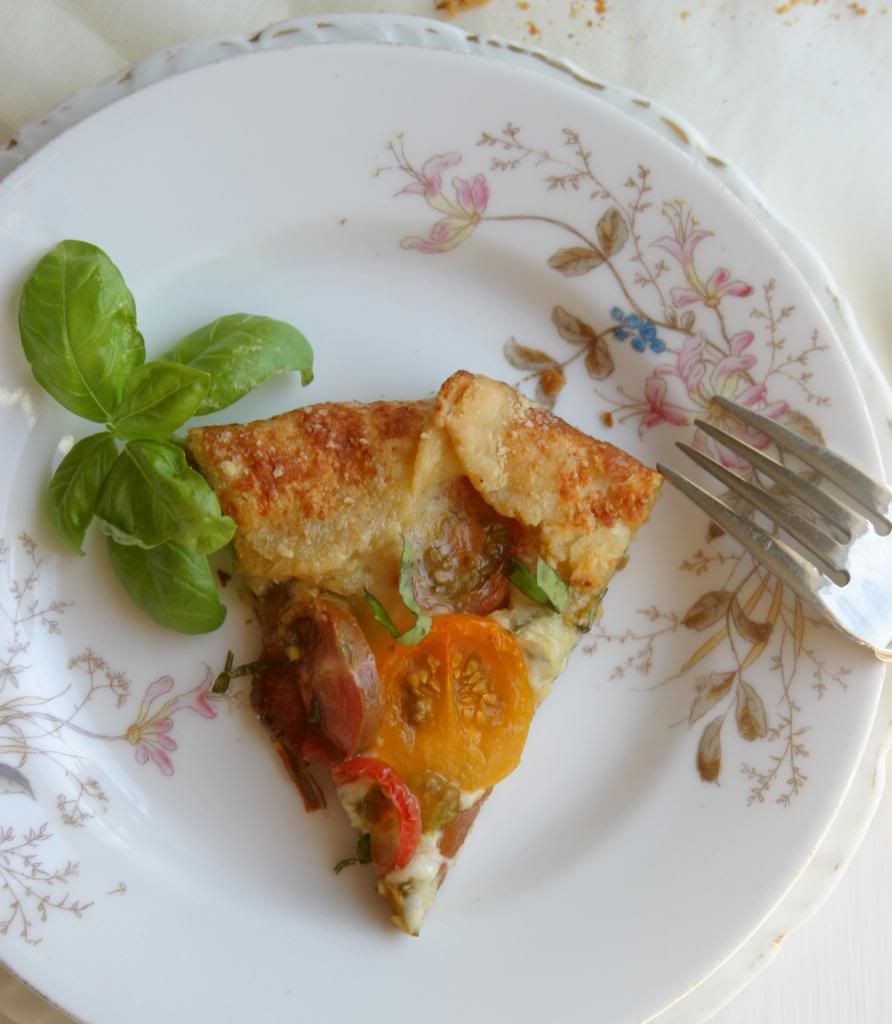
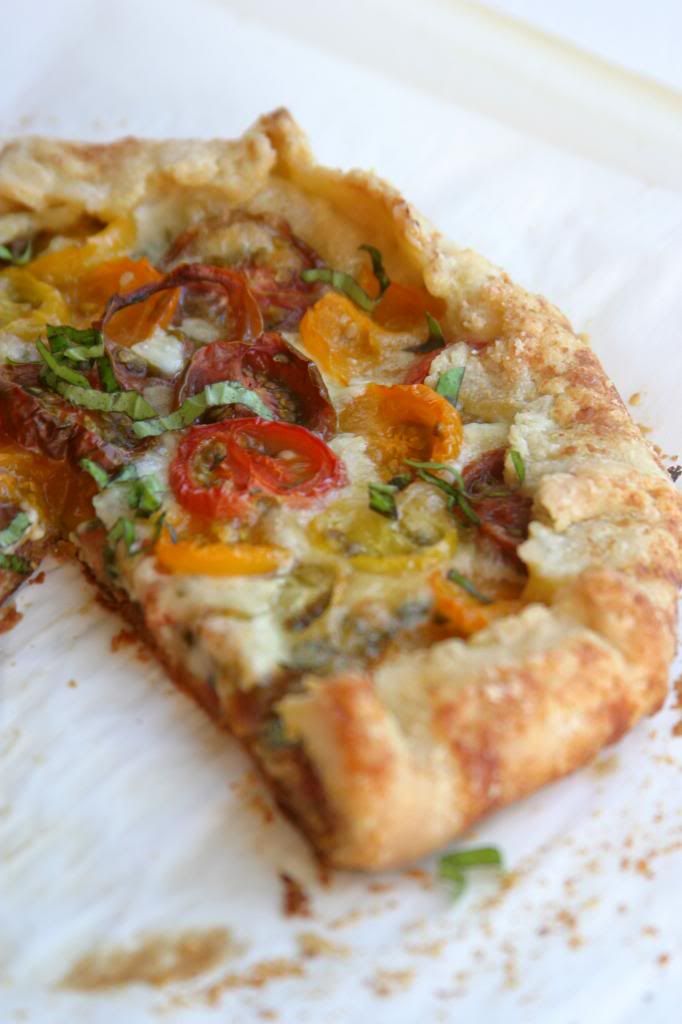
Tomato and Cheese Galette {A Tuesdays with Dorie Post}
As I sit here trying to organize my thoughts this evening, I am eating a bowl of my Mom's homemade chicken and orzo soup still buzzing with excitement from a fun night out. I was invited to the Friends and Family preview evening for the newest Whole Foods to open up in the area. That's a post for a different time, but let's just say that I found myself giddy to be standing in a grocery store being poured a local pinot noir at a bar built into an Airstream. It was really fun (and the pinot was excellent!).
The sight of all of the signs pointing out the locally produced (and hyper locally as well- that means within a 5 mile radius of the store) fruits and veggies, wine, cheese, granola and other spectacular looking foods was wonderful to see, but it did make me a bit sad. Sad that in just a few short weeks, I'll be leaving it all behind. That's not to say that I am not in anyway looking forward to the adventures in my near future. I fancy myself riding my bike to the local butcher, dairy farmer and Saturday market and filling up my wicker basket with all I need for the week's meals. But I will definitely be missing my garden and the fabulous produce that we have such easy access to here in Southern California.
Most of all, I will miss the tomatoes. I planted a full garden's worth earlier in the spring knowing that I wouldn't likely be around to enjoy the fruits of my labor. But I couldn't bear to see the garden's brown earth remain barren where in the summers past they had been covered in cucumber vines, herbs and stakes tied with branches holding up the most beautiful of tomatoes. The first of this years crop are just beginning to find their way into the light. The cherry tomatoes are hanging on the vines, small and still green, but with the promise of something much more. I was hoping to have a tomato ready to eat before I moved, but I guess that's just not in the cards.
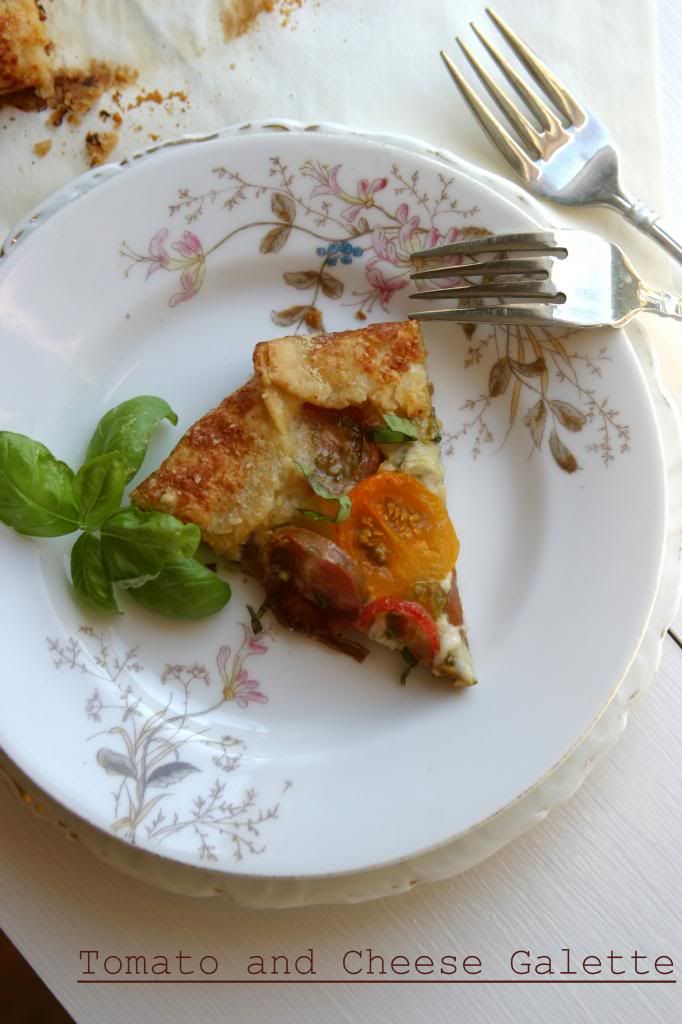
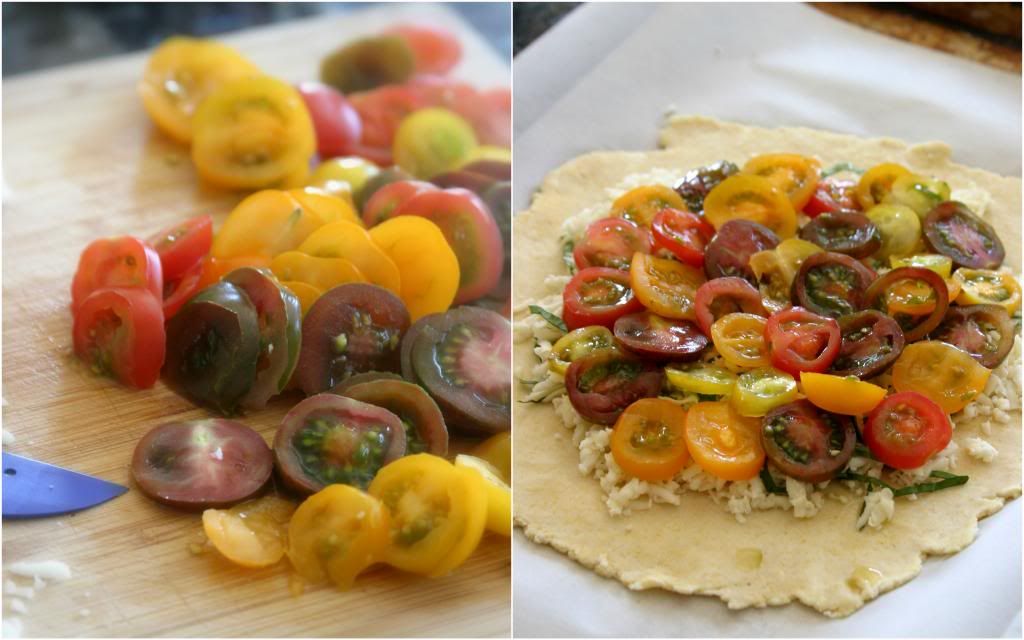
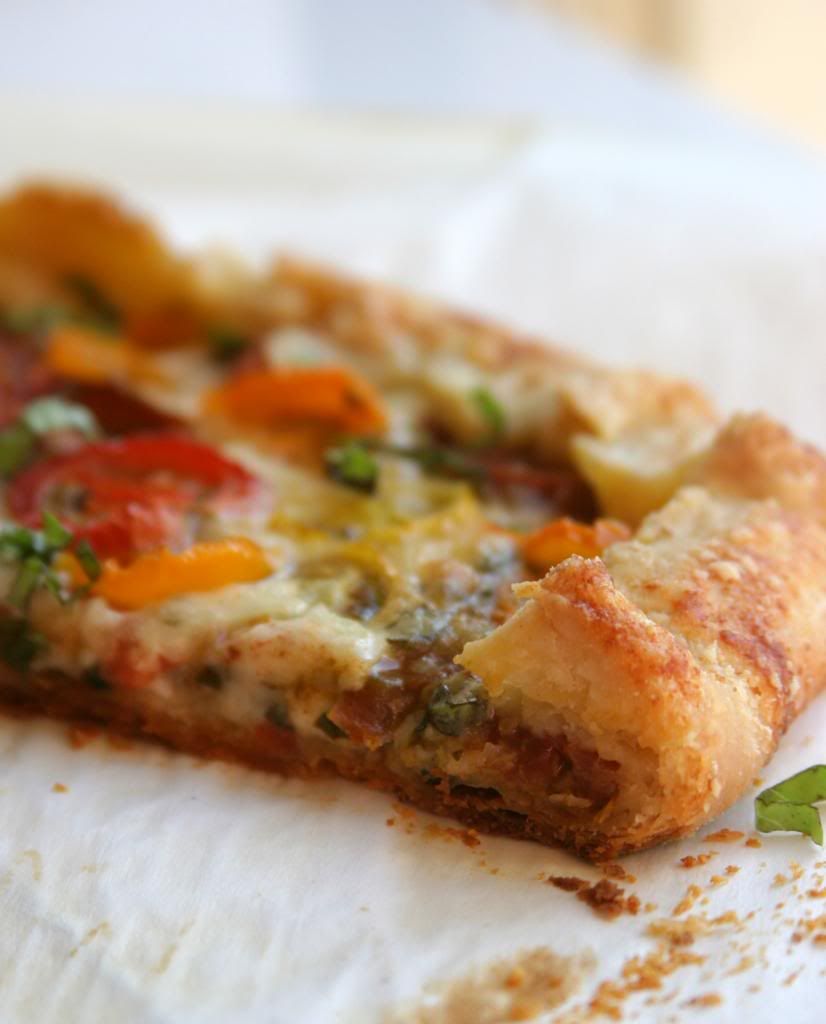
I can imagine the dark red heirloom Riesentraube tomatoes- growing right next to a patch of basil- would have been just perfect in this sweet little tart. It's a savory tart, almost like a fancy pizza, with a crisp and flaky crust. I'm so glad I found it. Perhaps one day soon, in the warmth of a late European summer afternoon I might pull another out of my new (and tiny) German oven. For now, I'll have to be happy with making the best of the few early tomatoes I can find in my own SoCal Saturday market instead. Sad to be leaving but happy to have been here to experience it in the meantime.
Tomato and Cheese Galette
Makes 1 8-inch galette. Adapted, only slightly, from Baking with Julia by Dorie Greenspan.
For the printable recipe, click here.
This is a Tuesdays with Dorie post, so there are plenty of other pretty pies to check out on the official page. I decided to vary the cheese selection a bit, thinking that fontina would make a better partner for the mozzarella that the monterrey jack that was called for in the original. I was pleased with the result and my boys enjoyed nibbling on the extra pieces of fontina as the galette baked. That's a win-win in my book. Oh, and the crust is to die for. Just saying.
1 recipe of galette dough (recipe follows)
1/2 cup shredded mozzarella cheese
1/2 cup shredded fontina cheese
1/4 cup fresh basil leaves, cut into chiffonade (finely shredded) or torn
2 to 3 ripe plum tomatoes or 1 1/2 cups grape or cherry tomatoes, cut into 1/4-inch-thick slices
3 tbs grated parmesean cheese
Preheat the oven to 400° and position a rack in the lower third of the oven. Prepare a baking sheet by lining it with parchment paper.
On a lightly floured work surface, roll out the dough into an 11-inch circle that’s about 1/8 inch thick. The dough is quite soft so make sure to lift it now and then and toss some flour under it and on the top to prevent it from sticking everywhere. When you’ve accomplished the above dimensions, move it to your prepared pan. The best and easiest way to move this dough is to roll it up around your rolling pin and then unroll it onto the prepared baking sheet.
In a bowl, toss the mozzarella and fontina cheeses and basil together and then sprinkle it over the rolled out dough, leaving a 2-3 inch border. On top of the cheese, place the tomatoes in concentric circles, again leaving the couple inch border. Fold the uncovered border dough up over the filling, allowing the dough to naturally pleat as you work your way around the galette. Sprinkle the parmesean cheese around the fluted edges of the crust.
Bake the galette for 35-40 minutes, or until the pastry is golden and crisp and the cheese is bubbly. When it’s done, allow the galette rest on the sheet for 10 minutes. Cut apart with a knife or pizza wheel and serve.
Galette Dough:
1 1/2 tbs buttermilk
2 1/2 tbs (approx.) ice water
1/2 cup all-purpose flour
2 tbs cup yellow cornmeal
1/2 tsp sugar
1/4 tsp salt
3 1/2 tbsp cold unsalted butter, cut into 4-5 pieces
By Hand:
Stir the buttermilk and ice water together in a small bowl and set aside. Then, in a large bowl, combine the flour, cornmeal, sugar and salt and stir with a fork to mix. Drop in the butter chunks and toss them a round a bit to coat them with the flour mixture. Using a pastry blender, work the butter into the flour, working for butter pieces that range in size from bread crumbs to small peas.
Add the cold water/sour cream mixture into the dough 1 tablespoon at a time, stirring with a fork after each addition to evenly distribute the liquid. When all the mixture has been added, the dough should be moist enough to stick together when it’s pressed; if it’s not, add in more cold water, 1 teaspoon at a time. Use your hands to gather the dough together.
When you’ve gathered it together into a cohesive ball, press the dough into a disk shape, wrap in plastic and chill for at least 2 hours.
In a Food Processor:
Stir the buttermilk and ice water together in a small bowl; set aside. Put the flour, cornmeal, sugar, and salt in the work of a processor fitted with the metal blade; pulse to combine. Drop the butter pieces into the bowl and pulse 8 to 10 times or until the mixture is speckled with pieces of butter that vary in size from bread crumbs to peas. With the machine running, add the buttermilk mixture and process just until the dough forms soft, moist curds.
Remove the dough from the processor and press it into a disk. Wrap in plastic and chill for at least 2 hours.
The sight of all of the signs pointing out the locally produced (and hyper locally as well- that means within a 5 mile radius of the store) fruits and veggies, wine, cheese, granola and other spectacular looking foods was wonderful to see, but it did make me a bit sad. Sad that in just a few short weeks, I'll be leaving it all behind. That's not to say that I am not in anyway looking forward to the adventures in my near future. I fancy myself riding my bike to the local butcher, dairy farmer and Saturday market and filling up my wicker basket with all I need for the week's meals. But I will definitely be missing my garden and the fabulous produce that we have such easy access to here in Southern California.
I can imagine the dark red heirloom Riesentraube tomatoes- growing right next to a patch of basil- would have been just perfect in this sweet little tart. It's a savory tart, almost like a fancy pizza, with a crisp and flaky crust. I'm so glad I found it. Perhaps one day soon, in the warmth of a late European summer afternoon I might pull another out of my new (and tiny) German oven. For now, I'll have to be happy with making the best of the few early tomatoes I can find in my own SoCal Saturday market instead. Sad to be leaving but happy to have been here to experience it in the meantime.
Tomato and Cheese Galette
Makes 1 8-inch galette. Adapted, only slightly, from Baking with Julia by Dorie Greenspan.
For the printable recipe, click here.
This is a Tuesdays with Dorie post, so there are plenty of other pretty pies to check out on the official page. I decided to vary the cheese selection a bit, thinking that fontina would make a better partner for the mozzarella that the monterrey jack that was called for in the original. I was pleased with the result and my boys enjoyed nibbling on the extra pieces of fontina as the galette baked. That's a win-win in my book. Oh, and the crust is to die for. Just saying.
1 recipe of galette dough (recipe follows)
1/2 cup shredded mozzarella cheese
1/2 cup shredded fontina cheese
1/4 cup fresh basil leaves, cut into chiffonade (finely shredded) or torn
2 to 3 ripe plum tomatoes or 1 1/2 cups grape or cherry tomatoes, cut into 1/4-inch-thick slices
3 tbs grated parmesean cheese
Preheat the oven to 400° and position a rack in the lower third of the oven. Prepare a baking sheet by lining it with parchment paper.
On a lightly floured work surface, roll out the dough into an 11-inch circle that’s about 1/8 inch thick. The dough is quite soft so make sure to lift it now and then and toss some flour under it and on the top to prevent it from sticking everywhere. When you’ve accomplished the above dimensions, move it to your prepared pan. The best and easiest way to move this dough is to roll it up around your rolling pin and then unroll it onto the prepared baking sheet.
In a bowl, toss the mozzarella and fontina cheeses and basil together and then sprinkle it over the rolled out dough, leaving a 2-3 inch border. On top of the cheese, place the tomatoes in concentric circles, again leaving the couple inch border. Fold the uncovered border dough up over the filling, allowing the dough to naturally pleat as you work your way around the galette. Sprinkle the parmesean cheese around the fluted edges of the crust.
Bake the galette for 35-40 minutes, or until the pastry is golden and crisp and the cheese is bubbly. When it’s done, allow the galette rest on the sheet for 10 minutes. Cut apart with a knife or pizza wheel and serve.
Galette Dough:
1 1/2 tbs buttermilk
2 1/2 tbs (approx.) ice water
1/2 cup all-purpose flour
2 tbs cup yellow cornmeal
1/2 tsp sugar
1/4 tsp salt
3 1/2 tbsp cold unsalted butter, cut into 4-5 pieces
By Hand:
Stir the buttermilk and ice water together in a small bowl and set aside. Then, in a large bowl, combine the flour, cornmeal, sugar and salt and stir with a fork to mix. Drop in the butter chunks and toss them a round a bit to coat them with the flour mixture. Using a pastry blender, work the butter into the flour, working for butter pieces that range in size from bread crumbs to small peas.
Add the cold water/sour cream mixture into the dough 1 tablespoon at a time, stirring with a fork after each addition to evenly distribute the liquid. When all the mixture has been added, the dough should be moist enough to stick together when it’s pressed; if it’s not, add in more cold water, 1 teaspoon at a time. Use your hands to gather the dough together.
When you’ve gathered it together into a cohesive ball, press the dough into a disk shape, wrap in plastic and chill for at least 2 hours.
In a Food Processor:
Stir the buttermilk and ice water together in a small bowl; set aside. Put the flour, cornmeal, sugar, and salt in the work of a processor fitted with the metal blade; pulse to combine. Drop the butter pieces into the bowl and pulse 8 to 10 times or until the mixture is speckled with pieces of butter that vary in size from bread crumbs to peas. With the machine running, add the buttermilk mixture and process just until the dough forms soft, moist curds.
Remove the dough from the processor and press it into a disk. Wrap in plastic and chill for at least 2 hours.
Labels:
Appetizers,
Breads,
CSA,
Main dish,
Pizza,
Summer,
Tomatoes,
Tuesdays with Dorie,
Vegetables,
Vegetarian
Thursday, June 13, 2013
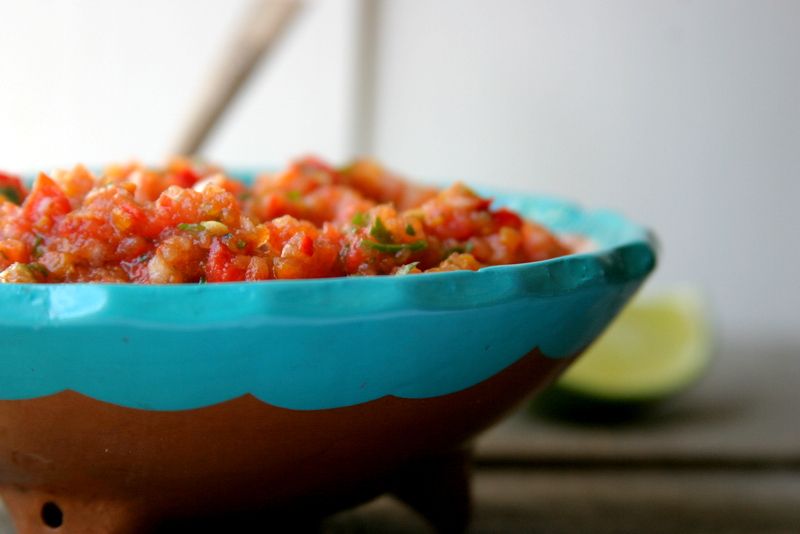
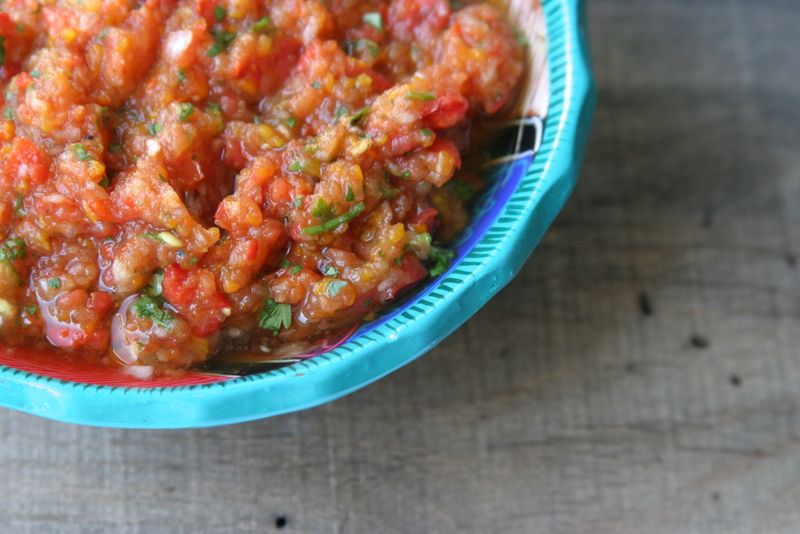
Roasted Sweet Pepper Salsa
I'm not the world's greatest friend, I will freely admit that. I forget to call and catch up, I don't always think to see if someone wants to walk the mall with me, I really like my alone time. And I suppose I still have some lingering friendship issues that go way back to confrontations with some mean girls back in middle school (who doesn't have those?). And, yes, you're right. I'm in my late 30s so I really need to get over that.
Most of my friends are okay with my communication issues. In fact, many of them are exactly like me. Maybe that's why I chose them as friends. We all get it. We don't need to chat every day for hours on end to be close, instead we're secure enough in our friendships to call when we need each other or genuinely want to talk or get together. And that makes those conversations, dinners or talks over a glass of wine all the more meaningful.
But as most things in life go, one of these things is not like the other. I have one super close friend, Libby, who doesn't put up with my silence. She holds me accountable for putting the time and effort into the friendship. And frankly, that's what I love about her the most. If she loves you, she'll let you know. Out loud and with passion. Of course you also don't want to get on her bad side, because she's just as vocal about that too. Libby is fiercely loyal, generous with her time and talents and she will pull you along with her for the crazy ride of life all the while pulling you out of your own shell.
Libby is also the one friend who loves to cook with me. When we lived close to each other we'd spend whole days just rummaging through cookbooks and online recipes and cooking up a storm. Those were some of the best days ever. And even now that we live many hundreds of miles apart, we still text photos of great dinners we've made and compare notes on techniques or recipes we'd like to try. It's a friendship that will endure and stand out from any of the others I've had or will have in my life. Libby is a true treasure in my life.
So I suppose it's fitting that I stole the idea for this recipe from her. It's one of my favorite Libby dishes and one the was made to share on several of those marathon cooking days or Friday night dinners at each others' houses. I have a feeling it will quickly become one of your favorites too. It's a simple salsa that will brighten up a dull day and sit perfectly aside that beer with a lime in it on a summertime picnic table. There's really nothing that compares to a freshly made salsa, and most especially this one.
Roasted Sweet Pepper Salsa
Makes 2 generous cups of salsa. Inspired by Libby.
For the printable recipe, click here.
I often worry when I post a recipe like this that it will be too simple and unimpressive. But then, who am I trying to impress? And, honestly, everyone needs a perfect salsa recipe in their recipe files. This one is mine. It's the best with freshly made tortilla chips (just quarter those cute little corn tortillas and deep fry, then sprinkle with salt), but the bagged chips will taste just as great when paired with this salsa and a beer. You must have the beer. You won't regret it. I never really measure my quantities when I make salsa, so these are approximates. And the truth is, salsa is one of those things that you have to taste along the way anyway. You never know how flavorful and fresh the tomatoes will taste or how spicy your pepper will be. So try as you go and you'll get it right.
2 red, yellow or orange bell peppers or 6 of the multicolored baby bell peppers
3 large Roma or plum tomatoes, coarsely chopped
1/2 white or red onion
1 to 2 jalapeno or serrano chilies
handful (about 1/3 cup) cilantro
juice of 1 lime
salt to taste (I usually end up with 1/2 to 1 tsp)
Place the bell peppers on a baking tray in a hot oven (450 degrees) to roast, or you can place them over an open gas flame on your stove top or grill. Roast the peppers until the skins have charred and blistered, turning occasionally. It will take about 10-12 minutes to get them fully roasted. Place the roasted peppers in a plastic or paper bag and seal. When the peppers are cool enough to handle, peel the skins off and pull out the stems and seeds. Coarsely chop the peppers.
Seed and coarsely chop the jalapeno pepper. You may want to taste the tiniest bit to determine the amount of heat the pepper has (I usually just touch a cut end to my tongue and can judge it's heat by that tiny taste).
You can chop all of the ingredients by hand and simply mix them together. You will get a chunky salsa if you do it that way. If you chop by hand, simply chop all of the ingredients as finely as you like them, stir together and taste to decide how much salt you'd like and if the salsa needs any additional lime juice. I like a smoother salsa so I use my food processor to do the work for me. To make the salsa using a food processor, place the onion and jalapeno in the food processor and pulse several times to begin chopping. Then add the rest of the ingredients and process until some larger pieces still remain but the salsa is mostly finely chopped. Taste for salt and lime.
Serve with tortilla chips. The salsa will keep, covered, in the refrigerator for 2-3 days.

Most of my friends are okay with my communication issues. In fact, many of them are exactly like me. Maybe that's why I chose them as friends. We all get it. We don't need to chat every day for hours on end to be close, instead we're secure enough in our friendships to call when we need each other or genuinely want to talk or get together. And that makes those conversations, dinners or talks over a glass of wine all the more meaningful.
But as most things in life go, one of these things is not like the other. I have one super close friend, Libby, who doesn't put up with my silence. She holds me accountable for putting the time and effort into the friendship. And frankly, that's what I love about her the most. If she loves you, she'll let you know. Out loud and with passion. Of course you also don't want to get on her bad side, because she's just as vocal about that too. Libby is fiercely loyal, generous with her time and talents and she will pull you along with her for the crazy ride of life all the while pulling you out of your own shell.
Libby is also the one friend who loves to cook with me. When we lived close to each other we'd spend whole days just rummaging through cookbooks and online recipes and cooking up a storm. Those were some of the best days ever. And even now that we live many hundreds of miles apart, we still text photos of great dinners we've made and compare notes on techniques or recipes we'd like to try. It's a friendship that will endure and stand out from any of the others I've had or will have in my life. Libby is a true treasure in my life.
So I suppose it's fitting that I stole the idea for this recipe from her. It's one of my favorite Libby dishes and one the was made to share on several of those marathon cooking days or Friday night dinners at each others' houses. I have a feeling it will quickly become one of your favorites too. It's a simple salsa that will brighten up a dull day and sit perfectly aside that beer with a lime in it on a summertime picnic table. There's really nothing that compares to a freshly made salsa, and most especially this one.
Roasted Sweet Pepper Salsa
Makes 2 generous cups of salsa. Inspired by Libby.
For the printable recipe, click here.
I often worry when I post a recipe like this that it will be too simple and unimpressive. But then, who am I trying to impress? And, honestly, everyone needs a perfect salsa recipe in their recipe files. This one is mine. It's the best with freshly made tortilla chips (just quarter those cute little corn tortillas and deep fry, then sprinkle with salt), but the bagged chips will taste just as great when paired with this salsa and a beer. You must have the beer. You won't regret it. I never really measure my quantities when I make salsa, so these are approximates. And the truth is, salsa is one of those things that you have to taste along the way anyway. You never know how flavorful and fresh the tomatoes will taste or how spicy your pepper will be. So try as you go and you'll get it right.
2 red, yellow or orange bell peppers or 6 of the multicolored baby bell peppers
3 large Roma or plum tomatoes, coarsely chopped
1/2 white or red onion
1 to 2 jalapeno or serrano chilies
handful (about 1/3 cup) cilantro
juice of 1 lime
salt to taste (I usually end up with 1/2 to 1 tsp)
Place the bell peppers on a baking tray in a hot oven (450 degrees) to roast, or you can place them over an open gas flame on your stove top or grill. Roast the peppers until the skins have charred and blistered, turning occasionally. It will take about 10-12 minutes to get them fully roasted. Place the roasted peppers in a plastic or paper bag and seal. When the peppers are cool enough to handle, peel the skins off and pull out the stems and seeds. Coarsely chop the peppers.
Seed and coarsely chop the jalapeno pepper. You may want to taste the tiniest bit to determine the amount of heat the pepper has (I usually just touch a cut end to my tongue and can judge it's heat by that tiny taste).
You can chop all of the ingredients by hand and simply mix them together. You will get a chunky salsa if you do it that way. If you chop by hand, simply chop all of the ingredients as finely as you like them, stir together and taste to decide how much salt you'd like and if the salsa needs any additional lime juice. I like a smoother salsa so I use my food processor to do the work for me. To make the salsa using a food processor, place the onion and jalapeno in the food processor and pulse several times to begin chopping. Then add the rest of the ingredients and process until some larger pieces still remain but the salsa is mostly finely chopped. Taste for salt and lime.
Serve with tortilla chips. The salsa will keep, covered, in the refrigerator for 2-3 days.
Labels:
Appetizers,
Family Recipes,
Quick,
Sauces,
Sides,
Snacks,
Summer,
Tomatoes,
Vegetables,
Vegetarian
Wednesday, June 5, 2013
Parmesean Zucchini Crisps and Herbed White Bean Hummus
I honestly have no idea what I'm going to write about today. There is so much going through my mind that it's hard to get it to settle on one thought. My home and world are in chaos right now and it seems my thoughts are mirroring the turmoil of my environment. Nothing is settled, nothing is where it's supposed to be. And it's very difficult to live like that while attempting to maintain your sanity and some semblance of a normal life.
We're getting ready to make a big move. To a new country and a new continent. And while the prospects of all the exploring, learning from new cultures, sampling new cuisines and expanding my understanding of my own cultural heritage are so exciting I can't believe that I will be lucky enough to spend years living in Europe, I am still terrified of the whole moving process. I've moved before, I'm a Navy wife after all, but this is not your average move across town or even across the US. I feel as if I might as well be moving to a new planet. Even with all the advice I've gotten from friends who've gone through the process and even complete strangers kind enough to try to ease my fears, I know down in my gut that I will feel unprepared and utterly unglued until the day we arrive in our new home country.
My house is looking like it's come unglued these days too. My bedroom furniture is in the living room because we hadn't yet put down that wood flooring we had intended to get taken care of two years ago. My laundry room looks like an earthquake hit in the aftermath of the "Great Rat Saga of 2013" (a story for another day perhaps, though critter stories don't really seem to go well with food). The master bath is half tiled and half painted and I'm sharing bathroom space with my two sons, a experience that is not highly recommended. We're sorting through clothes and furniture, deciding what we'll need in our new home and what we can sell or store until we get back to the States several years from now.
My mind feels as unsettled as my belongings. Too many thoughts, too much to take care of or worry about, and no time to rest or be rearranged into a place more peaceful or calm. I have a feeling that I will be mentally and physically exhausted until August when we might perhaps (if all goes well and the German home Gods smile upon us) be happily ensconced in a new home and may begin enjoying all that our new European surroundings have to offer.
Until then, I offer you snacks. It's not much to look at, but I highly recommend giving the hummus a try. It's probably the best I've ever had and the simplest too. And maybe a good, wholesome snack will help settle my soul during the chaos of what is to come. I wish the same peace for you.
Parmesean Zucchini Crisps
Makes enough for 1 or two people to snack on.
For the printable recipe click here.
These crisps are an easy way to eat up a surplus of summer zucchini very quickly. It seems like a lot, but trust me, after being baked the zucchini lose quite a bit of volume and you'll be surprised at how quickly they fly out of the bowl. I have managed to eat the whole batch all by myself!
4 small to medium zucchini
sea salt
cooking spray, an olive oil mister or coconut oil spray
2 tbs grated parmesean cheese
Preheat your oven to 225 degrees. Line 2 baking sheets with parchment or a silicone liner (I prefer the parchment because it absorbs some of the moisture from the zucchini).
Using a mandoline or very sharp knife, slice the zucchini into 1/8 inch thick rounds (that was the number 2 setting on my mandoline). Lay the zucchini out in a single layer on the baking sheets and lightly spray with whichever spray your prefer. You can even lightly brush the zucchini with olive oil if that's all you have. Very lightly sprinkle the zucchini with the sea salt. You don't want to over salt them because as they cook they will shrink and lose moisture and the salt will become concentrated. I use maybe a tsp for all of the zucchini, perhaps even less. Sprinkle with the cheese and place in the oven. Bake for 1 hour and then remove from the oven. Flip the crisps and return to the oven, rotating your baking sheets top to bottom and back to front on the way in. Continue baking until the zucchini are completely crispy, 30-40 minutes.
The crisps only stay crispy for a short while, so enjoy them right away. You may be able to re-crisp them in a warm oven for a few minutes if you have leftovers. But all that zucchini ends up being eaten very quickly!
Herbed White Bean Hummus
Makes about 2 cups.
This is by far the easiest hummus I've ever made. There's no tahini to stir in or peeling of garbanzo beans. You could, of course, cook your own beans and you might get a better hummus as a result. But honestly, how many of us are going to do that just for a snack? I simply used canned white beans and was extremely happy with the texture and flavor. Use whatever herbs you have growing in your garden or hanging out in your crisper drawer. That's the beauty of a dip like this, there are no set rules. I used thyme and rosemary and found it to be just to my liking. I briefly saute the garlic and herbs to bring out the flavor and mellow the garlic a bit, but it isn't absolutely necessary. If you're in a pinch, just throw it all in the blender and go for it!
1 can white (or cannellini) beans
juice of 1 lemon
1 clove garlic, minced
4 tbs chopped fresh herbs (such as rosemary, thyme, basil, parsley or chives)
4 tbs olive oil
salt and pepper to taste
In a small saute pan, heat 1 tbs of the olive oil along with the garlic and herbs. Cook over medium heat for a few minutes, just until the garlic is fragrant the herbs wilt a bit.
Place all of the remaining ingredients into a blender or food processor. Add the warm garlic and herbs and blend until smooth.
Serve with pita, cucumber and carrot sticks, sliced radishes and the zucchini crisps. Refrigerate any unused hummus in a covered container.
We're getting ready to make a big move. To a new country and a new continent. And while the prospects of all the exploring, learning from new cultures, sampling new cuisines and expanding my understanding of my own cultural heritage are so exciting I can't believe that I will be lucky enough to spend years living in Europe, I am still terrified of the whole moving process. I've moved before, I'm a Navy wife after all, but this is not your average move across town or even across the US. I feel as if I might as well be moving to a new planet. Even with all the advice I've gotten from friends who've gone through the process and even complete strangers kind enough to try to ease my fears, I know down in my gut that I will feel unprepared and utterly unglued until the day we arrive in our new home country.
My house is looking like it's come unglued these days too. My bedroom furniture is in the living room because we hadn't yet put down that wood flooring we had intended to get taken care of two years ago. My laundry room looks like an earthquake hit in the aftermath of the "Great Rat Saga of 2013" (a story for another day perhaps, though critter stories don't really seem to go well with food). The master bath is half tiled and half painted and I'm sharing bathroom space with my two sons, a experience that is not highly recommended. We're sorting through clothes and furniture, deciding what we'll need in our new home and what we can sell or store until we get back to the States several years from now.
My mind feels as unsettled as my belongings. Too many thoughts, too much to take care of or worry about, and no time to rest or be rearranged into a place more peaceful or calm. I have a feeling that I will be mentally and physically exhausted until August when we might perhaps (if all goes well and the German home Gods smile upon us) be happily ensconced in a new home and may begin enjoying all that our new European surroundings have to offer.
Until then, I offer you snacks. It's not much to look at, but I highly recommend giving the hummus a try. It's probably the best I've ever had and the simplest too. And maybe a good, wholesome snack will help settle my soul during the chaos of what is to come. I wish the same peace for you.
Parmesean Zucchini Crisps
Makes enough for 1 or two people to snack on.
For the printable recipe click here.
These crisps are an easy way to eat up a surplus of summer zucchini very quickly. It seems like a lot, but trust me, after being baked the zucchini lose quite a bit of volume and you'll be surprised at how quickly they fly out of the bowl. I have managed to eat the whole batch all by myself!
4 small to medium zucchini
sea salt
cooking spray, an olive oil mister or coconut oil spray
2 tbs grated parmesean cheese
Preheat your oven to 225 degrees. Line 2 baking sheets with parchment or a silicone liner (I prefer the parchment because it absorbs some of the moisture from the zucchini).
Using a mandoline or very sharp knife, slice the zucchini into 1/8 inch thick rounds (that was the number 2 setting on my mandoline). Lay the zucchini out in a single layer on the baking sheets and lightly spray with whichever spray your prefer. You can even lightly brush the zucchini with olive oil if that's all you have. Very lightly sprinkle the zucchini with the sea salt. You don't want to over salt them because as they cook they will shrink and lose moisture and the salt will become concentrated. I use maybe a tsp for all of the zucchini, perhaps even less. Sprinkle with the cheese and place in the oven. Bake for 1 hour and then remove from the oven. Flip the crisps and return to the oven, rotating your baking sheets top to bottom and back to front on the way in. Continue baking until the zucchini are completely crispy, 30-40 minutes.
The crisps only stay crispy for a short while, so enjoy them right away. You may be able to re-crisp them in a warm oven for a few minutes if you have leftovers. But all that zucchini ends up being eaten very quickly!
Herbed White Bean Hummus
Makes about 2 cups.
This is by far the easiest hummus I've ever made. There's no tahini to stir in or peeling of garbanzo beans. You could, of course, cook your own beans and you might get a better hummus as a result. But honestly, how many of us are going to do that just for a snack? I simply used canned white beans and was extremely happy with the texture and flavor. Use whatever herbs you have growing in your garden or hanging out in your crisper drawer. That's the beauty of a dip like this, there are no set rules. I used thyme and rosemary and found it to be just to my liking. I briefly saute the garlic and herbs to bring out the flavor and mellow the garlic a bit, but it isn't absolutely necessary. If you're in a pinch, just throw it all in the blender and go for it!
1 can white (or cannellini) beans
juice of 1 lemon
1 clove garlic, minced
4 tbs chopped fresh herbs (such as rosemary, thyme, basil, parsley or chives)
4 tbs olive oil
salt and pepper to taste
In a small saute pan, heat 1 tbs of the olive oil along with the garlic and herbs. Cook over medium heat for a few minutes, just until the garlic is fragrant the herbs wilt a bit.
Place all of the remaining ingredients into a blender or food processor. Add the warm garlic and herbs and blend until smooth.
Serve with pita, cucumber and carrot sticks, sliced radishes and the zucchini crisps. Refrigerate any unused hummus in a covered container.
Wednesday, May 29, 2013
Cherry and Cantaloupe Popsicles
You can't usually tell, but lurking right at the edge of most of the photos I post here is a small boy waiting (rather impatiently) for me to finish up so he can grab whatever food is in front of lens and take off. He also, for reasons I have yet to determine, really likes to have his picture taken posing with the muffin, cookie or slice of bread I've taken the time to style just so. He'll stand just outside the frame of my photo bouncing back and forth waiting for me to give him the go ahead to pick up the tasty bite and stand holding it with a big goofy grin on his face.
I have a ton of unpublished photos, mingled in and amongst the more polished ones, of my little man and his favorite foods. He gets such a kick out of it.
I'm often in a hurry to get the pictures taken, so I get annoyed by his persistence to have those few extra poses taken. Can't he understand that I just want to be left alone for a few precious moments? Of course not!
And, if I really take a moment to think about, I ought not to let bother me so much. He's only four and this age of eagerness to have his picture taken or even to interact with me won't last forever. I can already tell by the decreasing frequency of hugs and cuddles with my eight year old, that the years will go quickly and before I know it I'll have a couple of sullen teenage boys on my hands.
So this time around I decided to embrace his need to be in my photos. And, come on, aren't those little hands just the cutest? It started with a few fingers sneaking their way across my field of view trying to steal one of these incredibly tempting popsicles. Instead of snapping at my little man to wait, I kept taking pictures. I may even have posed him once or twice. And in the end, my favorite photos are the ones where the popsicle is threatening to run away with it's little owner.
The pictures are downright fun, and so are the popsicles. After all, that's what a popsicle is meant to be, right? And when it's in the shape of a rocket, it's even more irresistible. I know from experience on this one. So go ahead, steal away little man. Mom is more than happy to let you run away with one of these pops.
Cherry and Cantaloupe Popsicles
Fills 6 rocket pops or 8 standard sized popsicle molds. Adapted from Honest Cooking.
For the printable recipe, click here.
These popsicles are only lightly sweetened with a bit of honey and have a touch of yogurt added for creaminess. You can separate the flavors into their own popsicles, put them together with a bit of a swirl or layer them the way I do. It's all up to you. The amount of sweetener is up to you and the sweetness of your fruit.
1/4 cup greek yogurt, divided in half
2-3 tsp honey, divided in half
2 tbs lime juice, divided in half
1 1/2 cup cubed cantaloupe (about 1/2 small cantaloupe)
1 cup cherries
Place half of the yogurt and lime juice and 1 tsp of honey into a blender. Add the cantaloupe and blend together until smooth. Taste for sweetness, adding up to another 1/2 tsp of honey if necessary. Pour into the bottoms of bottom of popsicle molds, dividing the puree evenly among the molds. Set aside or into the freezer.
In the same blender, pour in the rest of the yogurt and lime juice as well as 1 tsp of honey and the cherries. Blend until smooth. Taste for sweetness, adding a bit more honey as needed. For a layered effect, slowly pour the cherry puree over the cantaloupe puree in the popsicle molds. If you would like the flavors swirled, with a bamboo skewer or toothpick, gently swirl the two layers together once or twice. Freeze the popsicles for one hour. Add the sticks to the center of the popsicles and return them to the freezer for three to four more hours, until fully frozen.
To unmold, run the popsicles under warm water for a few seconds.
I have a ton of unpublished photos, mingled in and amongst the more polished ones, of my little man and his favorite foods. He gets such a kick out of it.
I'm often in a hurry to get the pictures taken, so I get annoyed by his persistence to have those few extra poses taken. Can't he understand that I just want to be left alone for a few precious moments? Of course not!
And, if I really take a moment to think about, I ought not to let bother me so much. He's only four and this age of eagerness to have his picture taken or even to interact with me won't last forever. I can already tell by the decreasing frequency of hugs and cuddles with my eight year old, that the years will go quickly and before I know it I'll have a couple of sullen teenage boys on my hands.
So this time around I decided to embrace his need to be in my photos. And, come on, aren't those little hands just the cutest? It started with a few fingers sneaking their way across my field of view trying to steal one of these incredibly tempting popsicles. Instead of snapping at my little man to wait, I kept taking pictures. I may even have posed him once or twice. And in the end, my favorite photos are the ones where the popsicle is threatening to run away with it's little owner.
The pictures are downright fun, and so are the popsicles. After all, that's what a popsicle is meant to be, right? And when it's in the shape of a rocket, it's even more irresistible. I know from experience on this one. So go ahead, steal away little man. Mom is more than happy to let you run away with one of these pops.
Cherry and Cantaloupe Popsicles
Fills 6 rocket pops or 8 standard sized popsicle molds. Adapted from Honest Cooking.
For the printable recipe, click here.
These popsicles are only lightly sweetened with a bit of honey and have a touch of yogurt added for creaminess. You can separate the flavors into their own popsicles, put them together with a bit of a swirl or layer them the way I do. It's all up to you. The amount of sweetener is up to you and the sweetness of your fruit.
1/4 cup greek yogurt, divided in half
2-3 tsp honey, divided in half
2 tbs lime juice, divided in half
1 1/2 cup cubed cantaloupe (about 1/2 small cantaloupe)
1 cup cherries
Place half of the yogurt and lime juice and 1 tsp of honey into a blender. Add the cantaloupe and blend together until smooth. Taste for sweetness, adding up to another 1/2 tsp of honey if necessary. Pour into the bottoms of bottom of popsicle molds, dividing the puree evenly among the molds. Set aside or into the freezer.
In the same blender, pour in the rest of the yogurt and lime juice as well as 1 tsp of honey and the cherries. Blend until smooth. Taste for sweetness, adding a bit more honey as needed. For a layered effect, slowly pour the cherry puree over the cantaloupe puree in the popsicle molds. If you would like the flavors swirled, with a bamboo skewer or toothpick, gently swirl the two layers together once or twice. Freeze the popsicles for one hour. Add the sticks to the center of the popsicles and return them to the freezer for three to four more hours, until fully frozen.
To unmold, run the popsicles under warm water for a few seconds.
Monday, May 27, 2013
Pineapple Lime Lemonade
It's unofficial start to the summer, and this is my new official summer drink.
I ordered this drink as an afterthought at a local Mexican place a few weeks ago and after one sip I was hooked. Afterwards, I spent more time than I should probably admitobsessing over thinking about it. I just couldn't shake the memory of the first refreshing sweet-tart sip. It stuck with me and I knew I wouldn't be able to move on unless I could perfect my own version at home.
Yes, I know, it's just lemonade. But, I'm telling you that the sweetness from the pineapple and the slight bitter/tart flavor of the lime take this lemonade to a place somewhere beyond the ordinary and everyday. I dare you to try it and not become obsessed with it to.
Double dog dare you.
Pineapple Lime Lemonade
Makes 1 pitcher, about 2 quarts.
For the printable recipe, click here.
1/2 cup sugar
3 3/4 cup water, divided
zest and juice of 1 lime, plus 1 lime sliced into wedges
1 cup lemon juice (from 5-6 lemons)
1 cup pureed fresh pineapple (from about 1/4 of a pineapple)
1 large handful ice
In a small saucepan, heat the sugar and 3/4 cup of the water until the sugar melts.
Place the lime zest in the bottom of a 2 quart pitcher. Pour the warm sugar syrup over the zest and let cool. Stir in the lemon juice, pureed pineapple, lime wedges and remaining 3 cups water. Stir in the ice and let the lemonade get cold. You can drink the lemonade right away, but if you let it sit overnight, the lime wedges impart an extra lime-y tartness that we found to be quite delicious.
Serve in cold glasses with an additional wedge of lime.
I ordered this drink as an afterthought at a local Mexican place a few weeks ago and after one sip I was hooked. Afterwards, I spent more time than I should probably admit
Double dog dare you.
Pineapple Lime Lemonade
Makes 1 pitcher, about 2 quarts.
For the printable recipe, click here.
1/2 cup sugar
3 3/4 cup water, divided
zest and juice of 1 lime, plus 1 lime sliced into wedges
1 cup lemon juice (from 5-6 lemons)
1 cup pureed fresh pineapple (from about 1/4 of a pineapple)
1 large handful ice
In a small saucepan, heat the sugar and 3/4 cup of the water until the sugar melts.
Place the lime zest in the bottom of a 2 quart pitcher. Pour the warm sugar syrup over the zest and let cool. Stir in the lemon juice, pureed pineapple, lime wedges and remaining 3 cups water. Stir in the ice and let the lemonade get cold. You can drink the lemonade right away, but if you let it sit overnight, the lime wedges impart an extra lime-y tartness that we found to be quite delicious.
Serve in cold glasses with an additional wedge of lime.
Subscribe to:
Posts (Atom)