Showing posts with label Vegetarian. Show all posts
Thursday, March 19, 2015
Spring Kohlrabi Salad
So I don't really remember why we got it going, but somehow an old college roommate and I have started a little farmer's market Facebook game. It's called "Can you guess the vegetable?". The whole thing cracks me up because before I met this roommate, she was never into cooking. A few lessons in our tiny apartment kitchen started what I like to think of as a deep appreciation for getting her bake on, and I'm happy to take all of the credit!
Our game goes a little something like this-
1. I visit the weekly market here in town. I generally get inspired to take a bunch of photos while wandering from tent to tent, so I snap a few as I go.
2. I post a picture of something odd or particular to Germany and she guesses what it might be (though she has gotten it right, more times than not).
I usually get some odd looks from the Germans selling their goods when I break out the camera or my phone. It's like they can't figure out what could be so picturesque about their crates and stacks of fruits and veggies. Of course, to me not much (except my gorgeous kiddos) could be any prettier. Sometimes stealth is the wisest way to get a great photo, as is the case with the lovely older lady who had no idea I was taking pictures of the gently stacked flowers in her shopping basket this morning (so pretty!).
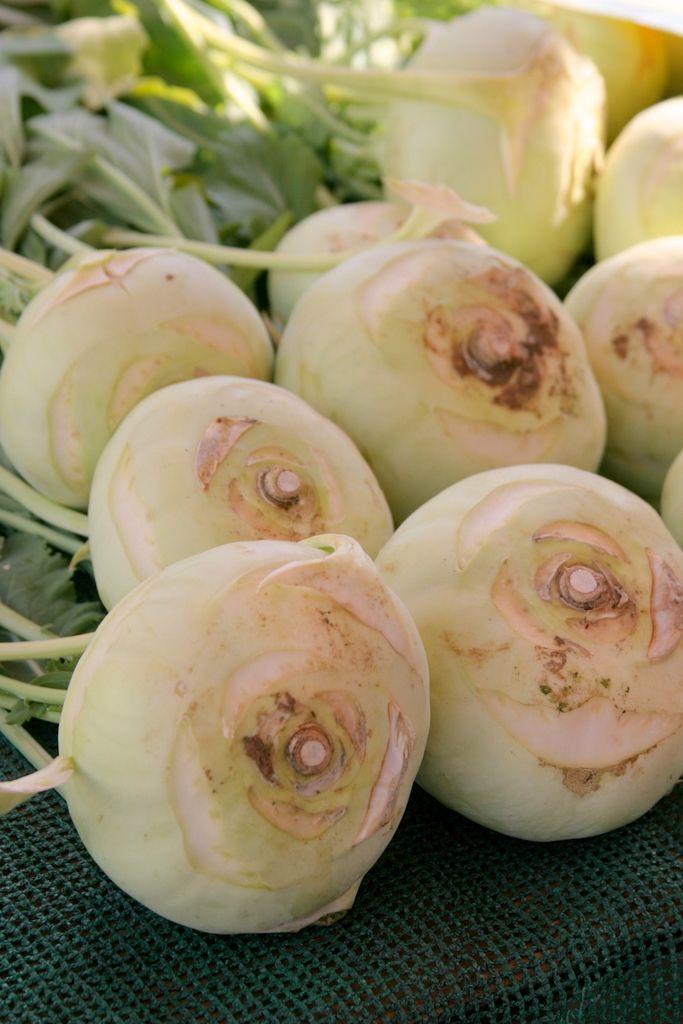
Last week's guessing game centered around the kohlrabi. It's a totally alien-looking veggie that I had never encountered before moving to Germany. Though I've noticed it's growing popularity in the US. My roomie didn't know what it was, but my awesome sister guessed it right away. I love kohlrabi raw- it's crunchy and juicy very much like an apple but with a sweet earthy flavor reminiscent of broccoli (it's a cousin after all) and cabbage. But it's also great tossed with olive oil, salt and pepper and roasted along with root veggies.
The conversation that ensued after disclosing the identity of the "mystery veggie" last week inspired me to make sure I picked up some kohlrabi this week. As I walked around the market this morning I found several farmers selling giant green heads of it so I had my pick. Yea me! My basket also filled up with all sorts of late winter and early spring stuff and I could absolutely feel the transition in the air. The warm sun, the bushels of tulips, radishes, spring onions. It was like a perfect storm of inspiration.
I could feel the hibernation of winter shaking off. The salad that I created when I got home was only the first step. Hopefully the next few will take me towards asparagus and strawberries. Then on to the beautiful apricots that lead the way to everything that is delicious and wonderful about summer. In the meantime, the leftovers of this first salad of many are waiting for me to dig into again tomorrow.
Sweet!
Spring Kohlrabi Salad
Serves 6 as a side dish.
For the printable recipe, click here.
This crunchy salad is more like a slaw than a traditional salad. Lots of texture and a great balance of flavors. The dressing is light and slightly tangy with buttermilk and lemon. I like the nuts in the salad, but you can certainly leave them out if you have nut issues. Today I used almonds but would have tossed in walnuts if I had them. Both are equally delicious in the salad. And as a bonus, this is one salad that keeps well so it's perfect to make ahead or take along to a potluck or BBQ. One further note- kohlrabi has very thick skin so you definitely need a good sharp peeler. It might even take two passes to get all of the skin away.
1 pound kohlrabi (1 large head), peeled and sliced thinly into matchsticks
1 medium sweet apple such as honeycrisp or pink lady, sliced thinly into matchsticks
2 or 3 radishes, diced or sliced into matchsticks
1 small spring onion or 1 scallion, thinly sliced
2 tbs chopped parsley
3 tbs sliced almonds or chopped walnuts
1/4 cup buttermilk
1 tbs fresh lemon juice
1/2 tsp honey
1 1/2 tsp whole grain or dijon mustard
Place all the salad ingredients into a large bowl. In a small bowl whisk together the buttermilk, lemon juice, honey and mustard. Pour the dressing over the salad and toss gently.
The salad can be kept in the refrigerator overnight in a sealed container.
Thursday, November 6, 2014
Manchego Crackers
I follow a few other bloggers that have become new moms or second/third time moms in the past year. These ladies are the real deal. They are brilliant writers, photographers and recipe developers. From the outside looking in it seems they've got it all together. And I never noticed any break or pause when the little ones arrived in their lives. New baby? No big deal.
Um, what?
I am in total awe of the ability of these ladies to juggle the exhaustion and foggy brain with day to day life and still being able to pull together some great recipes and posts. I just don't know how they do it. I have lots of ideas and inspiration- that's not the problem. It's the organization and time that I can't seem to work out. I have no idea how the other mom bloggers do it.
And then I read something the other day that made me stop and think. It was a mom talking about how there is so much pressure these days to appear as if we are always having the best time and are doing the most adventurous things. But the reality of the situation is often much different than the appearance. In her own example, she had taken pictures of her kids on a kite flying outing looking happy and carefree. But what the pictures don't show is that is was a freezing day that didn't last more than an hour with much crying and several broken kites.
It made me realize that those other mom bloggers are probably much more like me than I realize. They may look like they've got it all together but they're probably just putting their best face forward and are living in as much chaos behind the scenes as I am. The difference is that they manage to pull together a few great moments that look good on the screen (and probably taste just as awesome). But it's all just appearances.
My goal going forward is not about food or photographs. It's much more personal. I need to stop putting so much pressure on myself and realize that my life is not any less wonderful if I can't get a blog post done for a week or two. In fact, it will probably be even better because I'll get to spend real time with my kids- talking with my oldest who is really starting to show his personality and maturity, battling and playing with my 5 year old rough and tumble kid and snuggling with my baby girl. We'll cook some awesome food together, go on adventures around Europe and see some amazing sights for sure. And if I get in a great photo shoot in the meantime, you can be sure it's something that I love and am proud of because I took the time to really put my heart into it.
This time around it's these great crackers. The quince jam that I paired with it is wonderful, but I think I'll save that for another day. The crackers are just as good with the jam as without (or with another type of preserves like fig!). They are crisp, tangy and super easy to make. I took them along to a wine tasting get together and they were the perfect accompaniment to the wines. And just to give a further shout out to being real, the wines were all under $5 and the one we brought was awful. But it was a fun night with new friends and that's all that matters.
Manchego Crackers
Makes about 3 dozen 3 inch crackers
For the printable recipe, click here.
Manchego is one of my favorite cheeses. It's a hard sheep milk cheese from Spain, a bit tangy and nutty. If you can't find Manchego, you could use Pecorino Romano or Parmesan which share some of the same qualities. The cheese pairs beautifully with quince and fig jams on a cheese board and these crackers are no different. They are best used the same day as they are baked as they lose some of their snap as time goes on. I doubt you'll have any leftover anyway.
1 cup shredded Manchego cheese
3/4 cup all purpose flour
1/2 tsp freshly cracked black pepper
5 tbs cold butter, cut into cubes
3 tbs plain Greek yogurt
In a food processor, blend together the cheese, flour and pepper. Drop in the butter and yogurt and pulse the mixture until it just comes together and you can still see streaks of the butter and yogurt. Pour the dough onto a sheet of parchment or wax paper and press into a log with a 3 inch diameter (I made mine with squared sides but round would be just as nice. Wrap tightly in the paper and refrigerate for at least 1 hour and up to 3 days. You could also freeze the dough for up to 3 months.
When ready to bake the crackers, preheat your oven to 325 degrees and line a baking sheet with parchment. Take the dough from the fridge and let it warm on the counter for a few minutes to make slicing easier. Using a sharp, heavy knife slice the dough into 1/4 inch slices. I found that the thinner crackers had a better snap to them so try not to get too thick. Lay the slices flat on the baking tray. They don't need a lot of space between them as they don't spread much at all.
Bake for 15-18 minutes, flipping the crackers after the first 10 minutes. The finished crackers are a beautiful golden color (but not brown). Cool on a wire rack completely. Store the crackers in an airtight container.
*You can also make the cracker dough by hand if you don't have a food processor. Simply mix the dry ingredients together in a large bowl and then cut the butter and yogurt in using a pastry blender or two knives.
Wednesday, September 24, 2014
Kurbissuppe {Pumpkin Soup}
I'm smitten. In total and complete love. And I'm not the only one.
We named our sweet baby girl Lorelei to honor her German birthplace. But what we didn't know was just how true to her namesake she's proving to be. Lorelei is known in German legend as a siren who lured men to her (and their doom) in the Rhine River. In just two weeks our Lorelei has shown to have a pretty powerful hold over her daddy and two big brothers. I can imagine that she will have the men in her life wrapped around her little finger as long as her heart desires.
This new little sweetheart came into our lives when we thought we were way past the "baby" stage of life. I love my older boys and seeing their personalities unfold as they grow into young men. So I was amazed at how quickly my heart was won over by their baby sister. My fears of being completely unprepared emotionally for this new addition to our lives, of the change that would shake up our comfortable life and of how I would be able to juggle all of those new baby difficulties and still be a good mom to my boys were washed away the moment that incredibly chubby-cheeked face was presented to me. In that moment I couldn't imagine our family without her.
A new season has begun in our family just as fall has descended upon us here in Germany. I thought it fitting to share the most popular fall dish in our adopted home. You know fall has arrived when you see two things in the market- huge pyramid stacks of crazily pointy cabbages called spitzkohl and pumpkins. There are all sorts of pumpkins for sale, everything from presliced slabs of giant pumpkins to small winter squash like Hokkaido (or Kuri) squash. And my favorite fall festivity may just be the carved and stacked pumpkins that cover the gardens at the yearly pumpkin festival at a nearby Baroque castle. I think it will be Lorelei's first big introduction to the fests of Germany and rightfully so because in my mind her arrival will forever be linked to the crisp early days of the German autumn.
Kurbissuppe {Pumpkin Soup}
Serves 4 as a main course.
For the printable recipe, click here.
This is a pretty traditional German-style pumpkin soup. There are no fancy spices or herbs here, it's pretty straightforward pumpkin. I chose to use Hokkaido squash instead of a true pumpkin, but you could certainly use sugar pumpkins in place of the squash if you can find them. I roasted my squash first to add a bit more flavor and the Hokkaido can be roasted and eaten with the skin on- a bonus in my book. Here in Germany, the locals would drizzle pumpkin seed oil over their soup. The oil is a glorious deep green color and really adds something to the flavor of the soup. I didn't have any on hand, but found that a swirl of balsamic vinegar (I actually used a reduced balsamic glaze which you can find in many grocery stores these days) was the perfect foil for the rich soup. I wouldn't skip that drizzle if I were you. If you'd like a richer soup a swirl of creme fraiche wouldn't be out of place stirred into each bowl. And if you have them, sprinkle a few roasted pumpkin seeds over the top. The Germans would.
2 smaller-sized Hokkaido squash
1 medium yukon gold or other waxy potato, chopped into half inch cubes
1 small onion, chopped
2 carrots, peeled and chopped
2 cloves garlic, chopped
6 cups chicken or vegetable stock (or even water if you want to keep the flavor pure pumpkin)
olive oil
salt and pepper to taste
Optional garnishes:
balsamic vinegar or balsamic cream
pumpkin seed oil
roasted pumpkin seeds
creme fraiche
Preheat your oven to 400 degrees. Line a baking sheet with parchment paper.
Slice the Hokkaido squash in half and scrape out the seeds and membranes. Cut the flesh into 2 inch wide crescents. On the baking sheet, toss the squash with a drizzle of olive oil and salt and pepper. Roast for 25-30 minutes, flipping halfway through, until the flesh is tender and caramelized at the edges. Coarsely chop once out of the oven.
With about 10 minutes left to the roasting time, heat a tablespoon of olive oil in a 5 quart stockpot over medium heat. Stir in the onion and carrot and saute until just beginning to soften, about 4 minutes. Add in the potatoes and garlic and saute for another 3 to 4 minutes (being careful not to burn the garlic). Stir in the stock and roasted squash. Add a pinch of salt and pepper. Bring the soup to a boil and then reduce the heat a bit. Simmer the soup until all of the vegetables are very tender, about 15-20 minutes. Blend the soup in batches until smooth in a blender or in the pot using an immersion blender.
Serve the soup with a drizzle of balsamic vinegar or pumpkin seed oil, a sprinkle of roasted pumpkin seeds and a swirl of creme fraiche.
Thursday, July 10, 2014
Mint Tea
I've gotten a lot of inspiration from our travels around Europe. My job as we prepare for our trips is to research the area we will be visiting. I look up all there is to see and do at our destination. My husband calls me "our travel agent", a role I am happy to fill. It's really fun to hunt around for information- I read the guidebooks, ask around for experienced travelers to the area and sift through the multitudes of websites available to me to try to get to know an area before we get there. I usually end up making a huge list that I know we will never get to complete, but I'd rather have lots of options so that we can choose what to do based on our mood at the moment.
Sometimes my lists include food options- places that people online rave about perhaps or somewhere that I've read about in a review that seems to serve the most traditional foods in the area. But most often we simply wing it. We ask the locals or wander the streets until something just seems right- usually it's a little place just off the main square that is full of locals. Both my husband and I really enjoy seeking out the traditional foods of a place. It's not only a way to taste the local foods, it's also a peek into the culture of the people. And that's the best part for me. You really get to know someone (or a whole group of folks) by what is found on the menus.
It's been a few months since we visited The Netherlands but a few shining food moments still linger in my memory. The cheese is an easy one- any place that can put together entire towns based on the cheese industry is my kind of place. Gouda and Edam are just a couple of notable examples. The other dish (of sorts) that I noticed at every restaurant we ate or drank at was a simple tea. Europeans might be known for their love of coffee, but the Dutch seem to have an equal fondness for tea. But not the sort of dried black teas that they brought back from their exploration of the Indian continent. I noticed quite a lot of people lounging after their meals with glasses of hot mint tea. Very Moroccan inspired, if you ask me. And certainly memorable.
So in the face of a huge bounty of mint from my garden and very few ideas as to what to do with it all, I called up my memory of the Dutch after dinner drink and set out to make my own mint tea. Of several varieties of mint I have growing, I chose a Moroccan variety. It just seemed a natural fit. Moroccan mint is very peppermint-like, but a bit sharper (zingy would be a good description). And with just a touch of honey and hot water, it makes a wonderful tea. With each sip I am brought back to the canals, tulips and wonderful city atmosphere of Delft and Haarlem.
Mint Tea
Serves from one to many.
For a printable recipe, click here.
There really is no recipe for this tea. It's so simple. I'll give you a suggested amount to have per cup of tea, but it's ultimately up to you and your dinner guests. If you have the access to several mint varieties, try them out to see what you like best. I like pineapple mint, which is sweeter than traditional mint and has the aroma of pineapple, as well as the Moroccan variety. I used a very mild blossom honey (from Slovenia!) to gently sweeten the tea and not compete too much with the mint flavor. The glasses that I prefer for the tea are smaller juice sized ones.
Per glass:
1-2 sprigs of mint, rinsed
1/2-1 tsp light-flavored honey
hot, but not boiling, water
Place the sprigs of mint into the glass. Pour the hot water over the tea and then stir in the honey to taste. Let the tea steep for 4-5 minutes.
Thursday, May 22, 2014
Dukkah Spice and Honey Roasted Carrots with Arugula
Goodness, I'm tired. But tired in a good way if you know what I mean.
It's the kind of tired that comes from long days of playing with my kids and being a family together. The kind of tired that happens when life is working and all the little things come together. When everyone wakes up with the right kind of attitude for facing the day and so much good gets accomplished. It's the best kind of tired.
I had a few unscheduled moments yesterday so I took the opportunity to sit in the sun on the bench in my garden. I read a magazine (all the way through!), sipped a blueberry lemon iced tea that I promise will make it to this space soon and simply enjoyed the contentedness of being quiet. I considered feeling guilty about it for a moment. Should I be playing with my boys, doing a load of laundry, organizing the room that will be home to a new baby girl in a few short months?
I could have been doing any of those things, but I realized that the few minutes that I took to recharge my battery in the sun wasn't going to keep me from being a good mom or wife. In fact, I would probably be a better one having given myself a break. So I gave myself permission to close my eyes, sit back and enjoy the warm afternoon for just a few minutes longer.
Dukkah Spice and Honey Roasted Carrots with Arugula
Serves 6. Adapted, barely, from Better Homes and Gardens.
For the printable recipe, click here.
I've made this recipe a few times now in my constant quest for side dishes that involve something other than green beans or broccoli. The last time it graced our table was for a dinner with friends that are retiring from military life and moving back to the U.S.. It received rave reviews so I think I've got it just right. The dukkah spice is an Egyptian spice that is a mix of toasted nuts (typically hazelnuts) and seeds. The one I've outlined for you here is a very traditional one using sesame, coriander and cumin seeds. I think it's just perfect but if you'd like to try something different I think pistachios and perhaps a bit of heat in the form of a hot paprika or a smoky chili powder would be great additions. The lemon dressed arugula helps to balance out the sweetness of the honey and carrots. These carrots are a great accompaniment to any grilled meat or roasted pork.
1 1/2 pounds of thin carrots, scrubbed and peeled if desired (halve any particularly wide carrots lengthwise)
3 tablespoons olive oil, divided
1/3 cup coarsely chopped hazelnuts
1 tablespoon coriander seeds
1 tablespoon sesame seeds
1 1/2 teaspoons cumin seeds
1/2 teaspoon kosher or sea salt
a few grinds of freshly cracked pepper
1 tablespoon honey
a large handful arugula (about 2 cups)
juice of 1/2 lemon
Preheat your oven to 425 degrees.
Place the carrots on a parchment lined baking sheet. Toss with 1 tablespoon of olive oil, spread evenly on the baking pan and roast for 20 minutes.
In the meantime, heat a small pan on the stove over medium low heat. Place the hazelnuts in the pan and toast just until the nuts get fragrant and the slightest bit golden, about 3 minutes. Place the hazelnuts in a bowl and toss the coriander, sesame and cumin seeds in the warm pan. Place back over the heat and toast the seeds for about 2 minutes or until they become fragrant. Add the toasted seeds to the nuts and grind them together with the salt and pepper in a spice grinder or with a mortar and pestle until coarsely crushed together.
When the first 20 minutes of roasting is finished, drizzle the carrots with the honey and half of the spice and nut mixture. Toss to coat. Return the carrots to the oven and continue roasting for another 5 to 10 minutes or until the carrots are just fork tender (but not burnt or mushy).
At the last minute, toss the arugula with the lemon juice and olive oil in a large bowl. Arrange on a platter. When the carrots are ready spread them over the arugula, sprinkle some of the remaining dukkah spice over the top and gently toss together. Serve immediately.
Monday, October 7, 2013
Red Lentil and Tomato Soup
This soup has been haunting me for two years. It's one of my absolute favorites and I think I have made and photographed it at least three times in an attempt to share it with you. Not a single photograph has ever been worthy of posting. Seriously. Not. One. Ever.
Until today. {Insert me jumping up and down clapping in glee here!} I've come to the conclusion that my photography woes with regards to this soup have been due to three factors. First, it's taken me forever to really feel comfortable with my camera skills, capturing the light in an attractive way and food styling abilities. I think I may be at the point where I've gotten the hang of it. Or maybe I just got lucky on this one. For today, at least, I'm not going to question it because it means I finally have some decent photos to share with you.
Second, I don't often plan what recipes I'm going to make and when I'm going to make them. That sort of leaves me at the mercy of whatever lighting I have on the day I decide to whip up a batch of something new. In the case of this soup I seem to only make it on rainy and cloudy days when I can't squeeze out enough light to make even the prettiest cake or cookie look edible, let alone a humble soup. But really the biggest problem I've been having is that fact that, let's face it, the soup is not the most attractive color. Some things are just really hard to make look enticing in a photo and the mustard-like color of the lentils just is not very photogenic.
But by golly, I think I've finally managed to make it look like it's something you might want to eat. And thank goodness because it really is an awesome soup. Thank you pretty German morning light from my big back windows. Thank you Anthropologie for the sweet little napkin that makes all of my food look awesome against it and IKEA for the rolling kitchen cart that helps me find just the right spot to take my pictures. And thanks to you- my faithful readers- for having the patience and fortitude to stick it out with me through the oddly colored and poorly focused photos of my past with the hope that I may just find my stride and finally deliver on a soup that took me two years to get right.
Red Lentil and Tomato Soup
Makes 4-6 servings of soup. Slightly finessed from Fine Cooking.
For the printable recipe, click here.
This soup is pretty darn perfect for my family's taste, but it is infinitely adaptable. My husband, ever the carnivore, likes a bit of shredded chicken or turkey stirred into his bowl. The greens add a really nice slightly bitter note to the soup, but are certainly not necessary and the soup is quite good without them. If you choose to use them, you can throw in whatever you have in your fridge. I've used kale, spinach, swiss chard and even bok choy with equal success. And you can go totally vegetarian (even vegan!) by using vegetable stock as your liquid. The possibilities here are endless. The real key is the red lentils, which I would not substitute with any other sort of lentil as they cook differently. You can find them in many grocery stores these days so seek them out near the rest of the dry legumes and grains in your local store.
1 medium onion, chopped finely
1 large carrot, peeled and diced
1 stalk celery, diced
1 tsp curry powder or garaham masala
1 tsp dried cumin
1/2 tsp smoked paprika
1 pinch cayenne pepper (to taste)
a generous pinch of sea or kosher salt
1 14 oz. can diced tomatoes in the juices (fire roasted are my favorite to use in this soup)
4 cups home made or low sodium chicken stock (to go vegetarian, use vegetable stock)
1 cup dried red lentils
2 tbs chopped sun dried or slow roasted tomatoes
1 heaping cup chopped bitter greens such as kale, swiss chard, or mustard greens
Heat 2 tbs olive oil in a large saucepan (3 qt) over medium heat. Add the onions and cook, stirring, until they have softened and become translucent (about 5 minutes). Add the carrots, celery, curry powder, cumin and smoked paprika and stir for about 1 minute or until the spices toast and become very fragrant. Add the salt, stock, tomatoes and their juices, and lentils to the pot. Stir continuously until the soup comes to a boil so that the lentils do not stick and form clumps. Once the soup reaches a boil, turn the heat down to medium low and simmer uncovered for about 45 minutes or until the carrots and lentils have softened. Add the sun dried tomatoes and greens and cook for another 4-5 minutes to soften the greens. Taste for seasoning and add salt as needed. Serve immediately.
The soup will keep for several days in the refrigerator, though the lentils will soak up much of the liquid. Simply add a bit or water or stock when you reheat it. You can also freeze the soup for up to three months.
Monday, July 15, 2013
Watermelon, Cucumber, Arugula and Feta Salad with Lime Vinaigrette
So you can take the girl out of her home and kitchen, but apparently you can't take the food blogger out of the girl. I thought I wasn't going to have anything to say or share for quite a while with this move. But I was sooo wrong. It started with a suggestion from my mom, continued through a dinner out with my family and ended up as an obsession. This recipe was one that I just couldn't shake the need to attempt on my own.
And when I spend my free moments (miraculously I do have those- 5 hours on a plane, many long wait times for cars and shuttles, the evening hours where quiet is necessary because I'm sharing a room with my sleeping children...) trying to memorize the ingredients and work out the ratios of a salad I had for dinner one night on the road, it becomes more and more of an obsession. I just needed the opportunity to take it from my memory to the plate.
I was admittedly a skeptic when I first heard about this whole watermelon and feta combination. It just seemed odd in a way that I couldn't quite work out. But the rest of the food world didn't share my opinion and I had been seeing similar salads all over the blogs and Pinterest. When my mom mentioned the salad to me not that long ago, I gave her that look of "really?" but thought if she liked it, maybe I was missing something.
Fast forward to a dinner out with my family and the salad from that dinner that I've recreated here. It was mind blowing to me how perfectly balanced the watermelon and feta were. So this is what I had been missing all along! I will never doubt my mother or all of those other foodies out there again (ok, I still haven't been sold on the idea of Brussels sprouts yet, no matter how much bacon goes along with it). But this salad is my new favorite and I offer my thanks to whomever put these unlikely ingredients together in the first place. You are a genius.
Watermelon, Cucumber, Arugula and Feta Salad with Lime Vinaigrette
Serves 6
For the printable recipe, click here.
I did my best to measure the ingredients in the vinaigrette, but the salad is one that you can throw together so that it tastes good to you. I've given a rough estimate of ingredients below, but feel free to amend them to your liking.
2 large handfuls of baby arugula
1 small seedless watermelon cut into 1 inch cubes (about 5 cups)
2 medium cucumbers, halved and sliced 1/2 inch thick (about 2 cups)
2-3 ounces feta cheese, crumbled
Zest and juice of 1 large lime (about 1 tsp zest and 3 tbs juice)
6 tbs olive oil
2 tsp honey
Salt and pepper to taste
Lay the arugula on a serving platter and top with the watermelon, cucumbers and feta.
Make the vinaigrette by whisking together the lime zest and juice, olive oil and honey. Add a pinch of salt and crack of pepper to taste. Drizzle the vinaigrette over the salad and serve immediately.
Monday, June 17, 2013
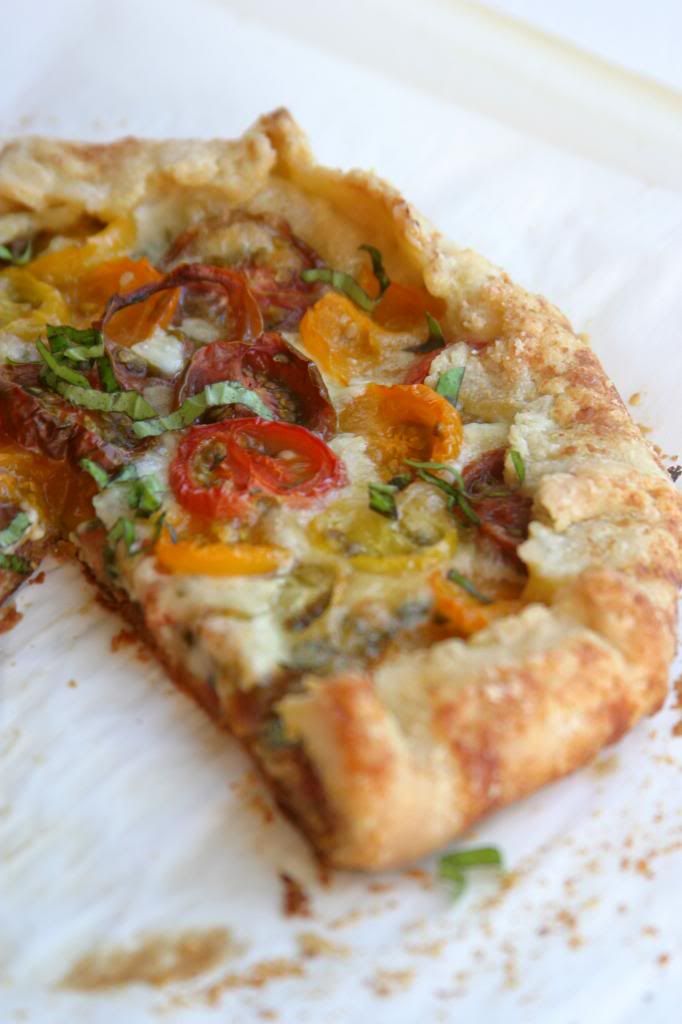
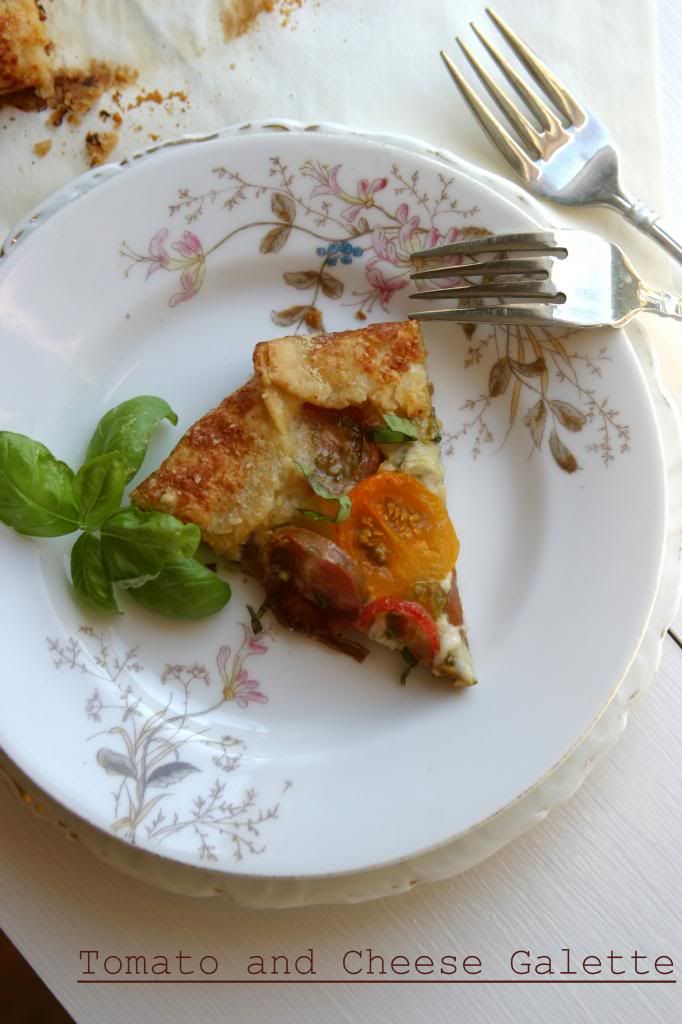
Tomato and Cheese Galette {A Tuesdays with Dorie Post}
As I sit here trying to organize my thoughts this evening, I am eating a bowl of my Mom's homemade chicken and orzo soup still buzzing with excitement from a fun night out. I was invited to the Friends and Family preview evening for the newest Whole Foods to open up in the area. That's a post for a different time, but let's just say that I found myself giddy to be standing in a grocery store being poured a local pinot noir at a bar built into an Airstream. It was really fun (and the pinot was excellent!).
The sight of all of the signs pointing out the locally produced (and hyper locally as well- that means within a 5 mile radius of the store) fruits and veggies, wine, cheese, granola and other spectacular looking foods was wonderful to see, but it did make me a bit sad. Sad that in just a few short weeks, I'll be leaving it all behind. That's not to say that I am not in anyway looking forward to the adventures in my near future. I fancy myself riding my bike to the local butcher, dairy farmer and Saturday market and filling up my wicker basket with all I need for the week's meals. But I will definitely be missing my garden and the fabulous produce that we have such easy access to here in Southern California.
Most of all, I will miss the tomatoes. I planted a full garden's worth earlier in the spring knowing that I wouldn't likely be around to enjoy the fruits of my labor. But I couldn't bear to see the garden's brown earth remain barren where in the summers past they had been covered in cucumber vines, herbs and stakes tied with branches holding up the most beautiful of tomatoes. The first of this years crop are just beginning to find their way into the light. The cherry tomatoes are hanging on the vines, small and still green, but with the promise of something much more. I was hoping to have a tomato ready to eat before I moved, but I guess that's just not in the cards.
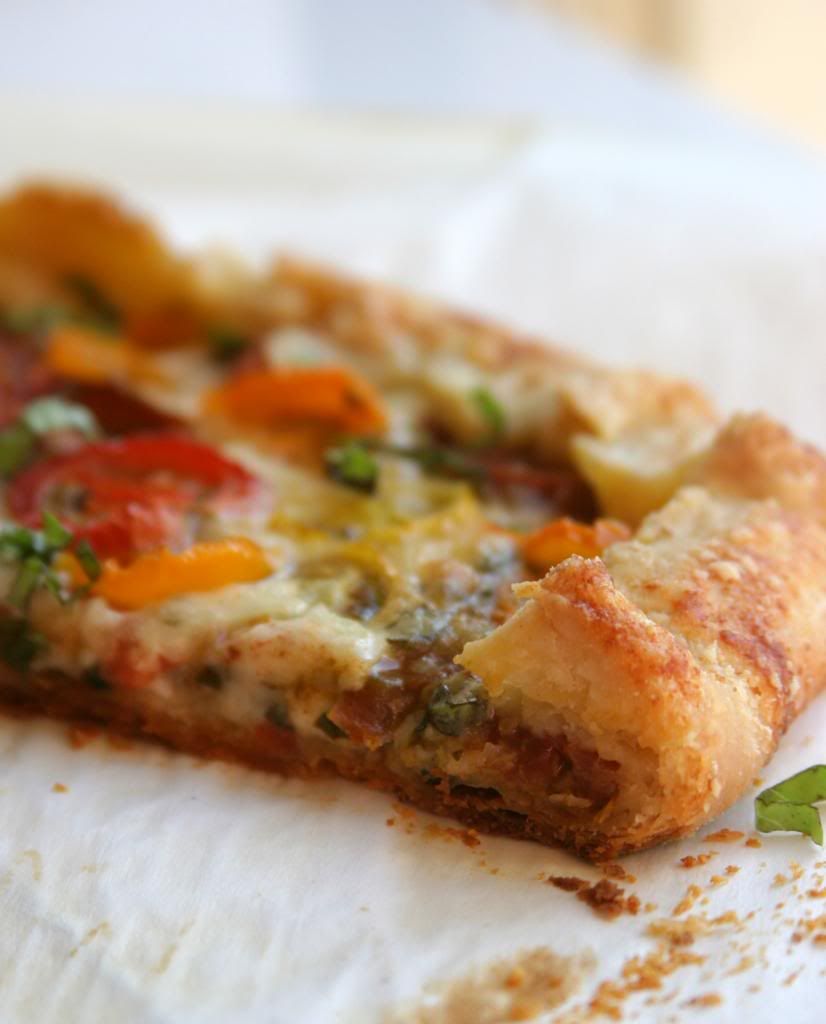
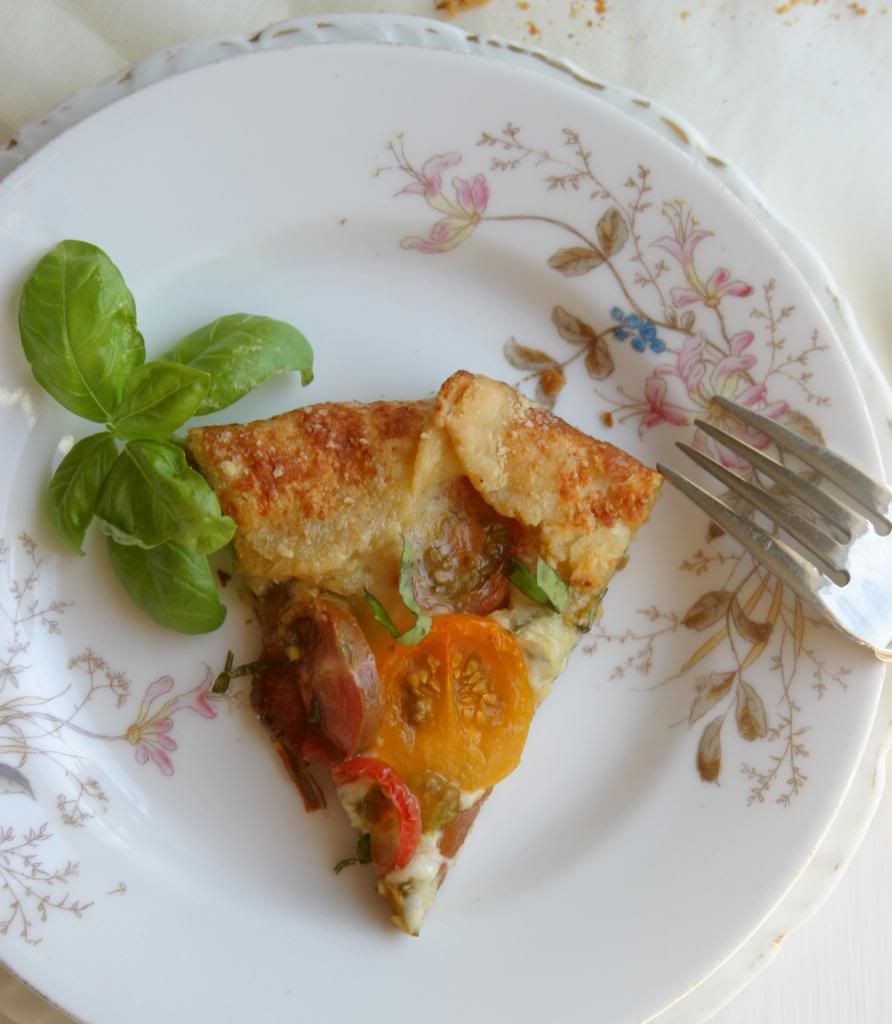
I can imagine the dark red heirloom Riesentraube tomatoes- growing right next to a patch of basil- would have been just perfect in this sweet little tart. It's a savory tart, almost like a fancy pizza, with a crisp and flaky crust. I'm so glad I found it. Perhaps one day soon, in the warmth of a late European summer afternoon I might pull another out of my new (and tiny) German oven. For now, I'll have to be happy with making the best of the few early tomatoes I can find in my own SoCal Saturday market instead. Sad to be leaving but happy to have been here to experience it in the meantime.
Tomato and Cheese Galette
Makes 1 8-inch galette. Adapted, only slightly, from Baking with Julia by Dorie Greenspan.
For the printable recipe, click here.
This is a Tuesdays with Dorie post, so there are plenty of other pretty pies to check out on the official page. I decided to vary the cheese selection a bit, thinking that fontina would make a better partner for the mozzarella that the monterrey jack that was called for in the original. I was pleased with the result and my boys enjoyed nibbling on the extra pieces of fontina as the galette baked. That's a win-win in my book. Oh, and the crust is to die for. Just saying.
1 recipe of galette dough (recipe follows)
1/2 cup shredded mozzarella cheese
1/2 cup shredded fontina cheese
1/4 cup fresh basil leaves, cut into chiffonade (finely shredded) or torn
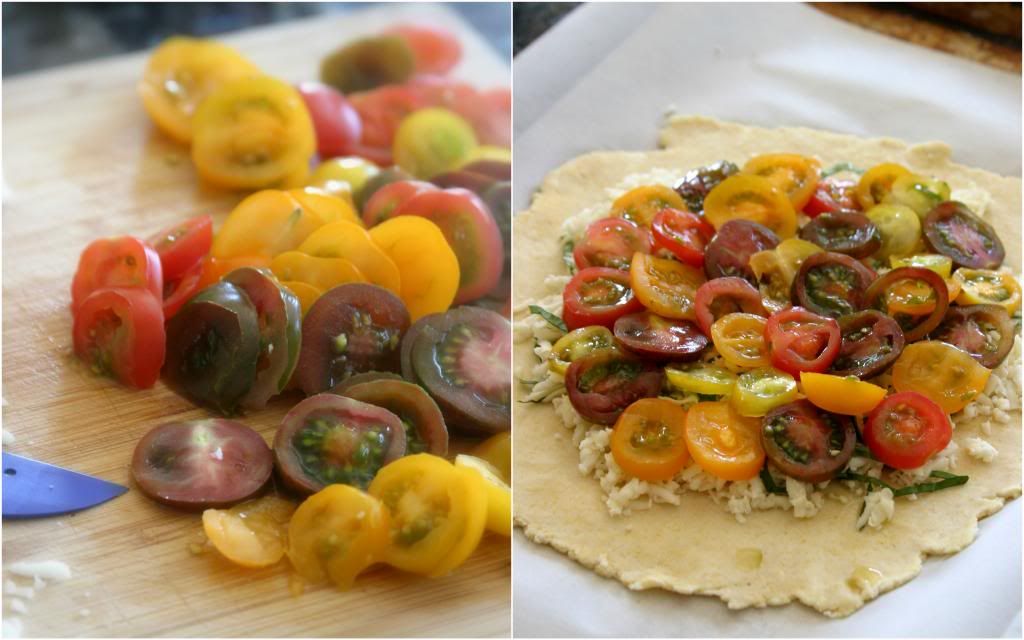
2 to 3 ripe plum tomatoes or 1 1/2 cups grape or cherry tomatoes, cut into 1/4-inch-thick slices
3 tbs grated parmesean cheese
Preheat the oven to 400° and position a rack in the lower third of the oven. Prepare a baking sheet by lining it with parchment paper.
On a lightly floured work surface, roll out the dough into an 11-inch circle that’s about 1/8 inch thick. The dough is quite soft so make sure to lift it now and then and toss some flour under it and on the top to prevent it from sticking everywhere. When you’ve accomplished the above dimensions, move it to your prepared pan. The best and easiest way to move this dough is to roll it up around your rolling pin and then unroll it onto the prepared baking sheet.
In a bowl, toss the mozzarella and fontina cheeses and basil together and then sprinkle it over the rolled out dough, leaving a 2-3 inch border. On top of the cheese, place the tomatoes in concentric circles, again leaving the couple inch border. Fold the uncovered border dough up over the filling, allowing the dough to naturally pleat as you work your way around the galette. Sprinkle the parmesean cheese around the fluted edges of the crust.
Bake the galette for 35-40 minutes, or until the pastry is golden and crisp and the cheese is bubbly. When it’s done, allow the galette rest on the sheet for 10 minutes. Cut apart with a knife or pizza wheel and serve.
Galette Dough:
1 1/2 tbs buttermilk
2 1/2 tbs (approx.) ice water
1/2 cup all-purpose flour
2 tbs cup yellow cornmeal
1/2 tsp sugar
1/4 tsp salt
3 1/2 tbsp cold unsalted butter, cut into 4-5 pieces
By Hand:
Stir the buttermilk and ice water together in a small bowl and set aside. Then, in a large bowl, combine the flour, cornmeal, sugar and salt and stir with a fork to mix. Drop in the butter chunks and toss them a round a bit to coat them with the flour mixture. Using a pastry blender, work the butter into the flour, working for butter pieces that range in size from bread crumbs to small peas.
Add the cold water/sour cream mixture into the dough 1 tablespoon at a time, stirring with a fork after each addition to evenly distribute the liquid. When all the mixture has been added, the dough should be moist enough to stick together when it’s pressed; if it’s not, add in more cold water, 1 teaspoon at a time. Use your hands to gather the dough together.
When you’ve gathered it together into a cohesive ball, press the dough into a disk shape, wrap in plastic and chill for at least 2 hours.
In a Food Processor:
Stir the buttermilk and ice water together in a small bowl; set aside. Put the flour, cornmeal, sugar, and salt in the work of a processor fitted with the metal blade; pulse to combine. Drop the butter pieces into the bowl and pulse 8 to 10 times or until the mixture is speckled with pieces of butter that vary in size from bread crumbs to peas. With the machine running, add the buttermilk mixture and process just until the dough forms soft, moist curds.
Remove the dough from the processor and press it into a disk. Wrap in plastic and chill for at least 2 hours.
The sight of all of the signs pointing out the locally produced (and hyper locally as well- that means within a 5 mile radius of the store) fruits and veggies, wine, cheese, granola and other spectacular looking foods was wonderful to see, but it did make me a bit sad. Sad that in just a few short weeks, I'll be leaving it all behind. That's not to say that I am not in anyway looking forward to the adventures in my near future. I fancy myself riding my bike to the local butcher, dairy farmer and Saturday market and filling up my wicker basket with all I need for the week's meals. But I will definitely be missing my garden and the fabulous produce that we have such easy access to here in Southern California.
I can imagine the dark red heirloom Riesentraube tomatoes- growing right next to a patch of basil- would have been just perfect in this sweet little tart. It's a savory tart, almost like a fancy pizza, with a crisp and flaky crust. I'm so glad I found it. Perhaps one day soon, in the warmth of a late European summer afternoon I might pull another out of my new (and tiny) German oven. For now, I'll have to be happy with making the best of the few early tomatoes I can find in my own SoCal Saturday market instead. Sad to be leaving but happy to have been here to experience it in the meantime.
Tomato and Cheese Galette
Makes 1 8-inch galette. Adapted, only slightly, from Baking with Julia by Dorie Greenspan.
For the printable recipe, click here.
This is a Tuesdays with Dorie post, so there are plenty of other pretty pies to check out on the official page. I decided to vary the cheese selection a bit, thinking that fontina would make a better partner for the mozzarella that the monterrey jack that was called for in the original. I was pleased with the result and my boys enjoyed nibbling on the extra pieces of fontina as the galette baked. That's a win-win in my book. Oh, and the crust is to die for. Just saying.
1 recipe of galette dough (recipe follows)
1/2 cup shredded mozzarella cheese
1/2 cup shredded fontina cheese
1/4 cup fresh basil leaves, cut into chiffonade (finely shredded) or torn
2 to 3 ripe plum tomatoes or 1 1/2 cups grape or cherry tomatoes, cut into 1/4-inch-thick slices
3 tbs grated parmesean cheese
Preheat the oven to 400° and position a rack in the lower third of the oven. Prepare a baking sheet by lining it with parchment paper.
On a lightly floured work surface, roll out the dough into an 11-inch circle that’s about 1/8 inch thick. The dough is quite soft so make sure to lift it now and then and toss some flour under it and on the top to prevent it from sticking everywhere. When you’ve accomplished the above dimensions, move it to your prepared pan. The best and easiest way to move this dough is to roll it up around your rolling pin and then unroll it onto the prepared baking sheet.
In a bowl, toss the mozzarella and fontina cheeses and basil together and then sprinkle it over the rolled out dough, leaving a 2-3 inch border. On top of the cheese, place the tomatoes in concentric circles, again leaving the couple inch border. Fold the uncovered border dough up over the filling, allowing the dough to naturally pleat as you work your way around the galette. Sprinkle the parmesean cheese around the fluted edges of the crust.
Bake the galette for 35-40 minutes, or until the pastry is golden and crisp and the cheese is bubbly. When it’s done, allow the galette rest on the sheet for 10 minutes. Cut apart with a knife or pizza wheel and serve.
Galette Dough:
1 1/2 tbs buttermilk
2 1/2 tbs (approx.) ice water
1/2 cup all-purpose flour
2 tbs cup yellow cornmeal
1/2 tsp sugar
1/4 tsp salt
3 1/2 tbsp cold unsalted butter, cut into 4-5 pieces
By Hand:
Stir the buttermilk and ice water together in a small bowl and set aside. Then, in a large bowl, combine the flour, cornmeal, sugar and salt and stir with a fork to mix. Drop in the butter chunks and toss them a round a bit to coat them with the flour mixture. Using a pastry blender, work the butter into the flour, working for butter pieces that range in size from bread crumbs to small peas.
Add the cold water/sour cream mixture into the dough 1 tablespoon at a time, stirring with a fork after each addition to evenly distribute the liquid. When all the mixture has been added, the dough should be moist enough to stick together when it’s pressed; if it’s not, add in more cold water, 1 teaspoon at a time. Use your hands to gather the dough together.
When you’ve gathered it together into a cohesive ball, press the dough into a disk shape, wrap in plastic and chill for at least 2 hours.
In a Food Processor:
Stir the buttermilk and ice water together in a small bowl; set aside. Put the flour, cornmeal, sugar, and salt in the work of a processor fitted with the metal blade; pulse to combine. Drop the butter pieces into the bowl and pulse 8 to 10 times or until the mixture is speckled with pieces of butter that vary in size from bread crumbs to peas. With the machine running, add the buttermilk mixture and process just until the dough forms soft, moist curds.
Remove the dough from the processor and press it into a disk. Wrap in plastic and chill for at least 2 hours.
Labels:
Appetizers,
Breads,
CSA,
Main dish,
Pizza,
Summer,
Tomatoes,
Tuesdays with Dorie,
Vegetables,
Vegetarian
Thursday, June 13, 2013
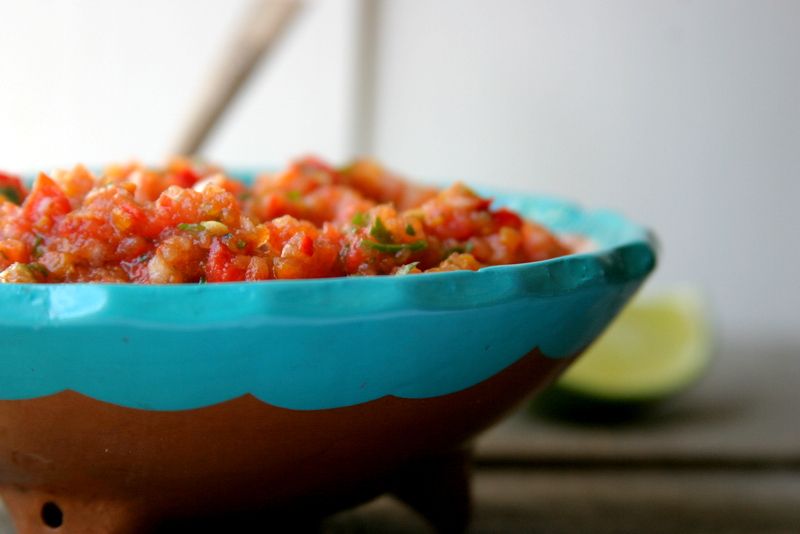
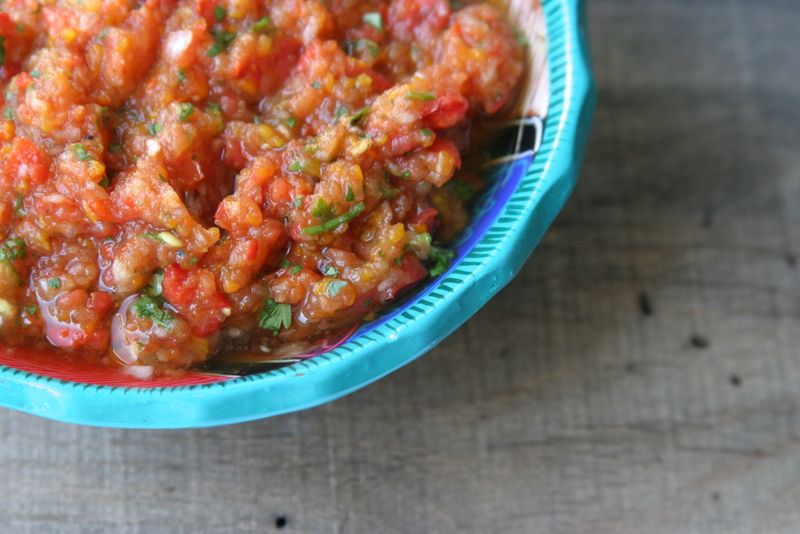
Roasted Sweet Pepper Salsa
I'm not the world's greatest friend, I will freely admit that. I forget to call and catch up, I don't always think to see if someone wants to walk the mall with me, I really like my alone time. And I suppose I still have some lingering friendship issues that go way back to confrontations with some mean girls back in middle school (who doesn't have those?). And, yes, you're right. I'm in my late 30s so I really need to get over that.
Most of my friends are okay with my communication issues. In fact, many of them are exactly like me. Maybe that's why I chose them as friends. We all get it. We don't need to chat every day for hours on end to be close, instead we're secure enough in our friendships to call when we need each other or genuinely want to talk or get together. And that makes those conversations, dinners or talks over a glass of wine all the more meaningful.
But as most things in life go, one of these things is not like the other. I have one super close friend, Libby, who doesn't put up with my silence. She holds me accountable for putting the time and effort into the friendship. And frankly, that's what I love about her the most. If she loves you, she'll let you know. Out loud and with passion. Of course you also don't want to get on her bad side, because she's just as vocal about that too. Libby is fiercely loyal, generous with her time and talents and she will pull you along with her for the crazy ride of life all the while pulling you out of your own shell.
Libby is also the one friend who loves to cook with me. When we lived close to each other we'd spend whole days just rummaging through cookbooks and online recipes and cooking up a storm. Those were some of the best days ever. And even now that we live many hundreds of miles apart, we still text photos of great dinners we've made and compare notes on techniques or recipes we'd like to try. It's a friendship that will endure and stand out from any of the others I've had or will have in my life. Libby is a true treasure in my life.
So I suppose it's fitting that I stole the idea for this recipe from her. It's one of my favorite Libby dishes and one the was made to share on several of those marathon cooking days or Friday night dinners at each others' houses. I have a feeling it will quickly become one of your favorites too. It's a simple salsa that will brighten up a dull day and sit perfectly aside that beer with a lime in it on a summertime picnic table. There's really nothing that compares to a freshly made salsa, and most especially this one.
Roasted Sweet Pepper Salsa
Makes 2 generous cups of salsa. Inspired by Libby.
For the printable recipe, click here.
I often worry when I post a recipe like this that it will be too simple and unimpressive. But then, who am I trying to impress? And, honestly, everyone needs a perfect salsa recipe in their recipe files. This one is mine. It's the best with freshly made tortilla chips (just quarter those cute little corn tortillas and deep fry, then sprinkle with salt), but the bagged chips will taste just as great when paired with this salsa and a beer. You must have the beer. You won't regret it. I never really measure my quantities when I make salsa, so these are approximates. And the truth is, salsa is one of those things that you have to taste along the way anyway. You never know how flavorful and fresh the tomatoes will taste or how spicy your pepper will be. So try as you go and you'll get it right.
2 red, yellow or orange bell peppers or 6 of the multicolored baby bell peppers
3 large Roma or plum tomatoes, coarsely chopped
1/2 white or red onion
1 to 2 jalapeno or serrano chilies
handful (about 1/3 cup) cilantro
juice of 1 lime
salt to taste (I usually end up with 1/2 to 1 tsp)
Place the bell peppers on a baking tray in a hot oven (450 degrees) to roast, or you can place them over an open gas flame on your stove top or grill. Roast the peppers until the skins have charred and blistered, turning occasionally. It will take about 10-12 minutes to get them fully roasted. Place the roasted peppers in a plastic or paper bag and seal. When the peppers are cool enough to handle, peel the skins off and pull out the stems and seeds. Coarsely chop the peppers.
Seed and coarsely chop the jalapeno pepper. You may want to taste the tiniest bit to determine the amount of heat the pepper has (I usually just touch a cut end to my tongue and can judge it's heat by that tiny taste).
You can chop all of the ingredients by hand and simply mix them together. You will get a chunky salsa if you do it that way. If you chop by hand, simply chop all of the ingredients as finely as you like them, stir together and taste to decide how much salt you'd like and if the salsa needs any additional lime juice. I like a smoother salsa so I use my food processor to do the work for me. To make the salsa using a food processor, place the onion and jalapeno in the food processor and pulse several times to begin chopping. Then add the rest of the ingredients and process until some larger pieces still remain but the salsa is mostly finely chopped. Taste for salt and lime.
Serve with tortilla chips. The salsa will keep, covered, in the refrigerator for 2-3 days.
Most of my friends are okay with my communication issues. In fact, many of them are exactly like me. Maybe that's why I chose them as friends. We all get it. We don't need to chat every day for hours on end to be close, instead we're secure enough in our friendships to call when we need each other or genuinely want to talk or get together. And that makes those conversations, dinners or talks over a glass of wine all the more meaningful.
But as most things in life go, one of these things is not like the other. I have one super close friend, Libby, who doesn't put up with my silence. She holds me accountable for putting the time and effort into the friendship. And frankly, that's what I love about her the most. If she loves you, she'll let you know. Out loud and with passion. Of course you also don't want to get on her bad side, because she's just as vocal about that too. Libby is fiercely loyal, generous with her time and talents and she will pull you along with her for the crazy ride of life all the while pulling you out of your own shell.
Libby is also the one friend who loves to cook with me. When we lived close to each other we'd spend whole days just rummaging through cookbooks and online recipes and cooking up a storm. Those were some of the best days ever. And even now that we live many hundreds of miles apart, we still text photos of great dinners we've made and compare notes on techniques or recipes we'd like to try. It's a friendship that will endure and stand out from any of the others I've had or will have in my life. Libby is a true treasure in my life.
So I suppose it's fitting that I stole the idea for this recipe from her. It's one of my favorite Libby dishes and one the was made to share on several of those marathon cooking days or Friday night dinners at each others' houses. I have a feeling it will quickly become one of your favorites too. It's a simple salsa that will brighten up a dull day and sit perfectly aside that beer with a lime in it on a summertime picnic table. There's really nothing that compares to a freshly made salsa, and most especially this one.
Roasted Sweet Pepper Salsa
Makes 2 generous cups of salsa. Inspired by Libby.
For the printable recipe, click here.
I often worry when I post a recipe like this that it will be too simple and unimpressive. But then, who am I trying to impress? And, honestly, everyone needs a perfect salsa recipe in their recipe files. This one is mine. It's the best with freshly made tortilla chips (just quarter those cute little corn tortillas and deep fry, then sprinkle with salt), but the bagged chips will taste just as great when paired with this salsa and a beer. You must have the beer. You won't regret it. I never really measure my quantities when I make salsa, so these are approximates. And the truth is, salsa is one of those things that you have to taste along the way anyway. You never know how flavorful and fresh the tomatoes will taste or how spicy your pepper will be. So try as you go and you'll get it right.
2 red, yellow or orange bell peppers or 6 of the multicolored baby bell peppers
3 large Roma or plum tomatoes, coarsely chopped
1/2 white or red onion
1 to 2 jalapeno or serrano chilies
handful (about 1/3 cup) cilantro
juice of 1 lime
salt to taste (I usually end up with 1/2 to 1 tsp)
Place the bell peppers on a baking tray in a hot oven (450 degrees) to roast, or you can place them over an open gas flame on your stove top or grill. Roast the peppers until the skins have charred and blistered, turning occasionally. It will take about 10-12 minutes to get them fully roasted. Place the roasted peppers in a plastic or paper bag and seal. When the peppers are cool enough to handle, peel the skins off and pull out the stems and seeds. Coarsely chop the peppers.
Seed and coarsely chop the jalapeno pepper. You may want to taste the tiniest bit to determine the amount of heat the pepper has (I usually just touch a cut end to my tongue and can judge it's heat by that tiny taste).
You can chop all of the ingredients by hand and simply mix them together. You will get a chunky salsa if you do it that way. If you chop by hand, simply chop all of the ingredients as finely as you like them, stir together and taste to decide how much salt you'd like and if the salsa needs any additional lime juice. I like a smoother salsa so I use my food processor to do the work for me. To make the salsa using a food processor, place the onion and jalapeno in the food processor and pulse several times to begin chopping. Then add the rest of the ingredients and process until some larger pieces still remain but the salsa is mostly finely chopped. Taste for salt and lime.
Serve with tortilla chips. The salsa will keep, covered, in the refrigerator for 2-3 days.
Labels:
Appetizers,
Family Recipes,
Quick,
Sauces,
Sides,
Snacks,
Summer,
Tomatoes,
Vegetables,
Vegetarian
Wednesday, June 5, 2013
Parmesean Zucchini Crisps and Herbed White Bean Hummus
I honestly have no idea what I'm going to write about today. There is so much going through my mind that it's hard to get it to settle on one thought. My home and world are in chaos right now and it seems my thoughts are mirroring the turmoil of my environment. Nothing is settled, nothing is where it's supposed to be. And it's very difficult to live like that while attempting to maintain your sanity and some semblance of a normal life.
We're getting ready to make a big move. To a new country and a new continent. And while the prospects of all the exploring, learning from new cultures, sampling new cuisines and expanding my understanding of my own cultural heritage are so exciting I can't believe that I will be lucky enough to spend years living in Europe, I am still terrified of the whole moving process. I've moved before, I'm a Navy wife after all, but this is not your average move across town or even across the US. I feel as if I might as well be moving to a new planet. Even with all the advice I've gotten from friends who've gone through the process and even complete strangers kind enough to try to ease my fears, I know down in my gut that I will feel unprepared and utterly unglued until the day we arrive in our new home country.
My house is looking like it's come unglued these days too. My bedroom furniture is in the living room because we hadn't yet put down that wood flooring we had intended to get taken care of two years ago. My laundry room looks like an earthquake hit in the aftermath of the "Great Rat Saga of 2013" (a story for another day perhaps, though critter stories don't really seem to go well with food). The master bath is half tiled and half painted and I'm sharing bathroom space with my two sons, a experience that is not highly recommended. We're sorting through clothes and furniture, deciding what we'll need in our new home and what we can sell or store until we get back to the States several years from now.
My mind feels as unsettled as my belongings. Too many thoughts, too much to take care of or worry about, and no time to rest or be rearranged into a place more peaceful or calm. I have a feeling that I will be mentally and physically exhausted until August when we might perhaps (if all goes well and the German home Gods smile upon us) be happily ensconced in a new home and may begin enjoying all that our new European surroundings have to offer.
Until then, I offer you snacks. It's not much to look at, but I highly recommend giving the hummus a try. It's probably the best I've ever had and the simplest too. And maybe a good, wholesome snack will help settle my soul during the chaos of what is to come. I wish the same peace for you.
Parmesean Zucchini Crisps
Makes enough for 1 or two people to snack on.
For the printable recipe click here.
These crisps are an easy way to eat up a surplus of summer zucchini very quickly. It seems like a lot, but trust me, after being baked the zucchini lose quite a bit of volume and you'll be surprised at how quickly they fly out of the bowl. I have managed to eat the whole batch all by myself!
4 small to medium zucchini
sea salt
cooking spray, an olive oil mister or coconut oil spray
2 tbs grated parmesean cheese
Preheat your oven to 225 degrees. Line 2 baking sheets with parchment or a silicone liner (I prefer the parchment because it absorbs some of the moisture from the zucchini).
Using a mandoline or very sharp knife, slice the zucchini into 1/8 inch thick rounds (that was the number 2 setting on my mandoline). Lay the zucchini out in a single layer on the baking sheets and lightly spray with whichever spray your prefer. You can even lightly brush the zucchini with olive oil if that's all you have. Very lightly sprinkle the zucchini with the sea salt. You don't want to over salt them because as they cook they will shrink and lose moisture and the salt will become concentrated. I use maybe a tsp for all of the zucchini, perhaps even less. Sprinkle with the cheese and place in the oven. Bake for 1 hour and then remove from the oven. Flip the crisps and return to the oven, rotating your baking sheets top to bottom and back to front on the way in. Continue baking until the zucchini are completely crispy, 30-40 minutes.
The crisps only stay crispy for a short while, so enjoy them right away. You may be able to re-crisp them in a warm oven for a few minutes if you have leftovers. But all that zucchini ends up being eaten very quickly!
Herbed White Bean Hummus
Makes about 2 cups.
This is by far the easiest hummus I've ever made. There's no tahini to stir in or peeling of garbanzo beans. You could, of course, cook your own beans and you might get a better hummus as a result. But honestly, how many of us are going to do that just for a snack? I simply used canned white beans and was extremely happy with the texture and flavor. Use whatever herbs you have growing in your garden or hanging out in your crisper drawer. That's the beauty of a dip like this, there are no set rules. I used thyme and rosemary and found it to be just to my liking. I briefly saute the garlic and herbs to bring out the flavor and mellow the garlic a bit, but it isn't absolutely necessary. If you're in a pinch, just throw it all in the blender and go for it!
1 can white (or cannellini) beans
juice of 1 lemon
1 clove garlic, minced
4 tbs chopped fresh herbs (such as rosemary, thyme, basil, parsley or chives)
4 tbs olive oil
salt and pepper to taste
In a small saute pan, heat 1 tbs of the olive oil along with the garlic and herbs. Cook over medium heat for a few minutes, just until the garlic is fragrant the herbs wilt a bit.
Place all of the remaining ingredients into a blender or food processor. Add the warm garlic and herbs and blend until smooth.
Serve with pita, cucumber and carrot sticks, sliced radishes and the zucchini crisps. Refrigerate any unused hummus in a covered container.
We're getting ready to make a big move. To a new country and a new continent. And while the prospects of all the exploring, learning from new cultures, sampling new cuisines and expanding my understanding of my own cultural heritage are so exciting I can't believe that I will be lucky enough to spend years living in Europe, I am still terrified of the whole moving process. I've moved before, I'm a Navy wife after all, but this is not your average move across town or even across the US. I feel as if I might as well be moving to a new planet. Even with all the advice I've gotten from friends who've gone through the process and even complete strangers kind enough to try to ease my fears, I know down in my gut that I will feel unprepared and utterly unglued until the day we arrive in our new home country.
My house is looking like it's come unglued these days too. My bedroom furniture is in the living room because we hadn't yet put down that wood flooring we had intended to get taken care of two years ago. My laundry room looks like an earthquake hit in the aftermath of the "Great Rat Saga of 2013" (a story for another day perhaps, though critter stories don't really seem to go well with food). The master bath is half tiled and half painted and I'm sharing bathroom space with my two sons, a experience that is not highly recommended. We're sorting through clothes and furniture, deciding what we'll need in our new home and what we can sell or store until we get back to the States several years from now.
My mind feels as unsettled as my belongings. Too many thoughts, too much to take care of or worry about, and no time to rest or be rearranged into a place more peaceful or calm. I have a feeling that I will be mentally and physically exhausted until August when we might perhaps (if all goes well and the German home Gods smile upon us) be happily ensconced in a new home and may begin enjoying all that our new European surroundings have to offer.
Until then, I offer you snacks. It's not much to look at, but I highly recommend giving the hummus a try. It's probably the best I've ever had and the simplest too. And maybe a good, wholesome snack will help settle my soul during the chaos of what is to come. I wish the same peace for you.
Parmesean Zucchini Crisps
Makes enough for 1 or two people to snack on.
For the printable recipe click here.
These crisps are an easy way to eat up a surplus of summer zucchini very quickly. It seems like a lot, but trust me, after being baked the zucchini lose quite a bit of volume and you'll be surprised at how quickly they fly out of the bowl. I have managed to eat the whole batch all by myself!
4 small to medium zucchini
sea salt
cooking spray, an olive oil mister or coconut oil spray
2 tbs grated parmesean cheese
Preheat your oven to 225 degrees. Line 2 baking sheets with parchment or a silicone liner (I prefer the parchment because it absorbs some of the moisture from the zucchini).
Using a mandoline or very sharp knife, slice the zucchini into 1/8 inch thick rounds (that was the number 2 setting on my mandoline). Lay the zucchini out in a single layer on the baking sheets and lightly spray with whichever spray your prefer. You can even lightly brush the zucchini with olive oil if that's all you have. Very lightly sprinkle the zucchini with the sea salt. You don't want to over salt them because as they cook they will shrink and lose moisture and the salt will become concentrated. I use maybe a tsp for all of the zucchini, perhaps even less. Sprinkle with the cheese and place in the oven. Bake for 1 hour and then remove from the oven. Flip the crisps and return to the oven, rotating your baking sheets top to bottom and back to front on the way in. Continue baking until the zucchini are completely crispy, 30-40 minutes.
The crisps only stay crispy for a short while, so enjoy them right away. You may be able to re-crisp them in a warm oven for a few minutes if you have leftovers. But all that zucchini ends up being eaten very quickly!
Herbed White Bean Hummus
Makes about 2 cups.
This is by far the easiest hummus I've ever made. There's no tahini to stir in or peeling of garbanzo beans. You could, of course, cook your own beans and you might get a better hummus as a result. But honestly, how many of us are going to do that just for a snack? I simply used canned white beans and was extremely happy with the texture and flavor. Use whatever herbs you have growing in your garden or hanging out in your crisper drawer. That's the beauty of a dip like this, there are no set rules. I used thyme and rosemary and found it to be just to my liking. I briefly saute the garlic and herbs to bring out the flavor and mellow the garlic a bit, but it isn't absolutely necessary. If you're in a pinch, just throw it all in the blender and go for it!
1 can white (or cannellini) beans
juice of 1 lemon
1 clove garlic, minced
4 tbs chopped fresh herbs (such as rosemary, thyme, basil, parsley or chives)
4 tbs olive oil
salt and pepper to taste
In a small saute pan, heat 1 tbs of the olive oil along with the garlic and herbs. Cook over medium heat for a few minutes, just until the garlic is fragrant the herbs wilt a bit.
Place all of the remaining ingredients into a blender or food processor. Add the warm garlic and herbs and blend until smooth.
Serve with pita, cucumber and carrot sticks, sliced radishes and the zucchini crisps. Refrigerate any unused hummus in a covered container.
Monday, May 6, 2013
Marinated Artichoke Hearts
I will forget to water. I just will. And I know it. Sigh....
But in a place where the artichoke plants are a perennial (come back year after year, for you non-garden types), even I can feel like an accomplished gardener. This year I had four plants that stuck around from last spring with their big, fern-like silvery green leaves. The plants are actually quite pretty and I would totally put them in my front yard landscape. If you're wondering, this variety is called Purple of Romagna and the flowers (aka the part that you eat) is a pretty purple color and the petals are a bit spikier than the more familiar globe artichokes. I grew them from seed. Yup, I did that. And, boy, have they produced for me this spring.
My husband loves those marinated artichoke hearts that come on antipasto plates. So I have been trying to duplicate their flavor at home for a couple of years. Unsuccessfully. He always eats them, mind you, but they're never quite right. The bumper crop of baby artichokes I had inspired me to give it one more try. And after steaming, grilling and pan roasting what seemed like a mountain of artichokes, I needed something different.
Paydirt! I have found the magical balance between vinegar, spice, oil, and herbs to make my hubby go "Mmmmmmmm". And boy, would I have been bummed had it not been right. Those little chokes need quite a bit of prep work to get them
If you can still find artichokes in your market, especially small ones, I beesech you to try these just once. They're so much better than the ones in that olive bar at your grocery store.
Makes 3 pint jars. Adapted from The Art of Preserving, by Rick Field, Lisa Atwood and Rebecca Courchesne.
For the printable recipe, click here.
The difficulty here is not in the recipe itself, but in the prep work. But if you can stand the few (or 20) minutes it may take you to remove the outer leaves and chokes from the artichokes, you'll be well rewarded. One of the great things about a recipe like this is that you can adapt the recipe to your liking. Add more garlic, take away the lemon peel, or use the herbs that you have in your kitchen. For us, this combination hits the sweet spot. The recipe makes three jars of artichoke hearts, one to eat as soon as it's ready and the other two to store in the back of the fridge to pull out for unexpected company or to give to friends (who will thank you profusely!).
5 lbs baby or smallish artichokes
juice of 2 lemons, plus 6 tbs
1 cup white vinegar
1/2 cup rice wine vinegar
1 tbs plus 1 tsp kosher or sea salt
zest of two lemons, removed in strips with a vegetable peeler or cocktail zester
3 cloves garlic, thinly sliced
red pepper flakes (1 pinch per jar)
2 1/2 tbs chopped fresh herbs (I used 1 tbs each chopped parsley and basil and 1 tsp each chopped chives and sage)
1 tsp black peppercorns
6 tbs olive oil
You will need 3 hot, sterilized pint jars and their lids at the ready. You can accomplish this by either washing the jars and then heating them in a hot water bath for at least 10 minutes, or running them through the sterilize cycle on your dishwasher right before use.
Fill a large bowl halfway with water and stir in the juice of 2 lemons. Working quickly with 1 artichoke at a time, begin peeling off the tougher outer layers of leaves until you get to the pale, tender inner leaves. Cut about 1/2 inch off the top of the artichoke, cut off any remaining dark leaves from the base, then cut the artichoke into quarters lengthwise. Immediately immerse the artichokes in the lemon water to prevent browning. Repeat with the remaining artichokes.
Remove the artichokes with a slotted spoon and place them in a large saucepan over medium heat. Add in 1/4 cup of the lemon water from the bowl. Cover and cook until just tender, about 10 minutes. Remove the artichokes from the pot and return them to the lemon water. Stir in a handful of ice cubes to stop the artichokes from cooking further.
Meanwhile, in a medium saucepan, combine the 6 tbs lemon juice, vinegars, and salt. Add 1 1/2 cups water and bring to a boil. Stir to dissolve the salt.
Using your prepared jars, evenly divide the lemon zest strips, garlic, peppercorns and herbs amongst the three jars. Tightly pack the cooled artichoke hearts into the jars to within 1 inch of the rim. Ladle the hot bring into the jars, leaving about 3/4 inch of headspace at the top. Add 2 tbs olive oil to each jar. This should bring the headspace to 1/4-1/2 inch. Wipe the rims and seal the jars tightly.
Leave the jars undisturbed on the counter for 24 hours, then refrigerate. Shake the jars daily to distribute the seasonings for 1 week, at which time the artichokes will be ready to eat. Keep the jars refrigerated. They will keep for up to another 2 weeks.
Labels:
Appetizers,
CSA,
Preservation,
Sides,
Snacks,
Spring,
Vegetables,
Vegetarian
Subscribe to:
Posts (Atom)