Showing posts with label Fall. Show all posts
Showing posts with label Fall. Show all posts
Tuesday, October 27, 2015
Mom's Chocolate Pear Upside Down Cake
Tradition [truh-dish-uh n] noun : 1. the handing down of information, beliefs, and customs by word of mouth or by example from one generation to another without written instruction 2. characteristic manner, method, or style
I've been struggling with this post, which is why it has taken so long to arrive in this space. I keep sitting down to write and coming up blank. I love this recipe, I love its origins and what it has become. So what's the problem? And what does that have to do with the definition of tradition that I wrote above? Both valid questions.
The thing is, I really don't know. I can guess, sure, but it's not clear to me yet what the block is about. Too many things to list here, I suppose- maybe in a future post. Probably all boiling down to life, kids, responsibilities. You know, the stuff that distracts from really living fully. Buuuuut...... I try not to make this blog a personal diary so much as an exploration of the thoughts that run though my day with enough frequency to make them relevant. It's not a true confessions page though. So lets keep it lighter, shall we?
In the meantime I'm trying to overcome my blogging block by going back to my roots. Which always leads me to my Mom. Hence the nod to tradition referenced earlier. The cake I'm offering up today is one of those cakes that I can remember her making since I was a small child. She grabbed the recipe from a magazine long ago and it was one of those total 70s recipes. Canned fruit, maraschino cherries, you know the kind. She did away with the cherries from the start but pretty much stuck to the recipe otherwise. I thought I might take it a step further (and kick tradition to the curb, if you will) and modernize it just a bit more. So gone is the can of sugar-laden fruit; replaced instead by gently poached pears who's poaching liquid is also used to make the caramel-ly goodness that is characteristic of an upside down cake. It's a nod to tradition without being strictly traditional. And maybe just the thing to kick my blogging butt out of its funk.
Chocolate Pear Upside Down Cake
Makes 1 8x8 inch square or 9 inch round cake.
For the printable recipe, click here.
This update of my Mom's classic is enhanced with poached pears but its still a simple cake at heart. If you don't have time to poach your own pears, by all means use pears canned in their juices (not in syrup!). The recipe has pecans in the ingredient list but you won't see them in my photos because my little family doesn't appreciate them. So I guess they're optional but really great if you have them.
For the pear topping:
1/4 cup (4 tbs) unsalted butter
1/2 cup packed brown sugar
2 tbs pear poaching liquid
4 poached pear halves (recipe to follow)
1/4 cup coarsely chopped pecans
For the cake:
1 1/4 cup sugar
1 1/2 cups all purpose flour
1/4 cup cocoa powder
1/2 tsp baking soda
1/2 tsp salt
10 tbs softened butter
1 tsp vanilla extract
2 eggs
1/2 cup buttermilk
Preheat oven to 350 degrees.
Melt the 1/4 cup of butter and pour it into a 9 inch square cake pan. Drizzle the corn syrup over the butter and then sprinkle the brown sugar in the pan.
Cut the pear halves into 4 equal portion lengthwise and arrange the pieces in a sunburst pattern over the mixture in the baking pan. Sprinkle the chopped pecans around the pears.
Sift together the flour, cocoa powder, baking soda and salt. Set aside.
In a large mixing bowl (fitted to a stand mixer or with a handheld mixer with beaters attached), beat together the butter, sugar and vanilla until light and fluffy. Add the eggs one at a time, beating fully between additions. Add the dry ingredients alternately with the buttermilk in three additions. Mix until thoroughly combined.
Pour the batter into the pan gently so as to disturb the pattern of the pears as little as possible. Bake for 45-55 minutes, until a toothpick inserted into the center of the cake comes out clean of batter or very wet crumbs. Cool the cake for about 5 minutes and then run a knife around the edges of the pan to loosen. Invert the cake onto a serving platter. Cut into squares.
Poached Pears
2 ripe but still firm pears
1 quart water
1/2 cup honey
Stir the water and honey together in a 2 quart pot. Bring the mixture to a boil over a medium heat. In the meantime, peel, quarter and core the pears.
When the water/honey mixture comes to a boil add the pears. Turn the heat down to medium and simmer the pears for 20-25 minutes or until the tip of a sharp knife easily pierces the pears. Remove the pears from the poaching liquid and cool making sure to reserve 2 tablespoons of the poaching liquid.
Pears can be stored in the cooled poaching liquid in the refrigerator until use.
Friday, October 9, 2015
Our Favorite Apple Cake
The day started out with an entirely different plan. We were to meet up with friends on the grounds of a lovely Baroque castle for one of our favorite fall festivals. Beautifully carved pumpkins, amazing statues and scenes created out of stacking all sorts of gourds and squash, pumpkin-centered food and record breaking giant pumpkins all in an idyllic setting. Sounds perfect, doesn't it? Well it would have been if not for the German national holiday and the hordes of people trying to do the very same thing we were. As we sat in traffic and drove in circles trying to find parking I could feel my husband's frustration level rising (and kid-friendly language beginning to fail him), so I turned to him and said, "Let's get out of here".
It was such a good call.
We ended up doing not much of anything, really. But had a great day doing it. Pointing the car in a direction where no other people were going we ended up driving through (and stopping to meander in) no fewer than three towns each with its own castle or medieval wall. And each was prettier than the previous one. In between was some beautiful countryside with fall colors all around. At the end, we settled on a beautiful town square to have dinner in. The evening was warm so we ate our dinner of wild game and traditional German sides out on the square watching children play and night watchmen lead tours through town to the tune of church bells. This is German living at its best, my friends.
But my favorite part of the day wasn't the castles or the dinner. It was the 20 minutes that we spent stopped on the side of the road picking apples from some old, forgotten trees. The boys and their dad having fun and daring each other to go higher and get bigger apples. The oldest climbing up on his dad's shoulders balancing just enough to reach the really big ones. His little brother finding apples on the ground that were still worthy of picking (and eating as many of them as he could). Their baby sister just napped and played happily as I took it all in. Because as the boys get older I know these simple and blissful afternoons will be fewer and farther between. Sure, I'm thrilled to have the bowls full of apples to cook and bake with but it was the experience that was more fulfilling. No TV or video games, no forced fun. Just two boys and their dad, laughing, climbing and enjoying each others' company. To me, that was the true beauty of the day.
Our Favorite Apple Cake
Makes one cake. Adapted slightly from The Great Holiday Baking Book by Beatrice Ojakangas.
For the printable recipe, click here.
I have been making this cake for years. The original is from a book I was gifted one Christmas from a co-worker and I've made it every fall since. It reminds my husband of a cake that his mother used to make as a child and I think it might just be his favorite cake ever. We have always called it Jewish Apple Cake, though I really don't know why. I suppose growing up in a very mixed religious area of South Jersey we simply always associated the cake with our Jewish friends and the fall holiday of Rosh Hashanah. Though it needn't be limited to just one season. This is one of those homey, year round cakes that just makes you feel good.
3 cups all purpose flour
3 tsp baking powder
1 1/2 cups granulated sugar, divided
1/2 cup packed light brown sugar
1 cup neutral flavored oil
4 large eggs
3/4 cup fresh orange juice
2 tsp pure vanilla extract
6 medium apples (sweet, firm apples are best), peeled, cored and sliced thinly (about 4 cups finished)
1 tbs ground cinnamon
Preheat the oven to 350 degrees. Butter a 9 or 10 inch tube pan (or 9x13 inch rectangular pan).
In a large bowl, combine the flour, baking powder, 1 cup of the granulated sugar and the brown sugar. Stir to distribute the dry ingredients. In a separate bowl mix together the oil, eggs, orange juice and vanilla. Pour the wet ingredients into the bowl with the dry ingredients. With an electric mixer or by hand beat the mixture until light and fluffy.
In another large bowl stir the apples together with the remaining 1/2 cup of granulated sugar and the cinnamon until the apples are well coated. Place half of the apples at the bottom of the prepared pan. Pour the batter over the apples and even it out with a spatula if necessary. Arrange the rest of the apples over the top.
Bake for 1 hour to 1 hour and 15 minutes or until a wooden skewer inserted into the center of the cake comes out clean. The cake will be golden on top and the apples will be tender. Cool the cake in the pan on a wire rack for 10 minutes. Remove the cake from the pan onto a serving dish. If using a tube pan, loosen the cake from the pan and invert it onto a plate. The invert the cake again onto a serving platter. Replace any apples that might have remained in the pan and let cool completely before serving.
The cake will keep for 3 days in an airtight container at room temperature.
Wednesday, October 15, 2014
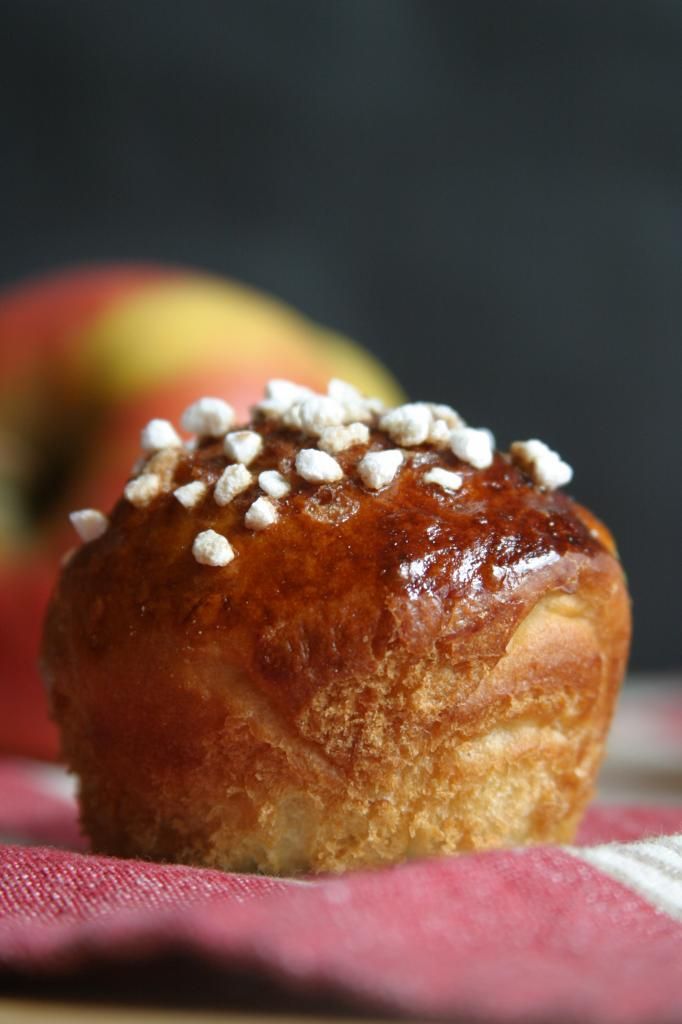
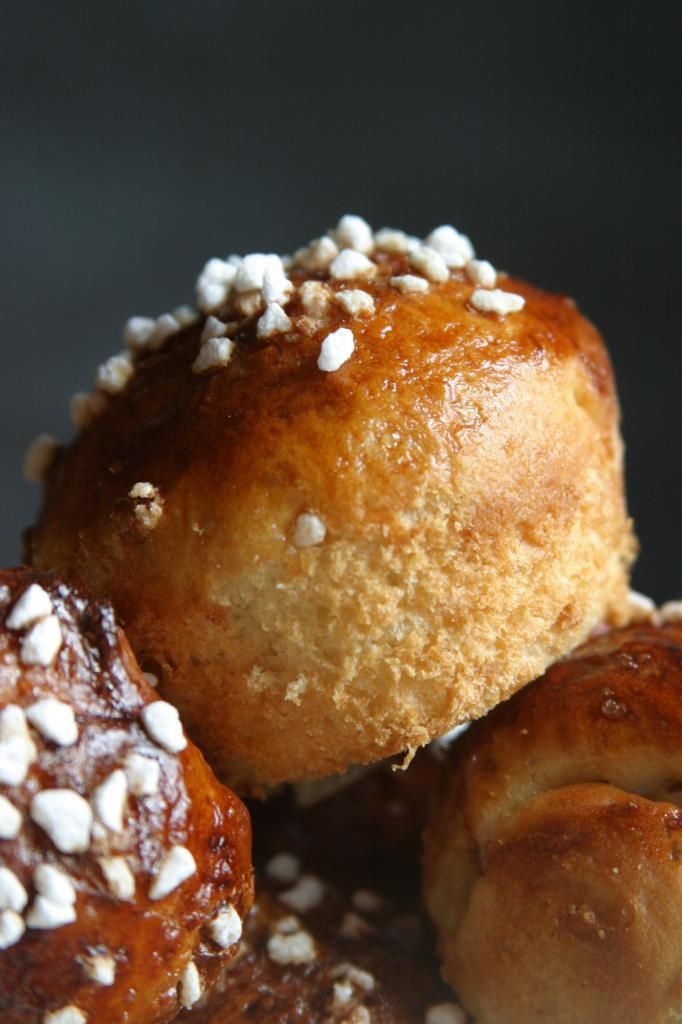
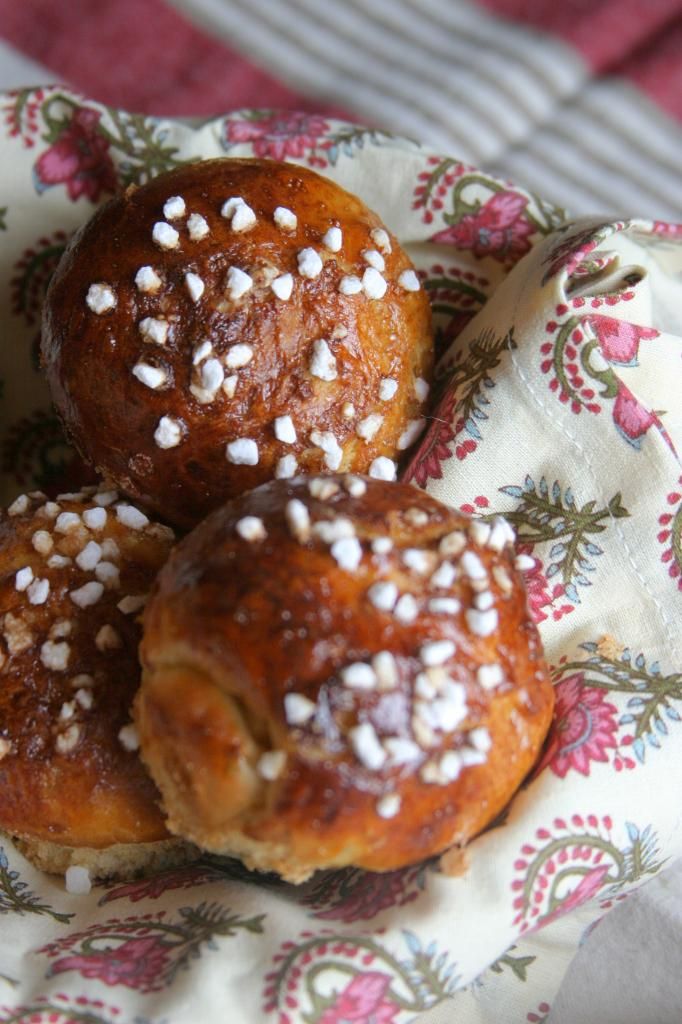
Smitten Kitchen's Apple & Honey Challah "Muffins"
My post on my personal Facebook page yesterday morning:
"Why do I feel like I have completed some amazing feat by just getting my kids
out the door in the morning? I'm spent."
It's funny how something so simple can resonate with so many. I even got comments and likes from those friends I never hear from but know are lurking somewhere out there in the Facebook shadows. As one friend put it, "You just summed up motherhood." And now that I'm back at the beginning of the journey with our new baby girl I'm finding I'd forgotten just how much of a juggling act it can be. Some days I feel like I am the whole circus combined into one exhausted act. I can juggle, walk the high wire and tame the lions all in the same day. Sometimes more than once! Only I don't look nearly as good in a leotard as those Cirque du Soleil girls do (but oh, how I wish....).
I do have to admit, however, my juggling act isn't always the best (almost as sad as my post-baby body in the aforementioned leotard). Sometimes those little balls just won't stay up in the air no matter how much I try. A few fall before I can snatch them back up. Lately one of those fallen balls is my kids' breakfast- especially on those rushed weekday mornings. It's nearly impossible to get a healthy, warm breakfast on the table for my two bigs while simultaneously nursing or changing their baby sister who seems to always be hungry at the most inconvenient times. So those poor boys are reduced to grabbing whatever they can pop in a toaster or pour in a bowl. It's hard for me to watch.
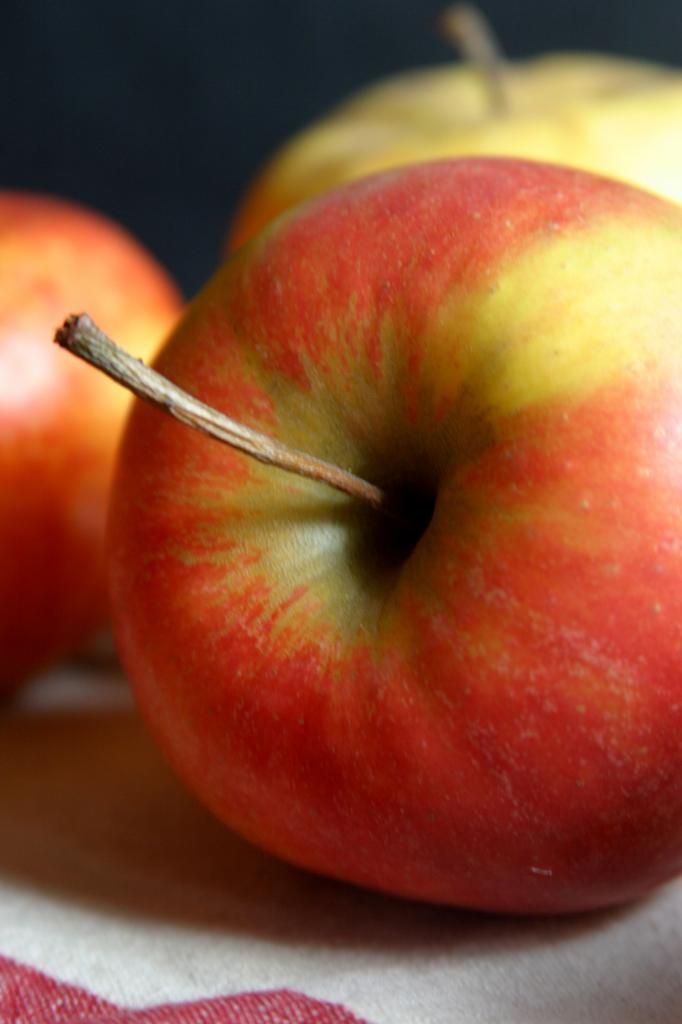
I don't have a solution for my juggling woes. Just a few really awesome catches every now and again that make me feel like Barnum and Bailey might actually be calling me up sometime soon after all. These sweet little "muffins" are one of them. I took one of my favorite recipes and made it easy for my kiddos to grab in the mornings when I'm not around to help them out. Challah is a beautiful bread enriched with eggs and honey and with the abundant apples in season right now folded right into the dough these little rolls are truly my idea of a perfect breakfast alongside a cup of cold milk.
I'm not going to give you a recipe this time around because I truly did nothing to alter the original recipe in it's brilliance. So instead I will give you the link to Deb at Smitten Kitchen's recipe (so click here now!) and tell you that it makes 2 dozen "muffins" if you make the whole recipe. Follow Deb's recipe until you get to the step for the braiding of the dough. Instead of cutting the dough into 4, cut it into 24 equal pieces. Place those pieces of dough into buttered muffin tins and continue on with the recipe as written. I halved the recipe this time around and ended up with 12 of the most beautiful breakfast treats around.
Wednesday, September 24, 2014
Kurbissuppe {Pumpkin Soup}
I'm smitten. In total and complete love. And I'm not the only one.
We named our sweet baby girl Lorelei to honor her German birthplace. But what we didn't know was just how true to her namesake she's proving to be. Lorelei is known in German legend as a siren who lured men to her (and their doom) in the Rhine River. In just two weeks our Lorelei has shown to have a pretty powerful hold over her daddy and two big brothers. I can imagine that she will have the men in her life wrapped around her little finger as long as her heart desires.
This new little sweetheart came into our lives when we thought we were way past the "baby" stage of life. I love my older boys and seeing their personalities unfold as they grow into young men. So I was amazed at how quickly my heart was won over by their baby sister. My fears of being completely unprepared emotionally for this new addition to our lives, of the change that would shake up our comfortable life and of how I would be able to juggle all of those new baby difficulties and still be a good mom to my boys were washed away the moment that incredibly chubby-cheeked face was presented to me. In that moment I couldn't imagine our family without her.
A new season has begun in our family just as fall has descended upon us here in Germany. I thought it fitting to share the most popular fall dish in our adopted home. You know fall has arrived when you see two things in the market- huge pyramid stacks of crazily pointy cabbages called spitzkohl and pumpkins. There are all sorts of pumpkins for sale, everything from presliced slabs of giant pumpkins to small winter squash like Hokkaido (or Kuri) squash. And my favorite fall festivity may just be the carved and stacked pumpkins that cover the gardens at the yearly pumpkin festival at a nearby Baroque castle. I think it will be Lorelei's first big introduction to the fests of Germany and rightfully so because in my mind her arrival will forever be linked to the crisp early days of the German autumn.
Kurbissuppe {Pumpkin Soup}
Serves 4 as a main course.
For the printable recipe, click here.
This is a pretty traditional German-style pumpkin soup. There are no fancy spices or herbs here, it's pretty straightforward pumpkin. I chose to use Hokkaido squash instead of a true pumpkin, but you could certainly use sugar pumpkins in place of the squash if you can find them. I roasted my squash first to add a bit more flavor and the Hokkaido can be roasted and eaten with the skin on- a bonus in my book. Here in Germany, the locals would drizzle pumpkin seed oil over their soup. The oil is a glorious deep green color and really adds something to the flavor of the soup. I didn't have any on hand, but found that a swirl of balsamic vinegar (I actually used a reduced balsamic glaze which you can find in many grocery stores these days) was the perfect foil for the rich soup. I wouldn't skip that drizzle if I were you. If you'd like a richer soup a swirl of creme fraiche wouldn't be out of place stirred into each bowl. And if you have them, sprinkle a few roasted pumpkin seeds over the top. The Germans would.
2 smaller-sized Hokkaido squash
1 medium yukon gold or other waxy potato, chopped into half inch cubes
1 small onion, chopped
2 carrots, peeled and chopped
2 cloves garlic, chopped
6 cups chicken or vegetable stock (or even water if you want to keep the flavor pure pumpkin)
olive oil
salt and pepper to taste
Optional garnishes:
balsamic vinegar or balsamic cream
pumpkin seed oil
roasted pumpkin seeds
creme fraiche
Preheat your oven to 400 degrees. Line a baking sheet with parchment paper.
Slice the Hokkaido squash in half and scrape out the seeds and membranes. Cut the flesh into 2 inch wide crescents. On the baking sheet, toss the squash with a drizzle of olive oil and salt and pepper. Roast for 25-30 minutes, flipping halfway through, until the flesh is tender and caramelized at the edges. Coarsely chop once out of the oven.
With about 10 minutes left to the roasting time, heat a tablespoon of olive oil in a 5 quart stockpot over medium heat. Stir in the onion and carrot and saute until just beginning to soften, about 4 minutes. Add in the potatoes and garlic and saute for another 3 to 4 minutes (being careful not to burn the garlic). Stir in the stock and roasted squash. Add a pinch of salt and pepper. Bring the soup to a boil and then reduce the heat a bit. Simmer the soup until all of the vegetables are very tender, about 15-20 minutes. Blend the soup in batches until smooth in a blender or in the pot using an immersion blender.
Serve the soup with a drizzle of balsamic vinegar or pumpkin seed oil, a sprinkle of roasted pumpkin seeds and a swirl of creme fraiche.
Friday, August 15, 2014
Zwetschgenkuchen {German Plum Cake}
I'm ready. Done. That's all she wrote folks....
I have never been one of those women who gets all glowy in pregnancy. I don't gush and squeal and get all excited about ultrasounds. I'm much more matter of fact about things. I get the medical, clinical side of things and that's what I'm comfortable with. But you're not going to see me glowing in all of my impending mommy-ness. That's just not me. I'm not even really a baby person. I don't think I've ever walked up to a stranger with a baby and gotten all gooey about the baby's cuteness. Other people babies make me a bit uncomfortable. I'll hold your baby if you ask, but I'm not going to be the first to volunteer. Not even the second if I'm being really honest.
Don't get me wrong- I love my children more than I ever would have thought possible. I loved them when they were babies and was so thrilled that each of those little people was mine. I've just found myself more comfortable with them as they've grown older. More at ease and like I fit in my role as a mom. I think I hit my stride somewhere around the 2 year old mark with each of my boys. I enjoy them and their unique personalities and I feel much more like I fit into this "Mom" skin of mine. So I guess to me, it's no surprise that I'm sort of ready to get on with this show. And by that I mean baby #3.
It's taken me this long to get used to the idea that there will even be a baby #3. That's funny, I know. The reality seems to finally be hitting me and I've gone into a bit of a nesting mode. Names are being debated. My husband and I never seem to agree until the last second and to his credit (shhhh...don't tell him I said this....) he is the one who's come up with the winning name each time with the boys. We've got a little over 3 weeks until baby sister comes along, we'll come up with something great. I'm just ready...
Zwetschgenkuchen
Makes 8 muffin-sized cakes.
For the printable recipe, click here.
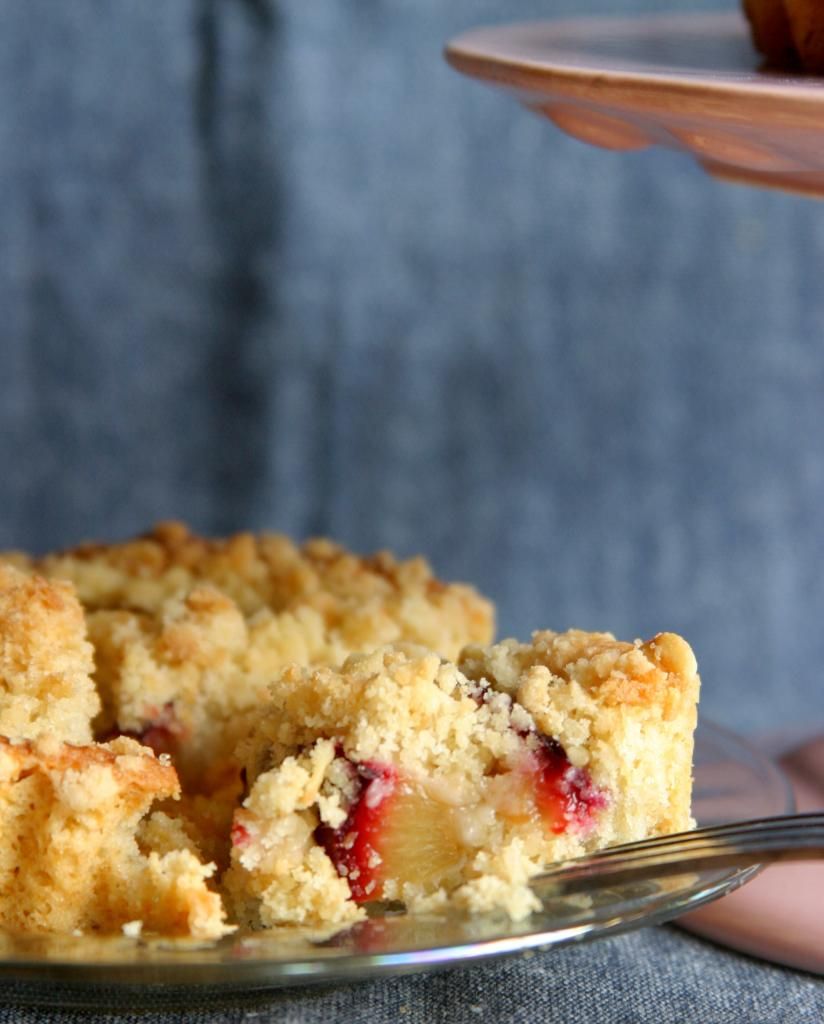
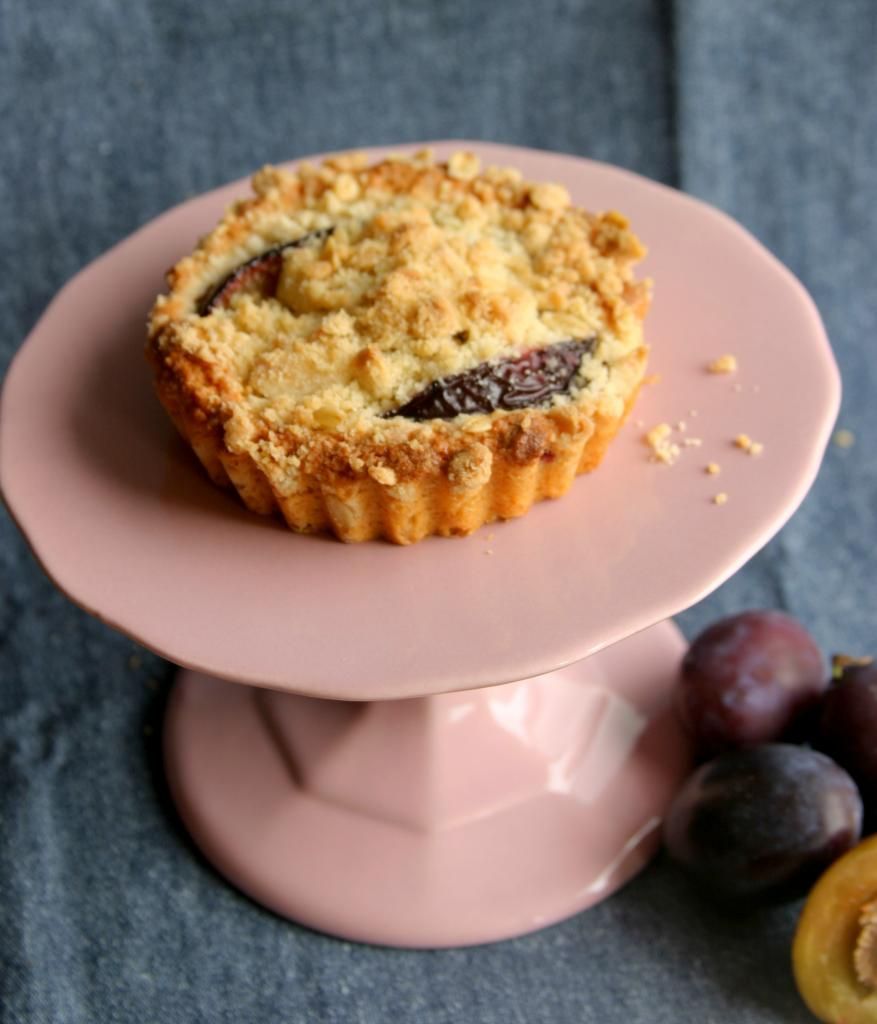
This is one of the first treats I had here in Germany. It's everywhere this time of year. We're in the heart of plum season and this plum is one of two (the other being the Mirabelle) that you would typically find in the markets. The plum to use here is called, in German, a Zwetschgen. You might find it in the U.S. labeled as an Italian prune plum. Damson plums would also be great in this recipe. Of course, any plum you use will taste great so don't hesitate to try it if you can't find the ones I've used. I did a bit of a take on the traditional in a couple of ways. Usually this is baked as one large tart-like cake (in some parts of Germany the base is even made with a yeast dough, but not here in the south). I've done them as mini cakes which I find get eat more quickly around my house. And in deference to my gestational diabetes I tried to back off on the sugar and white flour. I subbed in some oat flour in place of plain flour and I think it's really deliciously nutty. One last note- in the photos you'll see some plum slices poking out. I wish there had been way more! So I'm going to write the recipe with that in mind. If you're going to make a plum cake, you really need to taste the plum!
For the cake base:
1/4 cup plus 2 tbs sugar
5 tbs butter, room temperature
1 tsp lemon zest
1 large egg
1/2 cup plus 2 tbs oat flour (if you can't find this in the store, you can grind whole rolled oats into a powder in a food processor)
1/2 cup unbleached all purpose flour
3/4 tsp baking powder
1 tbs milk
8 Italian prune plums or Damson plums (or 6 regular plums)
For the streusel:
3 tbs cold butter
1/4 cup sugar
2/3 cup unbleached all purpose flour
2 tbs rolled oats
You can make the cake base by hand, with a food processor or mixer. I did it in my food processor, but the steps would remain the same. Place the sugar, butter and lemon zest in the bowl of a food processor and blend until light and fluffy and the sugar has dissolved. Add the egg and quickly incorporate until the mixture is smooth. Mix in the flours and baking powder and then the milk. You will have a smooth, soft dough not unlike a cookie dough. Refrigerate for a half hour to set the dough slightly.
In the meantime, pit and slice the plums into 6 slices (for the prune plums or Damsons, at least 8 slices for a larger plum). Make the streusel by stirring together the sugar, flour and oats. Using your fingertips, blend the butter into the dry ingredients until the streusel holds together in clumps and the butter in in pieces about the size of peas.
Remove the cake base dough from the refrigerator and preheat your oven to 350 degrees. Divide the dough into 8 balls and press each ball into the bottom of a regular sized muffin cup, pressing so that the dough is even and also spread slightly up the sides of the muffin cup. Place as many plum slices as you can fit into the muffin cup. Repeat this procedure for each of the 8 cakes. Divide the streusel evenly over the plums in each cup. Bake the cakes for about 20 minutes. The tops will be firm to the touch and the streusel a light golden color. Cool completely before serving.
Tuesday, December 17, 2013
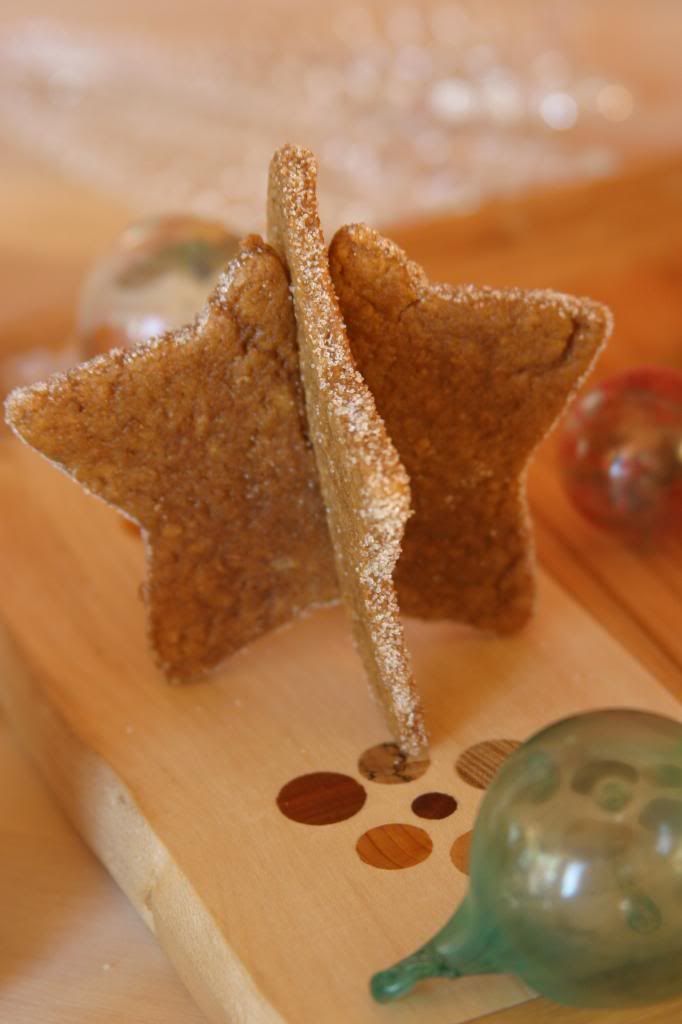
Spelt (or Whole Wheat) Gingersnap Cookies {Tuesdays with Dorie}
This morning as I was dropping off my little one at school I caught a glimpse of another Mom who must be much more on top of things than I am. She was carry a little bundle of cookies all bagged up and be-ribboned to give to teachers as gifts. And it dawned on me- Christmas is in just one week. I've only got three more days to pull together something tasty and sweet for my boys' teachers.
How did that happen? Didn't I just implore good old St. Nick to gift me with a bit more time?
My plan was to bake up a few batches of tried and true cookies- including my favorite chai spiced chocolate crinkle cookies and maybe some pizzelles- to gift to teachers and neighbors. We've got a cookie swap coming up in a few days as well and the there's Operation Cookie Drop, which the USO organizes to drop off cookies to soldiers, sailors and airmen who are stuck standing watch on Christmas Eve and Christmas day. In other words, I think I'll be up to my eyeballs in cookies for the next few days. Thanks to my hubby, who gave me my Christmas present (a new Kitchen Aid mixer!) early, I think I'm up to the task. The only question is which other cookies I want to include in my treat bags?
I think these little cookies may just make the cut. I already have a favorite molasses cookie- from Cooks Illustrated- so I wasn't too sure about these, but I gave them a shot anyway. Unlike most other cookie recipes, this one only makes about a dozen cookies. I kind of like that. There are just enough cookies to satisfy without making so many that you can't stand them anymore by the time you finish them off. They're chewy, warmly spiced and couldn't be any more Christmas-y if they tried.
It's been forever since I posted a Tuesdays with Dorie recipe and I missed the fun group of bloggers that I get to bake along with. That international move just completely got in the way. And then, of course, I had to figure out how to get by in this tiny kitchen of mine and how to find what I need in the German grocery stores. Just like everything else lately, I'm a bit behind and still trying to play catch up. But I'm slowly getting there and this is the first step in getting back to normal (or at least my new normal). I'm going to include the recipe because I made a few changes. And here's the link to find everyone else's version of these tasty little cookies.
Spelt (or Whole Wheat) Gingersnap Cookies
Makes about 1 dozen cookies. Adapted from Baking with Julia, edited by Dorie Greenspan. Recipe by David Blom.
Click here for the printable.
I love that the ingredients list for these cookies is relatively short and the process is fairly simple and straightforward. I did feel the need to tweak it just a bit though. The first batch I made was strictly by the books. I found that for being called a gingersnap, the original didn't seem to have a whole lot of ginger or snap to it. So I upped the amount of spice a bit and added cloves. I liked the first batch, but felt my second lived up to its name more fully. I also swapped out the all purpose flour for spelt flour. Mostly because it was at the front of my cabinet, but also because I knew I could hide it easily from my family in an already deeply colored dough. I quite enjoyed the depth that it cave the cookie. If you can't find spelt, you can certainly use whole wheat or all purpose flour.
1/4 cup sugar
3 tbs unsulfured molasses
2 tbs butter at room temperature
1/2 tsp ground ginger
1/4 tsp cinnamon
1/8 tsp ground cloves
1/8 tsp baking soda
1 1/2 tbs water
3/4 cup spelt (or whole wheat) flour
To glaze the cookies, you'll need 1 tbs molasses and 1 tbs water.
In the bowl of a mixer fitted with the paddle attachment (or a bowl suitable for use with a hand mixer) place the sugar, molasses, butter spices and baking soda. Mix on medium speed until the butter is whipped and creamy and all of the ingredients fully incorporated. This should take about 2 minutes. Slowly mix in the baking soda and flour until you have a soft dough, about 1 minute more.
Wrap the dough in plastic wrap, shaping it into a rough square or rectangle. Place the dough into the refrigerator until it firms up, 2 to 3 hours (or freeze for 45 minutes).
When ready to bake the cookies, remove the dough from the refrigerator and preheat your oven to 325 degrees. Line 2 baking sheets with parchment paper or a nonstick silicone liner.
Generously flour your work surface and rolling pin as the dough is quite sticky. Roll the dough out into a rectangle between 1/8 and 1/4 inch thick. Using a 2 inch cookie cutter dipped in flour, cut out cookies from the dough. Place them on the baking sheets with just a bit of room between them- they spread very little if at all. You can re-roll the scraps and cut out more cookies. If the dough is too soft, place it back into the refrigerator or freezer until it firms up a bit.
Mix the glaze and brush it on the unbaked cookies. Don't be too generous with the glaze, it can make the cookies a bit soggy. Bake the cookies for about 6 minutes. They will puff up and become just a bit firm (they will fall back down when cooling). Cool the cookies on the baking sheet for about a minute before removing them to finish cooling on a wire rack. The cookies will keep for up to 4 days in a well sealed container.
Friday, November 22, 2013
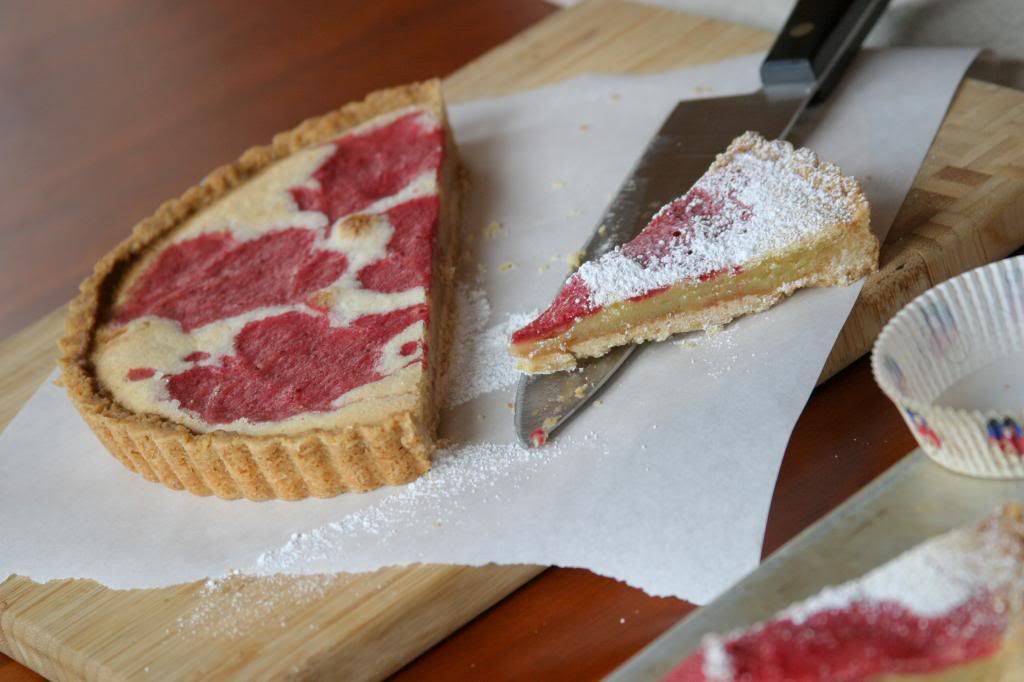
Cranberry Lemon Bars
Well, Thanksgiving for us is a thing of the past. And yes, I know that even though we are ahead of the rest of the US as far as times zones go we are not so far ahead as to actually BE after Thanksgiving which is still a week away. I may have been in a Mommy-fog since my oldest was born almost 9 years ago, but I can at least count that far. It's one of our favorite holidays though unless you're on an American military base, not exactly a popular one here in Germany. We decided that we'd really miss a big, old-fashioned holiday if we didn't throw one ourselves. But here's the problem- we'll be in Rome on the actual date.
Okay, I realize that being in Rome isn't really a problem. In fact, I will be incredibly thankful to be able to enjoy a place I've been wanting to explore for forever. So as I tuck into a platter of spaghetti carbonara on Thanksgiving day (and not, as a friend suggested, on wings at the Hard Rock Cafe just to say we "did" American on a very American holiday) I will be grateful for my good luck and the friends and family who will be traveling along with me to the Eternal City.
I've said before that we usually spend Thanksgiving with our "adopted" family of friends gathered in our military travels and the dinner we had this past weekend was no exception. Sixteen friends, both old a new, crammed themselves into our home to enjoy the big turkey feast. And we enjoyed every last bite as well as the company with which it was shared. Thankfully, I had help preparing the meal because there's no way my tiny oven could have churned out enough food unless I spent a good three days preparing and cooking. I love my friends, but that's just not happening. So, except for the pumpkin pie that my oldest dropped when retrieving it from our (American-sized) refrigerator in the basement, we feasted in proper American style.
The best part about the day after Thanksgiving? No, not the shopping- I loathe Black Friday shopping. It's the leftovers of course! Apple pie and cold sweet potatoes for breakfast. Shepherd's pie made from just about every part of the meal. Warmed pumpkin dinner rolls swiped with a dollop of the perfect cranberry sauce for a mid-morning snack. Today's offering is yet another way to use up those cranberries in case you made way too much like I did this year. These lemon bars are a great way to break up all of the heaviness of Thanksgiving leftovers. Bright with lemon and tart cranberry flavor and much less fussy than all of those apple pies you will have cursed just days before.
Another great thing about the day after Thanksgiving? You are officially allowed to listen to Christmas music. I've got my Pandora fired up as I type this cranking out some Trans Siberian Orchestra. Here's to a very joyous Thanksgiving and the best leftovers ever!
Cranberry Lemon Bars
Makes 12 triangles from an 8 inch tart pan or 12 squares from an 8 x 8 in square pan.
Adapted very slightly from Food & Wine magazine. Click here for the printable.
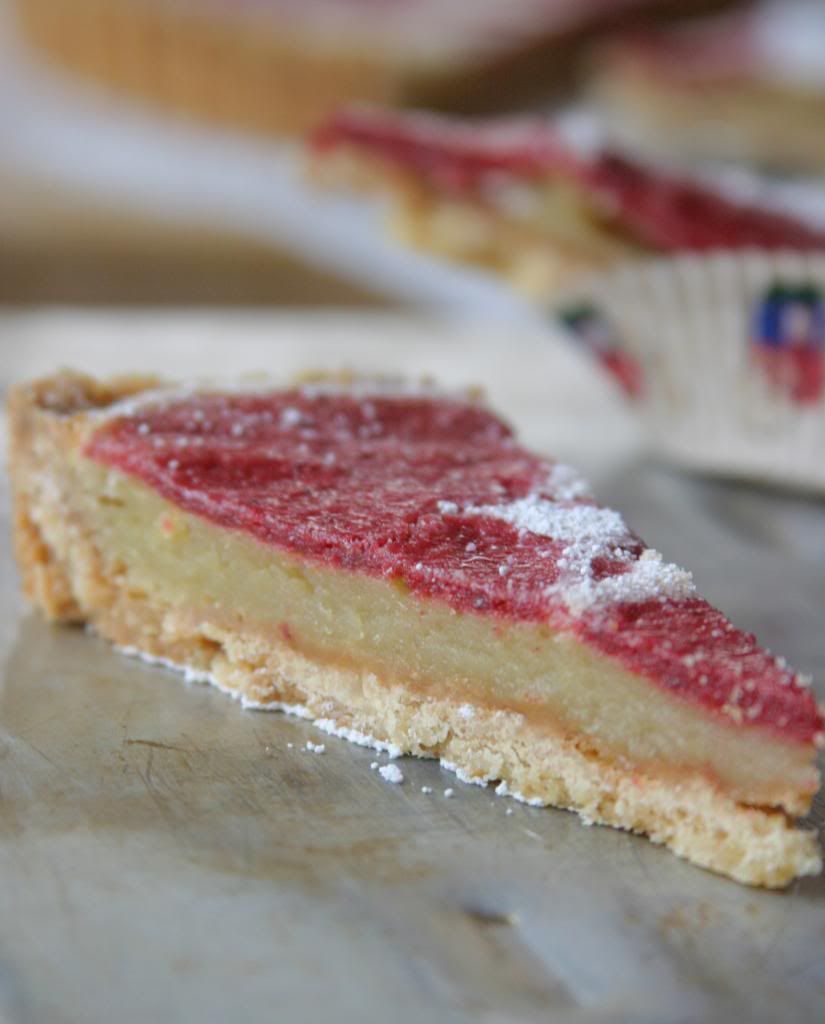
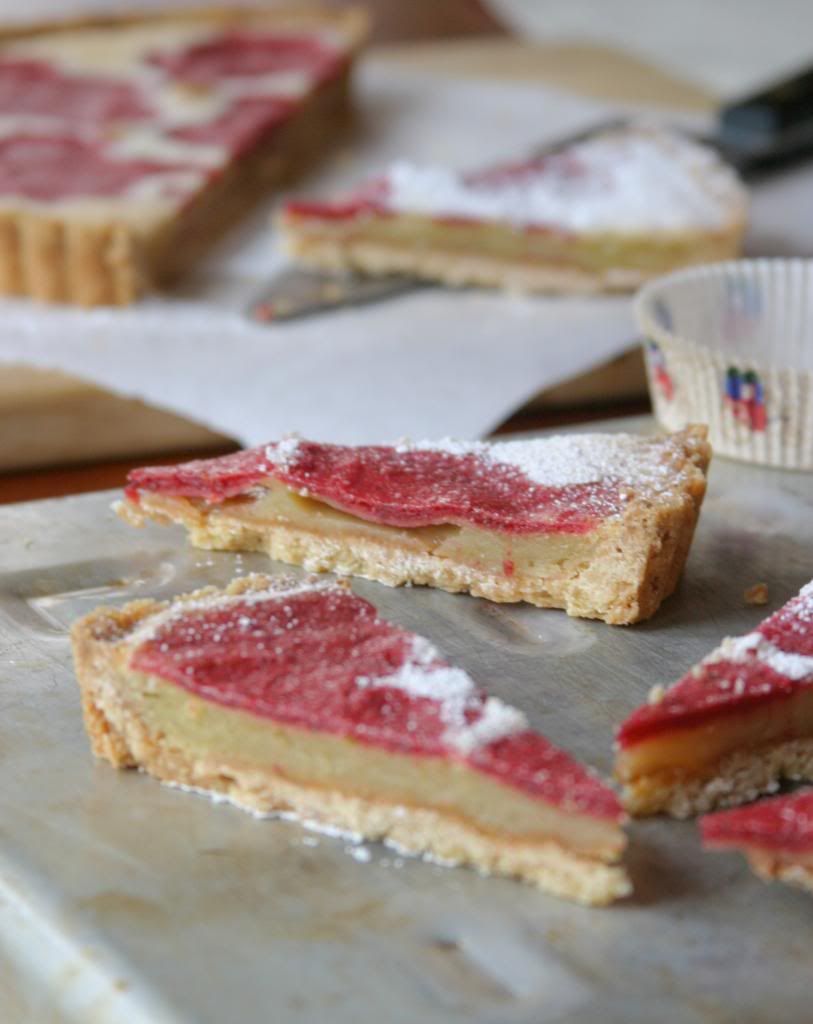
Our mail from the States trickles in slowly here in Germany. So the November issue of Food & Wine didn't land on my table until the day after I made my Thanksgiving feast. Which actually worked out just fine because I spied this recipe and knew I had the perfect cranberry sauce sitting in my fridge. I didn't use the cranberry mixture the magazine suggested so I'll give you the link to my recipe below. If you have your own favorite cranberry recipe, go ahead and use it here, just promise me you won't use the stuff from the can, please? The only other changes I made were to halve the recipe because I wasn't feeding a Thanksgiving crowd and this amount is just perfect for my family and to up the amount of lemon zest in the filling. The bars are so pretty on a dark, dreary fall afternoon and the tart/sweet taste paired with an easy, press-in crust are just right for a tired chef and tired post-Thanksgiving palate.
For the crust:
10 tbs cold butter, cut into small cubes
1/4 cup plus 2 tbs sugar
1 1/4 cups all purpose flour
For the lemon filling:
2 eggs
1 egg yolk
1 1/2 tsp grated lemon zest
1/4 cup fresh lemon juice
1 1/4 cup sugar
6 tbs all purpose flour
For the cranberry swirl:
1/3 cup of spiced cider cranberry sauce or 1/3 cup cranberries cooked with 2 tbs sugar and a pinch of cloves until sauce thickens and berries pop
Preheat your oven to 350 degrees.
To make the crust:
In a food processor or mixer blend the butter and sugar until the butter gets slightly fluffy and creamy (about 2 minutes). Add the flour and a pinch of kosher salt and blend until the flour is incorporated. Press the dough evenly into an 8 inch tart pan with a removable bottom or an 8 inch square baking pan that has been lined with parchment paper (let the parchment overhang the edges by an inch or two). Refrigerate for 15-20 minutes until the dough is firm. Bake the crust for 20-25 minutes or until the crust is lightly golden. Cool completely before filling.
To make the lemon filling:
In a medium bowl, whisk together the eggs, egg yolk, lemon zest, lemon juice, sugar and flour.
Assemble the tart and bake:
Blend the cranberries until smooth. Add 1/4 cup of the lemon mixture and blend.
Pour the lemon filling into the prepared crust. Dollop the cranberry mixture in several places over the lemon filling. With the tip of a knife or toothpick, swirl the cranberry sauce through the lemon filling. Bake the bars at 350 for 25-30 minutes until the filling is set.
Cool completely on a rack. Cut into 12 wedges or squares depending on the pan you used. Dust with powdered sugar before serving. Store in a sealed container in the refrigerator for up to 3 days.
Monday, November 11, 2013
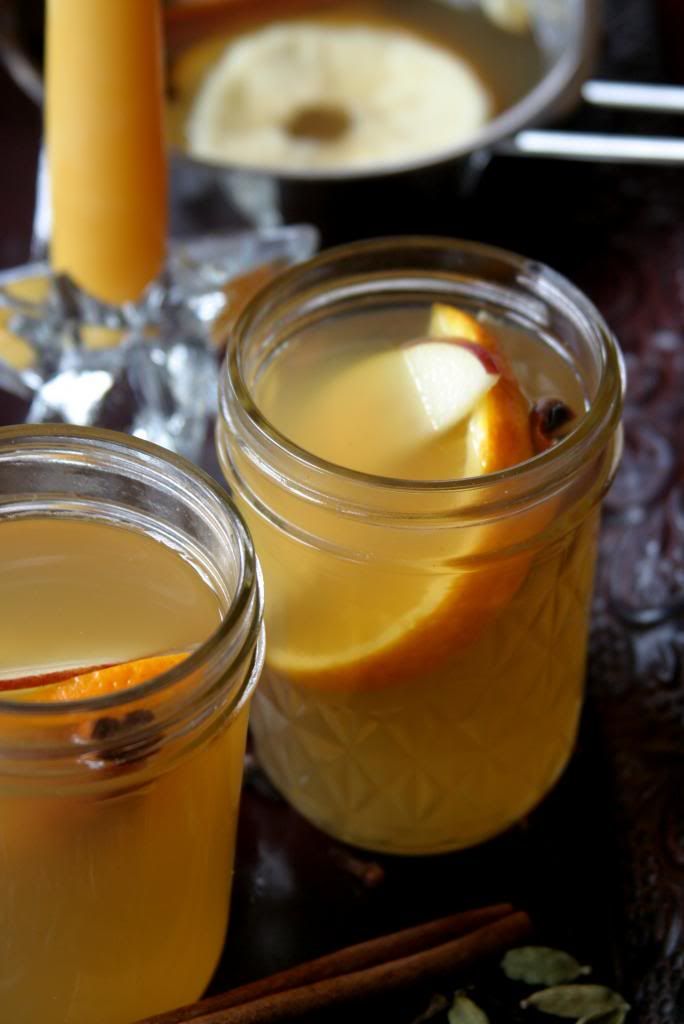
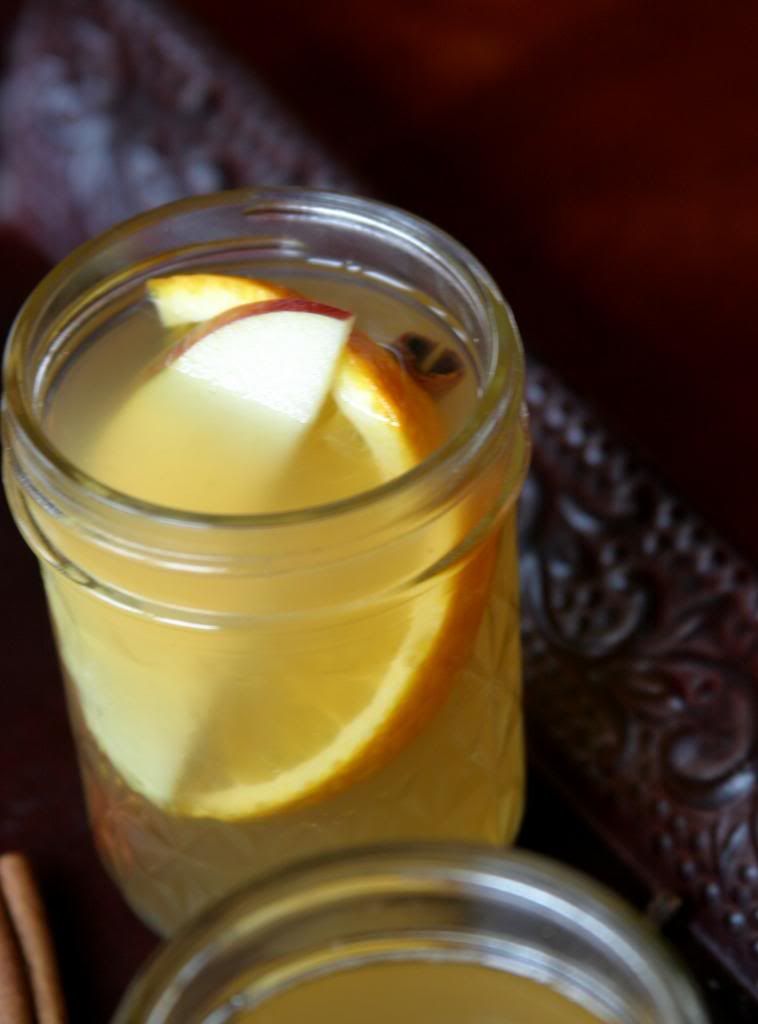
Spiced Apple Glühwein
I've been restless lately. Antsy, if you will. Germany is a great place to be, but I haven't found my "thing" here yet. You know that thing that I mean. It's the one that gets you out of bed in the morning and makes you excited for the day that's to come. I'm not sure how I want to spend my time- what would be the most valuable way to spend the hours I have free during the day. Do I want to volunteer on the base? Take German language courses? Work on my fitness or simply explore the area and work on my photography? Not knowing what to do with my time means I usually end up roaming around doing not much of anything. That's about the least fulfilling way to spend my time and it's been incredibly frustrating.
What I've been up to lately in my journey to find a purpose, my "thing" if you will, is planning several upcoming family getaways. At the very least it's a nice distraction. We've done quite a bit of traveling around Germany and it's been wonderful to see the culture and history of the country we're living in. But my restless spirit is in need of more. This past weekend was the start of that "more" for me. Hours of scouring the internet and pouring through travel books led to a whirlwind trip to Alsace, France.
We spent the weekend gazing up at the most stunning Cathedrals and searching out castles and sunset views of the Alsatian wine country. It was incredibly beautiful. I gazed in the window of every boulangerie and patisserie we passed. The kugelhopf that Alsace is known for was featured in every shop. There were half timbered houses lining the streets and canals in an area of the town of Strasbourg called "Petite France". Here we wandered around and found flea markets and food vendors lining the sidewalks. I scored the best fromage blanc with cinnamon and plums at a stall right next to live geese and ducks for sale. Seriously? I suppose the French take fresh food very seriously.
As we drove home last night through the first snowfall in the Black Forest (can you get more fabulously cliche than that?), I felt renewed. I have a few souvenirs in my wine cellar and additions to my pottery collection, but the best thing that I brought back was a peace that I think will last until the next big adventure. In the meantime, I have a Thanksgiving feast for all of our American friends to whip up and a trip to Rome to plan. I'm so looking forward to a little bit of home as well as the newest city to conquer. I guess finding my "thing:" can wait just a little longer.
Serves 4-6 people. Adapted from a traditional German recipe.
For the printable recipe, click here.
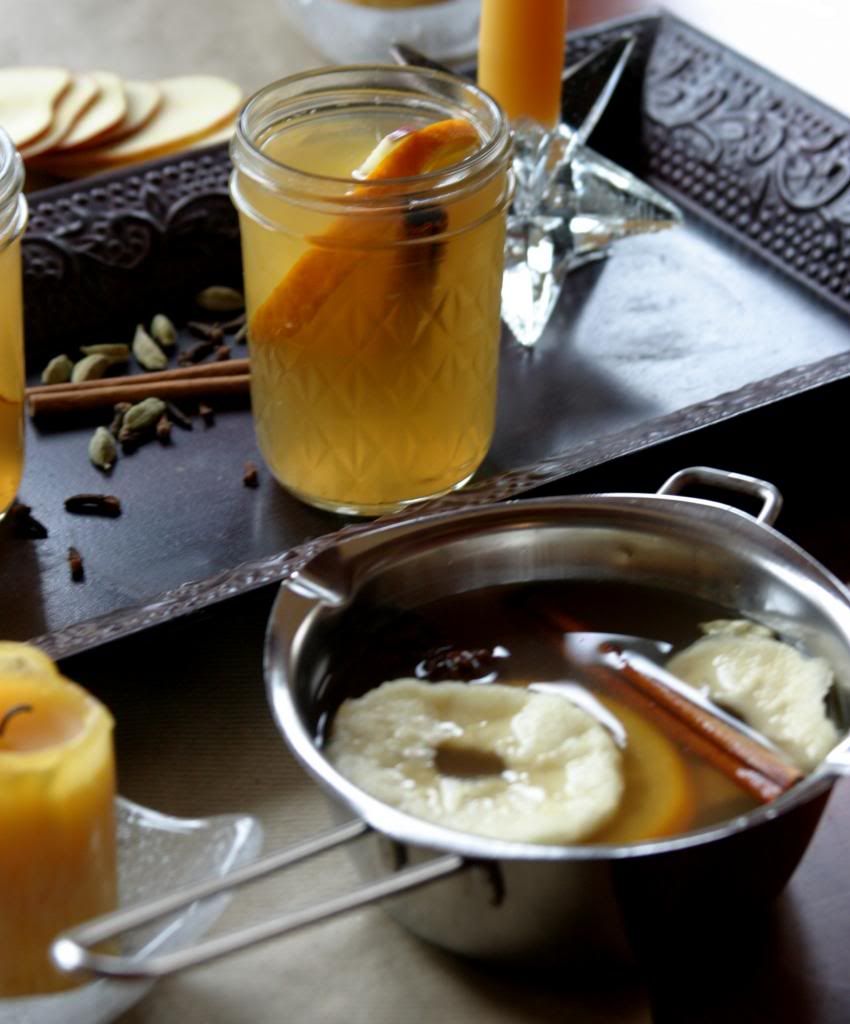
As the winter kicks into gear here in Europe, this is the sort of warm drink that you can find in every Christmas market, crepe shop and corner restaurant. Whether you call it mulled wine, vin chaud or glühwein the constants are warm wine and wintery spices. What else goes in is up to you. I like the traditional red wine but sometimes it can be too sweet and heavy. This white wine version is light and lightly spiced- perfect for sipping with a house full of friends and family on a chilly Thanksgiving afternoon or after a few hours of raking leaves in the yard. You can let it simmer on the lowest setting on your stove top or pour it in a slow cooker set to low and leave it on the counter for everyone to sample. When I made my version pictured here I put the whole spices straight into the pot with the juice and wine. I think I would have liked a bit more of the spice flavor to come through so I am suggesting that you toast the spices until fragrant before stirring them into the wine. The recipe below reflects this change.
1 bottle of dry white wine such as a Pinot Gris, Sauvingon Blanc, or Viognier
1 cup of unsweetened apple juice (preferably fresh pressed and unfiltered if you can get it)
3 tbs raw or turbinado sugar
1 orange sliced into thin rounds
8 slices of dried apple
3 cinnamon sticks
5 whole cardamom pods
1 star anise
8 cloves
thinly sliced apple for serving
In a medium pot stir together the wine, apple juice, sugar, orange slices and dried apple. In a separate small, dry pan toast the spices over medium low heat for just a minute or two. You'll know they are ready when the spices become very fragrant. Stir the spices into the rest of the ingredients. Heat the glühwein over low heat for at least 15 minutes before serving. Serve each cup with a slice of apple (and a cinnamon stick if you wish).
Labels:
Appetizers,
Christmas,
Citrus,
Drinks,
Fall,
German,
Thanksgiving,
Winter
Monday, October 7, 2013
Red Lentil and Tomato Soup
This soup has been haunting me for two years. It's one of my absolute favorites and I think I have made and photographed it at least three times in an attempt to share it with you. Not a single photograph has ever been worthy of posting. Seriously. Not. One. Ever.
Until today. {Insert me jumping up and down clapping in glee here!} I've come to the conclusion that my photography woes with regards to this soup have been due to three factors. First, it's taken me forever to really feel comfortable with my camera skills, capturing the light in an attractive way and food styling abilities. I think I may be at the point where I've gotten the hang of it. Or maybe I just got lucky on this one. For today, at least, I'm not going to question it because it means I finally have some decent photos to share with you.
Second, I don't often plan what recipes I'm going to make and when I'm going to make them. That sort of leaves me at the mercy of whatever lighting I have on the day I decide to whip up a batch of something new. In the case of this soup I seem to only make it on rainy and cloudy days when I can't squeeze out enough light to make even the prettiest cake or cookie look edible, let alone a humble soup. But really the biggest problem I've been having is that fact that, let's face it, the soup is not the most attractive color. Some things are just really hard to make look enticing in a photo and the mustard-like color of the lentils just is not very photogenic.
But by golly, I think I've finally managed to make it look like it's something you might want to eat. And thank goodness because it really is an awesome soup. Thank you pretty German morning light from my big back windows. Thank you Anthropologie for the sweet little napkin that makes all of my food look awesome against it and IKEA for the rolling kitchen cart that helps me find just the right spot to take my pictures. And thanks to you- my faithful readers- for having the patience and fortitude to stick it out with me through the oddly colored and poorly focused photos of my past with the hope that I may just find my stride and finally deliver on a soup that took me two years to get right.
Red Lentil and Tomato Soup
Makes 4-6 servings of soup. Slightly finessed from Fine Cooking.
For the printable recipe, click here.
This soup is pretty darn perfect for my family's taste, but it is infinitely adaptable. My husband, ever the carnivore, likes a bit of shredded chicken or turkey stirred into his bowl. The greens add a really nice slightly bitter note to the soup, but are certainly not necessary and the soup is quite good without them. If you choose to use them, you can throw in whatever you have in your fridge. I've used kale, spinach, swiss chard and even bok choy with equal success. And you can go totally vegetarian (even vegan!) by using vegetable stock as your liquid. The possibilities here are endless. The real key is the red lentils, which I would not substitute with any other sort of lentil as they cook differently. You can find them in many grocery stores these days so seek them out near the rest of the dry legumes and grains in your local store.
1 medium onion, chopped finely
1 large carrot, peeled and diced
1 stalk celery, diced
1 tsp curry powder or garaham masala
1 tsp dried cumin
1/2 tsp smoked paprika
1 pinch cayenne pepper (to taste)
a generous pinch of sea or kosher salt
1 14 oz. can diced tomatoes in the juices (fire roasted are my favorite to use in this soup)
4 cups home made or low sodium chicken stock (to go vegetarian, use vegetable stock)
1 cup dried red lentils
2 tbs chopped sun dried or slow roasted tomatoes
1 heaping cup chopped bitter greens such as kale, swiss chard, or mustard greens
Heat 2 tbs olive oil in a large saucepan (3 qt) over medium heat. Add the onions and cook, stirring, until they have softened and become translucent (about 5 minutes). Add the carrots, celery, curry powder, cumin and smoked paprika and stir for about 1 minute or until the spices toast and become very fragrant. Add the salt, stock, tomatoes and their juices, and lentils to the pot. Stir continuously until the soup comes to a boil so that the lentils do not stick and form clumps. Once the soup reaches a boil, turn the heat down to medium low and simmer uncovered for about 45 minutes or until the carrots and lentils have softened. Add the sun dried tomatoes and greens and cook for another 4-5 minutes to soften the greens. Taste for seasoning and add salt as needed. Serve immediately.
The soup will keep for several days in the refrigerator, though the lentils will soak up much of the liquid. Simply add a bit or water or stock when you reheat it. You can also freeze the soup for up to three months.
Tuesday, October 1, 2013
Marmalade French Yogurt Cake
Here's the thing about European kitchens- they're small. And I don't mean just the square footage. Every single thing in my kitchen seems to be made for smaller people. Or people who don't eat. Or cook. Or bake.
I knew it going into the move and did what I thought was my best to prepare myself- including leaving a good 1/3 of my gear behind knowing I wouldn't be able to fit it anywhere. But the reality of a situation is often times far beyond what you anticipate. Perhaps I'm a spoiled American girl used to her super-sized appliances. Sigh. Unpacking the last of my kitchen boxes yesterday made me realize how "American" my expectations still are. I simply have to learn to eat and shop like the Europeans who I know must eat because I constantly see them toting around their shopping baskets to and from the markets. I just don't know how they fit all their groceries into their kitchens. Maybe I need to do some spying into my neighbors' cabinets and fridges. It may help me gain some valuable insight into how to survive the next three years with my sanity intact.
I would guess that a basic rule of European kitchens is not to waste anything. Space is not wasted nor are the supplies packed into the tiny cupboards and fridges. In the spirit of wasting nothing (including the giant container of Greek yogurt that I bought without thinking about just where on Earth I was going to store said huge tub), I came up with this cake. The idea was borne from both my frustration over not having anywhere to store my yogurt and from a wonderful find at the bottom of a box I was unpacking- a jar of marmalade from my former life as an Etsy jam seller. Full disclosure: I don't like marmalade at all. I'm not a fan of the bitter notes of citrus peel. But there was no way I was letting this one go unused. It was the last of a batch that was made from the gorgeous trees in my California backyard, a mix of orange, honey tangerine and Meyer lemon. Not only is the jar getting close to it's expiration date, the nostalgia was just too much for me to ignore.
I've made a cake paring citrus with olive oil before and I enjoyed the combination. This time around I decided that I wanted something a bit more simple. Seeing as how I have no mixer or room for several bowls on my counter, any recipe that makes use of a single bowl and a spatula is just about perfect for me these days. It's light, moist and not too sweet. In other words, a cake tailor made for tea time, breakfast or a midnight snack that is just as good the day it's made as it is three days later. Even my kiddos, professed marmalade haters just like me, LOVE this cake. I still have 2/3 of a jar left of my precious marmalade and that giant tub of yogurt shoved into a corner of my tiny fridge. Which means that I have just enough to honor my little one's request for more cake!
Marmalade French Yogurt Cake
Makes 1 standard sized loaf. Adapted from Bon Apetit Magazine.
For the printable recipe, click here.
This is the sort of cake you can throw together at the drop of a hat, requires no special skills or equipment, and makes you seem like a baking genius. Who could ask for anything more? I used non-fat Greek yogurt and a full bodied olive oil for my cake and it turned out beautifully moist and light in flavor. It's one of those "use what you have" sort of recipes. One caveat-be sure to use a good quality marmalade as its flavor will make all of the difference. This cake will last for several days wrapped well or for a few months in the freezer.
1 1/2 cups all-purpose flour
2/3 cup sugar
2 tsp baking powder
2 large eggs
1/4 cup marmalade
2/3 cup Greek yogurt
1/3 cup olive oil
Preheat your oven to 350 degrees and butter and flour a standard sized loaf pan (or spray with non-stick spray).
In a large bowl whisk together the flour, sugar and baking powder. Stir in the eggs, marmalade, yogurt and olive oil. Pour the batter into the prepared pan and even out the the top. Sprinkle 1 tsp sugar over the top. Bake the cake for 45-50 minutes or until a toothpick inserted into the center comes out with moist crumbs clinging to it but free of wet batter. Cool the cake in the pan until it is just warm to the touch, then remove the cake from the pan and place it on a wire rack to finish cooling.
Friday, September 27, 2013
Chai Spice Roasted Pumpkin Seeds
When I picked up my life and drug it across an entire continent as well as an ocean, I had no idea what would happen to this little ol' blog of mine. I really still have no clue, but I promised myself that I would try to post a recipe or photos once a week. As much for my sanity as for those of you who enjoy reading along with my crazy life. The truth is that I'm really still just winging it over here and the familiar moments of fiddling with recipes until they are just right for me, finding the best light for photos in this new house and slogging through a hundred shots of the same thing to find the one perfect picture are comforting and grounding for me.
I guess what it all boils down to is that I'm still working out the kinks in my life. I have no idea how this blog will reflect those changes yet, but I'm not going away just yet and I hope those of you that I lost during my long hiatus will hop back on board and ride this roller coaster with me.
Along those same lines, I've also decided that what I really want to focus on are recipes that are simple. Family recipes. That is why I started writing the blog in the first place after all. Maybe being here in Germany where simple comfort dishes are the norm has influenced me more than I realize. That's not to say that the occasional more ambitious recipe for a fabulous European pastry (like the apple strudel I'm working to perfect that may or may not include an option for making your own pastry) won't make it onto these pages. But I realize that most folks don't have the time to be making multi-step whole wheat pear and olive oil challah bread. And I don't mean that there shouldn't be room in the day for everyone to make said bread because it's glorious. But it's just not practical. (If you want the recipe for that challah I'd be happy to share- just say the word. It's what almost made it here today, so I'm set to write it up.)
Chai Spiced Roasted Pumpkin Seeds
Makes 1 1/2 cups of seeds.
You can find the printable recipe here.
I love pumpkin seeds, either sweet or spicy. These are decidedly sweet with just enough salt to balance the spice and sugar. You can roast pumpkin seeds fresh out of the pumpkin (get busy carving those jack-o-lanterns carving friends) or use purchased shelled seeds from the grocery store. If you use seeds straight from the pumpkin, make sure they are washed and dried before you start.
1/2 tsp ground allspice (or cardamom)
1/2 tsp ground cinnamon
1/2 tsp ground ginger
1/4 tsp ground cloves
1/8 tsp sea salt
1/8 tsp white pepper (optional)
scraped seeds from half a vanilla bean, 1/2 tsp vanilla bean paste or 1 tsp vanilla extract
1 tbs sugar
1 1/2 cups pumpkin seeds
2 tbs olive oil
Preheat your oven to 350 degrees. Line a baking sheet with parchment paper or foil and set aside.
Stir together the allspice, cinnamon, ginger, cloves, salt, pepper, and sugar in a medium bowl. Add the pumpkin seeds, vanilla and olive oil. Toss until all the seeds are well coated. Spread the seeds out on the prepared baking sheet.
Bake for 25-30 minutes (stirring once or twice) until the pumpkin seeds have puffed and have become a toasty brown. Be careful not to burn the seeds! Let them cool completely before eating. Store in an airtight container for up to 1 week at room temperature.
Tuesday, September 10, 2013
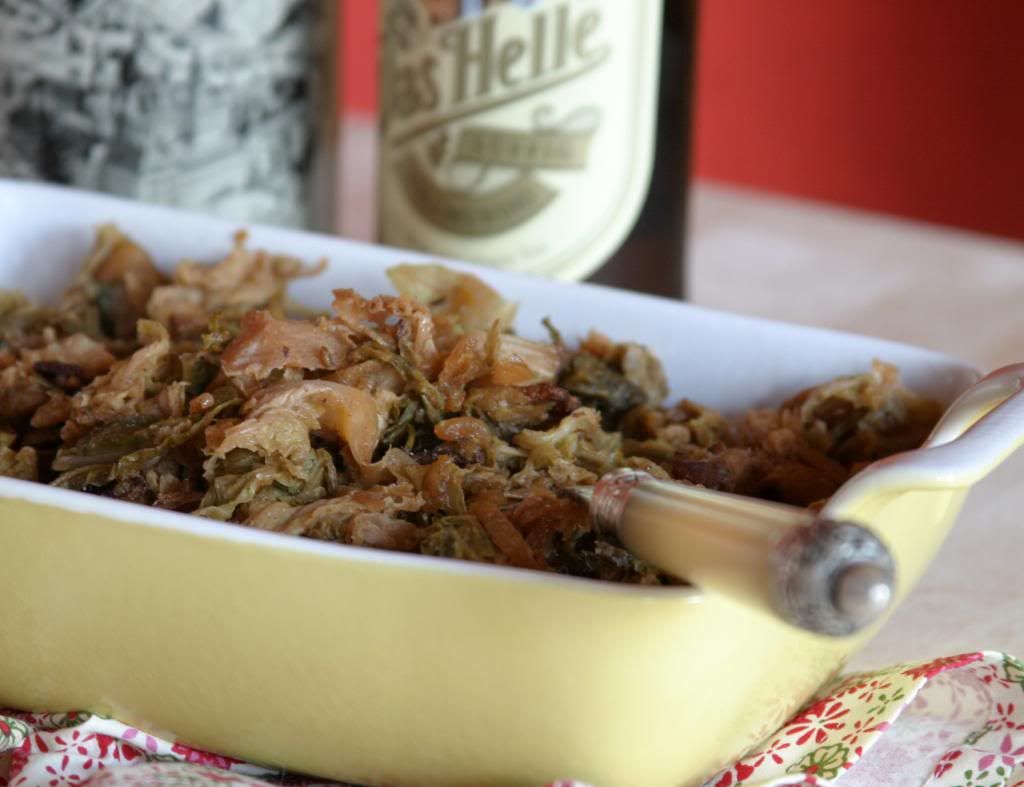
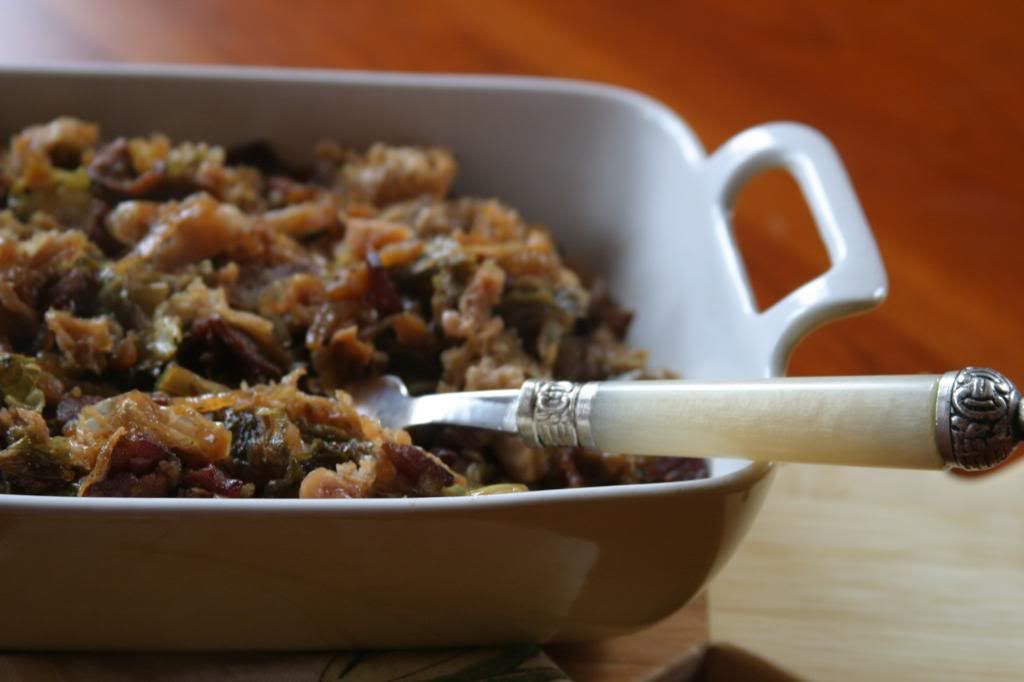
Balsamic Braised Cabbage with Apples and Bacon
If you've been following along recently, you'll know that my family and I spent a month living in a hotel room when we first got to Germany. Actually two adjoined rooms, the kids in one and hubs and I in the other. It was a kind of torturous hell for several reasons. First, there's no escape. No way to be on your own, even for just a few minutes. I love my family, but I think by the end of that month I didn't like them very much. There's only so much SpongeBob I can listen to (in German, no less) without wanting to throw the TV out the window onto the unsuspecting folks innocently waiting for the bus out in front of the hotel. We were all driving each other crazy. And don't even get me started on the awful domino effect of one of us picking up a stomach bug.....That was a seriously miserable weekend.
One thing I did gain from that month in hotel purgatory was an intimate familiarity with German cuisine. Having no kitchen means you eat EVERY meal out. Which may sound great, and it was. For about a week. Then it got very old very quickly. We had no car for quite a while, so we had a few choices of restaurants that we could walk to (or brave the riding the train to downtown Stuttgart, which is quite intimidating for a newcomer). Our choices were mainly German biergartens or little Italian trattorias. In other words- pork, potatoes, pizza and pasta. If it wasn't for the fact that I was walking everywhere I think I would have gained 15 pounds in that month. By the end of the month, those 4 p's of my new diet left me seriously craving fresh vegetables.
Germany's answer to the vegetable with dinner (if indeed you get a veggie) is cabbage in all of it's various renderings. You will find it chopped and quickly pickled, fully sauerkraut-ed, sliced and quickly sauteed with some apple or slow cooked- usually with some bacon or other smoked pork. I've never been a cabbage girl. In fact, living in SoCal, we used to live fields where cabbages grew all year long and the smell when the cabbages were harvested was enough to make me want to stay away from the cruciferous veggie for a long, long time. But necessity being what it is and my choices being limited, I've learned to like (kinda) cabbage. Today's recipe reflects the way that I've found like cabbage best. When slow cooked with vinegar, bacon and apples cabbage loses most of it's stinky quality and becomes silky, sweet/tart and slightly smoky. The Germans know a thing or two about pork and in my opinion pairing pork and cabbage is one of their best culinary contributions to date. Oh, and beer. And pretzels. Or Black Forest cake. Maybe strudel....
Balsamic Braised Cabbage with Apples and Bacon
Serves 4. Adapted only slightly from the irresistible Jamie Oliver.
For the printable recipe, click here.
This is a simple recipe for a Sunday supper side dish. It takes a while to braise, but the ingredients are few and easy to come by. I like it served along side braised pork shoulder for a very German meal. You can use whatever cabbage you like. The original recipe called for purple cabbage, which would be a beautiful color when finished. I found savoy cabbage at my market and it seemed to hold up very well to the long braise. As I was using a green cabbage I thought the heavy dark balsamic vinegar from Jamie Oliver's recipe would turn the dish an odd brown color. I found a white balsamic in my cupboard and went with that, though I think apple cider vinegar would work just as nicely and add a bit more punch to the end result.
4 slices of thick sliced smoked bacon, chopped into 1/2 inch pieces
1 tsp cumin or fennel seeds
1 small onion, halved and sliced
1 apple, cut into 1/2 inch chunks
1 head of savoy cabbage, roughly chopped
2/3 cup white balsamic or apple cider vinegar
salt and pepper to taste
In a large skillet, cook the bacon over medium heat until it is brown and (in Jamie Oliver's words) slightly sticky. Toss in the cumin seeds and saute for a moment until they are fragrant. Add the onions, stir and cover the pan. Cook until the onions become wilted and slightly translucent (about 5 minutes).
Add the apples, cabbage and vinegar and stir to combine ingredients well. Lower the heat to low, replace the lid and cook, stirring occasionally, for an hour. The cabbage will be wilted and silky and the vinegar will have been absorbed almost completely. Serve right away.
Tuesday, February 26, 2013
Spicy Pork, Potato and Pepper Stew
There are some foods that are just more photogenic than others, let's face it. I'm pretty sure I've got my cookies, cakes and salads down pat by now. They always look pretty, even if the picture isn't perfect. I'm admittedly a novice photographer. I don't know the technical terms for any of the things my camera can do. I just shoot by intuition and quite a lot of practice and bad photos along the way. I think I'm getting better.
After almost two years of blogging I have finally found the perfect window so taking a better picture in good lighting is now possible in my house in the dead of winter (of course, it helps that we've just now gotten around to getting the construction materials from projects around the house out of there so I can actually go into it). Summer photos are easier as the light through my big kitchen window is quite bright in both the morning and afternoon, but winter and spring have continued to be a struggle. I'm never completely satisfied with the final result. Until now. It's a been a long, slow learning curve for me. But I think I can finally begin to say that the photographs I present here are starting to represent the real me.
But that learning curve has resulted in many, many recipes that will never be shared with you because the food just doesn't look right. I find meats the hardest to shoot- I just can't make them look appetizing. And there's a spicy lentil soup that my family just adores that always looks too weirdly orange and lumpy to show off. Stews and chilis fit in the "tricky to photograph well" category as well. But maybe, just maybe, I'm getting somewhere with my photography. Because I think I've actually got a couple decent shots to go with a wonderful recipe that I'm relieved I can share. A stew worthy of a good picture, two pictures even, that I am proud to share with you, my friends.
Spicy Pork, Potato and Pepper Stew
Serves 4-6 people. Inspired by the stews in the Feb/March issue of Fine Cooking.
For the printable recipe, click here.
There's a bit of spicy in this stew from a hint of chipotle chili powder and some roasted green chilis. I found it to be just right and not overwhelmingly hot, and my 8 year old son agreed and heat-hating husband agreed with me. Feel free to add or subtract a bit of heat to your liking however. I confess to using jarred roasted peppers in my stew. I decided that in a stew with this many ingredients and length of cooking time that roasting my own would really be unnecessary. I'm glad I didn't go through the trouble of the extra step because I perfectly satisfied with the flavor of the jarred peppers. You could certainly roast your own if you want to, but it is not essential.
3 lbs boneless pork shoulder or Boston butt, trimmed of excess fat and cut into 1 1/2 inch cubes
3 tbs vegetable oil
1 medium onion, coarsely chopped
1 medium carrot, coarsely chopped
2 medium celery stalks, coarsely chopped
3 cloves garlic, chopped finely
1 tsp dried oregano
1 tsp ground cumin
1 tsp chipotle chili powder
1 tbs chopped roasted green (or hatch) chilis
1 12 oz beer, I used a dark lager
2 1/2 cups low sodium chicken broth
1 1/2 cups water
1 lb (about 2 medium) yukon gold or red skinned potatoes, peeled and cut into 1 inch cubes
4 medium shallots, quartered
2 roasted red peppers, cut into 1 inch pieces
1/4 cup chopped cilantro
salt and pepper to taste
lime wedges, for serving
In a large Dutch oven or other heavy duty pot, heat the oil until shimmering. Add about 1/3 of the pork in a single layer and brown well on 3-4 sides. Remove the meat and repeat the browning process two more times with the remaining 2/3 of the pork.
You need about 2 tbs of oil in the pan for the vegetables. If you need more add it now. Once hot, add the onions, carrots, celery and a pinch of salt and pepper and cook over medium heat until they begin to soften, about 5 minutes. Stir and scrape the bottom of the pot often. Add the garlic, oregano, cumin, chili powder and green chilis to the pot and stir until fragrant, just one minute.
Add the beer to the pot and scrape up any browned bits from the bottom. Raise the heat to medium high and simmer until the beer is reduced by half, about 5 minutes. Add the chicken broth and water and bring to a simmer. Return the meat to the pot along with any juices that have accumulated. Lower the heat to maintain a constant simmer. Place the lid on the pot and simmer for 30 minutes.
Add the potatoes and shallots to the pot after the first 30 minutes of simmering. Replace the lid and continue to cook for another 30-45 minutes. At that point, add in the roasted red peppers. Replace the lid and continue cooking for 30-45 minutes or until the pork is very tender and all the vegetables have cooked through. Stir in the cilantro and remove from the heat. Serve warm with a wedge of lime.
Thursday, November 15, 2012
Spiced Cider Cranberry Sauce
This cranberry sauce leaves me feeling a bit selfish, as it's for me and me alone. I seem to be the only one who loves a sauce made from fresh whole berries beautifully plated on my Thanksgiving table. That little pot of jewel colored cranberries just makes my mouth want to dance with pleasure. The thing is, I've decided that its OK to be a little selfish every once in a while. Because truly, as a wife, mother and aspiring jam entrepreneur I spend a whole lot of time thinking of others and what will make them happy. And luckily for me, I really do enjoy the way that I spend my days and the company of the friends and family I choose to spend those days with. For that I am truly thankful.
Speaking of thanks...
I am extraordinarily thankful that my New Jersey family was spared the worst of Hurricane Sandy and that after the inconvenience of about a week's loss of power, everyone is safe and warm in their own beds.
I am thankful that for the third holiday season in a row, I have my hard working military husband home with me. It is a blessing that so many families will do without this year.
I am thankful for the beauty that surrounds me every day.
I am thankful that my sons still love to hug their Momma and I will continue to hug them long past the point at which it becomes embarrassing to them.
I am thankful that the few abilities that I have can often bring a smile to others faces. It's a joy and a pleasure to have others enjoy my cooking and my writing.
Spiced Cider Cranberry Sauce
Makes about 2 cups.
For the printable, click here.
I have been making this cranberry sauce for years, tweaking it here and there until it reached the point where I could call it "perfect". I have long since lost the original magazine clipping that was the inspiration for this sauce, so I apologize to whomever was the first to print this, but as I have tinkered with it quite a bit, I have no trouble at all calling it my own. It would be my pleasure if you would do the same for yourself with this recipe.
1 12 oz. package of fresh cranberries
1/2 cup sugar
1 cup fresh apple cider or fresh, unfiltered apple juice (look for it in the refrigerated section of your market)
2 tbs fresh squeezed orange juice
zest of 1 medium orange
1/2 tsp cinnamon
1-2 tsp grated fresh ginger (to your taste)
1/4 tsp allspice
1/8 tsp ground cloves
Place the ingredients together in a medium saucepan. Bring to a boil over medium high heat. Reduce the heat so that you have a steady simmer. Simmer for about 10 minutes or until the cranberries have all popped, stirring occasionally. Remove from the stove and cool. Serve chilled with your favorite turkey and the company of family and best friends.
Labels:
Fall,
Family Recipes,
Fruit,
Sauces,
Sauces and Dressings,
Thanksgiving
Subscribe to:
Posts (Atom)


