Showing posts with label Main dish. Show all posts

Thursday, July 31, 2014

Honey Poppyseed Salad Dressing


I've been playing a bit of a disappearing act lately.  In the words of Indigo Montoya (who doesn't love The Princess Bride?).  "Let me 'splain...No, there is too much.  Let me sum up."

The third trimester of this pregnancy has hit me hard.  Between the 90 degree days that completely sap me of any energy and the crazy humidity that comes with weeks of pouring rain and causes amazing swelling in all my joints, I've been a bit out of commission.  Then there's the incredible back pain that seems to hit somewhere around noon every day.  But the thing that's been the biggest struggle of late is trying to get my high blood sugar under control. 


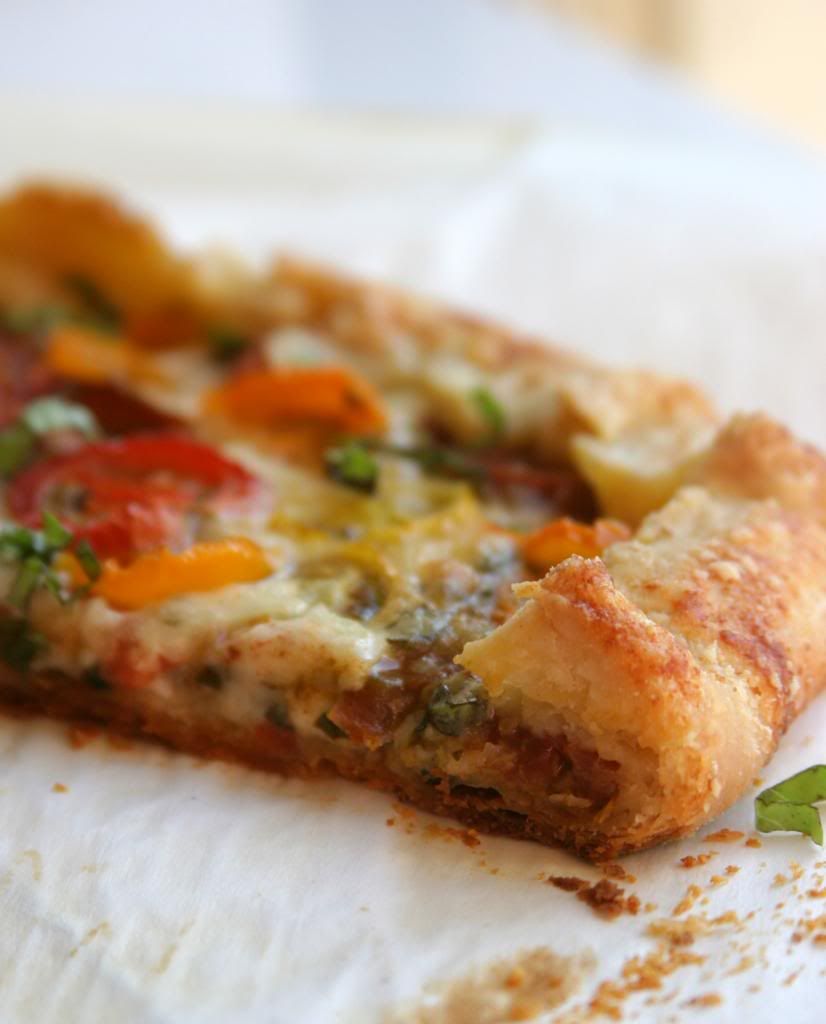
If you've been a reader for a while, you will by now recognize that I have a bit of a sweet tooth.  And it's hard for me to pass up a slice of bread or croissant if one crosses my path (okay, I really mean near impossible).  How can I just ignore the breadbasket sitting on my counter?  But I know how to seek out whole grains and, fortunately, am able to make my own breads and have a whole variety to choose from at my fingertips here in Germany.  Interestingly, I've found out that I enjoy spelt quite a bit.  Testing my blood sugar 6 times a day has made me accountable for every little thing I pick up to eat and I have to think about the smallest snack I might grab.  I've been working hard at it and don't always make the right choices, but after a few weeks I think I might be getting the hang of it.  Even making changes to my diet hasn't helped, though, and I'm still struggling with what my body is failing to accomplish every day and frustrated that I now have to rely on extra insulin too.

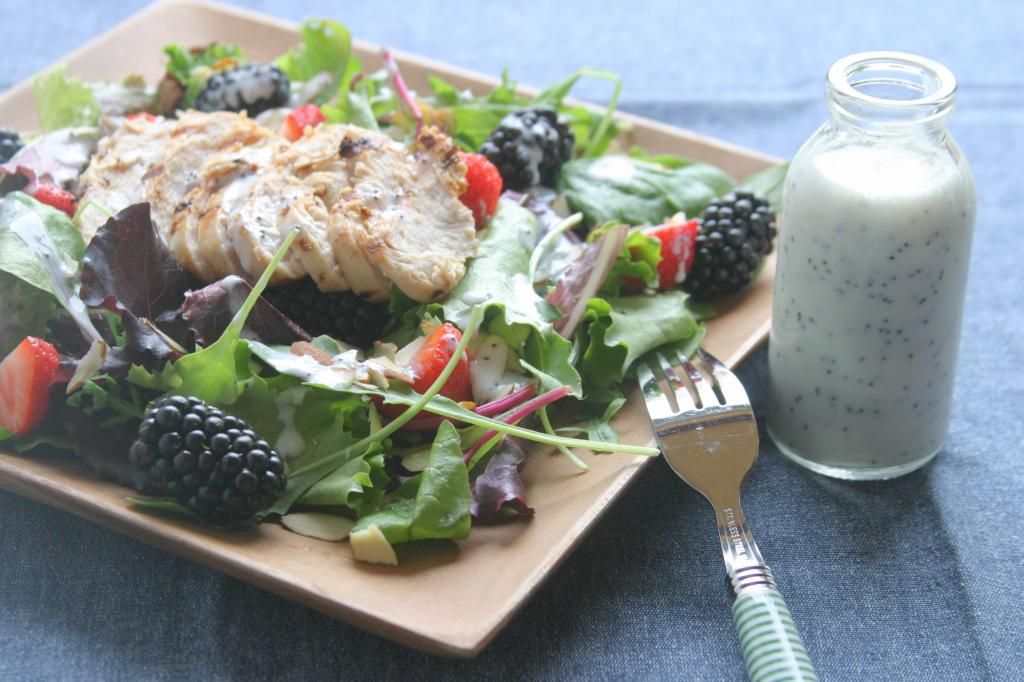
In all honesty, even though much of my waking day is spent concentrating on the food that goes into my body (and definitely what doesn't) I haven't exactly felt that I have a lot to contribute here.  I'm too tired and fixated on little details to have much left for photographing the few things I might find exciting enough to share.  Yesterday, though, I kicked my own butt into gear and forced myself to see that it isn't necessarily the complicated baking that makes for the best post, but the food that I am actually making for myself and my loved ones.  So even in the rain I found a bit of nice light and whipped up a simple salad dressing for a very summery salad.  One that fits into my new diet, but also one I think anybody would enjoy.  So I'm sharing- and I must say that's it's nice to be back.


Honey Poppyseed Salad Dressing
Makes about 1 1/2 cups.
For the printable recipe, click here.

I am not giving a recipe for the salad or grilled chicken that I served with the dressing.  Mostly because they're so simple they don't really need a recipe.  I used mixed baby greens, a handful of sliced almonds and some strawberries and blackberries for the salad.  The chicken is a boneless, skinless breast that I simply marinated for about a half hour in lemon juice, lemon zest, garlic and olive oil then grilled until cooked through but still juicy.  My favorite part of the salad?  The strawberries.  I think I could have eaten them in a soup of the dressing.

1/2 cup buttermilk
1/2 cup Greek yogurt
2 tbs olive oil
2 tbs honey
1 tbs lemon juice
2 tsp poppyseeds
1 small shallot, grated on a box grater or microplane with larger holes
a pinch of sea salt

Whisk all the ingredients together in a medium bowl.  Serve chilled with your favorite salad ingredients.


Wednesday, April 30, 2014

Grilled Goat Cheese with Hazelnuts and Basil Honey


Last week was a wonderful whirlwind of a week.  My family and I spent 7 days touring some of the most beautiful spots in Western Europe and places that I never thought I'd get to see.  Canals, castles, cathedrals, vast tulip fields and the North Sea were the highlights of our trip through Luxembourg, Belgium and The Netherlands.  And even with all of the anticipation before the trip, we were not let down in the least by what we got to see and experience.


The sights were not to be outdone by the food (and beer!) that we got to taste along the way.  I think my favorites tastes were in Belgium.  I love what they can do with their world famous beer, whether in a stew with tender pieces of beef or saucing the most perfect confit of rabbit.  And the waffles.  Oh!  The waffles.  We had the best Liege style waffles from a little van in the Burg platz in Bruges.  I will perfect that recipe for special mornings here at home, promise. 

I think the best surprise for me, both in the feel of the city and it's food was Delft in The Netherlands.  Delft is tucked in right next to the big, bustling international city of The Hague and couldn't feel any more opposite from its neighbor.  We arrived on a rainy afternoon to a sleepy city greeting us with it's cheerful signature blue and white pottery and cheese shops filled to the brim with giant wheels of Gouda-style cheese.  After buying a perfect little Delftware Dutch shoe and sampling our fill of cheese we found a great local favorite for lunch.  My pick on that day was the perfect topper to the sweet afternoon in the city- a grilled sandwich made with Dutch goat cheese, hazelnuts and something described as basil honey.  I was totally intrigued.  And hooked with the first bite, the sum being so much greater than the parts.  Thank you Delft for a new favorite.


Grilled Goat Cheese with Hazelnuts and Basil Honey
Makes one sandwich, but easily multiplied to make as many as you like.
For the printable, click here.

This is an incredibly simple sandwich with components that seem like they would never work together.  But they do, trust me on this one.  And the basil honey that so intrigued me?  Turns out it was nothing more than local honey blended with basil.  So easy, but it really makes the sandwich.  You can make this sandwich with a panini press or in a cast iron skillet. 

For each sandwich you'll need:
2 slices of good bread like a ciabatta or peasant loaf
1 ounce of soft goat cheese (perhaps a little more if you're using the longer middle slices of your loaf of bread)
1 tbs coarsely chopped hazelnuts
1 1/2 tbs light flavored honey
1 tbs chopped basil
a touch of butter for the pan

Heat the panini press or cast iron skillet.

Toast the hazelnuts in a small skillet over medium heat until they just begin to turn a light golden color.  Remove from the heat.  In a separate small bowl mix together the honey and basil.  You could blend them together if you like, but it isn't a make or break to the end result.

Spread the goat cheese on one slice of the bread.  Sprinkle with the toasted hazelnuts.  Spread the basil and honey mixture on the second slice of bread.  Place the second slice of bread (honey side down) over the first and press together.  Lightly butter your pan or panini press.  Place the sandwich in the pan or panini press and cook until lightly toasted and the cheese starts to get a bit melty.  Don't forget to flip and press your sandwich with a spatula if you're using a cast iron pan!  Slice in half and serve warm.


Thursday, April 17, 2014

Pork, Potato and Smoked Paprika Empanadas {Using Up My Leftovers}


We're gearing up for spring break here in our house.  I'm super excited for the trip we have scheduled for next week.  Mainly because it involves two of my favorite things- food and gardens.  We're headed to Belgium and The Netherlands and I have packed our itinerary full of waffles, french fries and chocolate eating as well as tulip fields as far as the eye can see in all their blooming glory.  If any has ever been to Bruges or Amsterdam and has specific recommendations on great places to eat, I'd happily take them.  I've got a little list going, but the more options the better in my book.

Sounds idyllic, doesn't it?  I promise loads of photos when we get back.  It's supposed to be a bit rainy, but I imagine the bright colors of those tulips and the canal-side homes in Bruges will make up for the gray skies. Can't!  Wait!


It's a good thing there's a vacation at the end of this week because one of the most stressful things I do around here is prepare for our trips.  Maybe I'm the only one who feels this way, but I certainly can't be, right?  It's exhausting- all the google searches on what I need to have in my car to drive through Belgium, all the laundry that needs doing before we get going, the food shopping for snacks and breakfast stuff that we can take along with us, stressing about how we're going to pack everything we need into the car.  And the worst of all- how to use up what I've got in my fridge so that what's in there doesn't go to waste and I don't have a fridge full of gross-ness awaiting me at the end of an awesome vacation.


This is one of the best ways that I know to use up leftovers.  And they've graced our table this past week to the delight of all but my picky little man (sigh).  My husband is very much an "I need meat at dinner" kind of guy and he's not a big fan of poultry, so we tend to eat a lot of pork around here.  Pork tenderloin is one of our favorites (especially this one), but we go for good old fashioned roasts as well as big, thick chops on the grill.  There are always leftovers because I don't know how to cook for less than an army of people (thanks to my Nana for that one!).  My family has come to expect these great little empanadas within a few days of the first dinner.  They never, ever disappoint.  Serve them up with a big salad and you've got one great dinner.

One less leftover in the fridge- check!


Pork, Potato and Smoked Paprika Empanadas
Makes about 15 empanadas.  Dough recipe from the sadly no-longer-in-print Gourmet magazine.
For the printable, click here.

This really is a favorite here in our house.  I've been using the same dough recipe from Gourmet magazine for years and it's pretty fool-proof.  I've been guilty over over mixing and re-rolling the scraps maybe one time too many and the empanadas are always tender and flaky.  I haven't changed a single thing from the original, though I do occasionally use apple cider vinegar instead of white vinegar depending on what is the closest to me when I'm working.  The filling is pretty flexible.  You can use whatever leftover pork you have and it will work just fine.  If you don't have thyme or smoked paprika you can go in another direction and be just as satisfied.  Maybe some cumin, chili powder and roasted chili peppers for a bit of a Tex Mex flavorMushrooms and tarragonYou could even swap out sweet potatoes for the yukon golds.  The possibilities are endless.

For the dough:
2 1/4 cups all purpose flour
1 1/2 tsp kosher salt
1 stick (1/2 cup or 8 tbs) cold butter, cut into 1/2 inch pieces
1/3 cup ice water
1 tbs white or apple cider vinegar

In a large bowl, blend together the butter, flour and salt with your finer tips or a pastry blender until the butter pieces are about the size of peas.

In another bowl, mix together the water and vinegar.  Using your hands or a fork, stir the liquid mixture into the flour and butter until you have a shaggy dough.  Turn the dough out onto a lightly floured surface and knead it two or three times just to bring the dough together.  Shape the dough into a disc, wrap it in plastic wrap and refrigerate for at least an hour.

*I've also made the dough in a food processor with no problem.  Follow the same steps, pulsing the processor blade to do your blending.

For the filling:
1/2 medium onion, diced
1 medium waxy potato (such as yukon gold), diced
1 cup leftover pork, shredded or diced
1 clove garlic, chopped
3 sprigs thyme
1/2 tsp smoked paprika
1/2 cup low-sodium or home made chicken broth, divided
1 tbs flour

1 egg for egg washing the empanadas

Saute the onion in 1 tbs olive oil for 2-3 min or just until softened.  Add potatoes and stir with the onions for another minute.  Add 1/4 cup of the chicken broth and bring to a simmer.  Simmer, uncovered, until the pan is almost dry to par-cook the potatoes.  Add the pork, garlic, the rest of the broth, thyme and paprika to the pan and stir just to warm through (about 3 minutes).  Sprinkle the flour over the pan and stir, cooking for another minute to thicken the pan juices.  Set the pan aside to cool COMPLETELY before proceeding.

To assemble:
Preheat your oven to 375 degrees.  Line two baking sheets with with parchment or a nonstick liner.  In a small bowl beat the egg with 1 tbs of water and set aside.

Roll the dough out into a circle about 1/8 of an inch thick.  Cut into circles using a 5 inch diameter cutter.  Place 1 heaping tablespoon of filling into the center of each circle.  Brush the edge of the circles with a bit of egg wash and fold the dough to form a half-circle enclosing the filling.  Press the edges with your fingers and crimp with a fork to ensure a tight seal.  You can re-roll the dough scraps and cut out more empanadas.

Place the empanadas on the prepared baking sheets.  Brush the tops with the remaining egg wash and sprinkle with a bit of smoked paprika.  Bake for 22-25 minutes until the tops are golden brown and the empanadas are puffed.  Cool slightly and serve warm.


Thursday, February 20, 2014

Herb and Greek Yogurt Egg Salad


It's been a rough few weeks here folks.  I won't go into specifics, but needless to say there have been a lot of long, sleepless nights and many days spent in bed or vegging out on the couch recuperating from one illness after another.  I've found it impossible to find the time or mental where-with-all to make any food of note during this whole time.  There have been a lot of chicken soups and simple pastas.

But we're back in working order around our house and the sun has been shining here in southern Germany for the past few days.  It's made me feel much more optimistic after the bleary and rain sodden winter we've been having.  The market in the town square this morning was bursting with early spring beauty.  Everyone was selling tulips, spring onions, radishes and baby artichokes.  It seems the Earth is reviving herself at the same time that my family has shaken ourselves free of illness.  It seems fortuitous.


So I'm slowly working my way through the recipes that have been brewing in my head.  Starting small, I think, is the way to go here.  And, honestly, I can't think of a simpler way to introduce the first signs of spring.

This just happens to be the very first egg salad that I have eaten let alone made at home.  It always seemed a bit odd to me, a salad of chopped eggs and mayonnaise.  I've never been a mayo fan so that's probably the first reason why I shied away from egg salad.  But I thought I might give it a try the other day and was thoroughly surprised with how much I enjoyed the simple salad.  Lightened up with some herbs and Greek yogurt and paired with quite possible the best roll in the world- the German pretzel roll (or laugenbrotchen around these parts), this is an egg salad for the novice.  But truly, everyone will enjoy it.

Welcome to spring.


Herb and Greek Yogurt Egg Salad
Makes 4 servings.
For the printable recipe, click here.

I had a disastrous time trying to peel my eggs for this salad.  Perhaps that's what inspired the salad in the first place.  Craggy hard-boiled eggs are just not pretty enough for deviled eggs, so I needed an alternative.  Also, I didn't quite cook my eggs through enough so only a few of the yolks make it into the salad which is why the salad in the photos looks so pale.  I was fine with that, but yours will be a more traditional yellow color.  I suggest chives and parsley for the herbs here, but feel free to go with dill or tarragon if you prefer.  If you can't find pretzel bread ( I found it showing up at stores in the states before we left for Germany), a whole grain bread would be just at home in this sandwich.  Don't forget some sliced cucumbers- you will enjoy the freshness and crunch.


6 large eggs
2 tbs mayonnaise
2 tbs Greek yogurt
1tsp Dijon mistard
2 tsp chopped herbs (chives, parsley, dill or tarragon)
salt and pepper to taste

Place the eggs in a single layer in a saucepan.  Fill the pan with water to about an inch above the top of the eggs.  Bring the water slowly to a boil over medium heat.  Once the water just begins to simmer begin a timer.  Cook the eggs for 10 minutes. 

Remove the eggs from the heat after the 10 minutes.  Carefully pour the hot water from the pot and fill it with cool water to stop the eggs cooking.  When the eggs are cool, carefully peel and chop them to 1/2 inch dice.

Gently stir the chopped eggs, mayonnaise, Greek yogurt and herbs together in a medium bowl.  Season to taste with salt and pepper.  Keep the egg salad covered and in the refrigerator until ready to serve.


Monday, October 7, 2013

Red Lentil and Tomato Soup


This soup has been haunting me for two years.  It's one of my absolute favorites and I think I have made and photographed it at least three times in an attempt to share it with you.  Not a single photograph has ever been worthy of posting.  Seriously.  Not.  One.  Ever.

Until today.  {Insert me jumping up and down clapping in glee here!}  I've come to the conclusion that my photography woes with regards to this soup have been due to three factors.  First, it's taken me forever to really feel comfortable with my camera skills, capturing the light in an attractive way and food styling abilities.  I think I may be at the point where I've gotten the hang of it. Or maybe I just got lucky on this one.  For today, at least, I'm not going to question it because it means I finally have some decent photos to share with you.


Second, I don't often plan what recipes I'm going to make and when I'm going to make them.  That sort of leaves me at the mercy of whatever lighting I have on the day I decide to whip up a batch of something new.  In the case of this soup I seem to only make it on rainy and cloudy days when I can't squeeze out enough light to make even the prettiest cake or cookie look edible, let alone a humble soup.  But really the biggest problem I've been having is that fact that, let's face it, the soup is not the most attractive color.  Some things are just really hard to make look enticing in a photo and the mustard-like color of the lentils just is not very photogenic. 

But by golly, I think I've finally managed to make it look like it's something you might want to eat.  And thank goodness because it really is an awesome soup.  Thank you pretty German morning light from my big back windows.  Thank you Anthropologie for the sweet little napkin that makes all of my food look awesome against it and IKEA for the rolling kitchen cart that helps me find just the right spot to take my pictures.  And thanks to you- my faithful readers- for having the patience and fortitude to stick it out with me through the oddly colored and poorly focused photos of my past with the hope that I may just find my stride and finally deliver on a soup that took me two years to get right.


Red Lentil and Tomato Soup
Makes 4-6 servings of soup. Slightly finessed from Fine Cooking.
For the printable recipe, click here.

This soup is pretty darn perfect for my family's taste, but it is infinitely adaptable.  My husband, ever the carnivore, likes a bit of shredded chicken or turkey stirred into his bowl.  The greens add a really nice slightly bitter note to the soup, but are certainly not necessary and the soup is quite good without them.  If you choose to use them, you can throw in whatever you have in your fridge.  I've used kale, spinach, swiss chard and even bok choy with equal success.  And you can go totally vegetarian (even vegan!) by using vegetable stock as your liquid.  The possibilities here are endless.  The real key is the red lentils, which I would not substitute with any other sort of lentil as they cook differently.  You can find them in many grocery stores these days so seek them out near the rest of the dry legumes and grains in your local store.

1 medium onion, chopped finely
1 large carrot, peeled and diced
1 stalk celery, diced
1 tsp curry powder or garaham masala
1 tsp dried cumin
1/2 tsp smoked paprika
1 pinch cayenne pepper (to taste)
a generous pinch of sea or kosher salt
1 14 oz. can diced tomatoes in the juices (fire roasted are my favorite to use in this soup)
4 cups home made or low sodium chicken stock (to go vegetarian, use vegetable stock)
1 cup dried red lentils
2 tbs chopped sun dried or slow roasted tomatoes
1 heaping cup chopped bitter greens such as kale, swiss chard, or mustard greens

Heat 2 tbs olive oil in a large saucepan (3 qt) over medium heat.  Add the onions and cook, stirring, until they have softened and become translucent (about 5 minutes).  Add the carrots, celery, curry powder, cumin and smoked paprika and stir for about 1 minute or until the spices toast and become very fragrant.  Add the salt, stock, tomatoes and their juices, and lentils to the pot.  Stir continuously until the soup comes to a boil so that the lentils do not stick and form clumps.  Once the soup reaches a boil, turn the heat down to medium low and simmer uncovered for about 45 minutes or until the carrots and lentils have softened.  Add the sun dried tomatoes and greens and cook for another 4-5 minutes to soften the greens.  Taste for seasoning and add salt as needed.  Serve immediately.

The soup will keep for several days in the refrigerator, though the lentils will soak up much of the liquid.  Simply add a bit or water or stock when you reheat it.  You can also freeze the soup for up to three months.


Monday, June 17, 2013

Tomato and Cheese Galette {A Tuesdays with Dorie Post}

As I sit here trying to organize my thoughts this evening, I am eating a bowl of my Mom's homemade chicken and orzo soup still buzzing with excitement from a fun night out.  I was invited to the Friends and Family preview evening for the newest Whole Foods to open up in the area.  That's a post for a different time, but let's just say that I found myself giddy to be standing in a grocery store being poured a local pinot noir at a bar built into an Airstream.  It was really fun (and the pinot was excellent!).
The sight of all of the signs pointing out the locally produced (and hyper locally as well- that means within a 5 mile radius of the store) fruits and veggies, wine, cheese, granola and other spectacular looking foods was wonderful to see, but it did make me a bit sad.  Sad that in just a few short weeks, I'll be leaving it all behind.  That's not to say that I am not in anyway looking forward to the adventures in my near future.  I fancy myself riding my bike to the local butcher, dairy farmer and Saturday market and filling up my wicker basket with all I need for the week's meals.  But I will definitely be missing my garden and the fabulous produce that we have such easy access to here in Southern California.
Most of all, I will miss the tomatoes.  I planted a full garden's worth earlier in the spring knowing that I wouldn't likely be around to enjoy the fruits of my labor.  But I couldn't bear to see the garden's brown earth remain barren where in the summers past they had been covered in cucumber vines, herbs and stakes tied with branches holding up the most beautiful of tomatoes.  The first of this years crop are just beginning to find their way into the light.  The cherry tomatoes are hanging on the vines, small and still green, but with the promise of something much more. I was hoping to have a tomato ready to eat before I moved, but I guess that's just not in the cards.

I can imagine the dark red heirloom Riesentraube tomatoes- growing right next to a patch of basil- would have been just perfect in this sweet little tart.  It's a savory tart, almost like a fancy pizza, with a crisp and flaky crust.  I'm so glad I found it.  Perhaps one day soon, in the warmth of a late European summer afternoon I might pull another out of my new (and tiny) German oven.  For now, I'll have to be happy with making the best of the few early tomatoes I can find in my own SoCal Saturday market instead.  Sad to be leaving but happy to have been here to experience it in the meantime.
Tomato and Cheese Galette
Makes 1 8-inch galette.  Adapted, only slightly, from Baking with Julia by Dorie Greenspan.
For the printable recipe, click here.

This is a Tuesdays with Dorie post, so there are plenty of other pretty pies to check out on the official page.  I decided to vary the cheese selection a bit, thinking that fontina would make a better partner for the mozzarella that the monterrey jack that was called for in the original.  I was pleased with the result and my boys enjoyed nibbling on the extra pieces of fontina as the galette baked.  That's a win-win in my book.  Oh, and the crust is to die for.  Just saying.

1 recipe of galette dough (recipe follows)

1/2 cup shredded mozzarella cheese
1/2 cup shredded fontina cheese
1/4 cup fresh basil leaves, cut into chiffonade (finely shredded) or torn
2 to 3 ripe plum tomatoes or 1 1/2 cups grape or cherry tomatoes, cut into 1/4-inch-thick slices
3 tbs grated parmesean cheese

Preheat the oven to 400° and position a rack in the lower third of the oven. Prepare a baking sheet by lining it with parchment paper.

On a lightly floured work surface, roll out the dough into an 11-inch circle that’s about 1/8 inch thick. The dough is quite soft so make sure to lift it now and then and toss some flour under it and on the top to prevent it from sticking everywhere. When you’ve accomplished the above dimensions, move it to your prepared pan. The best and easiest way to move this dough is to roll it up around your rolling pin and then unroll it onto the prepared baking sheet.

In a bowl, toss the mozzarella and fontina cheeses and basil together and then sprinkle it over the rolled out dough, leaving a 2-3 inch border. On top of the cheese, place the tomatoes in concentric circles, again leaving the couple inch border. Fold the uncovered border dough up over the filling, allowing the dough to naturally pleat as you work your way around the galette.  Sprinkle the parmesean cheese around the fluted edges of the crust.

Bake the galette for 35-40 minutes, or until the pastry is golden and crisp and the cheese is bubbly. When it’s done, allow the galette rest on the sheet for 10 minutes. Cut apart with a knife or pizza wheel and serve.

Galette Dough:

1 1/2 tbs buttermilk
2 1/2 tbs (approx.) ice water
1/2 cup all-purpose flour
2 tbs cup yellow cornmeal
1/2 tsp sugar
1/4 tsp salt
 3 1/2 tbsp cold unsalted butter, cut into 4-5 pieces

By Hand:
Stir the buttermilk and ice water together in a small bowl and set aside. Then, in a large bowl, combine the flour, cornmeal, sugar and salt and stir with a fork to mix. Drop in the butter chunks and toss them a round a bit to coat them with the flour mixture. Using a pastry blender, work the butter into the flour, working for butter pieces that range in size from bread crumbs to small peas.

Add the cold water/sour cream mixture into the dough 1 tablespoon at a time, stirring with a fork after each addition to evenly distribute the liquid. When all the mixture has been added, the dough should be moist enough to stick together when it’s pressed; if it’s not, add in more cold water, 1 teaspoon at a time. Use your hands to gather the dough together.

When you’ve gathered it together into a cohesive ball, press the dough into a disk shape, wrap in plastic and chill for at least 2 hours.

In a Food Processor:
Stir the buttermilk and ice water together in a small bowl; set aside. Put the flour, cornmeal, sugar, and salt in the work of a processor fitted with the metal blade; pulse to combine. Drop the butter pieces into the bowl and pulse 8 to 10 times or until the mixture is speckled with pieces of butter that vary in size from bread crumbs to peas. With the machine running, add the buttermilk mixture and process just until the dough forms soft, moist curds.

Remove the dough from the processor and press it into a disk. Wrap in plastic and chill for at least 2 hours.

Tuesday, February 26, 2013

Spicy Pork, Potato and Pepper Stew

There are some foods that are just more photogenic than others, let's face it.  I'm pretty sure I've got my cookies, cakes and salads down pat by now.  They always look pretty, even if the picture isn't perfect.  I'm admittedly a novice photographer.  I don't know the technical terms for any of the things my camera can do.  I just shoot by intuition and quite a lot of practice and bad photos along the way.  I think I'm getting better.

After almost two years of blogging I have finally found the perfect window so taking a better picture in good lighting is now possible in my house in the dead of winter (of course, it helps that we've just now gotten around to getting the construction materials from projects around the house out of there so I can actually go into it).  Summer photos are easier as the light through my big kitchen window is quite bright in both the morning and afternoon, but winter and spring have continued to be a struggle.  I'm never completely satisfied with the final result.  Until now.  It's a been a long, slow learning curve for me.  But I think I can finally begin to say that the photographs I present here are starting to represent the real me.

But that learning curve has resulted in many, many recipes that will never be shared with you because the food just doesn't look right.  I find meats the hardest to shoot- I just can't make them look appetizing.  And there's a spicy lentil soup that my family just adores that always looks too weirdly orange and lumpy to show off.  Stews and chilis fit in the "tricky to photograph well" category as well.  But maybe, just maybe, I'm getting somewhere with my photography.  Because I think I've actually got a couple decent shots to go with a wonderful recipe that I'm relieved I can share.  A stew worthy of a good picture, two pictures even, that I am proud to share with you, my friends.
Spicy Pork, Potato and Pepper Stew
Serves 4-6 people.  Inspired by the stews in the Feb/March issue of Fine Cooking.
For the printable recipe, click here.

There's a bit of spicy in this stew from a hint of chipotle chili powder and some roasted green chilis.  I found it to be just right and not overwhelmingly hot, and my 8 year old son agreed and heat-hating husband agreed with me.  Feel free to add or subtract a bit of heat to your liking however.  I confess to using jarred roasted peppers in my stew.  I decided that in a stew with this many ingredients and length of cooking time that roasting my own would really be unnecessary.  I'm glad I didn't go through the trouble of the extra step because I perfectly satisfied with the flavor of the jarred peppers.  You could certainly roast your own if you want to, but it is not essential.

3 lbs boneless pork shoulder or Boston butt, trimmed of excess fat and cut into 1 1/2 inch cubes
3 tbs vegetable oil
1 medium onion, coarsely chopped
1 medium carrot, coarsely chopped
2 medium celery stalks, coarsely chopped
3 cloves garlic, chopped finely
1 tsp dried oregano
1 tsp ground cumin
1 tsp chipotle chili powder
1 tbs chopped roasted green (or hatch) chilis
1 12 oz beer, I used a dark lager
2 1/2 cups low sodium chicken broth
1 1/2 cups water
1 lb (about 2 medium) yukon gold or red skinned potatoes, peeled and cut into 1 inch cubes
4 medium shallots, quartered
2 roasted red peppers, cut into 1 inch pieces
1/4 cup chopped cilantro
salt and pepper to taste
lime wedges, for serving

In a large Dutch oven or other heavy duty pot, heat the oil until shimmering.  Add about 1/3 of the pork in a single layer and brown well on 3-4 sides.  Remove the meat and repeat the browning process two more times with the remaining 2/3 of the pork. 

You need about 2 tbs of oil in the pan for the vegetables.  If you need more add it now.  Once hot, add the onions, carrots, celery and a pinch of salt and pepper and cook over medium heat until they begin to soften, about 5 minutes.  Stir and scrape the bottom of the pot often.  Add the garlic, oregano, cumin, chili powder and green chilis to the pot and stir until fragrant, just one minute.

Add the beer to the pot and scrape up any browned bits from the bottom.  Raise the heat to medium high and simmer until the beer is reduced by half, about 5 minutes.  Add the chicken broth and water  and bring to a simmer.  Return the meat to the pot along with any juices that have accumulated.  Lower the heat to maintain a constant simmer.  Place the lid on the pot and simmer for 30 minutes.

Add the potatoes and shallots to the pot after the first 30 minutes of simmering.  Replace the lid and continue to cook for another 30-45 minutes.  At that point, add in the roasted red peppers.  Replace the lid and continue cooking for 30-45 minutes or until the pork is very tender and all the vegetables have cooked through.  Stir in the cilantro and remove from the heat.  Serve warm with a wedge of lime.


Thursday, January 3, 2013

Three Cheese Butternut Squash Cannelloni

Cannelloni....It's a great word, isn't it? Cannelloni, cannelloni, cannelloni.  I think I could go around saying it all day and would never get tired of it.  And then I might switch to cannolli.  One fewer syllables, but just as tasty.  Gotta love Italian, it's a language that just rolls off the tongue and the words are always just so much fun.

The family members that I served this to on Christmas Eve had just as much fun with the word cannelloni that I did.  The word was bouncing around my Mother in Law's table amid snippets of laughter, conversation, and several mismatched courses of dinner which were only tied together by the people sitting around the table.  Everyone brought something to the party- old favorites shrimp creole and potato pierogies, newcomers like spinach salad and chocolate babka and the newest comer to the party, butternut squash cannelloni.  By the end of the meal, we were all in agreement about three things.  First, it had been an unexpectedly mellow and enjoyable evening.  Second, the craziness of the preparation for dinner had been worth it as we shared one very delicious meal.  And last, but not least, I needed to share the cannelloni recipe on my little blog.  Mostly just because we wanted my niece Jeannette to stop saying "I love these cannelloni"!

I'm happy to oblige.  So this is for my Mom, Helen, Jeannette and Mary Ann.  I hope you enjoy making the cannelloni for yourselves as much as I did creating it for you.

Three Cheese Butternut Squash Canneloni
Serves 6-8 people. 
For the printable recipe, click here.

I made these cannelloni in the heavily Italian-influenced South Jersey.  Because of that, I had access to fresh lasagna noodles on Christmas Eve morning.  If you aren't lucky enough to live near a market where you can get fresh pasta, you can certainly make your own.  May I also suggest that using store bough dried pasta would be perfectly acceptable.  You can use lasagna noodles or even shells.  You would simply need to cook the dry pasta for about half the suggested cooking time to soften them up enough to work with.

Filling:
1 medium butternut squash, halved lengthwise and seeded
1/2 cup ricotta cheese
1/3 cup parmesean or pecorino cheese
1/4 tsp nutmeg
1-2 tbs fresh sage (to taste)
1/2 cup chopped hazelnuts (not quite coarsely chopped, but not fine either- somewhere in between)

1 lb fresh lasagna noodles

Bechamel:
2 tbs butter
3 tbs flour
2 1/4 cup milk
2 cups grated gruyere cheese
1/4 tsp nutmeg

salt and pepper to taste

Preheat your oven to 425 degrees.  Drizzle the cut sides of the squash with a bit of olive oil and place them face down on a baking sheet.  Roast for 40-45 minutes or until a knife easily passes through the flesh.  Let cool completely.

Scoop the cooled squash from the skin and place in a food processor.  Puree the squash.  Add the ricotta, parmesean, nutmeg and sage to the food processor and process just until the ingredients are thoroughly mixed.  Transfer to a bowl and stir in the hazelnuts.  Season with salt and pepper to taste.  The filling can be used right away or made a day ahead and refrigerated.

Start the bechamel sauce by melting the butter in a large saucepan.  Sprinkle the flour over the melted butter and stir for 1 minute.  Do not let the flour brown.  Slowly add the milk, stirring constantly to avoid lumps.  Over medium heat, cook the sauce until it becomes thick and bubbly, stirring frequently.  Remove from the heat and add the nutmeg and gruyere cheese.  Stir until the cheese is melted.  Let the sauce cool while you prepare the cannelloni.

Bring the oven to 375 degrees.  Soak the fresh lasagna noodles for 1 minute in warm water.  Remove them and gently dry on a tea towel.  Cut them in half crosswise so that you have 4 inch lengths of pasta.  Spoon about 2 tablespoons of filling across the short side of the pasta about 1/2 inch from the edge.  Starting from that edge, roll the pasta to encase the filling and place seam side down on a rimmed baking sheet that has been spread with a layer of the bechamel sauce.  Continue filling and rolling the pasta.  You should be able to fit two rows of cannelloni on your baking sheet.  If you need to pack them tightly, that is just fine.  Spoon the remaining bechamel along the center of each row of cannelloni, gently spreading it a bit toward the edges.

Bake covered with foil for 25 minutes.  Remove the foil and bake for an additional 20 minutes until the sauce is lightly golden and bubbly and the pasta is cooked through.  Let the cannelloni stand for 5 minutes before serving.


Thursday, November 8, 2012

BBQ Turkey Sloppy Joes

This is a fantastically simple recipe that I have been dying to share for quite some time.  But it hasn't been easy.  For one reason or another, my pictures just never come out the way that I want them too.  Perhaps sloppy joes are just not all that photogenic.  This isn't a pretty sandwich, but I've come to the realization that this it's not meant to be beautiful.  It's meant to be a dribble down your arms, fall out of the bun, three napkin kind of sandwich.  A down and dirty sandwich.  And the taste makes up for the lack any beauty, so really I'm not complaining.  I just wish for once it would have cooperated with my desire to take a pretty picture.

So this is my final try.  I only got two decent pictures from the whole bunch I've taken, and those two are just going to have to do.  Because, really truly, this is one of those recipes that once you try it you will wonder how you didn't know about it until now.  It's a top 10 favorite in my house.  A recipe that makes it into the regular rotation with no complaints from anybody.  And it's a quick weeknight meal.  What's not to love about that?  Absolutely nothing!
BBQ Turkey Sloppy Joes
Serves 6
Click here for the printable.

This is a very adaptable sandwich.  Feel free to use ground beef instead of the turkey.  The two are pretty interchangeable in my house.  You can add some chili powder to kick up the spice or use plain tomatoes to make it more little kid friendly (though my little kid likes the green chiles).  Sometimes I melt some cheese like sharp cheddar or pepper jack onto the inside of the top bunSometimes I don't.  And the choice of bun is up to you- these little panini rolls were great, but I also really like a toasted potato bun.

3 tbs vegetable or canola oil
1 medium onion, diced
1 1/2 lbs ground turkey
1 clove of garlic, very finely diced
1 14 oz. can of chopped tomatoes, preferably fire roasted and with green chiles
3/4 cup ketchup
1 cup your favorite BBQ sauce
1/4 cup tomato paste
2 tbs apple cider vinegar
1 tsp (or more up to 2 tsp) ground cumin
salt and pepper to taste

In a large saute pan, heat the oil over medium heat.  When it begins to shimmer, add the onions and saute (stirring frequently) until they are translucent and lightly golden.  Add the turkey and cook until browned.  Stir in the garlic and cook just until the garlic is fragrant, about 1 minute.

Stir in the tomatoes, ketchup, BBQ sauce, tomato paste, vinegar and cumin.  Bring to a simmer, then reduce the heat to medium low and cook, stirring often, for about 20 minutes or until the sauce is thick.  Season with salt and pepper.

Serve, spooned onto toasted buns.


Saturday, October 27, 2012

Nana's Ricotta Cavatelli

I'm back. It was a long few weeks with no access to this little blog space and I missed it more than I thought I would.  When you rely on technology, sometimes it lets you down.  It happens and I accept that.  In the meantime, I've been cooking up a storm, taking pics, getting my garden ready for winter veggies, and focusing my time on my kids and my Etsy business.  And now thanks to the tech-lovin' husband of a friend, I'm up and running again.

As I was browsing through my almost 500 photographs trying to choose which one to write about first, one shot definitely stuck out at me.  It wasn't the best shot I had taken, but probably the most meaningful to me, so I thought I should start from there.  It's my three year old son's hands rolling out a piece of home made pasta the same way my grandmother taught me when I was little.

These little pastas are probably my favorite thing in the whole wide world.  I suppose for many reasons.  First and foremost, because they are tasty little pillows of deliciousness.  But also because they connect me to my family. I can remember standing next to Nana and using my little fingers to roll bits of dough across the wooden board.  When there was a big family dinner, she'd break out the hand-cranked machine and I'd help her feed the snake of dough between the rollers as little cavatelli shot out of the other end.  Seriously fun stuff for a little kid.  And now, seeing my son's hands repeat the same learning as my own did many years ago, it really drives home the point that oftentimes it's not the end result that counts but what you experience to get there.  And more importantly, who you share that experience with.
The recipe is simple.  Just a few ingredients lovingly put together to create a whole that is greater than the sum of its parts.  It's one of the first recipes I wrote in a little notebook given to me as I was planning my wedding and that I still pull out to jot down family recipes and my own ideas today.


Nana's Ricotta Cavatelli
Serves 3-4 people, but the recipe can easily be multiplied.
For a printable recipe, click here.

These cavatelli are very much like a gnocchi, only made with ricotta instead of potato.  You don't have to roll them out on the pasta board if you don't want to- simply cut the pasta into 1 inch pieces.  I think rolling them gives them a less chewy (i.e. more pleasing) texture and the little scoop you create is the perfect hiding spot for sauces.  But that's up to you.  I found my wooden boards at specialty kitchen shops, but you can also use the tines of a fork for rolling the cavatelli.  Lastly, if you can get your hands on some semolina flour the taste of the pasta will be all that much more interesting. 

1 lb. whole milk ricotta
1 lb. unbleached all-purpose flour, about 3 cups (you can use half all-purpose and half semolina flour as well)
1 egg

In a large bowl or on a clean counter, mix  2 1/2 cups of the flour, the ricotta and egg together with your hands.  Add more flour as needed.  You may not need all of the flour depending on how wet your ricotta is.  I was using very well drained home made ricotta, so I didn't need as much.  You are looking to create a smooth, not sticky dough. But you also don't want it to be dry.  You will know you have enough flour when the dough just comes together and is no longer sticky.

Knead the dough a few times on a floured work surface.  Cut it into 8-10 pieces. Working with one piece at a time, roll the dough into a log with a diameter of about an inch.  Cut the log into 1 inch pieces.  If using the wooden shaping board, roll each piece across the length of the board with your thumb, pushing down slightly to create a curved, shell-shaped piece of pasta. Transfer the pasta to a lightly floured baking sheet.

At this point you can cover the baking sheet with plastic wrap and refrigerate the pasta or freeze it.  If you freeze it, once the pasta is completely frozen, transfer it to a freezer bag.  It will keep for several months.  If cooking right away, place in a large pot of boiling, salted water.  The pasta is ready when it floats, about 3 minutes.  It is wonderful with a simple tomato sauce and some grated pecorino romano cheese.


Friday, June 29, 2012

Blackened Steak Sandwiches

Why is it that grilling is typically portrayed as a "man's job"?  Is there really something so inherently manly about cooking food over a flame?  I cook over a flame every time I use my gas stove.  Can there be that much of a difference between that type of cooking and throwing a steak on the grill that makes people think only a man should be grilling my dinner?
It's a question I've pondered quite a bit lately.  I watched my 7 year old son become absolutely transfixed and obsessed with tending to our campfire a few weekends ago.  I know for sure my husband's favorite part of camping is getting that fire going (and I'm definitely NOT allowed to do the cooking over that flame!).  I muttered my thoughts aloud as we were roasting marshmallows and our friends laughed at me while reminding me that fire is in every man's genes.
It's possible that there is some genetic component to it all.  My husband used to love to grill.  When we were first married he was the official steak grillmaster in the family.  And I happily handed him the patter of seasoned steaks to do with as he wished over that open flame. But somewhere along the way that changed.  For me, it's more about controlling how my food turns out than using the grill.  I became less willing to relinquish control over the outcome of my food as I became more confident in my cooking.  And perhaps it's also a matter of taste.  If it were up to my hubby, our dinner would be coated in a thick layer of Montreal steak seasoning instead of lovely things like meyer lemons and goat cheese.
Since I've taken over the grilling duties, I've come to love it.  I grill practically every day in the summer months and have even been known to cook on the grill during a rainy Seattle November because my kitchen was being renovated.  I've learned its hotspots, how to turn on the one burner that will never light properly, and where to place the veggies I want to slowly cook and not just scorch.  You'd be amazed what you can cook on a grill- you can even use your everyday pots and pans on it or use your grill to roast your Thanksgiving turkey!  My grill is one of my favorite cooking tools right up there next to my beloved 5 quart Le Creuset pot.
Blackened Steak Sandwiches
Serves 4.  Rub recipe adapted from Bon Apetit, September 2000.
For a printable version, click here.

Since I've taken over the grill, this has become a regular on our dinner table.  Everyone loves it!  The beauty of this sandwich is that it's extremely inexpensive, very easy to prepare and everyone can put it together the way they like.  It's a great meal for serving a crowd (hello, 4th of July BBQ!).  Our favorite toppings include roasted red peppers and home made blue cheese dressing.  I made some home-baked potato chips to go with it on this particular evening.  For the recipe check out this link.


2 lbs of sirloin steaks
2 tbs paprika
1 tbs ground black pepper
1 tbs kosher salt
2 tsp garlic powder
1 tsp dried oregano
1 tsp dried thyme
1/2 tsp cayenne
3 tbs melted and cooled butter

Take the steaks out of the refrigerator about 1/2 hour before you intend to grill them.  Mix together the rub ingredients in a small bowl.  Liberally sprinkle the rub over both sides of the steaks, pressing the rub in as you go.  Let the steaks rest on the counter for 25-30 minutes. 

When you are ready to grill, pour the melted butter over both sides of the steaks.  Grill them over medium high heat for 5-6 minutes per side for medium.  Don't get too worried if the steaks get quite dark- they're blackened after all.  But do watch for flare-ups.   That butter tends to drip and cause flames that will burn your steaks.  So don't walk away!  Let the steaks rest for 5 minutes after taking them off the grill.

Thinly slice the steaks and serve on toasted sandwich rolls with roasted red peppers and blue cheese dressing.


Monday, June 18, 2012

Chicken Satay Lettuce Wraps

This space has been very quiet for the past week.  I felt guilty about it, to tell you the truth.  Well at least I did at first.

Last week was the first full week of summer vacation for us.  We had no plans, I was just going to do what I usually do in the summer- wing it.  Maybe we'll go to the zoo, maybe the library, maybe just stay home and let the kids play with their neighborhood friends.  But at the last minute, we got invited to go camping with some of my oldest's school buddies.  Four days at the beach with nothing but games to play and waves to body surf.  Perfect.
And while there were plenty of marshmallows to roast and camp dinners to grill, I let my cooking mojo take a vacation.  It was nothing but campfire nachos, hot dogs and burgers.  Simple, good food that you don't need a recipe or fancy cookware to make it delicious.  I did feel anxious to get something on the blog- to not let a whole week go by in silence.  Once you get into the groove of this blogging thing, it's tough to just stop.  A little addiction of sorts.  But then as I got more sand between my toes, walked the tide pools, and watched my boys play from sun up to way past sundown I let go of my anxiety and just enjoyed being unplugged for a while.

My batteries needed the recharge.  And now I'm back with a vengeance, cooking up a storm and trying to figure out how to use my new (to me) fancy camera to get really great shots.  I'm not quite ready to show them off yet (confession- I can't figure out how to upload them!), but in the meantime, I've got some good stuff in store for you.  First up, spicy chicken satay wraps.
Chicken Satay Lettuce Wraps
Serves 4.
For a printable version click here.

Walking through our local farmer's market recently, I came across a couple of young cute guys selling natural peanut butter.  They had all sorts of flavors, from cocoa and honey to curry.  My favorite, however, was the chipotle.  It had a great spice and kick and it really amped up the peanut flavor.  I used it for the marinade in this recipe and couldn't be more pleased with the flavor.  If you're ever in my neck of the woods, check out Handsome Carver's peanut butter at the Channel Islands Farmer's Market, or be daring and buy one of their great peanut butters online. You won't regret it.

For the marinade:
2 lbs chicken breasts, sliced into 1 inch thick strips
1 small onion, coarsely chopped
4 cloves garlic
1/3 cup chipotle peanut butter (or 1/3 cup natural peanut butter, 3/4 tsp chipotle chili powder and a pinch of smoked paprika)
2 tbs low sodium soy sauce
2 tsp dark sesame oil

Place the chicken strips in a large, zip-top bag or a shallow bowl.  In a food processor, blend together the marinade ingredients.  Pour over the chicken and toss to coat the chicken well.  Refrigerate for at least an hour or up to overnight.

Thread the chicken strips onto skewers and grill for 4-5 minutes per side until completely cooked.  Let the chicken cool and then slip the strips off the skewers.

For the peanut sauce:
(adapted from The Parsley Thief)
2 cloves garlic
1/2 cup smooth natural peanut butter
1 tbs low sodium soy sauce
3 tbs rice vinegar
1 tbs brown sugar
1/4 tsp red pepper flakes
water to thin

Blend all of the sauce ingredients in a food processor.  Use water to thin the sauce to your desired consistency.

For the wraps:
1 head butter lettuce
2 persian cucumbers or 1 english cucumber, halved lengthwise and thinly sliced into half moons
1 large carrot, shredded or cut into matchsticks
2 scallions, white and light green parts thinly sliced

Layer the chicken and topping in a butter lettuce leaf.  Drizzle with peanut sauce and enjoy!