Showing posts with label Appetizers. Show all posts
Thursday, November 6, 2014
Manchego Crackers
I follow a few other bloggers that have become new moms or second/third time moms in the past year. These ladies are the real deal. They are brilliant writers, photographers and recipe developers. From the outside looking in it seems they've got it all together. And I never noticed any break or pause when the little ones arrived in their lives. New baby? No big deal.
Um, what?
I am in total awe of the ability of these ladies to juggle the exhaustion and foggy brain with day to day life and still being able to pull together some great recipes and posts. I just don't know how they do it. I have lots of ideas and inspiration- that's not the problem. It's the organization and time that I can't seem to work out. I have no idea how the other mom bloggers do it.
And then I read something the other day that made me stop and think. It was a mom talking about how there is so much pressure these days to appear as if we are always having the best time and are doing the most adventurous things. But the reality of the situation is often much different than the appearance. In her own example, she had taken pictures of her kids on a kite flying outing looking happy and carefree. But what the pictures don't show is that is was a freezing day that didn't last more than an hour with much crying and several broken kites.
It made me realize that those other mom bloggers are probably much more like me than I realize. They may look like they've got it all together but they're probably just putting their best face forward and are living in as much chaos behind the scenes as I am. The difference is that they manage to pull together a few great moments that look good on the screen (and probably taste just as awesome). But it's all just appearances.
My goal going forward is not about food or photographs. It's much more personal. I need to stop putting so much pressure on myself and realize that my life is not any less wonderful if I can't get a blog post done for a week or two. In fact, it will probably be even better because I'll get to spend real time with my kids- talking with my oldest who is really starting to show his personality and maturity, battling and playing with my 5 year old rough and tumble kid and snuggling with my baby girl. We'll cook some awesome food together, go on adventures around Europe and see some amazing sights for sure. And if I get in a great photo shoot in the meantime, you can be sure it's something that I love and am proud of because I took the time to really put my heart into it.
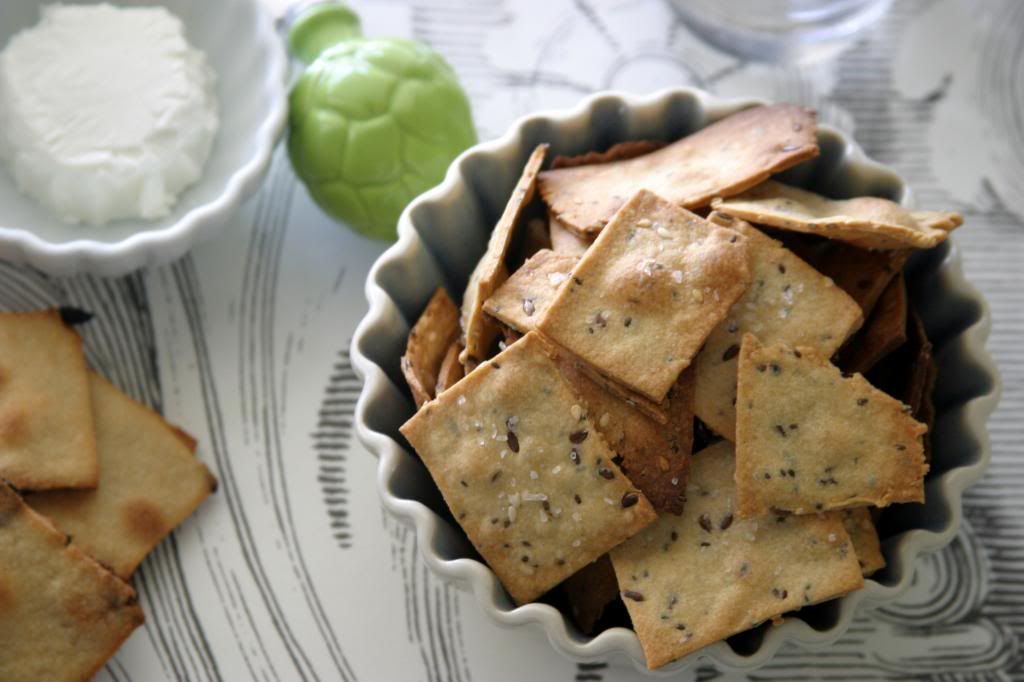
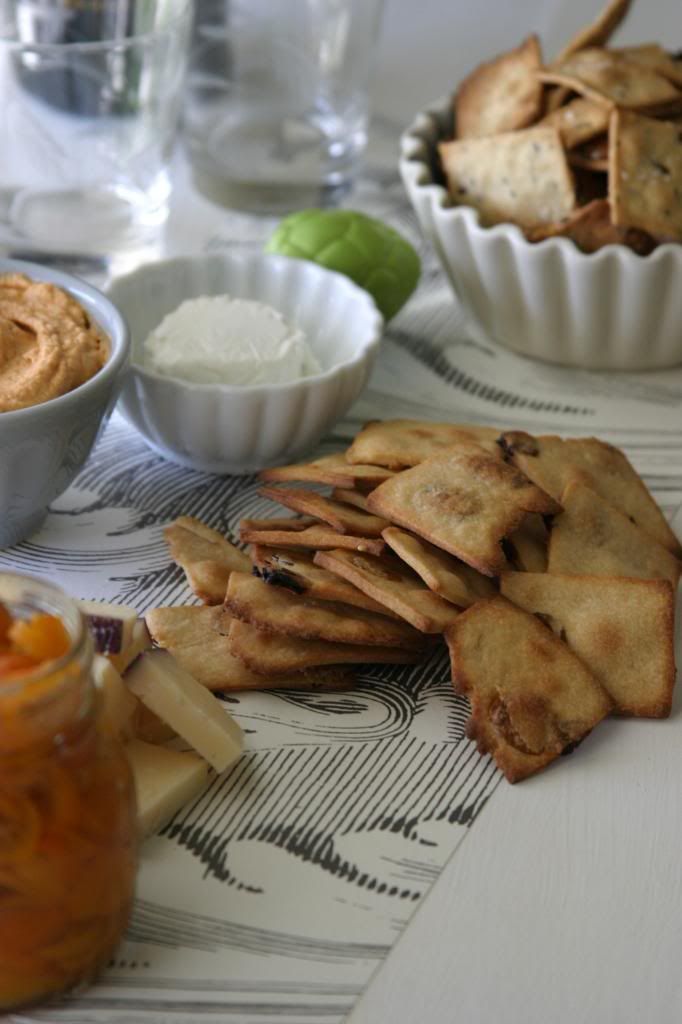
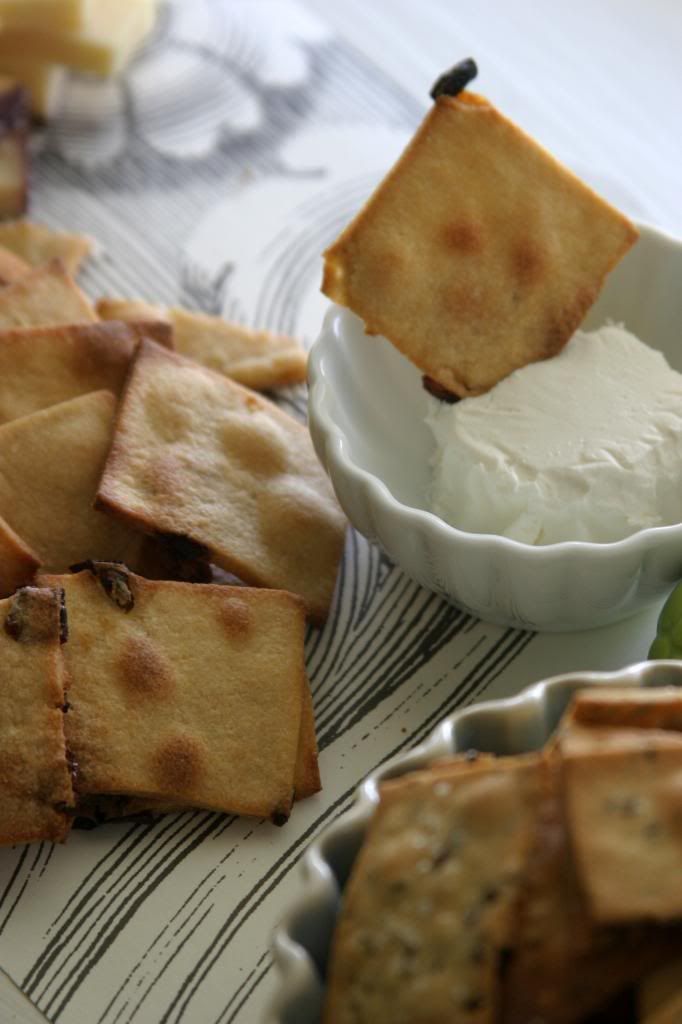
This time around it's these great crackers. The quince jam that I paired with it is wonderful, but I think I'll save that for another day. The crackers are just as good with the jam as without (or with another type of preserves like fig!). They are crisp, tangy and super easy to make. I took them along to a wine tasting get together and they were the perfect accompaniment to the wines. And just to give a further shout out to being real, the wines were all under $5 and the one we brought was awful. But it was a fun night with new friends and that's all that matters.
Manchego Crackers
Makes about 3 dozen 3 inch crackers
For the printable recipe, click here.
Manchego is one of my favorite cheeses. It's a hard sheep milk cheese from Spain, a bit tangy and nutty. If you can't find Manchego, you could use Pecorino Romano or Parmesan which share some of the same qualities. The cheese pairs beautifully with quince and fig jams on a cheese board and these crackers are no different. They are best used the same day as they are baked as they lose some of their snap as time goes on. I doubt you'll have any leftover anyway.
1 cup shredded Manchego cheese
3/4 cup all purpose flour
1/2 tsp freshly cracked black pepper
5 tbs cold butter, cut into cubes
3 tbs plain Greek yogurt
In a food processor, blend together the cheese, flour and pepper. Drop in the butter and yogurt and pulse the mixture until it just comes together and you can still see streaks of the butter and yogurt. Pour the dough onto a sheet of parchment or wax paper and press into a log with a 3 inch diameter (I made mine with squared sides but round would be just as nice. Wrap tightly in the paper and refrigerate for at least 1 hour and up to 3 days. You could also freeze the dough for up to 3 months.
When ready to bake the crackers, preheat your oven to 325 degrees and line a baking sheet with parchment. Take the dough from the fridge and let it warm on the counter for a few minutes to make slicing easier. Using a sharp, heavy knife slice the dough into 1/4 inch slices. I found that the thinner crackers had a better snap to them so try not to get too thick. Lay the slices flat on the baking tray. They don't need a lot of space between them as they don't spread much at all.
Bake for 15-18 minutes, flipping the crackers after the first 10 minutes. The finished crackers are a beautiful golden color (but not brown). Cool on a wire rack completely. Store the crackers in an airtight container.
*You can also make the cracker dough by hand if you don't have a food processor. Simply mix the dry ingredients together in a large bowl and then cut the butter and yogurt in using a pastry blender or two knives.
Thursday, April 17, 2014
Pork, Potato and Smoked Paprika Empanadas {Using Up My Leftovers}
We're gearing up for spring break here in our house. I'm super excited for the trip we have scheduled for next week. Mainly because it involves two of my favorite things- food and gardens. We're headed to Belgium and The Netherlands and I have packed our itinerary full of waffles, french fries and chocolate eating as well as tulip fields as far as the eye can see in all their blooming glory. If any has ever been to Bruges or Amsterdam and has specific recommendations on great places to eat, I'd happily take them. I've got a little list going, but the more options the better in my book.
Sounds idyllic, doesn't it? I promise loads of photos when we get back. It's supposed to be a bit rainy, but I imagine the bright colors of those tulips and the canal-side homes in Bruges will make up for the gray skies. Can't! Wait!
It's a good thing there's a vacation at the end of this week because one of the most stressful things I do around here is prepare for our trips. Maybe I'm the only one who feels this way, but I certainly can't be, right? It's exhausting- all the google searches on what I need to have in my car to drive through Belgium, all the laundry that needs doing before we get going, the food shopping for snacks and breakfast stuff that we can take along with us, stressing about how we're going to pack everything we need into the car. And the worst of all- how to use up what I've got in my fridge so that what's in there doesn't go to waste and I don't have a fridge full of gross-ness awaiting me at the end of an awesome vacation.
This is one of the best ways that I know to use up leftovers. And they've graced our table this past week to the delight of all but my picky little man (sigh). My husband is very much an "I need meat at dinner" kind of guy and he's not a big fan of poultry, so we tend to eat a lot of pork around here. Pork tenderloin is one of our favorites (especially this one), but we go for good old fashioned roasts as well as big, thick chops on the grill. There are always leftovers because I don't know how to cook for less than an army of people (thanks to my Nana for that one!). My family has come to expect these great little empanadas within a few days of the first dinner. They never, ever disappoint. Serve them up with a big salad and you've got one great dinner.
One less leftover in the fridge- check!
Pork, Potato and Smoked Paprika Empanadas
Makes about 15 empanadas. Dough recipe from the sadly no-longer-in-print Gourmet magazine.
For the printable, click here.
This really is a favorite here in our house. I've been using the same dough recipe from Gourmet magazine for years and it's pretty fool-proof. I've been guilty over over mixing and re-rolling the scraps maybe one time too many and the empanadas are always tender and flaky. I haven't changed a single thing from the original, though I do occasionally use apple cider vinegar instead of white vinegar depending on what is the closest to me when I'm working. The filling is pretty flexible. You can use whatever leftover pork you have and it will work just fine. If you don't have thyme or smoked paprika you can go in another direction and be just as satisfied. Maybe some cumin, chili powder and roasted chili peppers for a bit of a Tex Mex flavor? Mushrooms and tarragon? You could even swap out sweet potatoes for the yukon golds. The possibilities are endless.
For the dough:
2 1/4 cups all purpose flour
1 1/2 tsp kosher salt
1 stick (1/2 cup or 8 tbs) cold butter, cut into 1/2 inch pieces
1/3 cup ice water
1 tbs white or apple cider vinegar
In a large bowl, blend together the butter, flour and salt with your finer tips or a pastry blender until the butter pieces are about the size of peas.
In another bowl, mix together the water and vinegar. Using your hands or a fork, stir the liquid mixture into the flour and butter until you have a shaggy dough. Turn the dough out onto a lightly floured surface and knead it two or three times just to bring the dough together. Shape the dough into a disc, wrap it in plastic wrap and refrigerate for at least an hour.
*I've also made the dough in a food processor with no problem. Follow the same steps, pulsing the processor blade to do your blending.
For the filling:
1/2 medium onion, diced
1 medium waxy potato (such as yukon gold), diced
1 cup leftover pork, shredded or diced
1 clove garlic, chopped
3 sprigs thyme
1/2 tsp smoked paprika
1/2 cup low-sodium or home made chicken broth, divided
1 tbs flour
1 egg for egg washing the empanadas
Saute the onion in 1 tbs olive oil for 2-3 min or just until softened. Add potatoes and stir with the onions for another minute. Add 1/4 cup of the chicken broth and bring to a simmer. Simmer, uncovered, until the pan is almost dry to par-cook the potatoes. Add the pork, garlic, the rest of the broth, thyme and paprika to the pan and stir just to warm through (about 3 minutes). Sprinkle the flour over the pan and stir, cooking for another minute to thicken the pan juices. Set the pan aside to cool COMPLETELY before proceeding.
To assemble:
Preheat your oven to 375 degrees. Line two baking sheets with with parchment or a nonstick liner. In a small bowl beat the egg with 1 tbs of water and set aside.
Roll the dough out into a circle about 1/8 of an inch thick. Cut into circles using a 5 inch diameter cutter. Place 1 heaping tablespoon of filling into the center of each circle. Brush the edge of the circles with a bit of egg wash and fold the dough to form a half-circle enclosing the filling. Press the edges with your fingers and crimp with a fork to ensure a tight seal. You can re-roll the dough scraps and cut out more empanadas.
Place the empanadas on the prepared baking sheets. Brush the tops with the remaining egg wash and sprinkle with a bit of smoked paprika. Bake for 22-25 minutes until the tops are golden brown and the empanadas are puffed. Cool slightly and serve warm.
Thursday, February 27, 2014
Herb and Olive Oil Marinated Goat Cheese
I'm still on my "spring is on it's way!" kick. I can't really help it, my body is craving fresh, simple foods with lots of veggies and herbs and the markets are responding in just the most perfect way. And just in time too because frankly, I'm about done with stews and braises and trying to find winter veggies that my family will eat (they are just not squash or root vegetable people so I can forget butternuts, turnips and the like...).
Here in Germany we get to celebrate our first Fasching this coming week. It's pretty much the German version of Carnival or Mardi Gras that gets celebrated in other parts of the world. There are parades, costumes and parties in every big city in our part of the country and in many of the small towns too. As I was walking out the door this morning with two costumed kiddos all excited and ready to go to school, I ran into my German neighbor. She asked if we have Fasching back in the US. When I said no, she just chuckled and replied that there isn't anything like Fasching anywhere in the world and that we are in for some fun. I can't wait to check it all out!
There are many stories about the origin of the celebration, most having to do with the start of lent, but I like the version that my oldest came home from school with yesterday. His teacher described the first Fasching as a celebration of the end of a particularly long and hungry winter and the first signs of spring. I can dig that sort of celebration. That's exactly how I'm feeling these days so I'm ready to party with the best of them. Or at least I think so- those Germans really know how to have a good time.
So if you feel like celebrating spring along with me, I've got a simple party appetizer sort of recipe for you today. I honestly can't think of a reason NOT to have a jar of this beautiful cheese in your fridge. It's about the easiest thing ever to prepare and after just a few days of the herbs mingling with the oil and cheesy goodness, you've got something that is more than the sum of its parts. Pure perfection.
Herb and Olive Oil Marinated Goat Cheese
Makes 1 pint jar.
For the printable recipe, click here.
There really is no specific recipe here, I am simply inclined to give you suggestions and send you on your way. Truly, the direction you go with this is all your own. I went a decidedly Mediterranean route with my herbs choosing to use basil, oregano and Italian parsley. It would be lovely with tarragon or dill instead if you are so inclined. And if you can get your hands on a french feta (which is milder than it's Greek counterpart), you might try that in place of the goat cheese.
The only rule to really follow here is that you should use a really good quality olive oil. I know it seems like you would use a lot, but the flavor of the oil is really important to the final result. I used a good sharp, grassy Greek oil. When you use the cheese, save the oil and strain it. You will have a wonderful herb-infused oil that you can use for all sorts of things (think viniagrettes or to brush over a flatbread before tossing it in the oven).
1 log of fresh, soft goat cheese
fresh herbs, rinsed and dried, at least 1 small bunch in total (about 6 stems of one variety or a total of 6 mixed)
good quality olive oil, about 1 cup
Using a clean pint jar, layer about half of the herbs in the bottom of the jar. Slice the cheese into 1 inch thick discs and place them into the jar until it it almost full. Tuck the remaining herbs around the cheese and over the top. Fill the jar with the olive oil almost to the top. Make sure to cover the herbs completely. Cover the jar and store in the refrigerator for at least three days to really flavor the oil and cheese.
When ready to serve, remove the cheese slices from the jar and serve alongside toasted baguette slices, crackers or warm flatbread. The cheese will keep for up to two weeks in the refrigerator stored in the oil.
Monday, November 11, 2013
Spiced Apple Glühwein
I've been restless lately. Antsy, if you will. Germany is a great place to be, but I haven't found my "thing" here yet. You know that thing that I mean. It's the one that gets you out of bed in the morning and makes you excited for the day that's to come. I'm not sure how I want to spend my time- what would be the most valuable way to spend the hours I have free during the day. Do I want to volunteer on the base? Take German language courses? Work on my fitness or simply explore the area and work on my photography? Not knowing what to do with my time means I usually end up roaming around doing not much of anything. That's about the least fulfilling way to spend my time and it's been incredibly frustrating.
What I've been up to lately in my journey to find a purpose, my "thing" if you will, is planning several upcoming family getaways. At the very least it's a nice distraction. We've done quite a bit of traveling around Germany and it's been wonderful to see the culture and history of the country we're living in. But my restless spirit is in need of more. This past weekend was the start of that "more" for me. Hours of scouring the internet and pouring through travel books led to a whirlwind trip to Alsace, France.
We spent the weekend gazing up at the most stunning Cathedrals and searching out castles and sunset views of the Alsatian wine country. It was incredibly beautiful. I gazed in the window of every boulangerie and patisserie we passed. The kugelhopf that Alsace is known for was featured in every shop. There were half timbered houses lining the streets and canals in an area of the town of Strasbourg called "Petite France". Here we wandered around and found flea markets and food vendors lining the sidewalks. I scored the best fromage blanc with cinnamon and plums at a stall right next to live geese and ducks for sale. Seriously? I suppose the French take fresh food very seriously.
As we drove home last night through the first snowfall in the Black Forest (can you get more fabulously cliche than that?), I felt renewed. I have a few souvenirs in my wine cellar and additions to my pottery collection, but the best thing that I brought back was a peace that I think will last until the next big adventure. In the meantime, I have a Thanksgiving feast for all of our American friends to whip up and a trip to Rome to plan. I'm so looking forward to a little bit of home as well as the newest city to conquer. I guess finding my "thing:" can wait just a little longer.
Serves 4-6 people. Adapted from a traditional German recipe.
For the printable recipe, click here.
As the winter kicks into gear here in Europe, this is the sort of warm drink that you can find in every Christmas market, crepe shop and corner restaurant. Whether you call it mulled wine, vin chaud or glühwein the constants are warm wine and wintery spices. What else goes in is up to you. I like the traditional red wine but sometimes it can be too sweet and heavy. This white wine version is light and lightly spiced- perfect for sipping with a house full of friends and family on a chilly Thanksgiving afternoon or after a few hours of raking leaves in the yard. You can let it simmer on the lowest setting on your stove top or pour it in a slow cooker set to low and leave it on the counter for everyone to sample. When I made my version pictured here I put the whole spices straight into the pot with the juice and wine. I think I would have liked a bit more of the spice flavor to come through so I am suggesting that you toast the spices until fragrant before stirring them into the wine. The recipe below reflects this change.
1 bottle of dry white wine such as a Pinot Gris, Sauvingon Blanc, or Viognier
1 cup of unsweetened apple juice (preferably fresh pressed and unfiltered if you can get it)
3 tbs raw or turbinado sugar
1 orange sliced into thin rounds
8 slices of dried apple
3 cinnamon sticks
5 whole cardamom pods
1 star anise
8 cloves
thinly sliced apple for serving
In a medium pot stir together the wine, apple juice, sugar, orange slices and dried apple. In a separate small, dry pan toast the spices over medium low heat for just a minute or two. You'll know they are ready when the spices become very fragrant. Stir the spices into the rest of the ingredients. Heat the glühwein over low heat for at least 15 minutes before serving. Serve each cup with a slice of apple (and a cinnamon stick if you wish).
Labels:
Appetizers,
Christmas,
Citrus,
Drinks,
Fall,
German,
Thanksgiving,
Winter
Monday, June 17, 2013
Tomato and Cheese Galette {A Tuesdays with Dorie Post}
As I sit here trying to organize my thoughts this evening, I am eating a bowl of my Mom's homemade chicken and orzo soup still buzzing with excitement from a fun night out. I was invited to the Friends and Family preview evening for the newest Whole Foods to open up in the area. That's a post for a different time, but let's just say that I found myself giddy to be standing in a grocery store being poured a local pinot noir at a bar built into an Airstream. It was really fun (and the pinot was excellent!).
The sight of all of the signs pointing out the locally produced (and hyper locally as well- that means within a 5 mile radius of the store) fruits and veggies, wine, cheese, granola and other spectacular looking foods was wonderful to see, but it did make me a bit sad. Sad that in just a few short weeks, I'll be leaving it all behind. That's not to say that I am not in anyway looking forward to the adventures in my near future. I fancy myself riding my bike to the local butcher, dairy farmer and Saturday market and filling up my wicker basket with all I need for the week's meals. But I will definitely be missing my garden and the fabulous produce that we have such easy access to here in Southern California.
Most of all, I will miss the tomatoes. I planted a full garden's worth earlier in the spring knowing that I wouldn't likely be around to enjoy the fruits of my labor. But I couldn't bear to see the garden's brown earth remain barren where in the summers past they had been covered in cucumber vines, herbs and stakes tied with branches holding up the most beautiful of tomatoes. The first of this years crop are just beginning to find their way into the light. The cherry tomatoes are hanging on the vines, small and still green, but with the promise of something much more. I was hoping to have a tomato ready to eat before I moved, but I guess that's just not in the cards.
I can imagine the dark red heirloom Riesentraube tomatoes- growing right next to a patch of basil- would have been just perfect in this sweet little tart. It's a savory tart, almost like a fancy pizza, with a crisp and flaky crust. I'm so glad I found it. Perhaps one day soon, in the warmth of a late European summer afternoon I might pull another out of my new (and tiny) German oven. For now, I'll have to be happy with making the best of the few early tomatoes I can find in my own SoCal Saturday market instead. Sad to be leaving but happy to have been here to experience it in the meantime.
Tomato and Cheese Galette
Makes 1 8-inch galette. Adapted, only slightly, from Baking with Julia by Dorie Greenspan.
For the printable recipe, click here.
This is a Tuesdays with Dorie post, so there are plenty of other pretty pies to check out on the official page. I decided to vary the cheese selection a bit, thinking that fontina would make a better partner for the mozzarella that the monterrey jack that was called for in the original. I was pleased with the result and my boys enjoyed nibbling on the extra pieces of fontina as the galette baked. That's a win-win in my book. Oh, and the crust is to die for. Just saying.
1 recipe of galette dough (recipe follows)
1/2 cup shredded mozzarella cheese
1/2 cup shredded fontina cheese
1/4 cup fresh basil leaves, cut into chiffonade (finely shredded) or torn
2 to 3 ripe plum tomatoes or 1 1/2 cups grape or cherry tomatoes, cut into 1/4-inch-thick slices
3 tbs grated parmesean cheese
Preheat the oven to 400° and position a rack in the lower third of the oven. Prepare a baking sheet by lining it with parchment paper.
On a lightly floured work surface, roll out the dough into an 11-inch circle that’s about 1/8 inch thick. The dough is quite soft so make sure to lift it now and then and toss some flour under it and on the top to prevent it from sticking everywhere. When you’ve accomplished the above dimensions, move it to your prepared pan. The best and easiest way to move this dough is to roll it up around your rolling pin and then unroll it onto the prepared baking sheet.
In a bowl, toss the mozzarella and fontina cheeses and basil together and then sprinkle it over the rolled out dough, leaving a 2-3 inch border. On top of the cheese, place the tomatoes in concentric circles, again leaving the couple inch border. Fold the uncovered border dough up over the filling, allowing the dough to naturally pleat as you work your way around the galette. Sprinkle the parmesean cheese around the fluted edges of the crust.
Bake the galette for 35-40 minutes, or until the pastry is golden and crisp and the cheese is bubbly. When it’s done, allow the galette rest on the sheet for 10 minutes. Cut apart with a knife or pizza wheel and serve.
Galette Dough:
1 1/2 tbs buttermilk
2 1/2 tbs (approx.) ice water
1/2 cup all-purpose flour
2 tbs cup yellow cornmeal
1/2 tsp sugar
1/4 tsp salt
3 1/2 tbsp cold unsalted butter, cut into 4-5 pieces
By Hand:
Stir the buttermilk and ice water together in a small bowl and set aside. Then, in a large bowl, combine the flour, cornmeal, sugar and salt and stir with a fork to mix. Drop in the butter chunks and toss them a round a bit to coat them with the flour mixture. Using a pastry blender, work the butter into the flour, working for butter pieces that range in size from bread crumbs to small peas.
Add the cold water/sour cream mixture into the dough 1 tablespoon at a time, stirring with a fork after each addition to evenly distribute the liquid. When all the mixture has been added, the dough should be moist enough to stick together when it’s pressed; if it’s not, add in more cold water, 1 teaspoon at a time. Use your hands to gather the dough together.
When you’ve gathered it together into a cohesive ball, press the dough into a disk shape, wrap in plastic and chill for at least 2 hours.
In a Food Processor:
Stir the buttermilk and ice water together in a small bowl; set aside. Put the flour, cornmeal, sugar, and salt in the work of a processor fitted with the metal blade; pulse to combine. Drop the butter pieces into the bowl and pulse 8 to 10 times or until the mixture is speckled with pieces of butter that vary in size from bread crumbs to peas. With the machine running, add the buttermilk mixture and process just until the dough forms soft, moist curds.
Remove the dough from the processor and press it into a disk. Wrap in plastic and chill for at least 2 hours.
The sight of all of the signs pointing out the locally produced (and hyper locally as well- that means within a 5 mile radius of the store) fruits and veggies, wine, cheese, granola and other spectacular looking foods was wonderful to see, but it did make me a bit sad. Sad that in just a few short weeks, I'll be leaving it all behind. That's not to say that I am not in anyway looking forward to the adventures in my near future. I fancy myself riding my bike to the local butcher, dairy farmer and Saturday market and filling up my wicker basket with all I need for the week's meals. But I will definitely be missing my garden and the fabulous produce that we have such easy access to here in Southern California.
I can imagine the dark red heirloom Riesentraube tomatoes- growing right next to a patch of basil- would have been just perfect in this sweet little tart. It's a savory tart, almost like a fancy pizza, with a crisp and flaky crust. I'm so glad I found it. Perhaps one day soon, in the warmth of a late European summer afternoon I might pull another out of my new (and tiny) German oven. For now, I'll have to be happy with making the best of the few early tomatoes I can find in my own SoCal Saturday market instead. Sad to be leaving but happy to have been here to experience it in the meantime.
Tomato and Cheese Galette
Makes 1 8-inch galette. Adapted, only slightly, from Baking with Julia by Dorie Greenspan.
For the printable recipe, click here.
This is a Tuesdays with Dorie post, so there are plenty of other pretty pies to check out on the official page. I decided to vary the cheese selection a bit, thinking that fontina would make a better partner for the mozzarella that the monterrey jack that was called for in the original. I was pleased with the result and my boys enjoyed nibbling on the extra pieces of fontina as the galette baked. That's a win-win in my book. Oh, and the crust is to die for. Just saying.
1 recipe of galette dough (recipe follows)
1/2 cup shredded mozzarella cheese
1/2 cup shredded fontina cheese
1/4 cup fresh basil leaves, cut into chiffonade (finely shredded) or torn
2 to 3 ripe plum tomatoes or 1 1/2 cups grape or cherry tomatoes, cut into 1/4-inch-thick slices
3 tbs grated parmesean cheese
Preheat the oven to 400° and position a rack in the lower third of the oven. Prepare a baking sheet by lining it with parchment paper.
On a lightly floured work surface, roll out the dough into an 11-inch circle that’s about 1/8 inch thick. The dough is quite soft so make sure to lift it now and then and toss some flour under it and on the top to prevent it from sticking everywhere. When you’ve accomplished the above dimensions, move it to your prepared pan. The best and easiest way to move this dough is to roll it up around your rolling pin and then unroll it onto the prepared baking sheet.
In a bowl, toss the mozzarella and fontina cheeses and basil together and then sprinkle it over the rolled out dough, leaving a 2-3 inch border. On top of the cheese, place the tomatoes in concentric circles, again leaving the couple inch border. Fold the uncovered border dough up over the filling, allowing the dough to naturally pleat as you work your way around the galette. Sprinkle the parmesean cheese around the fluted edges of the crust.
Bake the galette for 35-40 minutes, or until the pastry is golden and crisp and the cheese is bubbly. When it’s done, allow the galette rest on the sheet for 10 minutes. Cut apart with a knife or pizza wheel and serve.
Galette Dough:
1 1/2 tbs buttermilk
2 1/2 tbs (approx.) ice water
1/2 cup all-purpose flour
2 tbs cup yellow cornmeal
1/2 tsp sugar
1/4 tsp salt
3 1/2 tbsp cold unsalted butter, cut into 4-5 pieces
By Hand:
Stir the buttermilk and ice water together in a small bowl and set aside. Then, in a large bowl, combine the flour, cornmeal, sugar and salt and stir with a fork to mix. Drop in the butter chunks and toss them a round a bit to coat them with the flour mixture. Using a pastry blender, work the butter into the flour, working for butter pieces that range in size from bread crumbs to small peas.
Add the cold water/sour cream mixture into the dough 1 tablespoon at a time, stirring with a fork after each addition to evenly distribute the liquid. When all the mixture has been added, the dough should be moist enough to stick together when it’s pressed; if it’s not, add in more cold water, 1 teaspoon at a time. Use your hands to gather the dough together.
When you’ve gathered it together into a cohesive ball, press the dough into a disk shape, wrap in plastic and chill for at least 2 hours.
In a Food Processor:
Stir the buttermilk and ice water together in a small bowl; set aside. Put the flour, cornmeal, sugar, and salt in the work of a processor fitted with the metal blade; pulse to combine. Drop the butter pieces into the bowl and pulse 8 to 10 times or until the mixture is speckled with pieces of butter that vary in size from bread crumbs to peas. With the machine running, add the buttermilk mixture and process just until the dough forms soft, moist curds.
Remove the dough from the processor and press it into a disk. Wrap in plastic and chill for at least 2 hours.
Labels:
Appetizers,
Breads,
CSA,
Main dish,
Pizza,
Summer,
Tomatoes,
Tuesdays with Dorie,
Vegetables,
Vegetarian
Thursday, June 13, 2013
Roasted Sweet Pepper Salsa
I'm not the world's greatest friend, I will freely admit that. I forget to call and catch up, I don't always think to see if someone wants to walk the mall with me, I really like my alone time. And I suppose I still have some lingering friendship issues that go way back to confrontations with some mean girls back in middle school (who doesn't have those?). And, yes, you're right. I'm in my late 30s so I really need to get over that.
Most of my friends are okay with my communication issues. In fact, many of them are exactly like me. Maybe that's why I chose them as friends. We all get it. We don't need to chat every day for hours on end to be close, instead we're secure enough in our friendships to call when we need each other or genuinely want to talk or get together. And that makes those conversations, dinners or talks over a glass of wine all the more meaningful.
But as most things in life go, one of these things is not like the other. I have one super close friend, Libby, who doesn't put up with my silence. She holds me accountable for putting the time and effort into the friendship. And frankly, that's what I love about her the most. If she loves you, she'll let you know. Out loud and with passion. Of course you also don't want to get on her bad side, because she's just as vocal about that too. Libby is fiercely loyal, generous with her time and talents and she will pull you along with her for the crazy ride of life all the while pulling you out of your own shell.
Libby is also the one friend who loves to cook with me. When we lived close to each other we'd spend whole days just rummaging through cookbooks and online recipes and cooking up a storm. Those were some of the best days ever. And even now that we live many hundreds of miles apart, we still text photos of great dinners we've made and compare notes on techniques or recipes we'd like to try. It's a friendship that will endure and stand out from any of the others I've had or will have in my life. Libby is a true treasure in my life.
So I suppose it's fitting that I stole the idea for this recipe from her. It's one of my favorite Libby dishes and one the was made to share on several of those marathon cooking days or Friday night dinners at each others' houses. I have a feeling it will quickly become one of your favorites too. It's a simple salsa that will brighten up a dull day and sit perfectly aside that beer with a lime in it on a summertime picnic table. There's really nothing that compares to a freshly made salsa, and most especially this one.
Roasted Sweet Pepper Salsa
Makes 2 generous cups of salsa. Inspired by Libby.
For the printable recipe, click here.
I often worry when I post a recipe like this that it will be too simple and unimpressive. But then, who am I trying to impress? And, honestly, everyone needs a perfect salsa recipe in their recipe files. This one is mine. It's the best with freshly made tortilla chips (just quarter those cute little corn tortillas and deep fry, then sprinkle with salt), but the bagged chips will taste just as great when paired with this salsa and a beer. You must have the beer. You won't regret it. I never really measure my quantities when I make salsa, so these are approximates. And the truth is, salsa is one of those things that you have to taste along the way anyway. You never know how flavorful and fresh the tomatoes will taste or how spicy your pepper will be. So try as you go and you'll get it right.
2 red, yellow or orange bell peppers or 6 of the multicolored baby bell peppers
3 large Roma or plum tomatoes, coarsely chopped
1/2 white or red onion
1 to 2 jalapeno or serrano chilies
handful (about 1/3 cup) cilantro
juice of 1 lime
salt to taste (I usually end up with 1/2 to 1 tsp)
Place the bell peppers on a baking tray in a hot oven (450 degrees) to roast, or you can place them over an open gas flame on your stove top or grill. Roast the peppers until the skins have charred and blistered, turning occasionally. It will take about 10-12 minutes to get them fully roasted. Place the roasted peppers in a plastic or paper bag and seal. When the peppers are cool enough to handle, peel the skins off and pull out the stems and seeds. Coarsely chop the peppers.
Seed and coarsely chop the jalapeno pepper. You may want to taste the tiniest bit to determine the amount of heat the pepper has (I usually just touch a cut end to my tongue and can judge it's heat by that tiny taste).
You can chop all of the ingredients by hand and simply mix them together. You will get a chunky salsa if you do it that way. If you chop by hand, simply chop all of the ingredients as finely as you like them, stir together and taste to decide how much salt you'd like and if the salsa needs any additional lime juice. I like a smoother salsa so I use my food processor to do the work for me. To make the salsa using a food processor, place the onion and jalapeno in the food processor and pulse several times to begin chopping. Then add the rest of the ingredients and process until some larger pieces still remain but the salsa is mostly finely chopped. Taste for salt and lime.
Serve with tortilla chips. The salsa will keep, covered, in the refrigerator for 2-3 days.
Labels:
Appetizers,
Family Recipes,
Quick,
Sauces,
Sides,
Snacks,
Summer,
Tomatoes,
Vegetables,
Vegetarian
Wednesday, June 5, 2013
Parmesean Zucchini Crisps and Herbed White Bean Hummus
I honestly have no idea what I'm going to write about today. There is so much going through my mind that it's hard to get it to settle on one thought. My home and world are in chaos right now and it seems my thoughts are mirroring the turmoil of my environment. Nothing is settled, nothing is where it's supposed to be. And it's very difficult to live like that while attempting to maintain your sanity and some semblance of a normal life.
We're getting ready to make a big move. To a new country and a new continent. And while the prospects of all the exploring, learning from new cultures, sampling new cuisines and expanding my understanding of my own cultural heritage are so exciting I can't believe that I will be lucky enough to spend years living in Europe, I am still terrified of the whole moving process. I've moved before, I'm a Navy wife after all, but this is not your average move across town or even across the US. I feel as if I might as well be moving to a new planet. Even with all the advice I've gotten from friends who've gone through the process and even complete strangers kind enough to try to ease my fears, I know down in my gut that I will feel unprepared and utterly unglued until the day we arrive in our new home country.
My house is looking like it's come unglued these days too. My bedroom furniture is in the living room because we hadn't yet put down that wood flooring we had intended to get taken care of two years ago. My laundry room looks like an earthquake hit in the aftermath of the "Great Rat Saga of 2013" (a story for another day perhaps, though critter stories don't really seem to go well with food). The master bath is half tiled and half painted and I'm sharing bathroom space with my two sons, a experience that is not highly recommended. We're sorting through clothes and furniture, deciding what we'll need in our new home and what we can sell or store until we get back to the States several years from now.
My mind feels as unsettled as my belongings. Too many thoughts, too much to take care of or worry about, and no time to rest or be rearranged into a place more peaceful or calm. I have a feeling that I will be mentally and physically exhausted until August when we might perhaps (if all goes well and the German home Gods smile upon us) be happily ensconced in a new home and may begin enjoying all that our new European surroundings have to offer.
Until then, I offer you snacks. It's not much to look at, but I highly recommend giving the hummus a try. It's probably the best I've ever had and the simplest too. And maybe a good, wholesome snack will help settle my soul during the chaos of what is to come. I wish the same peace for you.
Parmesean Zucchini Crisps
Makes enough for 1 or two people to snack on.
For the printable recipe click here.
These crisps are an easy way to eat up a surplus of summer zucchini very quickly. It seems like a lot, but trust me, after being baked the zucchini lose quite a bit of volume and you'll be surprised at how quickly they fly out of the bowl. I have managed to eat the whole batch all by myself!
4 small to medium zucchini
sea salt
cooking spray, an olive oil mister or coconut oil spray
2 tbs grated parmesean cheese
Preheat your oven to 225 degrees. Line 2 baking sheets with parchment or a silicone liner (I prefer the parchment because it absorbs some of the moisture from the zucchini).
Using a mandoline or very sharp knife, slice the zucchini into 1/8 inch thick rounds (that was the number 2 setting on my mandoline). Lay the zucchini out in a single layer on the baking sheets and lightly spray with whichever spray your prefer. You can even lightly brush the zucchini with olive oil if that's all you have. Very lightly sprinkle the zucchini with the sea salt. You don't want to over salt them because as they cook they will shrink and lose moisture and the salt will become concentrated. I use maybe a tsp for all of the zucchini, perhaps even less. Sprinkle with the cheese and place in the oven. Bake for 1 hour and then remove from the oven. Flip the crisps and return to the oven, rotating your baking sheets top to bottom and back to front on the way in. Continue baking until the zucchini are completely crispy, 30-40 minutes.
The crisps only stay crispy for a short while, so enjoy them right away. You may be able to re-crisp them in a warm oven for a few minutes if you have leftovers. But all that zucchini ends up being eaten very quickly!
Herbed White Bean Hummus
Makes about 2 cups.
This is by far the easiest hummus I've ever made. There's no tahini to stir in or peeling of garbanzo beans. You could, of course, cook your own beans and you might get a better hummus as a result. But honestly, how many of us are going to do that just for a snack? I simply used canned white beans and was extremely happy with the texture and flavor. Use whatever herbs you have growing in your garden or hanging out in your crisper drawer. That's the beauty of a dip like this, there are no set rules. I used thyme and rosemary and found it to be just to my liking. I briefly saute the garlic and herbs to bring out the flavor and mellow the garlic a bit, but it isn't absolutely necessary. If you're in a pinch, just throw it all in the blender and go for it!
1 can white (or cannellini) beans
juice of 1 lemon
1 clove garlic, minced
4 tbs chopped fresh herbs (such as rosemary, thyme, basil, parsley or chives)
4 tbs olive oil
salt and pepper to taste
In a small saute pan, heat 1 tbs of the olive oil along with the garlic and herbs. Cook over medium heat for a few minutes, just until the garlic is fragrant the herbs wilt a bit.
Place all of the remaining ingredients into a blender or food processor. Add the warm garlic and herbs and blend until smooth.
Serve with pita, cucumber and carrot sticks, sliced radishes and the zucchini crisps. Refrigerate any unused hummus in a covered container.
Monday, May 6, 2013
Marinated Artichoke Hearts
I will forget to water. I just will. And I know it. Sigh....
But in a place where the artichoke plants are a perennial (come back year after year, for you non-garden types), even I can feel like an accomplished gardener. This year I had four plants that stuck around from last spring with their big, fern-like silvery green leaves. The plants are actually quite pretty and I would totally put them in my front yard landscape. If you're wondering, this variety is called Purple of Romagna and the flowers (aka the part that you eat) is a pretty purple color and the petals are a bit spikier than the more familiar globe artichokes. I grew them from seed. Yup, I did that. And, boy, have they produced for me this spring.
My husband loves those marinated artichoke hearts that come on antipasto plates. So I have been trying to duplicate their flavor at home for a couple of years. Unsuccessfully. He always eats them, mind you, but they're never quite right. The bumper crop of baby artichokes I had inspired me to give it one more try. And after steaming, grilling and pan roasting what seemed like a mountain of artichokes, I needed something different.
Paydirt! I have found the magical balance between vinegar, spice, oil, and herbs to make my hubby go "Mmmmmmmm". And boy, would I have been bummed had it not been right. Those little chokes need quite a bit of prep work to get them
If you can still find artichokes in your market, especially small ones, I beesech you to try these just once. They're so much better than the ones in that olive bar at your grocery store.
Makes 3 pint jars. Adapted from The Art of Preserving, by Rick Field, Lisa Atwood and Rebecca Courchesne.
For the printable recipe, click here.
The difficulty here is not in the recipe itself, but in the prep work. But if you can stand the few (or 20) minutes it may take you to remove the outer leaves and chokes from the artichokes, you'll be well rewarded. One of the great things about a recipe like this is that you can adapt the recipe to your liking. Add more garlic, take away the lemon peel, or use the herbs that you have in your kitchen. For us, this combination hits the sweet spot. The recipe makes three jars of artichoke hearts, one to eat as soon as it's ready and the other two to store in the back of the fridge to pull out for unexpected company or to give to friends (who will thank you profusely!).
5 lbs baby or smallish artichokes
juice of 2 lemons, plus 6 tbs
1 cup white vinegar
1/2 cup rice wine vinegar
1 tbs plus 1 tsp kosher or sea salt
zest of two lemons, removed in strips with a vegetable peeler or cocktail zester
3 cloves garlic, thinly sliced
red pepper flakes (1 pinch per jar)
2 1/2 tbs chopped fresh herbs (I used 1 tbs each chopped parsley and basil and 1 tsp each chopped chives and sage)
1 tsp black peppercorns
6 tbs olive oil
You will need 3 hot, sterilized pint jars and their lids at the ready. You can accomplish this by either washing the jars and then heating them in a hot water bath for at least 10 minutes, or running them through the sterilize cycle on your dishwasher right before use.
Fill a large bowl halfway with water and stir in the juice of 2 lemons. Working quickly with 1 artichoke at a time, begin peeling off the tougher outer layers of leaves until you get to the pale, tender inner leaves. Cut about 1/2 inch off the top of the artichoke, cut off any remaining dark leaves from the base, then cut the artichoke into quarters lengthwise. Immediately immerse the artichokes in the lemon water to prevent browning. Repeat with the remaining artichokes.
Remove the artichokes with a slotted spoon and place them in a large saucepan over medium heat. Add in 1/4 cup of the lemon water from the bowl. Cover and cook until just tender, about 10 minutes. Remove the artichokes from the pot and return them to the lemon water. Stir in a handful of ice cubes to stop the artichokes from cooking further.
Meanwhile, in a medium saucepan, combine the 6 tbs lemon juice, vinegars, and salt. Add 1 1/2 cups water and bring to a boil. Stir to dissolve the salt.
Using your prepared jars, evenly divide the lemon zest strips, garlic, peppercorns and herbs amongst the three jars. Tightly pack the cooled artichoke hearts into the jars to within 1 inch of the rim. Ladle the hot bring into the jars, leaving about 3/4 inch of headspace at the top. Add 2 tbs olive oil to each jar. This should bring the headspace to 1/4-1/2 inch. Wipe the rims and seal the jars tightly.
Leave the jars undisturbed on the counter for 24 hours, then refrigerate. Shake the jars daily to distribute the seasonings for 1 week, at which time the artichokes will be ready to eat. Keep the jars refrigerated. They will keep for up to another 2 weeks.
Labels:
Appetizers,
CSA,
Preservation,
Sides,
Snacks,
Spring,
Vegetables,
Vegetarian
Thursday, March 7, 2013
Home Made Olive Oil Crackers {Seeded Semolina and Honey Raisin}
About a month back, I posted a little recipe for fruit snacks made in my kitchen and not in a factory. They were a hit with my boys and since then have become one of my top posts ever. I'm thrilled to pieces over it- both the recipe and the response to it. I suppose it means that more of us hard working moms are trying to find a way to give our kids better food that tastes good too. I'm trying to do better in my home, though not always successfully and I am far from perfect. But in a world where trustworthy dairy officials are trying to convince the FDA that milk should have added sweeteners that aren't listed on any label, any attempt at making "real food" is worth it in my book. So here comes home made favorite #2- crackers.
This is not my first foray into cracker making. I've tried graham crackers (not my best effort) and Smitten Kitchen's goldfish crackers (much, much better). But like cookie making, they require a stint in the fridge and a lot of rolling and cutting. Fine when you have plenty of time, but I don't always have plenty of time. Case in point, a day in the not so distant past when I had a tub of hummus calling my name at lunch time. A quick search of the pantry revealed that my carb-loving kiddos had eaten all of my pretzels and pita chips, so I was left dipper-less. But with a recipe like this one in my back pocket, I was able to whip up a warm bowl of crackers in about an hour and without a whole lot of effort. Thin, crispy, kinda healthy and just right for swiping through my hummus. Not too shabby.
Home Made Olive Oil Crackers
Makes about 4 dozen crackers. Master recipe from 101 Cookbooks.
For the printable recipe, click here.
I've made both plain crackers and flavored crackers using this recipe. The boys love the plain crackers sprinkled with just a touch of sea salt. I think each type has its place and is equally tasty. The plain are great for eating right out of hand. The seeded are great dippers (especially in hummus) and the honey raisin are wonderful smeared with a dab of fresh goat cheese. There are endless variations you could make on these- add some grated cheese or a beloved spice mix. I've used semolina flour in my crackers as per the master recipe and I love the extra crunch and flavor it gives. If you don't have any, go ahead and substitute it with white whole wheat or all purpose flour. The texture will be slightly different, but they will still be awesome.
Master recipe:
1 1/2 cups semolina flour
1 1/2 cups white whole wheat or all purpose flour
1 tsp fine sea salt
1 cup warm water
1/3 cup olive oil
For the seeded crackers (add with the dry ingredients):
3 tbs seeds of your choice (I used sesame, chia and flax seeds)
For the honey raisin (add with the liquid ingredients):
2 tbs honey
1/2 cup golden raisins, chopped
You can either mix these by hand or with a mixer. Simply stir together the flours and sea salt. Add the water and olive oil and mix until the ingredients come together to form a sturdy, slightly tacky but not sticky dough. Knead the dough a few times on a lightly floured surface, roll it into a ball and then cover with a kitchen towel or plastic wrap and let rest for 30 minutes.
In the meantime, preheat your oven to 450 degrees and line 2 baking sheets with parchment.
Cut the dough into 8 pieces. Cover the pieces you aren't working with. Using a rolling pin, roll the dough as thinly as you can (you can also use a pasta roller to roll out the dough, rolling until you reach setting #4). Cut the dough into squares or the shape of your choice using a knife, pizza cutter or cookie cutter. Place the crackers on the cookie sheet and brush with a bit of water. Sprinkle with sea salt.
Bake until nicely golden (6-8 minutes). Let cool before eating for a good crackery texture. Store in an airtight container for up to 2 days. These don't have any preservatives, so they don't last long without losing their "snap".
Tuesday, March 5, 2013
Pineapple Salsa
Everyone in my house is trying desperately to get over a nasty flu bug that hit us hard this past week. My husband had it first and then the boys and I fell prey to the virus this past weekend. The coughing and fevers have been pretty intense and I don't mind saying that I'm pretty tired of the whole darn thing.
One of the worst aspects of this for me (besides the horrific cough that just won't die) is the complete lack of taste that I've been suffering from. Food is pretty central to who I am and not being able to taste a single thing is beginning to drive me nuts. When I have the strength to, I'm making the most flavorful foods I can scrounge up- grilled steak with balsamic vinegar and rosemary was last night's dinner. I sort of tasted it. I suppose that should be considered a win, but it's still awfully disheartening. I'll keep trying and hopefully I'll be back in fighting shape soon.
But in the meantime, here's a simple and full of flavor salsa destined to wake up your tired winter tastebuds. The jar is sitting at the front of my refrigerator shelf taunting me with the bright citrus, sweetness and spice it knows I just can't wait to taste.
Pineapple Salsa
Makes about 2 1/2 cups.
For the printable recipe, click here.
This is a super-simple twist on a salsa that I just love. Its inspiration is a dish that I used to get at a favorite restaurant at our first duty station in Pensacola, FL, The Fish House. I'm finally getting around to making it at home 12 years after leaving there. The salsa is great as a dip for chips, but I like it as a topping for grilled chicken or pork. Sprinkle some on a taco or fajita for a burst of fresh flavor.
2 cups fresh pineapple, diced
1 large shallot or 1/2 small red onion, diced
zest of 1 lime
juice of 1 lime
1/4 cup chopped cilantro
1/2 tsp salt
1 jalapeno pepper, finely diced
Toss all the ingredients except the pepper in a medium bowl. Add the pepper to taste ( I had a surprisingly super hot jalapeno this last time and ended up only using half, but I've used a whole pepper before as well and still had a mild salsa). Allow the ingredients to macerate together for a half hour before using.
Store salsa in a covered container in the refrigerator for up to 3 days.
Labels:
Appetizers,
Citrus,
Fruit,
Quick,
Sauces and Dressings,
Sides,
Vegetarian
Tuesday, January 22, 2013
Arugula and Walnut Pesto
Necessity is the mother of invention, right? Okay, so I clearly didn't invent this pesto. It's been hanging around the old interweb for ages. And really, it's just pesto with different green stuff chopped into it. But this is the first time it was whipped up in my kitchen, and it's arrival on the table was something of a necessity, so I'm rolling with it.
Pesto is one of those condiments that can brighten up just about anything; just a spoonful can pull a dish from the depths of boring to the heights of fabulous. It's amazing to me that just a few simple ingredients can do that. I think it's because we Italians are brilliant cooks and flavor-makers. I know you all agree with me.
In the particular evening in question, I was making a big pot of smoky winter minestrone and the recipe suggested that a dollop of pesto in each bowl would balance the soup out perfectly. Having no basil in the fridge (it's winter and even in Southern California it's hard to come by good basil) and no other leafy herbs to speak of either, I decided to use up the arugula I had lingering in the crisper. I've made enough pestos in my day that putting it together was a snap. 5 ingredients- cheese, olive oil, the greens, garlic and nuts. Let me tell you something- I will never make that soup without the pesto again. It's a bit different from a basil pesto, a little more earthy and grassy, but sometimes different is a good thing. In this case, it's a great thing.
Arugula and Walnut Pesto
Makes about 1 cup.
For the printable recipe, click here.
If you'd like to make the minestrone that I served the pesto with, hop on over to food52 and check out the recipe. I confess I did add a tsp of smoked paprika and left out the zucchini (it's winter and who has any fresh zucchini, after all?). But it was awesome just the same. Oh, and if you have any pesto left over, putting a spoonful over a grilled rib eye along with a dash of lemon juice and lemon zest is a brilliant way to use of the rest.
2 packed cups arugula leaves (you can use either baby or grown up arugula)
3 cloves garlic
2 tbs chopped walnuts
1/4 cup grated pecorino romano or parmesean cheese
1/4 cup olive oil
In a food processor or blender, blend together the arugula, garlic, nut and cheese until finely chopped. Add the olive oil and blend until smooth. You can add a bit more oil if your pesto isn't as smooth as you like.
Keep the pesto covered and refrigerated until use. Unlike a basil pesto, this pesto will not develop a dark layer on the top due to oxidation, so you don't need to add a thin layer of olive oil over the top when chilling. But it doesn't hurt and looks awfully pretty when serving.
Tuesday, January 15, 2013
Creamy Dreamy Lemony Hummus
The Merriam-Webster dictionary defines metamorphosis in this way:
Metamorphosis: noun \ˌme-tə-ˈmȯr-fə-səs\ a striking alteration in appearance, character, or circumstances
There are other meanings of the word, as we all know, that refer to the radical change in appearance and form of an organism at a certain interval in its life. And while a caterpillar changing into a butterfly is beautifully fascinating (and was, in a way, the inspiration for these musings), it is not where my mind goes to on this particular day. Instead, I wonder about the "striking alteration in... character and circumstances" that are in the works for my life this coming year.
I've always been the kind of person who spends a great deal of time thinking about every detail of my life- overthinking quite often, truth be told. I plan out entire conversations and interactions with others so that I know my point will be made and my intentions not misunderstood. I conjure up memories from the past and replay them to my satisfaction. I dream about the days to come and what my role will be in the lives of those I care about. The food to be cooked, the bedtime stories to be read, and the chores and errands for the day as well larger and more philosophical musings all roll around in my head in a constant swirl vying for my attention. It's no wonder I have a terrible memory. There's just too much going on in there for me to give any new thoughts their due attention.
In the sometimes mindless and rhythmic task of chopping, peeling and stirring that comes with food preparation, my mind actually rests. I know it seems like the opposite should be true, but I think if you ask anyone who really loves cooking they will tell you that same thing. The mind is focused on those tasks and all of the babble in the background quiets down. Except that on an afternoon not that long ago as I was peeling chick peas in an effort to make a smoother and creamier hummus, I was struck by the odd beauty of the pile of translucent skins on my counter. They reminded me of the skins and shells shed by an animals undergoing some sort of transformation. A metamorphosis- shedding the old to make way for the new and better. And it sent my mind reeling.
My own life will be undergoing a radical metamorphosis this year. By mid-year there is a very strong possibility that my family will be pulling up our stakes here in America and moving to parts unknown somewhere in the world. At the very least we will be leaving a community we have come to love and will have to learn to navigate in a whole new arena. And I'm not sure I'm ready for it. But that's the way life works isn't it? You often get thrown into the deep end with no forewarning and you either figure out which way is up and make your way to the surface or get lost and never find your way to the top. While I've never been the greatest swimmer, I'm cautiously hopeful that I can get to the surface without too much difficulty.
It is my hope that the change is a true metamorphosis for me. Not only a change in circumstances, but in character as well. That I learn to adapt, enjoy my new surroundings, learn from the native people, see and experience all the new land and culture have to offer and, most importantly, teach my children that change is not only good but necessary to survival and fulfillment in life. The butterfly is always more beautiful than the caterpillar it started out as.
Creamy Dreamy Lemony Hummus
Makes about 2 cups.
For the printable recipe, click here.
This recipe isn't all that different from my previously posted hummus here on the blog, but with two notable exceptions. First, in order to get a lusciously creamy texture, I have learned that peeling the chick peas is the key. It isn't difficult, you just pinch the pea and it pops right out of the skin, but it does take a few extra minutes. I promise it will be worth it. And while you're peeling your chick peas, you can roast a lemon that will provide you with the sweetest juices ever for your hummus. Those few extra minutes take a really good hummus and make it spectacular.
1 lemon
1/4 cup water
6 tbs tahini (sesame seed paste)
2 tbs olive oil
3 garlic cloves
1/2 tsp kosher salt
1/4 tsp cumin
pinch of cayenne
1 15-oz can of chick peas (garbanzo beans), drained and rinsed
Preheat your oven to 450 degrees. Cut the lemon in half and place the halves, cut side up, in a small roasting dish. Roast for 20 minutes. Let cool. Juice the lemon halves in order to get 3 tbs juice.
While the lemon is roasting, peel the chick peas. Pinching the pea between your thumb and index finger, pop the pea from the skin and into the open palm of your opposite hand or directly into a bowl. Discard the skins.
In a small bowl, stir together the lemon juice and water. Set aside. In another small bowl, stir together the tahini and olive oil. Again, set aside.
In the bowl of a food processor, place the peeled chick peas (minus a small handful for topping the hummus), the garlic, cumin, salt, and cayenne. Pulse the mixture several times until almost fully ground together. Scrape down the sides of the bowl. With the food processor running, slowly pour in the lemon juice and water. Continue to process for about 30 more seconds. Scrape down the bowl again. Begin running the food processor a third time and slowly pour in the tahini and olive oil. Blend until smooth.
Serve with toasted pita chips and veggies. Hummus will keep for three to five days in the refrigerator.
Subscribe to:
Posts (Atom)