Showing posts with label Family Recipes. Show all posts
Saturday, April 9, 2016
Buttermilk Cupcakes
I'm going to exercise all of my patience, good nature and positivity today. It's imperative. Because if I give in to the "dark side" of my mood things can go very bad, very quickly. (Can you tell I just watched the newest Star Wars?)
There are some big wheels turning right now that determine the future of my family and they are just turning WAY TOO SLOW for my liking. It's time for the next big move thanks to the Navy and we know where we are going but the when, how and how frustrated we will be along the way is still up in the air. The simple act of moving is difficult as it is but throw in three kids, an international move, moving our furnishings into storage, passports, visas and a month in the States in between and you can see how I might be just the tiniest bit stressed.
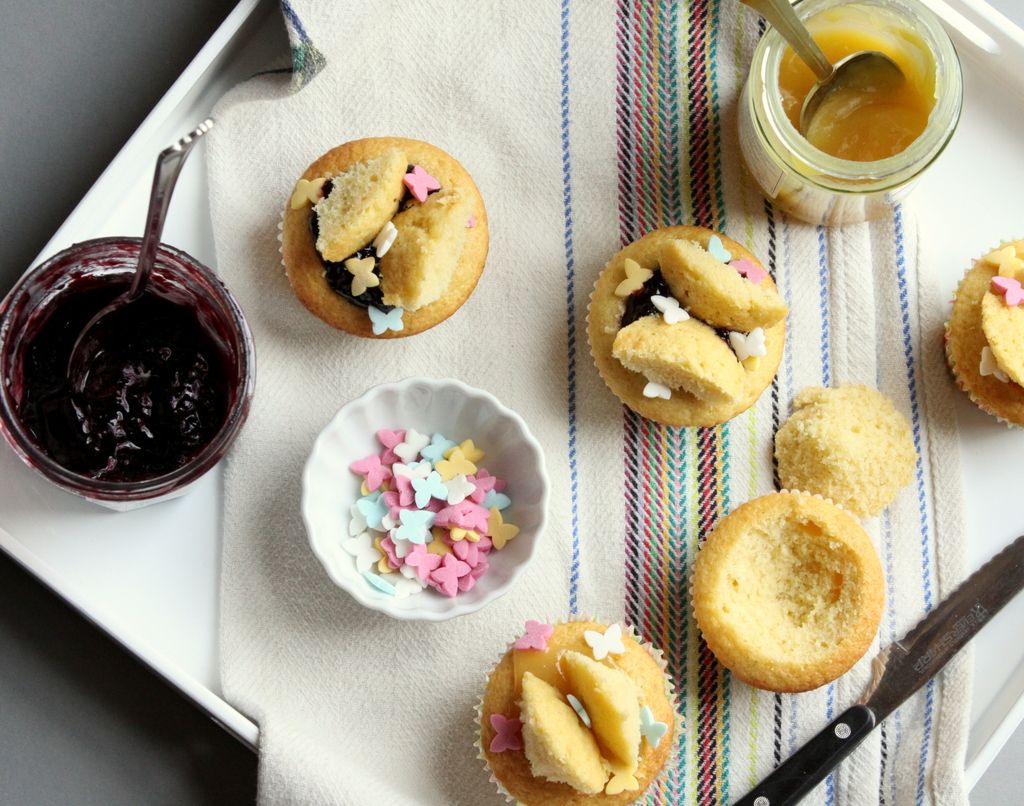
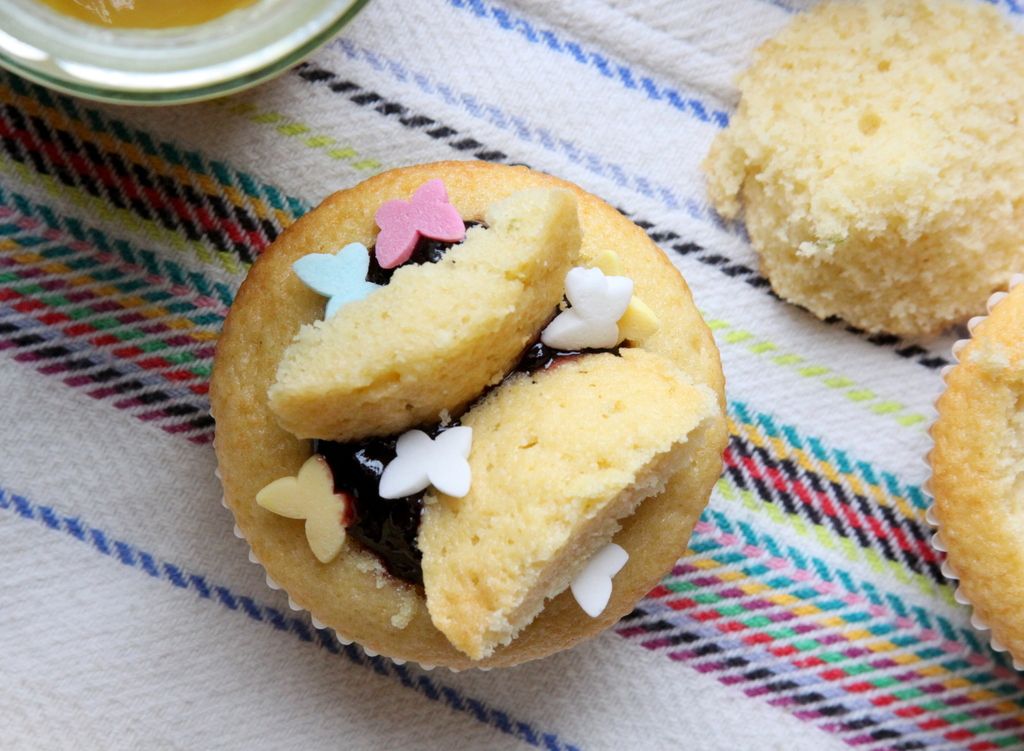
So instead over obsessing over things that are completely out of my control, I'm making cupcakes. Simple, light, vanilla scented ones. I've made these a few times recently and I'm happy to say that they always turn out just right and are easy to play with if you want to go beyond basic. The first time I baked them I made these sweet little butterfly cupcakes like my Nana used to make. You just cut a cone-shaped piece of cake from the top, fill the hole with something delicious (I used jam and lemon curd this time, but Nana used to use pastry cream), slice the cake cone in half and nestle it in the filling to look like butterfly wings. My kids loved them and I was reminded of hanging out in Nana's kitchen as a little girl. If anything was going to make me forget a mountain of stress, that was it.
Thanks, Nana.
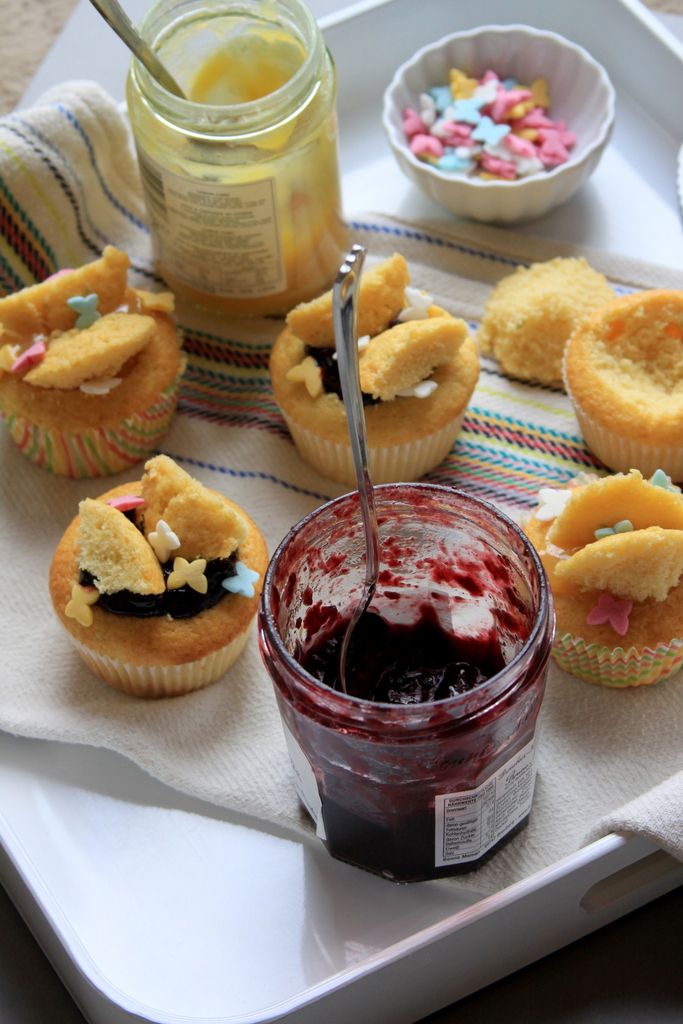
Buttermilk Cupcakes
Makes 1 dozen standard cupcakes. Adapted from this recipe by Martha Stewart.
For the printable recipe, click here.
This is a simple, basic cupcake that you can do in one bowl by hand without having to pull out (or clean!) a big mixer if you don't want to. It just takes a little elbow grease to whisk the eggs and sugar but it's totally do-able. That kinda makes it perfect in my book. The other bonus with this cupcake is that you really can leave it simple or jazz it up any way you want. I've made them with mini chocolate chips for a birthday topped with buttercream and left them plain for a quick treat. Add some lemon zest and blueberries, warm spices like cinnamon or cardamom or even bits of toffee or nuts to make them completely special and different. What you do with the cupcakes is up to you but they are bound to become one of those recipes you keep coming back to time and again.
2 large eggs, room temperature
2/3 cup sugar
1 cup all purpose flour
1 tsp baking powder
1/3 cup buttermilk
4 tbs butter
1/2 tsp vanilla extract
Preheat your oven to 350 degrees. Line the cups of a standard cupcake tin with cupcake liners. Set aside.
Place the eggs and sugar into the bowl of an electric mixer. Whisk on medium high until the mixture has thickened, lightened in color and forms ribbons on the surface that hold for a few seconds before disappearing. (Alternately, you can do this by hand with a whisk and a large bowl). Reduce the speed to low and slowly add in the flour and baking powder. Mix just until incorporated.
In a small saucepan, warm the buttermilk and butter just until the butter melts. With the mixer on low, slowly add the buttermilk/butter mixture to the batter until it is smooth. Add in the vanilla and mix until just incorporated (if you want to add anything to the batter such as chocolate chips or berries, add them now).
Divide the batter evenly among the prepared cupcake cups. Bake for about 15 minutes, or until the cupcakes are lightly golden on top and the tops spring back when pressed gently and a toothpick inserted into the center comes out clean. Let the cupcakes cool in the tin on a wire rack for about 10 minutes. Remove from the tin and cool completely on the rack. Cupcakes can be stored in an airtight container for up to three days at room temperature.
Friday, March 18, 2016
Saint Joseph's Cakes {Nana's Recipe}
A few years ago my mom sent my sister and I a message asking us what recipes we'd really love to have from when we were kids that she and our grandmother had made for us. We sent back a whole list of recipes, things that we rarely make ourselves and some that have become staples, that were the day to day must haves from our childhoods. There were pasta and bread recipe requests as well as the cakes and cookies that were the highlights of family meals and celebrations. Clearly, Mom had a plan to do something with this list of favorites. But I think life got in the way and she was never able to do what she had hoped to.
Fast forward a year and I was growing weary of asking Mom for the same recipes over and over again (Why did I not write that down? Where did that one go in the latest move?). Plus, I was pregnant with my third baby and eager to get family recipes all in one place so that I could pass them on to my children. So I made a determined effort to get all of the important baking recipes from my Mom and she and I collaborated in putting together a collection of recipes and stories in one book. When we made our list of recipes to include, there were some that were absolutely non-negotiable. Mostly these were the recipes from my Nana that came from Italy and would be completely lost of we didn't make the effort to write them down now. This "cake" was one of them.
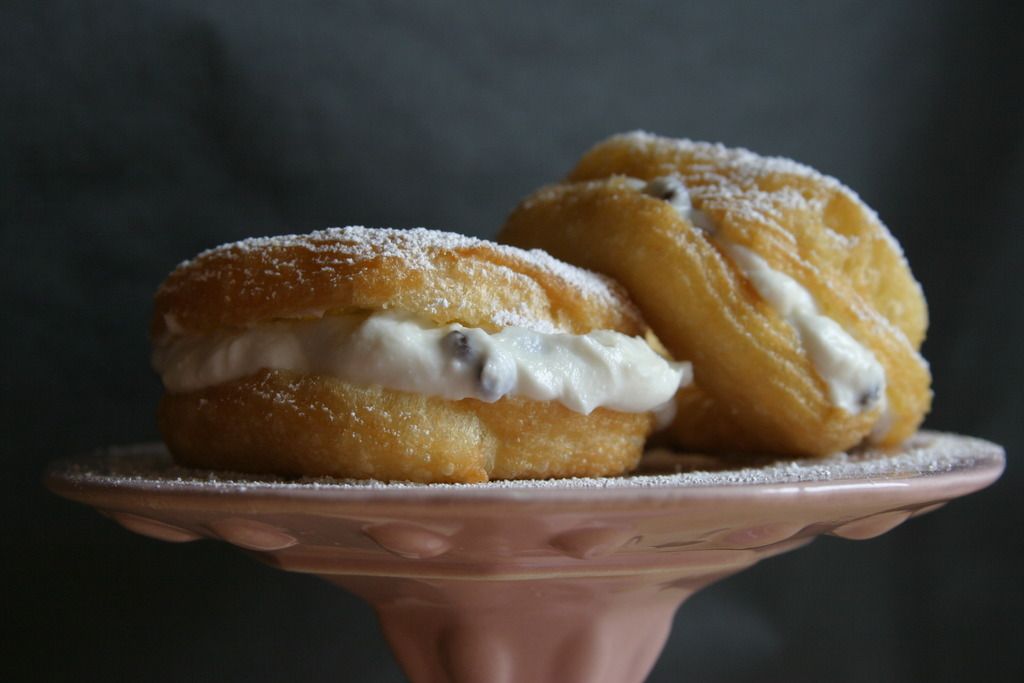
Nana made these cakes every year for St. Joseph's Day, a holiday that is celebrated in her Italian home region on March 19 every year. They were one of my absolute favorites growing up- a sort of doughnut/French cruller stuffed full with sweet ricotta and chocolate chips. It was one of the first that I made on my own for my college roommates and even for my students every year when I was teaching. Now my own children love them and ask for them from time to time. There was no way that I was going to leave this treat out of our collection. I did a bit of streamlining of the ricotta filling recipe, but other than that this recipe is all Nana. I wouldn't have it any other way.
Saint Joseph's Cakes
Makes at least one dozen 3 inch cakes.
For the printable recipe, click here.
These pretty little cakes are very much like a fried cream puff. Keeping that in mind, they don't do too well after about a day. So plan to eat them or share them all the day they are made. Don't fill them until you are ready to serve or they will become too soggy. The filling is the same as you would use to fill a cannoli so any leftover can be used to fill bought cannoli shells or even baked cream puffs (or if you are like me, straight off the spoon standing in front of the fridge).
½ cup neutral-flavored oil
1 cup water
Salt
1 cup pastry (or all-purpose) flour
1 tbs sugar
4 large eggs
½ tsp each grated lemon and orange rind
Also: Neutral-flavored oil for frying
Chocolate Chip Ricotta Cream (recipe follows)
Powdered sugar for dusting the tops
Cut several squares of parchment paper into 4 inch squares.
Combine oil, salt, and water in a saucepan. Bring to a boil. Add flour all at once and mix well with a wooden spoon until the dough leaves the side of pan. Remove from the stove and let it cool off a little. Add eggs, one at a time, mixing well after each addition. Add sugar, grated peels and mix well again.
Heat oil in a large pan that’s about 4 or 5 inches deep. Fill a large pastry bag fitted with a large star tip with the mixture. On each square of parchment paper, pipe out a 3” circle of dough. When the oil starts to shimmer on the surface drop the parchment with the dough circles into the oil. The paper will come off in a few seconds and you can remove it. Fry until golden brown, flip, and fry until the other side is golden. Let cool completely.
Slice in half and fill with chocolate chip ricotta cream. Dust with powdered sugar.
Chocolate Chip Ricotta Cream
2 3/4 cup ricotta
3/4 cup powdered sugar
1/4 cup mini chocolate chips
1 tsp vanilla extract
1 tsp finely grated orange zest
1/2 tsp fresh orange juice
Line a fine mesh sieve with a layer of cheesecloth and place over a bowl. Put the ricotta into the sieve and place the whole thing into the refrigerator to drain overnight (covered with plastic wrap).
In a large bowl, whip the drained ricotta and powdered sugar with a wooden spoon or spatula until fluffy. Beat in the chocolate chips, vanilla, orange zest and juice. Refrigerate, covered, at least one hour or until ready to use.
Friday, February 19, 2016
Whole Wheat Granola Muffins
Sometimes I just stand quietly in the doorway and watch my kids. When the days seem filled with rushing around and it seems like the people in my family barely notice each other, I try to purposely stop and simply take notice.
My baby girl is at the age where she is beginning to understand how to play by herself so she'll wander around with her stuffed animals or books talking her secret little language to herself. She pretends to read the books and she gives her animals huge hugs and kisses complete with a loud and thrilled "MWAH!" with each kiss. It's the sweetest thing to watch, truly, and it makes me thankful that she came along when she did to remind us all how happy we can be. She is so blissful and genuine and full of unconditional love. It's pretty amazing.
Then I watch my boys standing still, running, being big brothers and I am amazed all over again. My middle guy is still so adorably snuggly in one moment and thoughtful and grown up sounding in the next. He struggles sometimes like when he's trying to learn to read (in two languages at once but he's doing great) and I love that he still needs and wants my help. But then he blows me away with what he knows and how fast he can do math. He's at this perfect age and I just don't want him to get any older. Is that possible?
Of course, if I could stop my kids aging I probably wouldn't. Because it's so cool to get to watch them grow into real people with thoughts and feeling all their own. My oldest son is a, gasp and moan, tween. Did you know boys do the tween thing too? And that they are just as moody and unpredictable as girls? I. Had. No. Idea. He's also hit the age where I'm not allowed to hug him anymore or tell him that I love him. Or so he thinks- it hasn't stopped me yet. Despite being stuck in this horrible hormonal no-man's-land, every once in a while a take a quick look at him and I can see this almost adult-ness about him. The little boy roundness is all gone and there's the shadow of the man he'll grow to be. Sort of the opposite of Peter pan, you know? I can rely on him and have thoughtful conversations with him. Why on Earth would I want to stop that from happening?
I've found myself doing this a lot lately. Just watching. It makes me so grateful for the gift of these people in my life. I think I will do it more often. I take a lot (an understatement) of pictures of my kids. We get to have so many adventures here that I want to capture. But watching is different. Instead of just taking pictures of my kids I'm actually seeing them. And that's really all any of us want, right? To be truly seen by the people that we love.
Whole Wheat Granola Muffins
Makes 12 muffins.
For the printable recipe, click here.
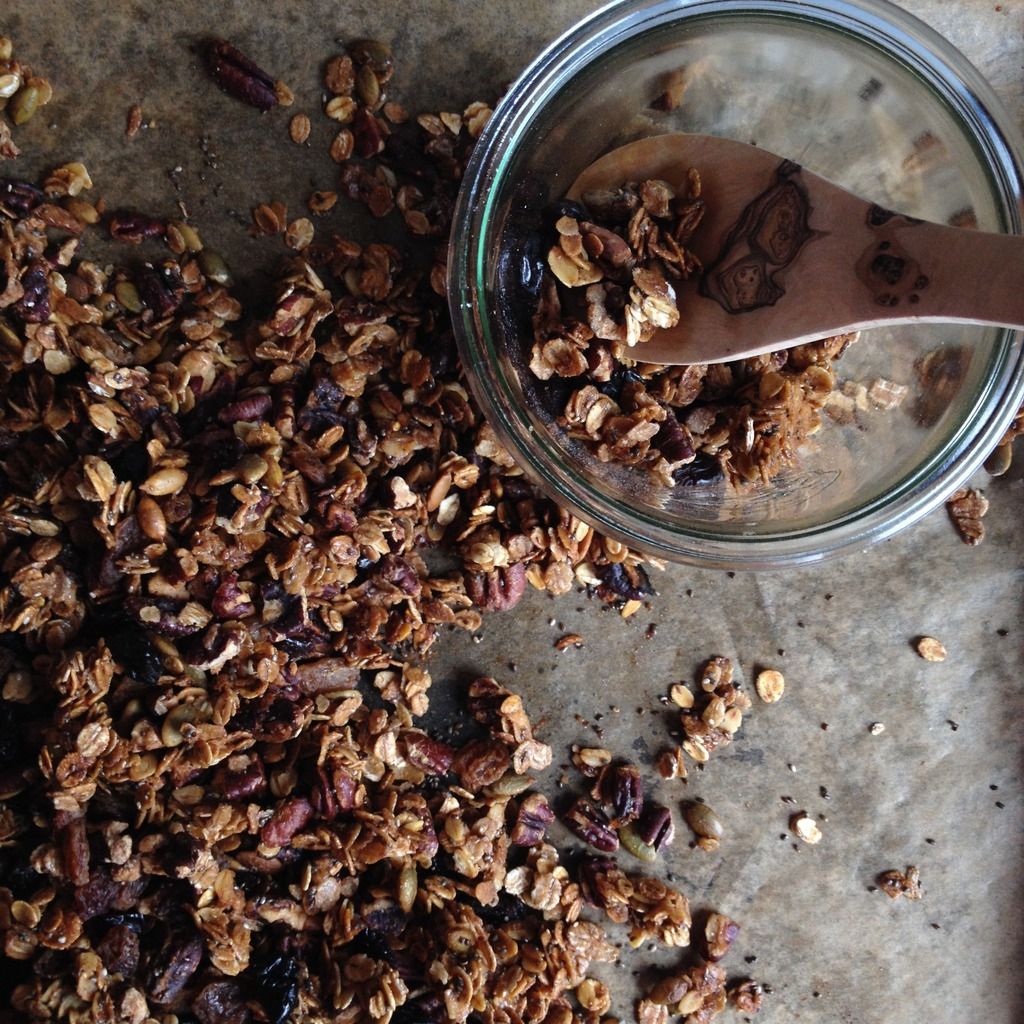
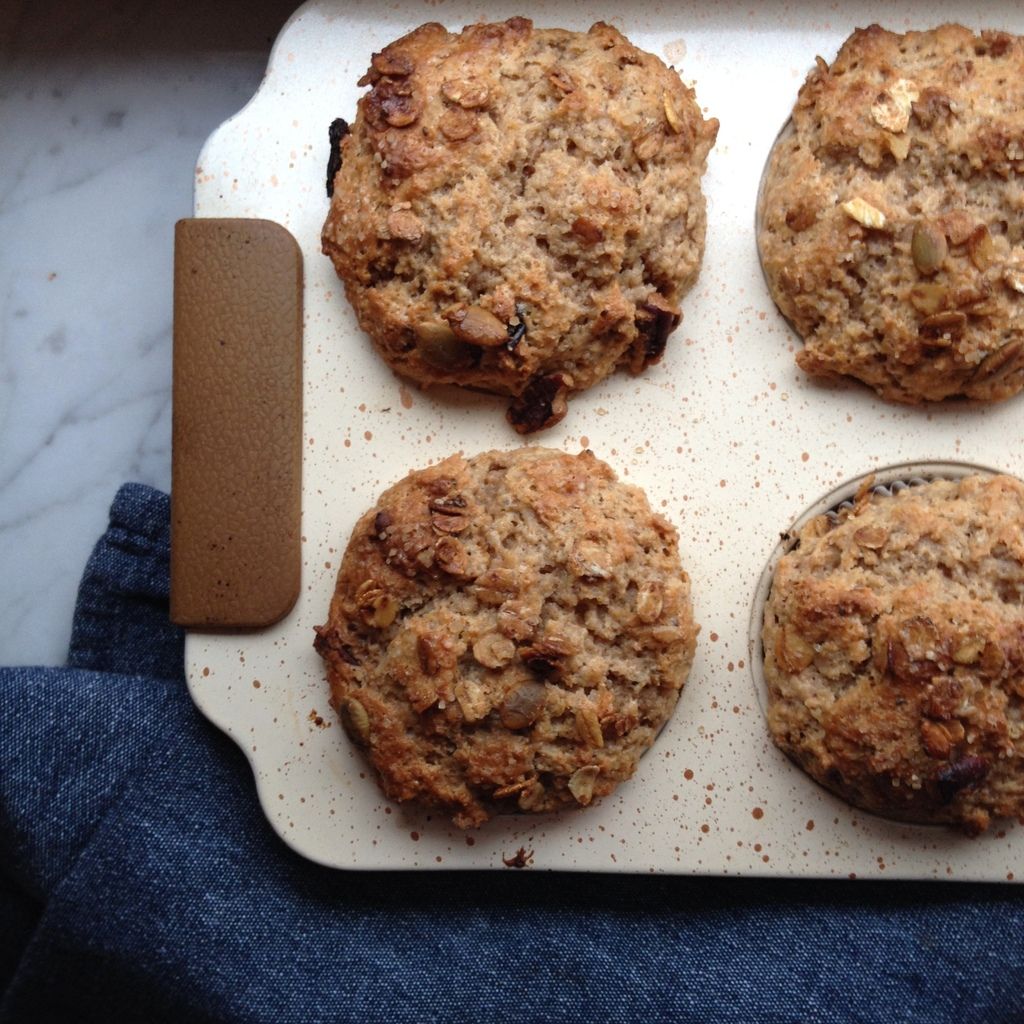
This is a very comforting muffin. Great for the quiet moments at the start of a day. But it has the added bonus of actually being healthy too. Yippee! I make my own granola and keep it in a jar on the counter, so that's what I use for my muffins. It's a pretty simple granola- a little maple syrup, pecans and pumpkin seeds, oats and dried cherries. It's based on a basic outline in Maggie Batista's book Food Gift Love. You can use your favorite granola but this muffin works better with a simple granola rather than one filled with a ton of mix-ins. In the recipe for the muffins I give a range for the milk measurement. Every yogurt is different and you don't want one that is too runny. But if the batter is too stiff after mixing in the lesser amount go ahead and add in the last two tablespoons. I like to finish the muffins with a sprinkle of granola before tucking them in the oven.
1 cup whole wheat flour
1 cup all purpose flour
1 cup light brown sugar
1/2 tsp cinnamon
1 tsp baking powder
1/2 tsp baking powder
1 cup granola
1 1/3 cups Greek-style yogurt
6- 8 tbs whole milk
1/3 cup neutral flavored oil
1 tsp vanilla extract
Preheat oven to 400 F. Line standard muffin pan with muffin cups or lightly butter. Set aside.
In a large bowl whisk together the flours, sugar, cinnamon, baking powder and baking soda. Stir in the granola.
In a separate bowl mix together the yogurt, oil, vanilla and 6 tbs milk. Gently stir the wet ingredients into the dry. If the batter is very stiff or dry stir in the remaining two tablespoons of milk. Divide the batter evenly among the muffin cups and sprinkle with a bit of granola or raw sugar if desired.
Bake for 16-18 minutes. Muffins are down when the tops are gently browned and spring back to the touch. Cool the muffins in the pan on a wire rack. Muffins will keep for up to three days in an airtight container but are best eaten within 24 hours.
Tuesday, October 27, 2015
Mom's Chocolate Pear Upside Down Cake
Tradition [truh-dish-uh n] noun : 1. the handing down of information, beliefs, and customs by word of mouth or by example from one generation to another without written instruction 2. characteristic manner, method, or style
I've been struggling with this post, which is why it has taken so long to arrive in this space. I keep sitting down to write and coming up blank. I love this recipe, I love its origins and what it has become. So what's the problem? And what does that have to do with the definition of tradition that I wrote above? Both valid questions.
The thing is, I really don't know. I can guess, sure, but it's not clear to me yet what the block is about. Too many things to list here, I suppose- maybe in a future post. Probably all boiling down to life, kids, responsibilities. You know, the stuff that distracts from really living fully. Buuuuut...... I try not to make this blog a personal diary so much as an exploration of the thoughts that run though my day with enough frequency to make them relevant. It's not a true confessions page though. So lets keep it lighter, shall we?
In the meantime I'm trying to overcome my blogging block by going back to my roots. Which always leads me to my Mom. Hence the nod to tradition referenced earlier. The cake I'm offering up today is one of those cakes that I can remember her making since I was a small child. She grabbed the recipe from a magazine long ago and it was one of those total 70s recipes. Canned fruit, maraschino cherries, you know the kind. She did away with the cherries from the start but pretty much stuck to the recipe otherwise. I thought I might take it a step further (and kick tradition to the curb, if you will) and modernize it just a bit more. So gone is the can of sugar-laden fruit; replaced instead by gently poached pears who's poaching liquid is also used to make the caramel-ly goodness that is characteristic of an upside down cake. It's a nod to tradition without being strictly traditional. And maybe just the thing to kick my blogging butt out of its funk.
Chocolate Pear Upside Down Cake
Makes 1 8x8 inch square or 9 inch round cake.
For the printable recipe, click here.
This update of my Mom's classic is enhanced with poached pears but its still a simple cake at heart. If you don't have time to poach your own pears, by all means use pears canned in their juices (not in syrup!). The recipe has pecans in the ingredient list but you won't see them in my photos because my little family doesn't appreciate them. So I guess they're optional but really great if you have them.
For the pear topping:
1/4 cup (4 tbs) unsalted butter
1/2 cup packed brown sugar
2 tbs pear poaching liquid
4 poached pear halves (recipe to follow)
1/4 cup coarsely chopped pecans
For the cake:
1 1/4 cup sugar
1 1/2 cups all purpose flour
1/4 cup cocoa powder
1/2 tsp baking soda
1/2 tsp salt
10 tbs softened butter
1 tsp vanilla extract
2 eggs
1/2 cup buttermilk
Preheat oven to 350 degrees.
Melt the 1/4 cup of butter and pour it into a 9 inch square cake pan. Drizzle the corn syrup over the butter and then sprinkle the brown sugar in the pan.
Cut the pear halves into 4 equal portion lengthwise and arrange the pieces in a sunburst pattern over the mixture in the baking pan. Sprinkle the chopped pecans around the pears.
Sift together the flour, cocoa powder, baking soda and salt. Set aside.
In a large mixing bowl (fitted to a stand mixer or with a handheld mixer with beaters attached), beat together the butter, sugar and vanilla until light and fluffy. Add the eggs one at a time, beating fully between additions. Add the dry ingredients alternately with the buttermilk in three additions. Mix until thoroughly combined.
Pour the batter into the pan gently so as to disturb the pattern of the pears as little as possible. Bake for 45-55 minutes, until a toothpick inserted into the center of the cake comes out clean of batter or very wet crumbs. Cool the cake for about 5 minutes and then run a knife around the edges of the pan to loosen. Invert the cake onto a serving platter. Cut into squares.
Poached Pears
2 ripe but still firm pears
1 quart water
1/2 cup honey
Stir the water and honey together in a 2 quart pot. Bring the mixture to a boil over a medium heat. In the meantime, peel, quarter and core the pears.
When the water/honey mixture comes to a boil add the pears. Turn the heat down to medium and simmer the pears for 20-25 minutes or until the tip of a sharp knife easily pierces the pears. Remove the pears from the poaching liquid and cool making sure to reserve 2 tablespoons of the poaching liquid.
Pears can be stored in the cooled poaching liquid in the refrigerator until use.
Friday, October 9, 2015
Our Favorite Apple Cake
The day started out with an entirely different plan. We were to meet up with friends on the grounds of a lovely Baroque castle for one of our favorite fall festivals. Beautifully carved pumpkins, amazing statues and scenes created out of stacking all sorts of gourds and squash, pumpkin-centered food and record breaking giant pumpkins all in an idyllic setting. Sounds perfect, doesn't it? Well it would have been if not for the German national holiday and the hordes of people trying to do the very same thing we were. As we sat in traffic and drove in circles trying to find parking I could feel my husband's frustration level rising (and kid-friendly language beginning to fail him), so I turned to him and said, "Let's get out of here".
It was such a good call.
We ended up doing not much of anything, really. But had a great day doing it. Pointing the car in a direction where no other people were going we ended up driving through (and stopping to meander in) no fewer than three towns each with its own castle or medieval wall. And each was prettier than the previous one. In between was some beautiful countryside with fall colors all around. At the end, we settled on a beautiful town square to have dinner in. The evening was warm so we ate our dinner of wild game and traditional German sides out on the square watching children play and night watchmen lead tours through town to the tune of church bells. This is German living at its best, my friends.
But my favorite part of the day wasn't the castles or the dinner. It was the 20 minutes that we spent stopped on the side of the road picking apples from some old, forgotten trees. The boys and their dad having fun and daring each other to go higher and get bigger apples. The oldest climbing up on his dad's shoulders balancing just enough to reach the really big ones. His little brother finding apples on the ground that were still worthy of picking (and eating as many of them as he could). Their baby sister just napped and played happily as I took it all in. Because as the boys get older I know these simple and blissful afternoons will be fewer and farther between. Sure, I'm thrilled to have the bowls full of apples to cook and bake with but it was the experience that was more fulfilling. No TV or video games, no forced fun. Just two boys and their dad, laughing, climbing and enjoying each others' company. To me, that was the true beauty of the day.
Our Favorite Apple Cake
Makes one cake. Adapted slightly from The Great Holiday Baking Book by Beatrice Ojakangas.
For the printable recipe, click here.
I have been making this cake for years. The original is from a book I was gifted one Christmas from a co-worker and I've made it every fall since. It reminds my husband of a cake that his mother used to make as a child and I think it might just be his favorite cake ever. We have always called it Jewish Apple Cake, though I really don't know why. I suppose growing up in a very mixed religious area of South Jersey we simply always associated the cake with our Jewish friends and the fall holiday of Rosh Hashanah. Though it needn't be limited to just one season. This is one of those homey, year round cakes that just makes you feel good.
3 cups all purpose flour
3 tsp baking powder
1 1/2 cups granulated sugar, divided
1/2 cup packed light brown sugar
1 cup neutral flavored oil
4 large eggs
3/4 cup fresh orange juice
2 tsp pure vanilla extract
6 medium apples (sweet, firm apples are best), peeled, cored and sliced thinly (about 4 cups finished)
1 tbs ground cinnamon
Preheat the oven to 350 degrees. Butter a 9 or 10 inch tube pan (or 9x13 inch rectangular pan).
In a large bowl, combine the flour, baking powder, 1 cup of the granulated sugar and the brown sugar. Stir to distribute the dry ingredients. In a separate bowl mix together the oil, eggs, orange juice and vanilla. Pour the wet ingredients into the bowl with the dry ingredients. With an electric mixer or by hand beat the mixture until light and fluffy.
In another large bowl stir the apples together with the remaining 1/2 cup of granulated sugar and the cinnamon until the apples are well coated. Place half of the apples at the bottom of the prepared pan. Pour the batter over the apples and even it out with a spatula if necessary. Arrange the rest of the apples over the top.
Bake for 1 hour to 1 hour and 15 minutes or until a wooden skewer inserted into the center of the cake comes out clean. The cake will be golden on top and the apples will be tender. Cool the cake in the pan on a wire rack for 10 minutes. Remove the cake from the pan onto a serving dish. If using a tube pan, loosen the cake from the pan and invert it onto a plate. The invert the cake again onto a serving platter. Replace any apples that might have remained in the pan and let cool completely before serving.
The cake will keep for 3 days in an airtight container at room temperature.
Monday, September 21, 2015
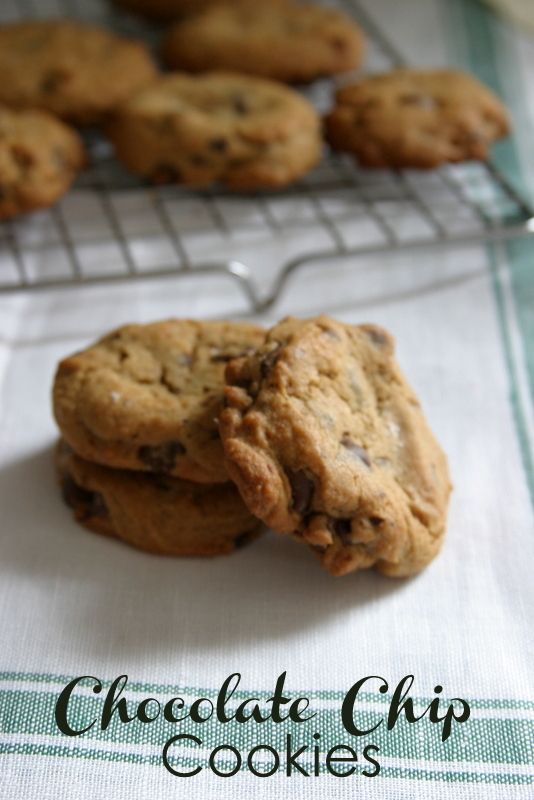
The Only Chocolate Chip Cookie
I've been thinking about the meaning of the word "home" a lot lately. For so many reasons, I suppose. But there are two that really seem to standout in my mind.
A recent trip to Budapest, one of the most surprisingly beautiful cities I have visited in Europe, brought my family face to face with hundreds of refugees fleeing the war torn Middle East for a better life. These people were walking from Budapest with the hopes of finding a safe and secure new home in Germany. Families, young men, and small children carrying their lives on their backs and leaving they only home they have ever known. You can watch the stories on the news and read about the crisis that is facing Europe right now, but to actually watch the people walking past you is something altogether different. Clarifying. And you wonder if these people will ever again feel at "home". Surely refugee camps, abandoned warehouses and halfway houses can't be the image of the new life they are desperately trying to find. But all of these places are light years from the hell that was their home. So maybe, just maybe, there's a glimmer of hope there.
Thursday, August 20, 2015
Lemon Zucchini Bread {Revisited}
A dear friend of mine recently sent me a text asking for a recipe I shared a few years ago in the early days of this page. Someone had gifted her some zucchini and having tasted my version of zucchini bread once-upon-a-time she was looking to make it for herself. The only problem was that she couldn't find the recipe anywhere on my page. Not a trace of the delicious lemony zucchini bread popped up in any of her searches. Curious, I did a bit of digging myself (it's my blog so of course I can find it right?)
Friday, December 12, 2014
Just a Little Thing...A New Book and My Favorite Christmas Cookie Ever
A year of work has finally come to an end.....
After a lot of recipe collecting and bugging my Mom for her instructions for my favorite childhood treats, writing, editing, photographing and a few extra pounds from, ehem, taste testing.....this labor of love is finally finished. It's just a little thing- 18 recipes that represent the collective kitchen wisdom of three generations of my family bound together into one sweet book. My Mom and I worked together to make this book before some of these recipes disappeared forever without being written down. My original intention was to give copies as gifts for my family, but I got so many requests for a copy from friends far and wide that I decided to self publish the book and offer it for sale.
So if you head on over to Blurb, you'll find My Mother's Kitchen for sale in a few different formats. You can grab a hard or soft cover 7x7 inch book or download an ebook for your iphone or iPad. I'd be honored if you were fond enough of me or my recipes to purchase yourself a copy. Thrilled and humbled beyond belief as well.
I thought I'd give you a little taste of what's in the book today. In keeping with the current theme of European cookies, here's my favorite Italian cookie. We always called them dardeeds because that's how my Nana pronounced it, but I have since come to find out that the actual name for this cookie is turdilli. I'm sticking with dardeeds, but you can call them whatever you like. Maybe call them delicious. Turdilli are definitely a regional secret from Calabria- most people have never seen or heard of them. I aim to change that right now.
Turdilli {or Dardeeds}
Makes a mountain of cookies. Divide the recipe by 3 for a more reasonable amount.
For the printable of this recipe, click here.
3 cups neutral flavored oil
2 cups dry red wine
1 cup whiskey
11 1/2 cups + 1 tbs all purpose flour
8 1/2 cups semolina flour
2 tsp sugar
3 eggs
½ tsp ground cinnamon
1 tbs ground clove
Neutral flavored oil for frying
2 cinnamon sticks
12 whole cloves, divided
2 lbs. honey
1/4 cup sugar
Place the oil, wine and whiskey in a large pot. Bring to a boil over medium heat. Boil for just a couple of minutes to burn off the alcohol. Remove from the stove and cool.
In a large mixing bowl stir together the flour, semolina, sugar, ground cloves and ground cinnamon. Pour in the cooled liquid ingredients and the 3 eggs. Mix until you have a cohesive, sturdy dough.
In a large pot, pour enough oil to fill the pot about three inches deep. Place the cinnamon sticks and 7 cloves into the oil. Insert a candy thermometer into the pot. Heat over medium until the oil reaches 350 degrees.
In the meantime, cut small sections of dough (keep the rest of the dough in a covered bowl) and form ropes about the diameter of your thumb. Cut into ¾ to 1” pieces and roll them on a fork or a wooden board used to roll cavatelli/gnocchi. Fry the dardeeds in batches, turning gently once, until golden. Let cool.
Rub the sides of a bowl large enough to hold all the finished dardeeds with half a lemon. Place the honey in a pot large enough to hold all the dardeeds. Add the remain cloves to the honey. Mix the sugar and flour together and add it to the honey also. Warm the mixture to just above a simmer but not quite boiling. Add the dardeeds and toss gently until they are all coated well. Remove from heat and turn out into the prepared bowl. Keep covered with foil.
After a lot of recipe collecting and bugging my Mom for her instructions for my favorite childhood treats, writing, editing, photographing and a few extra pounds from, ehem, taste testing.....this labor of love is finally finished. It's just a little thing- 18 recipes that represent the collective kitchen wisdom of three generations of my family bound together into one sweet book. My Mom and I worked together to make this book before some of these recipes disappeared forever without being written down. My original intention was to give copies as gifts for my family, but I got so many requests for a copy from friends far and wide that I decided to self publish the book and offer it for sale.
So if you head on over to Blurb, you'll find My Mother's Kitchen for sale in a few different formats. You can grab a hard or soft cover 7x7 inch book or download an ebook for your iphone or iPad. I'd be honored if you were fond enough of me or my recipes to purchase yourself a copy. Thrilled and humbled beyond belief as well.
I thought I'd give you a little taste of what's in the book today. In keeping with the current theme of European cookies, here's my favorite Italian cookie. We always called them dardeeds because that's how my Nana pronounced it, but I have since come to find out that the actual name for this cookie is turdilli. I'm sticking with dardeeds, but you can call them whatever you like. Maybe call them delicious. Turdilli are definitely a regional secret from Calabria- most people have never seen or heard of them. I aim to change that right now.
Turdilli {or Dardeeds}
Makes a mountain of cookies. Divide the recipe by 3 for a more reasonable amount.
For the printable of this recipe, click here.
3 cups neutral flavored oil
2 cups dry red wine
1 cup whiskey
11 1/2 cups + 1 tbs all purpose flour
8 1/2 cups semolina flour
2 tsp sugar
3 eggs
½ tsp ground cinnamon
1 tbs ground clove
Neutral flavored oil for frying
2 cinnamon sticks
12 whole cloves, divided
2 lbs. honey
1/4 cup sugar
Place the oil, wine and whiskey in a large pot. Bring to a boil over medium heat. Boil for just a couple of minutes to burn off the alcohol. Remove from the stove and cool.
In a large mixing bowl stir together the flour, semolina, sugar, ground cloves and ground cinnamon. Pour in the cooled liquid ingredients and the 3 eggs. Mix until you have a cohesive, sturdy dough.
In a large pot, pour enough oil to fill the pot about three inches deep. Place the cinnamon sticks and 7 cloves into the oil. Insert a candy thermometer into the pot. Heat over medium until the oil reaches 350 degrees.
In the meantime, cut small sections of dough (keep the rest of the dough in a covered bowl) and form ropes about the diameter of your thumb. Cut into ¾ to 1” pieces and roll them on a fork or a wooden board used to roll cavatelli/gnocchi. Fry the dardeeds in batches, turning gently once, until golden. Let cool.
Rub the sides of a bowl large enough to hold all the finished dardeeds with half a lemon. Place the honey in a pot large enough to hold all the dardeeds. Add the remain cloves to the honey. Mix the sugar and flour together and add it to the honey also. Warm the mixture to just above a simmer but not quite boiling. Add the dardeeds and toss gently until they are all coated well. Remove from heat and turn out into the prepared bowl. Keep covered with foil.
Thursday, April 17, 2014
Pork, Potato and Smoked Paprika Empanadas {Using Up My Leftovers}
We're gearing up for spring break here in our house. I'm super excited for the trip we have scheduled for next week. Mainly because it involves two of my favorite things- food and gardens. We're headed to Belgium and The Netherlands and I have packed our itinerary full of waffles, french fries and chocolate eating as well as tulip fields as far as the eye can see in all their blooming glory. If any has ever been to Bruges or Amsterdam and has specific recommendations on great places to eat, I'd happily take them. I've got a little list going, but the more options the better in my book.
Sounds idyllic, doesn't it? I promise loads of photos when we get back. It's supposed to be a bit rainy, but I imagine the bright colors of those tulips and the canal-side homes in Bruges will make up for the gray skies. Can't! Wait!
It's a good thing there's a vacation at the end of this week because one of the most stressful things I do around here is prepare for our trips. Maybe I'm the only one who feels this way, but I certainly can't be, right? It's exhausting- all the google searches on what I need to have in my car to drive through Belgium, all the laundry that needs doing before we get going, the food shopping for snacks and breakfast stuff that we can take along with us, stressing about how we're going to pack everything we need into the car. And the worst of all- how to use up what I've got in my fridge so that what's in there doesn't go to waste and I don't have a fridge full of gross-ness awaiting me at the end of an awesome vacation.
This is one of the best ways that I know to use up leftovers. And they've graced our table this past week to the delight of all but my picky little man (sigh). My husband is very much an "I need meat at dinner" kind of guy and he's not a big fan of poultry, so we tend to eat a lot of pork around here. Pork tenderloin is one of our favorites (especially this one), but we go for good old fashioned roasts as well as big, thick chops on the grill. There are always leftovers because I don't know how to cook for less than an army of people (thanks to my Nana for that one!). My family has come to expect these great little empanadas within a few days of the first dinner. They never, ever disappoint. Serve them up with a big salad and you've got one great dinner.
One less leftover in the fridge- check!
Pork, Potato and Smoked Paprika Empanadas
Makes about 15 empanadas. Dough recipe from the sadly no-longer-in-print Gourmet magazine.
For the printable, click here.
This really is a favorite here in our house. I've been using the same dough recipe from Gourmet magazine for years and it's pretty fool-proof. I've been guilty over over mixing and re-rolling the scraps maybe one time too many and the empanadas are always tender and flaky. I haven't changed a single thing from the original, though I do occasionally use apple cider vinegar instead of white vinegar depending on what is the closest to me when I'm working. The filling is pretty flexible. You can use whatever leftover pork you have and it will work just fine. If you don't have thyme or smoked paprika you can go in another direction and be just as satisfied. Maybe some cumin, chili powder and roasted chili peppers for a bit of a Tex Mex flavor? Mushrooms and tarragon? You could even swap out sweet potatoes for the yukon golds. The possibilities are endless.
For the dough:
2 1/4 cups all purpose flour
1 1/2 tsp kosher salt
1 stick (1/2 cup or 8 tbs) cold butter, cut into 1/2 inch pieces
1/3 cup ice water
1 tbs white or apple cider vinegar
In a large bowl, blend together the butter, flour and salt with your finer tips or a pastry blender until the butter pieces are about the size of peas.
In another bowl, mix together the water and vinegar. Using your hands or a fork, stir the liquid mixture into the flour and butter until you have a shaggy dough. Turn the dough out onto a lightly floured surface and knead it two or three times just to bring the dough together. Shape the dough into a disc, wrap it in plastic wrap and refrigerate for at least an hour.
*I've also made the dough in a food processor with no problem. Follow the same steps, pulsing the processor blade to do your blending.
For the filling:
1/2 medium onion, diced
1 medium waxy potato (such as yukon gold), diced
1 cup leftover pork, shredded or diced
1 clove garlic, chopped
3 sprigs thyme
1/2 tsp smoked paprika
1/2 cup low-sodium or home made chicken broth, divided
1 tbs flour
1 egg for egg washing the empanadas
Saute the onion in 1 tbs olive oil for 2-3 min or just until softened. Add potatoes and stir with the onions for another minute. Add 1/4 cup of the chicken broth and bring to a simmer. Simmer, uncovered, until the pan is almost dry to par-cook the potatoes. Add the pork, garlic, the rest of the broth, thyme and paprika to the pan and stir just to warm through (about 3 minutes). Sprinkle the flour over the pan and stir, cooking for another minute to thicken the pan juices. Set the pan aside to cool COMPLETELY before proceeding.
To assemble:
Preheat your oven to 375 degrees. Line two baking sheets with with parchment or a nonstick liner. In a small bowl beat the egg with 1 tbs of water and set aside.
Roll the dough out into a circle about 1/8 of an inch thick. Cut into circles using a 5 inch diameter cutter. Place 1 heaping tablespoon of filling into the center of each circle. Brush the edge of the circles with a bit of egg wash and fold the dough to form a half-circle enclosing the filling. Press the edges with your fingers and crimp with a fork to ensure a tight seal. You can re-roll the dough scraps and cut out more empanadas.
Place the empanadas on the prepared baking sheets. Brush the tops with the remaining egg wash and sprinkle with a bit of smoked paprika. Bake for 22-25 minutes until the tops are golden brown and the empanadas are puffed. Cool slightly and serve warm.
Wednesday, April 2, 2014
Black & Blueberry Rhubarb Jam {Small Batch}
Don't you just love how little kids get so excited for their birthdays? The week-long countdowns. The jumping out of bed ready to get on with all the fun birthday stuff when normally you can't drag them out of bed for anything. Running into school with a container full of mini cupcakes with all of the anticipation one little body can hold. It's exhilarating, and sweet, and a reminder for us parents of the simple joys of childhood.
Today is my little man's 5th birthday. There's something about 5 that just is different from all the birthdays that come before. It's a signal that toddler-hood is over. That little boy who would only walk down the street holding your hand is now just as willing to let it drop and go running with his big brother as he is to keep holding on to you. There's so much more he is capable of doing on his own and he is just a little bit more fearless. But cautious too, as he understands the world around him the tiniest bit more than he did a year ago. It's enough to make this Mama both proud and a little bit sad too.
I hope there will never come a day when my little guy won't want to snuggle for a few minutes before bed. Or run up to me at random moments and hug me ferociously. Or want to hold my hand for just a minute longer as he eyes up the kids in his new class and wonders whether they will want to play with him. Of course, I know in my head he won't want to do all of those things for much longer even if he promises that he will give me just as many hugs and kisses when he's all grown up. But I can hope right? And for the time being, I will hold onto as many of those moments as I can. Because for now he's still my little boy.
This recipe is for the birthday boy. He's my super-picky eater. Fussy beyond belief. But if there's one thing I know about him, it's that I can always get him to eat a pb&j sandwich. Especially if it's made with any of my home made jams (well, except for fig, but I make that one for myself anyway). We discovered when we moved to Germany that he really enjoyed rhubarb so when rhubarb season rolled around this year I made sure to grab some as soon as I saw those beautiful pink stalks at the market. This jam is packed with fruit and not a whole lot of sugar (plus a secret sweetener that you don't really taste but makes a huge difference to the balance of the jam). The little guy doesn't really know anything about the balance of tart, sweet and acidic. He just knows that it's good. And that's all that really matters to his Mom.
Black & Blueberry Rhubarb Jam
Makes about 1 pint.
For the printable recipe, click here.
This is an incredibly simple jam to make. I would have loved to have used fresh berries in the jam, but the seasons of the fruit don't overlap. So I used organic frozen berries instead. The jam doesn't suffer any in the end. In fact, it's probably better that I didn't use fresh fruit as their out of season flavors would not have been nearly as good as the frozen berries that are picked in season and at their best. Be sure to slice the rhubarb thinly so that you don't get any celery-like stringiness in your jam. There's really not enough jam here to can and save for later, but if you really want to, you can pack the finished jam into clean, sterilized quarter pint jars and process them in a boiling water bath for 10 minutes. Me- I just stick the jar in the fridge and enjoy it as fast as I can.
1 cup blueberries, fresh or frozen
1 cup blackberries, fresh or frozen
2 cups thinly sliced rhubarb (from about 2 stalks)
1/2 cup pure cane sugar
1/4 cup maple syrup
juice of half a lemon
Place all ingredients except for the lemon juice in a medium, non-reactive saucepan. Bring to a boil over medium high heat. Let the mixture cook at a vigorous bubble for 12-15 minutes, stirring occasionally to prevent scorching, until the berries have burst and the jam is thickened. Stir in the lemon juice and remove from the heat. Spoon the finished jam into a clean pint jar and let cool. Cover and keep in the refrigerator for 3-4 weeks.
Labels:
Breakfast,
Family Recipes,
Fruit,
Jams and Jellies,
Preservation,
Quick,
Spring
Thursday, June 13, 2013
Roasted Sweet Pepper Salsa
I'm not the world's greatest friend, I will freely admit that. I forget to call and catch up, I don't always think to see if someone wants to walk the mall with me, I really like my alone time. And I suppose I still have some lingering friendship issues that go way back to confrontations with some mean girls back in middle school (who doesn't have those?). And, yes, you're right. I'm in my late 30s so I really need to get over that.
Most of my friends are okay with my communication issues. In fact, many of them are exactly like me. Maybe that's why I chose them as friends. We all get it. We don't need to chat every day for hours on end to be close, instead we're secure enough in our friendships to call when we need each other or genuinely want to talk or get together. And that makes those conversations, dinners or talks over a glass of wine all the more meaningful.
But as most things in life go, one of these things is not like the other. I have one super close friend, Libby, who doesn't put up with my silence. She holds me accountable for putting the time and effort into the friendship. And frankly, that's what I love about her the most. If she loves you, she'll let you know. Out loud and with passion. Of course you also don't want to get on her bad side, because she's just as vocal about that too. Libby is fiercely loyal, generous with her time and talents and she will pull you along with her for the crazy ride of life all the while pulling you out of your own shell.
Libby is also the one friend who loves to cook with me. When we lived close to each other we'd spend whole days just rummaging through cookbooks and online recipes and cooking up a storm. Those were some of the best days ever. And even now that we live many hundreds of miles apart, we still text photos of great dinners we've made and compare notes on techniques or recipes we'd like to try. It's a friendship that will endure and stand out from any of the others I've had or will have in my life. Libby is a true treasure in my life.
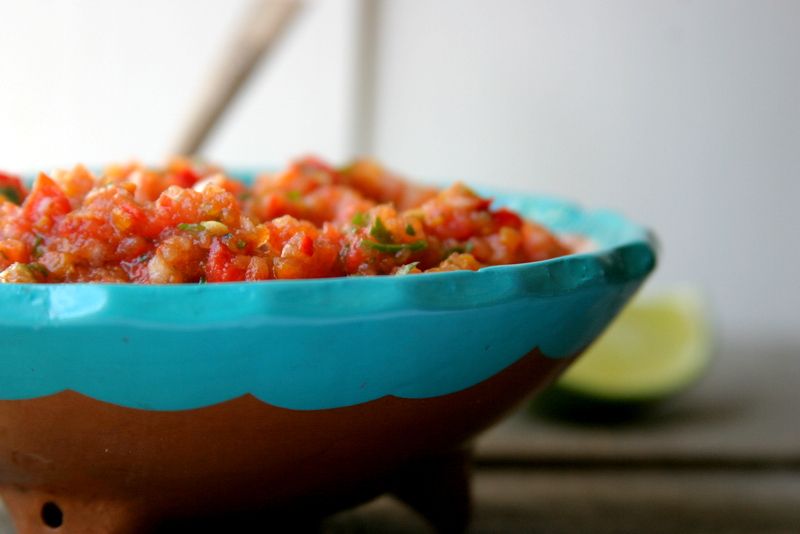
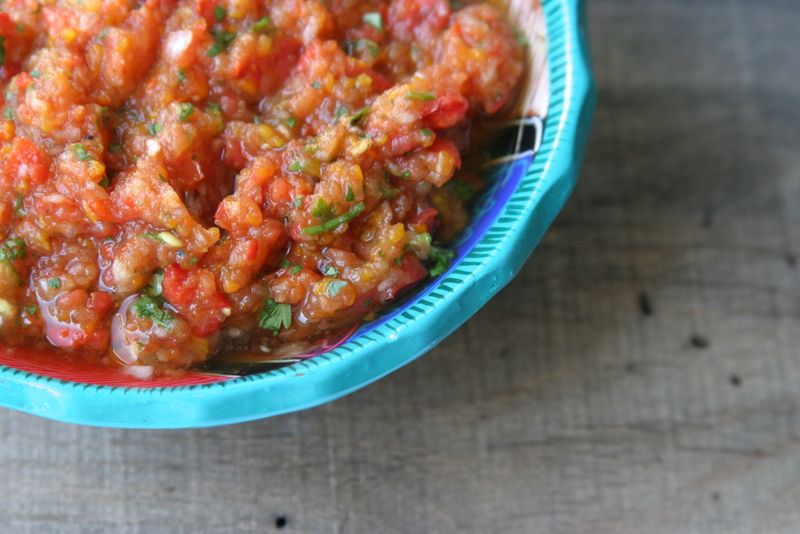
So I suppose it's fitting that I stole the idea for this recipe from her. It's one of my favorite Libby dishes and one the was made to share on several of those marathon cooking days or Friday night dinners at each others' houses. I have a feeling it will quickly become one of your favorites too. It's a simple salsa that will brighten up a dull day and sit perfectly aside that beer with a lime in it on a summertime picnic table. There's really nothing that compares to a freshly made salsa, and most especially this one.
Roasted Sweet Pepper Salsa
Makes 2 generous cups of salsa. Inspired by Libby.
For the printable recipe, click here.
I often worry when I post a recipe like this that it will be too simple and unimpressive. But then, who am I trying to impress? And, honestly, everyone needs a perfect salsa recipe in their recipe files. This one is mine. It's the best with freshly made tortilla chips (just quarter those cute little corn tortillas and deep fry, then sprinkle with salt), but the bagged chips will taste just as great when paired with this salsa and a beer. You must have the beer. You won't regret it. I never really measure my quantities when I make salsa, so these are approximates. And the truth is, salsa is one of those things that you have to taste along the way anyway. You never know how flavorful and fresh the tomatoes will taste or how spicy your pepper will be. So try as you go and you'll get it right.
2 red, yellow or orange bell peppers or 6 of the multicolored baby bell peppers
3 large Roma or plum tomatoes, coarsely chopped
1/2 white or red onion
1 to 2 jalapeno or serrano chilies
handful (about 1/3 cup) cilantro
juice of 1 lime
salt to taste (I usually end up with 1/2 to 1 tsp)
Place the bell peppers on a baking tray in a hot oven (450 degrees) to roast, or you can place them over an open gas flame on your stove top or grill. Roast the peppers until the skins have charred and blistered, turning occasionally. It will take about 10-12 minutes to get them fully roasted. Place the roasted peppers in a plastic or paper bag and seal. When the peppers are cool enough to handle, peel the skins off and pull out the stems and seeds. Coarsely chop the peppers.
Seed and coarsely chop the jalapeno pepper. You may want to taste the tiniest bit to determine the amount of heat the pepper has (I usually just touch a cut end to my tongue and can judge it's heat by that tiny taste).
You can chop all of the ingredients by hand and simply mix them together. You will get a chunky salsa if you do it that way. If you chop by hand, simply chop all of the ingredients as finely as you like them, stir together and taste to decide how much salt you'd like and if the salsa needs any additional lime juice. I like a smoother salsa so I use my food processor to do the work for me. To make the salsa using a food processor, place the onion and jalapeno in the food processor and pulse several times to begin chopping. Then add the rest of the ingredients and process until some larger pieces still remain but the salsa is mostly finely chopped. Taste for salt and lime.
Serve with tortilla chips. The salsa will keep, covered, in the refrigerator for 2-3 days.
Most of my friends are okay with my communication issues. In fact, many of them are exactly like me. Maybe that's why I chose them as friends. We all get it. We don't need to chat every day for hours on end to be close, instead we're secure enough in our friendships to call when we need each other or genuinely want to talk or get together. And that makes those conversations, dinners or talks over a glass of wine all the more meaningful.
But as most things in life go, one of these things is not like the other. I have one super close friend, Libby, who doesn't put up with my silence. She holds me accountable for putting the time and effort into the friendship. And frankly, that's what I love about her the most. If she loves you, she'll let you know. Out loud and with passion. Of course you also don't want to get on her bad side, because she's just as vocal about that too. Libby is fiercely loyal, generous with her time and talents and she will pull you along with her for the crazy ride of life all the while pulling you out of your own shell.
Libby is also the one friend who loves to cook with me. When we lived close to each other we'd spend whole days just rummaging through cookbooks and online recipes and cooking up a storm. Those were some of the best days ever. And even now that we live many hundreds of miles apart, we still text photos of great dinners we've made and compare notes on techniques or recipes we'd like to try. It's a friendship that will endure and stand out from any of the others I've had or will have in my life. Libby is a true treasure in my life.
So I suppose it's fitting that I stole the idea for this recipe from her. It's one of my favorite Libby dishes and one the was made to share on several of those marathon cooking days or Friday night dinners at each others' houses. I have a feeling it will quickly become one of your favorites too. It's a simple salsa that will brighten up a dull day and sit perfectly aside that beer with a lime in it on a summertime picnic table. There's really nothing that compares to a freshly made salsa, and most especially this one.
Roasted Sweet Pepper Salsa
Makes 2 generous cups of salsa. Inspired by Libby.
For the printable recipe, click here.
I often worry when I post a recipe like this that it will be too simple and unimpressive. But then, who am I trying to impress? And, honestly, everyone needs a perfect salsa recipe in their recipe files. This one is mine. It's the best with freshly made tortilla chips (just quarter those cute little corn tortillas and deep fry, then sprinkle with salt), but the bagged chips will taste just as great when paired with this salsa and a beer. You must have the beer. You won't regret it. I never really measure my quantities when I make salsa, so these are approximates. And the truth is, salsa is one of those things that you have to taste along the way anyway. You never know how flavorful and fresh the tomatoes will taste or how spicy your pepper will be. So try as you go and you'll get it right.
2 red, yellow or orange bell peppers or 6 of the multicolored baby bell peppers
3 large Roma or plum tomatoes, coarsely chopped
1/2 white or red onion
1 to 2 jalapeno or serrano chilies
handful (about 1/3 cup) cilantro
juice of 1 lime
salt to taste (I usually end up with 1/2 to 1 tsp)
Place the bell peppers on a baking tray in a hot oven (450 degrees) to roast, or you can place them over an open gas flame on your stove top or grill. Roast the peppers until the skins have charred and blistered, turning occasionally. It will take about 10-12 minutes to get them fully roasted. Place the roasted peppers in a plastic or paper bag and seal. When the peppers are cool enough to handle, peel the skins off and pull out the stems and seeds. Coarsely chop the peppers.
Seed and coarsely chop the jalapeno pepper. You may want to taste the tiniest bit to determine the amount of heat the pepper has (I usually just touch a cut end to my tongue and can judge it's heat by that tiny taste).
You can chop all of the ingredients by hand and simply mix them together. You will get a chunky salsa if you do it that way. If you chop by hand, simply chop all of the ingredients as finely as you like them, stir together and taste to decide how much salt you'd like and if the salsa needs any additional lime juice. I like a smoother salsa so I use my food processor to do the work for me. To make the salsa using a food processor, place the onion and jalapeno in the food processor and pulse several times to begin chopping. Then add the rest of the ingredients and process until some larger pieces still remain but the salsa is mostly finely chopped. Taste for salt and lime.
Serve with tortilla chips. The salsa will keep, covered, in the refrigerator for 2-3 days.
Labels:
Appetizers,
Family Recipes,
Quick,
Sauces,
Sides,
Snacks,
Summer,
Tomatoes,
Vegetables,
Vegetarian
Thursday, May 16, 2013
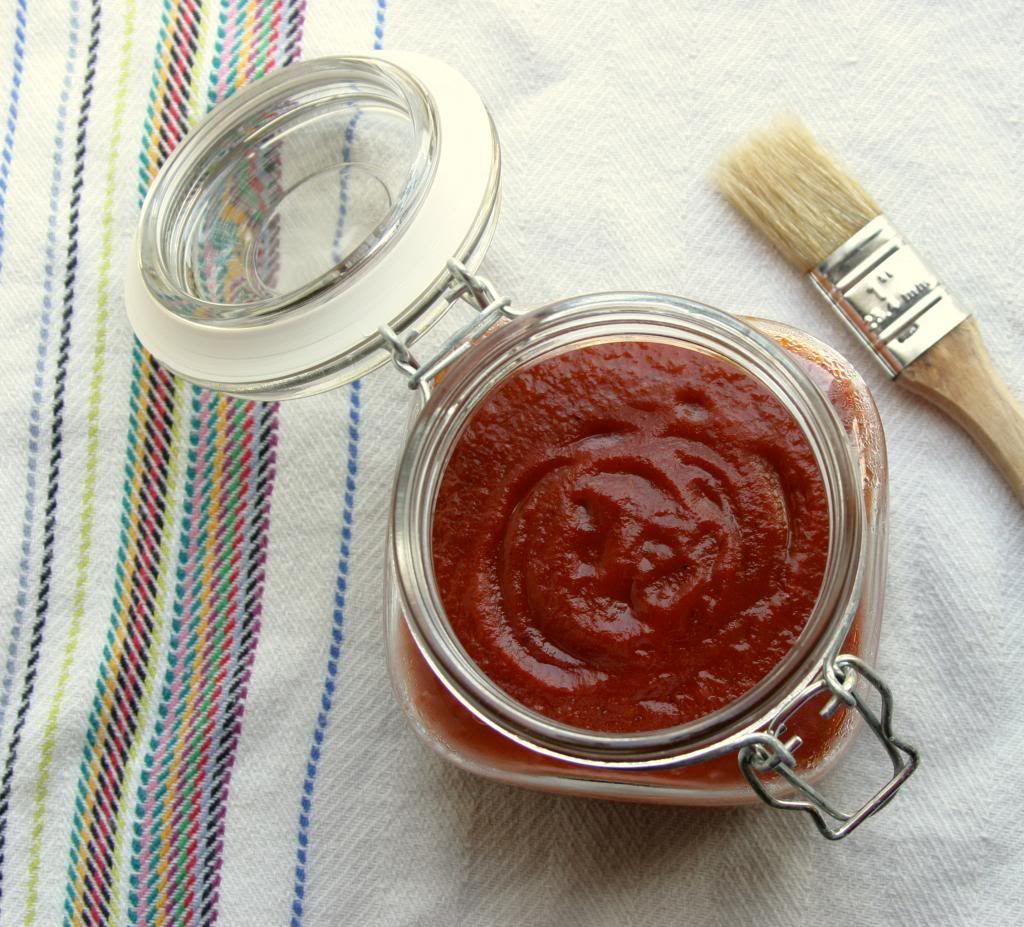
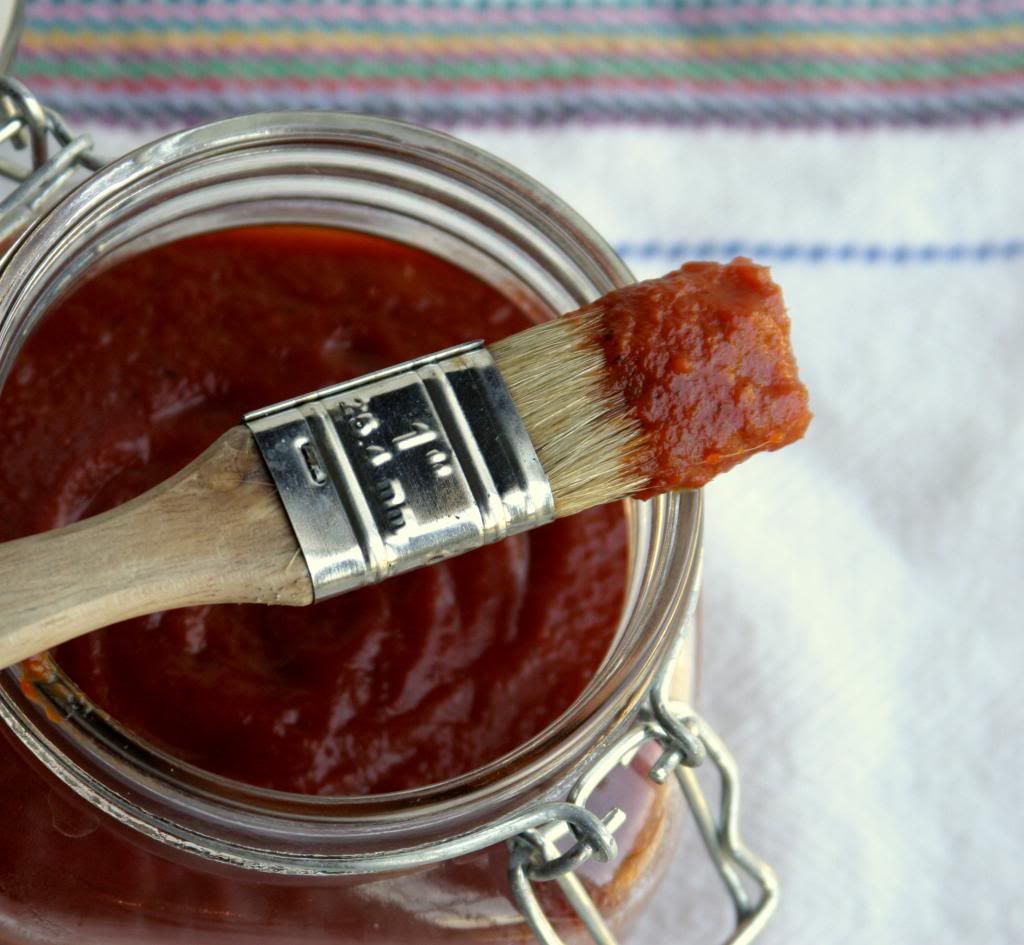
Fire Roasted BBQ Sauce
One of the first meals I ever cooked for my family was centered around barbequed chicken. And I'm not talking my hubby and kids. I mean my parents and sister. I couldn't exactly say when it was, high school or college, but I remember being excited and nervous all at the same time. I mean, my Mom had been making fabulous dinners for us since we were itty bitty and it was definitely a lot to live up to (not that she would have ever put any pressure or expectations on me, the nerves were all mine). I don't remember why I made this dinner, there was no special occasion that I can recall. But I can still very clearly picture myself stirring the sauce on my Mom's stove top and carrying it to the grill to coat the pieces of chicken I planned on serving. But the most lasting memory of it is the pride I felt in having actually made my own barbeque sauce for the chicken having and the sweet tang of my first bite of chicken. Oh, any my family loved it!
The recipe for the sauce came from one of the books in my Mom's extensive collection. A book that I later, ahem, "borrowed" from her and conveniently never remembered to return. It was a Carolina sauce, sweet from brown sugar and a great vinegar-y tang that I just loved. Over the years I tried other sauces from that book, but it was always the Carolina sauce that had my heart won over.
Perhaps it was nostalgia over that first successful meal I cooked for my Mom, but that sauce is the one that I always measure others against. I suppose, to me, it has reached an almost legendary status. But my beloved sauce would never fly on my dinner table these days. My husband just can't abide by sweet sauces, preferring a bolder smoky flavor instead. I've made my peace with it, but I will always miss my Carolina sauce.
Then came this sauce. My husband's first words to me as he took his first bites of the chicken I had slathered with my newest version were "Please tell me you wrote this recipe down". Winner, winner, chicken dinner! Seriously, is there a better compliment? And thank goodness I had the good instincts to keep track of what I was doing as I created the sauce, because I know I would never be able to repeat this one from memory. Maybe this one will rise to meet the "legendary" status of my very first home made barbeque sauce in time too. I don't know. But for now, it's what we're craving in my house. And that (in the words of Martha Stewart) is a very good thing.
Fire Roasted BBQ Sauce
Makes about 1 1/2 cups.
For the printable recipe, click here.
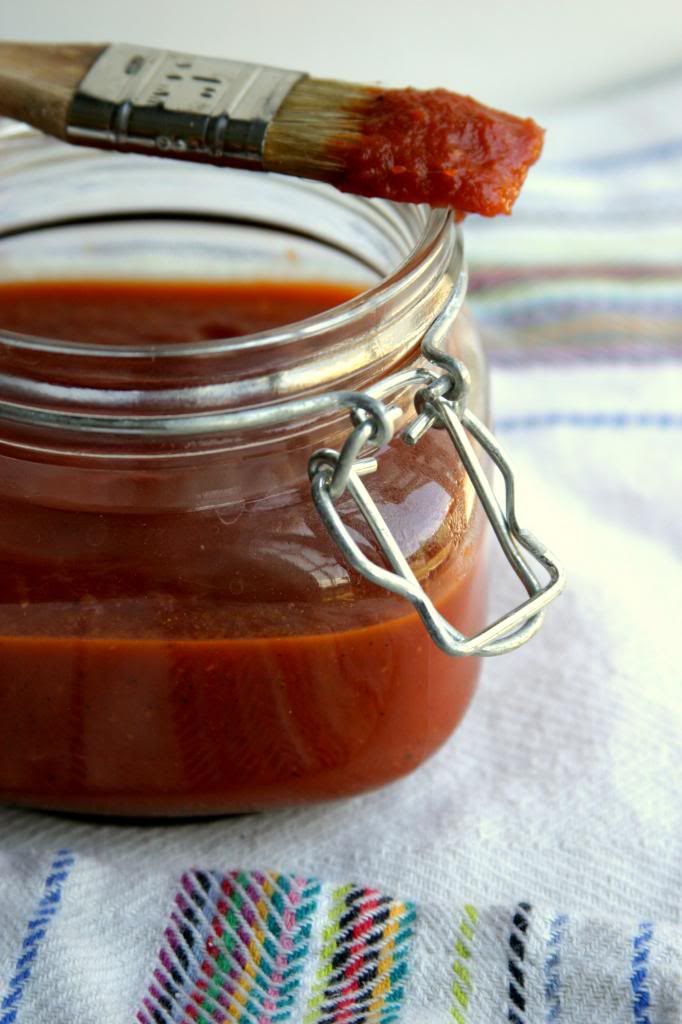
Barbeque sauce is one of the simplest things to make at home, people are just so used to the convenience of the store bought bottled stuff that they never think to make their own. But truly, nothing compares to what you can make on your own stove top. This sauce has a bit of a spicy kick, but you can use regular fire roasted tomatoes instead of the ones with the green chilies if you don't like the heat (though I would try it this way first). Then there's the tang of the vinegar balanced with just a bit of sweet. It's a sauce for everyone. The best part is that all you do is throw everything in the pot and cook until it's thick. It's that simple.
1 tbs vegetable or canola oil
1/4 cup chopped onion
1 clove garlic, minced
1 cup pureed fire roasted tomatoes with green chilies (if you can't find that in your store, you could use 1 cup pureed fire roasted tomatoes along with 2 tsp chopped canned green chilies)
1 tbs tomato paste
1/4 cup water
1 tbs molasses
1 tbs jam (apricot, peach or cherry) or 2 tbs brown sugar
2 tsp worcestershire sauce
1 tsp dijon mustard
1 tsp kosher salt
2 tbs apple cider vinegar
In a medium sauce pan, heat the oil. Stir in the onion and saute until the onions soften and begin to be translucent, about 4 minutes. Stir in the garlic and cook another minute until the garlic is just fragrant. Stir in the rest of the ingredients. Bring the sauce to a boil and then reduce the heat. Simmer the sauce until it begins to thicken, about 15 minutes. Remove the pan from the heat. If you like a smooth sauce, you can blend the sauce in the pot with an immersion blender or in a blender (I recommend waiting until it cools to use the blender). The sauce will keep for up to two weeks in a airtight container in the refrigerator.
The recipe for the sauce came from one of the books in my Mom's extensive collection. A book that I later, ahem, "borrowed" from her and conveniently never remembered to return. It was a Carolina sauce, sweet from brown sugar and a great vinegar-y tang that I just loved. Over the years I tried other sauces from that book, but it was always the Carolina sauce that had my heart won over.
Perhaps it was nostalgia over that first successful meal I cooked for my Mom, but that sauce is the one that I always measure others against. I suppose, to me, it has reached an almost legendary status. But my beloved sauce would never fly on my dinner table these days. My husband just can't abide by sweet sauces, preferring a bolder smoky flavor instead. I've made my peace with it, but I will always miss my Carolina sauce.
Then came this sauce. My husband's first words to me as he took his first bites of the chicken I had slathered with my newest version were "Please tell me you wrote this recipe down". Winner, winner, chicken dinner! Seriously, is there a better compliment? And thank goodness I had the good instincts to keep track of what I was doing as I created the sauce, because I know I would never be able to repeat this one from memory. Maybe this one will rise to meet the "legendary" status of my very first home made barbeque sauce in time too. I don't know. But for now, it's what we're craving in my house. And that (in the words of Martha Stewart) is a very good thing.
Fire Roasted BBQ Sauce
Makes about 1 1/2 cups.
For the printable recipe, click here.
Barbeque sauce is one of the simplest things to make at home, people are just so used to the convenience of the store bought bottled stuff that they never think to make their own. But truly, nothing compares to what you can make on your own stove top. This sauce has a bit of a spicy kick, but you can use regular fire roasted tomatoes instead of the ones with the green chilies if you don't like the heat (though I would try it this way first). Then there's the tang of the vinegar balanced with just a bit of sweet. It's a sauce for everyone. The best part is that all you do is throw everything in the pot and cook until it's thick. It's that simple.
1 tbs vegetable or canola oil
1/4 cup chopped onion
1 clove garlic, minced
1 cup pureed fire roasted tomatoes with green chilies (if you can't find that in your store, you could use 1 cup pureed fire roasted tomatoes along with 2 tsp chopped canned green chilies)
1 tbs tomato paste
1/4 cup water
1 tbs molasses
1 tbs jam (apricot, peach or cherry) or 2 tbs brown sugar
2 tsp worcestershire sauce
1 tsp dijon mustard
1 tsp kosher salt
2 tbs apple cider vinegar
In a medium sauce pan, heat the oil. Stir in the onion and saute until the onions soften and begin to be translucent, about 4 minutes. Stir in the garlic and cook another minute until the garlic is just fragrant. Stir in the rest of the ingredients. Bring the sauce to a boil and then reduce the heat. Simmer the sauce until it begins to thicken, about 15 minutes. Remove the pan from the heat. If you like a smooth sauce, you can blend the sauce in the pot with an immersion blender or in a blender (I recommend waiting until it cools to use the blender). The sauce will keep for up to two weeks in a airtight container in the refrigerator.
Thursday, January 31, 2013
Home Made Fruit Snacks
I really hadn't even planned on it being a post here on this little ol' blog. But a chance find of these cute ice cube molds in the dollar bin at Target (score!) coupled with pinning this recipe just the day before led to me and my three year old son into dabbling in fruit-snack-making a few days ago. And I can't seem to make myself stop. Not that anyone around here is complaining.
I, like so many of my friends, am trying to get away from the processed snack foods that clog the supermarket aisles. I try to find the snacks with the best possible ingredients when I do buy them, but there are still a few that give me pause when I go to put them in my grocery cart. And fruit snacks (my boys can devour a box in an afternoon) are one of the ones that stand as extremely questionable. If you can find an ingredient list that actually does contain fruit in some form, the sugar content is still super high and I just can't wrap my mind around the idea of eating carnuba wax. It just doesn't seem right. And I can't justify spending upwards of $4 a box on organic, sort of fruity snacks that are loaded with sugar and wax. Yuck. Why do kids like these things?
The solution is simple. Make my own version. The ingredient list is short and sweet- only four ingredients, all of which I would happily eat myself let alone feed to my kids. And it takes all of about an hour from start to snacking time. For a snack that doesn't involve the ingestion of wax, I think I can find the time. Honestly, if my kids continue to be as enthusiastic about them as they have been over the past few days I will be happy to keep popping these babies out of their cute little molds. It's the smallest things in life that make them happiest, isn't it?
Home Made Fruit Snacks
Makes about 3 dozen, depending on the size of your molds. Recipe from An Organic Wife.
For a printable recipe, click here.
This recipe is a very flexible one. You can use fresh or frozen fruit and whatever flavor your little ones love. So far I've done strawberry, mixed berry and peach all from frozen organic fruit as it's the middle of winter. Each is as good as the next and I've had no problem getting any of them to gel. I used small silicone ice cube molds in fun fruit shapes. If you can't find molds like this, you can just as easily use a baking dish to mold them flat and then cut the snacks into cubes. I would recommend a silicone baking pan as they are the best non-stick surface. You can use a regular baking dish as well, simply line it with parchment paper.
1 1/4 cups coarsely chopped fruit (berries, cherries, mangoes or peaches are a good place to start)
1/4 cup lemon juice
2 tbs honey
1/4 cup unflavored gelatin (this is 1 box of the Knox brand, the one you most often find in supermarkets) *** Edited*** An excellent vegetarian substitute for gelatin is agar-agar. There are many online sources.
Begin by heating the fruit and lemon juice in a small saucepan until the fruit begins to soften and break down. You aren't looking to cook the fruit, just make it soft enough to blend smoothly. Once the fruit is soft, add the honey and blend until smooth.
Whisk the fruit mixture while slowly adding the gelatin. Continue until all the gelatin has been incorporated. Don't stop whisking while adding the gelatin or you will have lumpy fruit snacks!
Spoon the fruit mixture into clean, dry molds and refrigerate them until set, up to 1 hour. Alternatively, pour the mixture into a lined baking pan and refrigerate until set. Once set, pop the fruit snacks from the molds. If you used a baking pan to mold your fruit snacks, cut them into 1/2 inch cubes after unmolding the sheet from the pan. You can store your fruit snacks in the refrigerator or on the counter in an airtight container.
Labels:
Family Recipes,
Fruit,
Preservation,
Quick,
Sides,
Snacks,
Vegetarian
Tuesday, January 29, 2013
Big Sur Bakery House-made Buns
Anticipation is a funny thing. You can spend a lot of time and energy waiting for a certain something to happen- thinking about it, wondering what it will be like, getting excited about the experience, worrying about what may happen. Sometimes the event you're anticipating instills fear in you and when it's over, you find that all of the worry and dread were far worse than the thing itself actually was. Kind of like the first day at a new school. Then there's a night like New Year's Eve- we get all excited about how much fun we'll have and how great the party will be and then we're exhausted and want to go home by 10:30 (at least, that's how I always feel). In the end, there's nothing but disappointment. It's the rare occasion, I find, when your experience actually matches the expectation, even rarer still when it exceeds those expectations.
This is one of those rare occasions. Years ago, I checked a cookbook out of my local library hoping to find a recipe or two in it that I might like. But mostly hoping for a good read. It's one of my favorite things to do- pour through cookbooks reading about the author's intention behind the recipes. I find the personal stories fascinating and the motivation for creating the food described within those books often more interesting than the recipes themselves. In this case, the cookbook was The Big Sur Bakery Cookbook. I had never heard of the restaurant, I just thought it seemed like an interesting read and honestly, it was one of the few cookbooks in that small library that I hadn't read yet.
By the time I reached the back cover, I had fallen in love with a place I had never been to. The setting seemed magical: a little bakery tucked into a damp hillside on a lonely stretch of road along the rocky coast. And I loved the stories of how the bakery started from humble beginnings and of the tradition of Thanksgiving dinners for the locals. And darn it if every single one of those recipes didn't sound fabulous to me. I promised myself that someday I would go there and try it for myself.
That day came this past fall. On our trip up the California coast at Thanksgiving, we purposefully drove through Big Sur to view the spectacular scenery. I made sure that my intention to stop at the Big Sur Bakery was known to my husband and thankfully we made a plan to stop for lunch. Here's where the anticipation comes to play. Because, really, what did I know about this place? All I had to go on were my instincts, a few stories in a cookbook, and the reviews on my Urbanspoon app. It's not a whole lot to go by and I hoped and prayed that I wouldn't be let down.
Thank goodness this was one of the exceptions to the anticipation rule. Everyone loved their food (my oldest was over the moon at the size of the meatball slices on his pizza!). As for me, I was truly happy that I was able to enjoy the tiny bakery tucked behind a gas station on a rainy Sunday afternoon with my family. We scrambled through the rain to find a warm and welcoming place filled with the smells of freshly baked bread and brewing coffee. Heaven on Earth to me. I have to confess that the best part of the experience was the bun that my lunch came on- I honestly don't even remember what was in the sandwich, the bun was that good. It fell somewhere between a brioche and challah, but with a lightness that was perfect.
Two months later (while cleaning out my pantry) I found a sheet of paper on which I had written out the recipe for the "house-made buns" taken from that cook book all those years ago. Some things are just meant to be.
Big Sur Bakery House-made Buns
Makes 8 buns. Recipe from The Big Sur Bakery Cookbook: A Year in the Life of a Restaurant.
For a printable recipe, click here.
These buns are the perfect place to sandwich a burger or some grilled steak or chicken. They have a bit of substance to them so they stand up to the meat and the juices, but no so much that you can't get your mouth around the sandwich. When I made them at home I grilled a skirt steak and topped it with caramelized onions, roasted peppers and a pesto mayonnaise. My only compliant is that my poppy seeds didn't stick. Perhaps an egg wash would have been more useful than the butter I used to brush over the buns. If you try it, will you let me know?
1 cup plus 2 tbs milk
1 1/2 tbs yeast
2 tbs butter, room temperature
3 1/4 cup flour
2 1/2 tbs sugar
2 tsp kosher salt
1 large egg
1 tbs poppy or sesame seeds for the tops (optional)
1 tbs melted butter
Place the milk in a small saucepan and heat until lukewarm. Do not boil the milk, you're just getting it warm enough to help bring the yeast back to life, so barely warm to the tough is what you're aiming for. Add the yeast to the warm milk, stir and set aside for 5 minutes.
In a mixer fitted with the dough hook, combine the milk and yeast mixture with half of the flour and mix on low speed. Add the softened butter, egg, salt and sugar one at a time and mix until well incorporated. Slowly add the remaining flour while mixing on low speed. You may need up to 1/4 cup additional flour to get all of the ingredients to come together. You are looking for a soft, smooth dough that is not sticky. Raise the speed of the mixer to medium and knead the dough for two minutes. Raise the speed up to medium high and mix for another 2 minutes.
Transfer the dough to a buttered bowl, cover it with plastic wrap and let sit in a warm spot on the counter for 45 minutes-1 hour, or until doubled in volume.
Preheat your oven to 375 degrees.
Turn the dough out onto a lightly floured surface. Divide it into 8 equal pieces and gently roll each piece into a ball about 3 1/2 to 4 inches in diameter. Place the buns onto a baking sheet lined with parchment paper. Cover with a clean kitchen towel and let the buns rise until nearly doubled in size, 30-45 minutes.
Brush the risen buns with the melted butter and, if using, sprinkle with the poppy or sesame seeds. Bake for 20 to 25 minutes, until the tops are golden brown. Cool on a wire rack. You can keep the buns in an airtight container for a day or two, but they don't stay fresh for too long. You can also freeze them, wrapped well, for up to three months. Any leftovers make lovely french toast or croutons.
This is one of those rare occasions. Years ago, I checked a cookbook out of my local library hoping to find a recipe or two in it that I might like. But mostly hoping for a good read. It's one of my favorite things to do- pour through cookbooks reading about the author's intention behind the recipes. I find the personal stories fascinating and the motivation for creating the food described within those books often more interesting than the recipes themselves. In this case, the cookbook was The Big Sur Bakery Cookbook. I had never heard of the restaurant, I just thought it seemed like an interesting read and honestly, it was one of the few cookbooks in that small library that I hadn't read yet.
By the time I reached the back cover, I had fallen in love with a place I had never been to. The setting seemed magical: a little bakery tucked into a damp hillside on a lonely stretch of road along the rocky coast. And I loved the stories of how the bakery started from humble beginnings and of the tradition of Thanksgiving dinners for the locals. And darn it if every single one of those recipes didn't sound fabulous to me. I promised myself that someday I would go there and try it for myself.
That day came this past fall. On our trip up the California coast at Thanksgiving, we purposefully drove through Big Sur to view the spectacular scenery. I made sure that my intention to stop at the Big Sur Bakery was known to my husband and thankfully we made a plan to stop for lunch. Here's where the anticipation comes to play. Because, really, what did I know about this place? All I had to go on were my instincts, a few stories in a cookbook, and the reviews on my Urbanspoon app. It's not a whole lot to go by and I hoped and prayed that I wouldn't be let down.
Thank goodness this was one of the exceptions to the anticipation rule. Everyone loved their food (my oldest was over the moon at the size of the meatball slices on his pizza!). As for me, I was truly happy that I was able to enjoy the tiny bakery tucked behind a gas station on a rainy Sunday afternoon with my family. We scrambled through the rain to find a warm and welcoming place filled with the smells of freshly baked bread and brewing coffee. Heaven on Earth to me. I have to confess that the best part of the experience was the bun that my lunch came on- I honestly don't even remember what was in the sandwich, the bun was that good. It fell somewhere between a brioche and challah, but with a lightness that was perfect.
Two months later (while cleaning out my pantry) I found a sheet of paper on which I had written out the recipe for the "house-made buns" taken from that cook book all those years ago. Some things are just meant to be.
Big Sur Bakery House-made Buns
Makes 8 buns. Recipe from The Big Sur Bakery Cookbook: A Year in the Life of a Restaurant.
For a printable recipe, click here.
These buns are the perfect place to sandwich a burger or some grilled steak or chicken. They have a bit of substance to them so they stand up to the meat and the juices, but no so much that you can't get your mouth around the sandwich. When I made them at home I grilled a skirt steak and topped it with caramelized onions, roasted peppers and a pesto mayonnaise. My only compliant is that my poppy seeds didn't stick. Perhaps an egg wash would have been more useful than the butter I used to brush over the buns. If you try it, will you let me know?
1 cup plus 2 tbs milk
1 1/2 tbs yeast
2 tbs butter, room temperature
3 1/4 cup flour
2 1/2 tbs sugar
2 tsp kosher salt
1 large egg
1 tbs poppy or sesame seeds for the tops (optional)
1 tbs melted butter
Place the milk in a small saucepan and heat until lukewarm. Do not boil the milk, you're just getting it warm enough to help bring the yeast back to life, so barely warm to the tough is what you're aiming for. Add the yeast to the warm milk, stir and set aside for 5 minutes.
In a mixer fitted with the dough hook, combine the milk and yeast mixture with half of the flour and mix on low speed. Add the softened butter, egg, salt and sugar one at a time and mix until well incorporated. Slowly add the remaining flour while mixing on low speed. You may need up to 1/4 cup additional flour to get all of the ingredients to come together. You are looking for a soft, smooth dough that is not sticky. Raise the speed of the mixer to medium and knead the dough for two minutes. Raise the speed up to medium high and mix for another 2 minutes.
Transfer the dough to a buttered bowl, cover it with plastic wrap and let sit in a warm spot on the counter for 45 minutes-1 hour, or until doubled in volume.
Preheat your oven to 375 degrees.
Turn the dough out onto a lightly floured surface. Divide it into 8 equal pieces and gently roll each piece into a ball about 3 1/2 to 4 inches in diameter. Place the buns onto a baking sheet lined with parchment paper. Cover with a clean kitchen towel and let the buns rise until nearly doubled in size, 30-45 minutes.
Brush the risen buns with the melted butter and, if using, sprinkle with the poppy or sesame seeds. Bake for 20 to 25 minutes, until the tops are golden brown. Cool on a wire rack. You can keep the buns in an airtight container for a day or two, but they don't stay fresh for too long. You can also freeze them, wrapped well, for up to three months. Any leftovers make lovely french toast or croutons.
Thursday, January 3, 2013
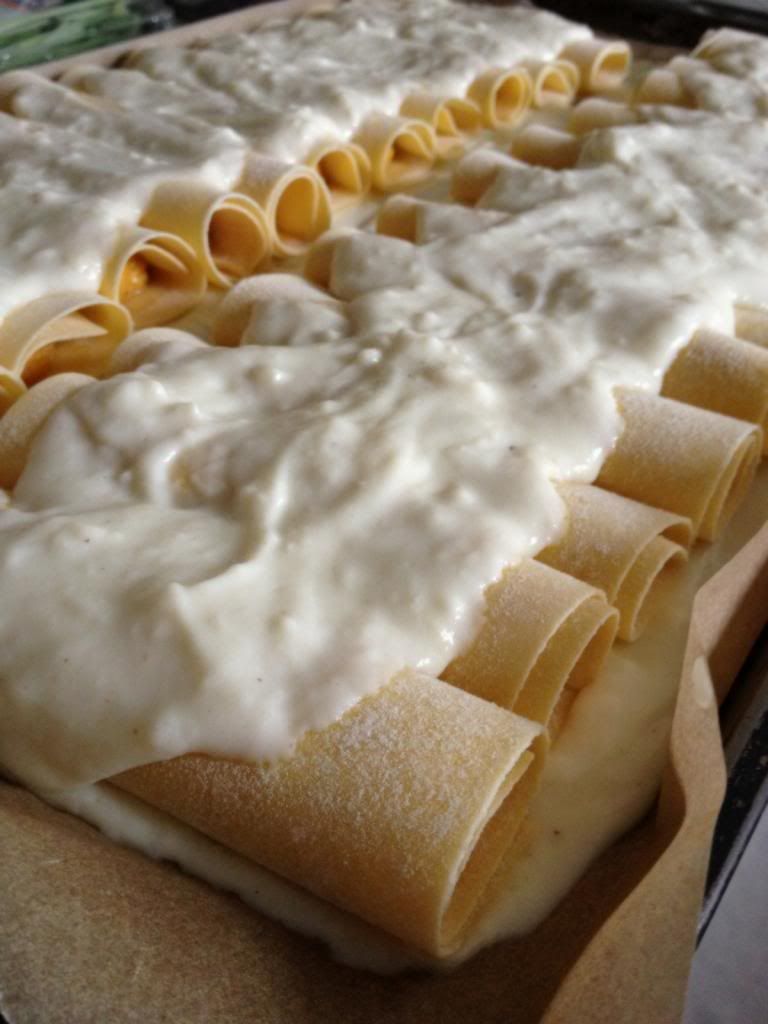
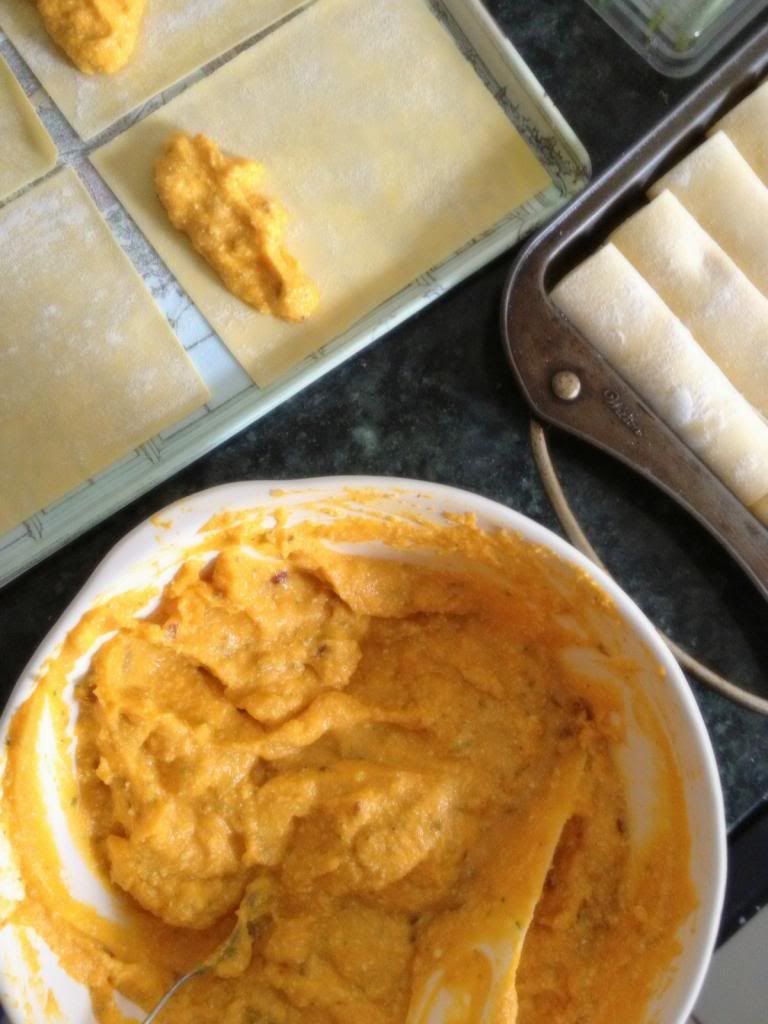
Three Cheese Butternut Squash Cannelloni
Cannelloni....It's a great word, isn't it? Cannelloni, cannelloni, cannelloni. I think I could go around saying it all day and would never get tired of it. And then I might switch to cannolli. One fewer syllables, but just as tasty. Gotta love Italian, it's a language that just rolls off the tongue and the words are always just so much fun.
The family members that I served this to on Christmas Eve had just as much fun with the word cannelloni that I did. The word was bouncing around my Mother in Law's table amid snippets of laughter, conversation, and several mismatched courses of dinner which were only tied together by the people sitting around the table. Everyone brought something to the party- old favorites shrimp creole and potato pierogies, newcomers like spinach salad and chocolate babka and the newest comer to the party, butternut squash cannelloni. By the end of the meal, we were all in agreement about three things. First, it had been an unexpectedly mellow and enjoyable evening. Second, the craziness of the preparation for dinner had been worth it as we shared one very delicious meal. And last, but not least, I needed to share the cannelloni recipe on my little blog. Mostly just because we wanted my niece Jeannette to stop saying "I love these cannelloni"!
I'm happy to oblige. So this is for my Mom, Helen, Jeannette and Mary Ann. I hope you enjoy making the cannelloni for yourselves as much as I did creating it for you.
Three Cheese Butternut Squash Canneloni
Serves 6-8 people.
For the printable recipe, click here.
I made these cannelloni in the heavily Italian-influenced South Jersey. Because of that, I had access to fresh lasagna noodles on Christmas Eve morning. If you aren't lucky enough to live near a market where you can get fresh pasta, you can certainly make your own. May I also suggest that using store bough dried pasta would be perfectly acceptable. You can use lasagna noodles or even shells. You would simply need to cook the dry pasta for about half the suggested cooking time to soften them up enough to work with.
Filling:
1 medium butternut squash, halved lengthwise and seeded
1/2 cup ricotta cheese
1/3 cup parmesean or pecorino cheese
1/4 tsp nutmeg
1-2 tbs fresh sage (to taste)
1/2 cup chopped hazelnuts (not quite coarsely chopped, but not fine either- somewhere in between)
1 lb fresh lasagna noodles
Bechamel:
2 tbs butter
3 tbs flour
2 1/4 cup milk
2 cups grated gruyere cheese
1/4 tsp nutmeg
salt and pepper to taste
Preheat your oven to 425 degrees. Drizzle the cut sides of the squash with a bit of olive oil and place them face down on a baking sheet. Roast for 40-45 minutes or until a knife easily passes through the flesh. Let cool completely.
Scoop the cooled squash from the skin and place in a food processor. Puree the squash. Add the ricotta, parmesean, nutmeg and sage to the food processor and process just until the ingredients are thoroughly mixed. Transfer to a bowl and stir in the hazelnuts. Season with salt and pepper to taste. The filling can be used right away or made a day ahead and refrigerated.
Start the bechamel sauce by melting the butter in a large saucepan. Sprinkle the flour over the melted butter and stir for 1 minute. Do not let the flour brown. Slowly add the milk, stirring constantly to avoid lumps. Over medium heat, cook the sauce until it becomes thick and bubbly, stirring frequently. Remove from the heat and add the nutmeg and gruyere cheese. Stir until the cheese is melted. Let the sauce cool while you prepare the cannelloni.
Bring the oven to 375 degrees. Soak the fresh lasagna noodles for 1 minute in warm water. Remove them and gently dry on a tea towel. Cut them in half crosswise so that you have 4 inch lengths of pasta. Spoon about 2 tablespoons of filling across the short side of the pasta about 1/2 inch from the edge. Starting from that edge, roll the pasta to encase the filling and place seam side down on a rimmed baking sheet that has been spread with a layer of the bechamel sauce. Continue filling and rolling the pasta. You should be able to fit two rows of cannelloni on your baking sheet. If you need to pack them tightly, that is just fine. Spoon the remaining bechamel along the center of each row of cannelloni, gently spreading it a bit toward the edges.
Bake covered with foil for 25 minutes. Remove the foil and bake for an additional 20 minutes until the sauce is lightly golden and bubbly and the pasta is cooked through. Let the cannelloni stand for 5 minutes before serving.
The family members that I served this to on Christmas Eve had just as much fun with the word cannelloni that I did. The word was bouncing around my Mother in Law's table amid snippets of laughter, conversation, and several mismatched courses of dinner which were only tied together by the people sitting around the table. Everyone brought something to the party- old favorites shrimp creole and potato pierogies, newcomers like spinach salad and chocolate babka and the newest comer to the party, butternut squash cannelloni. By the end of the meal, we were all in agreement about three things. First, it had been an unexpectedly mellow and enjoyable evening. Second, the craziness of the preparation for dinner had been worth it as we shared one very delicious meal. And last, but not least, I needed to share the cannelloni recipe on my little blog. Mostly just because we wanted my niece Jeannette to stop saying "I love these cannelloni"!
I'm happy to oblige. So this is for my Mom, Helen, Jeannette and Mary Ann. I hope you enjoy making the cannelloni for yourselves as much as I did creating it for you.
Three Cheese Butternut Squash Canneloni
Serves 6-8 people.
For the printable recipe, click here.
I made these cannelloni in the heavily Italian-influenced South Jersey. Because of that, I had access to fresh lasagna noodles on Christmas Eve morning. If you aren't lucky enough to live near a market where you can get fresh pasta, you can certainly make your own. May I also suggest that using store bough dried pasta would be perfectly acceptable. You can use lasagna noodles or even shells. You would simply need to cook the dry pasta for about half the suggested cooking time to soften them up enough to work with.
Filling:
1 medium butternut squash, halved lengthwise and seeded
1/2 cup ricotta cheese
1/3 cup parmesean or pecorino cheese
1/4 tsp nutmeg
1-2 tbs fresh sage (to taste)
1/2 cup chopped hazelnuts (not quite coarsely chopped, but not fine either- somewhere in between)
1 lb fresh lasagna noodles
Bechamel:
2 tbs butter
3 tbs flour
2 1/4 cup milk
2 cups grated gruyere cheese
1/4 tsp nutmeg
salt and pepper to taste
Preheat your oven to 425 degrees. Drizzle the cut sides of the squash with a bit of olive oil and place them face down on a baking sheet. Roast for 40-45 minutes or until a knife easily passes through the flesh. Let cool completely.
Scoop the cooled squash from the skin and place in a food processor. Puree the squash. Add the ricotta, parmesean, nutmeg and sage to the food processor and process just until the ingredients are thoroughly mixed. Transfer to a bowl and stir in the hazelnuts. Season with salt and pepper to taste. The filling can be used right away or made a day ahead and refrigerated.
Start the bechamel sauce by melting the butter in a large saucepan. Sprinkle the flour over the melted butter and stir for 1 minute. Do not let the flour brown. Slowly add the milk, stirring constantly to avoid lumps. Over medium heat, cook the sauce until it becomes thick and bubbly, stirring frequently. Remove from the heat and add the nutmeg and gruyere cheese. Stir until the cheese is melted. Let the sauce cool while you prepare the cannelloni.
Bring the oven to 375 degrees. Soak the fresh lasagna noodles for 1 minute in warm water. Remove them and gently dry on a tea towel. Cut them in half crosswise so that you have 4 inch lengths of pasta. Spoon about 2 tablespoons of filling across the short side of the pasta about 1/2 inch from the edge. Starting from that edge, roll the pasta to encase the filling and place seam side down on a rimmed baking sheet that has been spread with a layer of the bechamel sauce. Continue filling and rolling the pasta. You should be able to fit two rows of cannelloni on your baking sheet. If you need to pack them tightly, that is just fine. Spoon the remaining bechamel along the center of each row of cannelloni, gently spreading it a bit toward the edges.
Bake covered with foil for 25 minutes. Remove the foil and bake for an additional 20 minutes until the sauce is lightly golden and bubbly and the pasta is cooked through. Let the cannelloni stand for 5 minutes before serving.
Wednesday, December 12, 2012
Pizzelle | Brown Butter Maple and Traditional Anise {The Great Food Blogger Cookie Swap 2012}
There's a lot of talk about my family in this space. My Mom and Nana are enormously influential in my life and I feel like so much of what I do is in honor of what they taught me. The title of my blog says it all- too me food and cooking is at the heart of everything I do for and with my family. It is me giving my heart to others.
I don't talk too much about the other side of my family, the family that I married into when I said "I do" 13 years ago. That's not to mean that I don't value them or haven't learned an enormous amount from them, because I have. It's just that for the most part, food was a necessity for them, not a joyful experience or the inspiration for cherished memories like it was during my childhood. These cookies are one of the few rare exceptions and the thing that connects my food heritage with my in-laws', most especially my father in law.
My father in law grew up a poor immigrant from the Ukraine in an even poorer coal mining town in Pennsylvania. This was the Great Depression, so there were no luxuries to speak of and all the children did their part to help the family. When his mother passed away, my father in laws' oldest sister, Annie, stepped in to raise him and his siblings. Annie was sister and mother to him. Though I never got to meet her, I hear the stories and know that she must have been a very special woman.
When Annie married a man of Italian heritage, her Eastern European roots intertwined with his and the Italian favorites of her husband became the mainstay of her cooking. She excelled at it from what I hear. Every Christmas, both Ukrainian and Italian treats were made and Annie's younger brother (my father in law) fell in love with a simple Italian cookie, the pizzelle. So much so that when his own children grew up and got married, he made sure he sent each off with a pizzelle maker of his or her own. That's how I aquired mine and I cherish it.
My father in law likes to act gruff and tough. He's a man who grew up in hard times and did everything he could to instill a strong work ethic in his children, while setting an excellent example himself. He did a fine job, I must say. But under that tough-as-nails exterior is a man with a very generous heart. A bit like Santa Claus, he's a giver who doesn't ask for acknowledgement or thanks. I saw that side of him for the first time as he gave me this pizzelle maker with a twinkle in his eye. I will remember it forever.
These cookies were sent to three lovely ladies and fellow food bloggers as part of the Great Food Blogger Cookie Swap of 2012. I was so excited to take part in this event for the second year in a row with almost 500 other food bloggers. In return I received some very tasty cookies. There were Mexican Hot Chocolate cookies from Deetz at Cookies and Kiddos and Lemon Honey Drop cookies from Brenda of Meal Planning Magic. I'm still waiting on my third dozen, but I'm sure it will be here any day now. Thanks ladies!
Pizzelle
I don't talk too much about the other side of my family, the family that I married into when I said "I do" 13 years ago. That's not to mean that I don't value them or haven't learned an enormous amount from them, because I have. It's just that for the most part, food was a necessity for them, not a joyful experience or the inspiration for cherished memories like it was during my childhood. These cookies are one of the few rare exceptions and the thing that connects my food heritage with my in-laws', most especially my father in law.
My father in law grew up a poor immigrant from the Ukraine in an even poorer coal mining town in Pennsylvania. This was the Great Depression, so there were no luxuries to speak of and all the children did their part to help the family. When his mother passed away, my father in laws' oldest sister, Annie, stepped in to raise him and his siblings. Annie was sister and mother to him. Though I never got to meet her, I hear the stories and know that she must have been a very special woman.
When Annie married a man of Italian heritage, her Eastern European roots intertwined with his and the Italian favorites of her husband became the mainstay of her cooking. She excelled at it from what I hear. Every Christmas, both Ukrainian and Italian treats were made and Annie's younger brother (my father in law) fell in love with a simple Italian cookie, the pizzelle. So much so that when his own children grew up and got married, he made sure he sent each off with a pizzelle maker of his or her own. That's how I aquired mine and I cherish it.
My father in law likes to act gruff and tough. He's a man who grew up in hard times and did everything he could to instill a strong work ethic in his children, while setting an excellent example himself. He did a fine job, I must say. But under that tough-as-nails exterior is a man with a very generous heart. A bit like Santa Claus, he's a giver who doesn't ask for acknowledgement or thanks. I saw that side of him for the first time as he gave me this pizzelle maker with a twinkle in his eye. I will remember it forever.
These cookies were sent to three lovely ladies and fellow food bloggers as part of the Great Food Blogger Cookie Swap of 2012. I was so excited to take part in this event for the second year in a row with almost 500 other food bloggers. In return I received some very tasty cookies. There were Mexican Hot Chocolate cookies from Deetz at Cookies and Kiddos and Lemon Honey Drop cookies from Brenda of Meal Planning Magic. I'm still waiting on my third dozen, but I'm sure it will be here any day now. Thanks ladies!
Pizzelle
Makes about 2 dozen cookies. Adapted from The International Cookie Cookbook, by Nancy Baggett.
Click here for the printable recipe.
Traditional Anise Pizzelle:
10 tbs butter, melted and cooled
2 1/4 cups all-purpose flour
1/4 tsp baking powder
2 eggs
2/3 cup sugar
1 tsp anise extract
1 tsp anise seeds
Heat the pizzelle maker according to manufacturer's directions.
In a large bowl, beat the eggs and sugar until light and frothy. Add the anise extract and anise seeds and mix for just a moment. Add the dry ingredients and beat on low speed until the mixture is smooth. Add in the cooled butter and mix just until incorporated.
Lightly brush the interior surfaces of the pizzelle maker with vegetable oil, making sure to get into the grooves, or spray with non-stick spray. Place a heaping tablespoon of batter slightly behind the center of the pizzelle pressing area. Close the lid and squeezing tightly or locking the clasp, cook for 20 seconds. Check for desired brownness of the pizzelle and if necessary cook for 5 seconds more. We like our lightly browned, so 20 seconds is perfect. Using a heat-proof spatula, gently remove the cookie from the iron and lay flat on waxed or parchment paper to cool. Repeat with remaining dough. Cookies will keep for up to 5 days when stored in an airtight container, though they may soften.
Maple Brown Butter Pizzelle:
10 tbs butter
2 1/4 cup flour
1/4 tsp baking powder
2 eggs
2/3 cup maple sugar
3 tbs good quality maple syrup
Follow the same procedure as the traditional pizzelle, the only difference is that you will need to brown the butter first. In a small saucepan, gently heat and melt the butter. Continue heating it until the milk solids have turned a golden brown and you can smell a distinctly nutty aroma. Let cool and continue with the rest of the steps.
Click here for the printable recipe.
Traditional Anise Pizzelle:
10 tbs butter, melted and cooled
2 1/4 cups all-purpose flour
1/4 tsp baking powder
2 eggs
2/3 cup sugar
1 tsp anise extract
1 tsp anise seeds
Heat the pizzelle maker according to manufacturer's directions.
In a large bowl, beat the eggs and sugar until light and frothy. Add the anise extract and anise seeds and mix for just a moment. Add the dry ingredients and beat on low speed until the mixture is smooth. Add in the cooled butter and mix just until incorporated.
Lightly brush the interior surfaces of the pizzelle maker with vegetable oil, making sure to get into the grooves, or spray with non-stick spray. Place a heaping tablespoon of batter slightly behind the center of the pizzelle pressing area. Close the lid and squeezing tightly or locking the clasp, cook for 20 seconds. Check for desired brownness of the pizzelle and if necessary cook for 5 seconds more. We like our lightly browned, so 20 seconds is perfect. Using a heat-proof spatula, gently remove the cookie from the iron and lay flat on waxed or parchment paper to cool. Repeat with remaining dough. Cookies will keep for up to 5 days when stored in an airtight container, though they may soften.
Maple Brown Butter Pizzelle:
10 tbs butter
2 1/4 cup flour
1/4 tsp baking powder
2 eggs
2/3 cup maple sugar
3 tbs good quality maple syrup
Follow the same procedure as the traditional pizzelle, the only difference is that you will need to brown the butter first. In a small saucepan, gently heat and melt the butter. Continue heating it until the milk solids have turned a golden brown and you can smell a distinctly nutty aroma. Let cool and continue with the rest of the steps.
Subscribe to:
Posts (Atom)