Showing posts with label Spring. Show all posts

Friday, March 18, 2016

Saint Joseph's Cakes {Nana's Recipe}


A few years ago my mom sent my sister and I a message asking us what recipes we'd really love to have from when we were kids that she and our grandmother had made for us.  We sent back a whole list of recipes, things that we rarely make ourselves and some that have become staples, that were the day to day must haves from our childhoods.  There were pasta and bread recipe requests as well as the cakes and cookies that were the highlights of family meals and celebrations.  Clearly, Mom had a plan to do something with this list of favorites.  But I think life got in the way and she was never able to do what she had hoped to.


Fast forward a year and I was growing weary of asking Mom for the same recipes over and over again (Why did I not write that down?  Where did that one go in the latest move?).  Plus, I was pregnant with my third baby and eager to get family recipes all in one place so that I could pass them on to my children.  So I made a determined effort to get all of the important baking recipes from my Mom and she and I collaborated in putting together a collection of recipes and stories in one book.  When we made our list of recipes to include, there were some that were absolutely non-negotiable.  Mostly these were the recipes from my Nana that came from Italy and would be completely lost of we didn't make the effort to write them down now.  This "cake" was one of them.

Nana made these cakes every year for St. Joseph's Day, a holiday that is celebrated in her Italian home region on March 19 every year.  They were one of my absolute favorites growing up- a sort of doughnut/French cruller stuffed full with sweet ricotta and chocolate chips.  It was one of the first that I made on my own for my college roommates and even for my students every year when I was teaching.  Now my own children love them and ask for them from time to time.  There was no way that I was going to leave this treat out of our collection.  I did a bit of streamlining of the ricotta filling recipe, but other than that this recipe is all Nana.  I wouldn't have it any other way.


Saint Joseph's Cakes
Makes at least one dozen 3 inch cakes.
For the printable recipe, click here.

These pretty little cakes are very much like a fried cream puff.  Keeping that in mind, they don't do too well after about a day.  So plan to eat them or share them all the day they are made.  Don't fill them until you are ready to serve or they will become too soggy.  The filling is the same as you would use to fill a cannoli so any leftover can be used to fill bought cannoli shells or even baked cream puffs (or if you are like me, straight off the spoon standing in front of the fridge).

½ cup neutral-flavored oil                                   
1 cup water                     
Salt
1 cup pastry (or all-purpose) flour
1 tbs sugar    
4 large eggs                                           
½ tsp each grated lemon and orange rind

Also: Neutral-flavored oil for frying
Chocolate Chip Ricotta Cream (recipe follows)
Powdered sugar for dusting the tops

 Cut several squares of parchment paper into 4 inch squares.

Combine oil, salt, and water in a saucepan. Bring to a boil. Add flour all at once and mix well with a wooden spoon until the dough leaves the side of pan. Remove from the stove and let it cool off a little.  Add eggs, one at a time, mixing well after each addition. Add sugar, grated peels and mix well again.

Heat oil in a large pan that’s about 4 or 5 inches deep.  Fill a large pastry bag fitted with a large star tip with the mixture. On each square of parchment paper, pipe out a 3” circle of dough. When the oil starts to shimmer on the surface drop the parchment with the dough circles into the oil. The paper will come off in a few seconds and you can remove it. Fry until golden brown, flip, and fry until the other side is golden. Let cool completely.

Slice in half and fill with chocolate chip ricotta cream.  Dust with powdered sugar.

Chocolate Chip Ricotta Cream
2 3/4 cup ricotta
3/4 cup powdered sugar
1/4 cup mini chocolate chips
1 tsp vanilla extract
1 tsp finely grated orange zest
1/2 tsp fresh orange juice

Line a fine mesh sieve with a layer of cheesecloth and place over a bowl.  Put the ricotta into the sieve and place the whole thing into the refrigerator to drain overnight (covered with plastic wrap).

In a large bowl, whip the drained ricotta and powdered sugar with a wooden spoon or spatula until fluffy.  Beat in the chocolate chips, vanilla, orange zest and juice.  Refrigerate, covered, at least one hour or until ready to use.


Friday, May 29, 2015

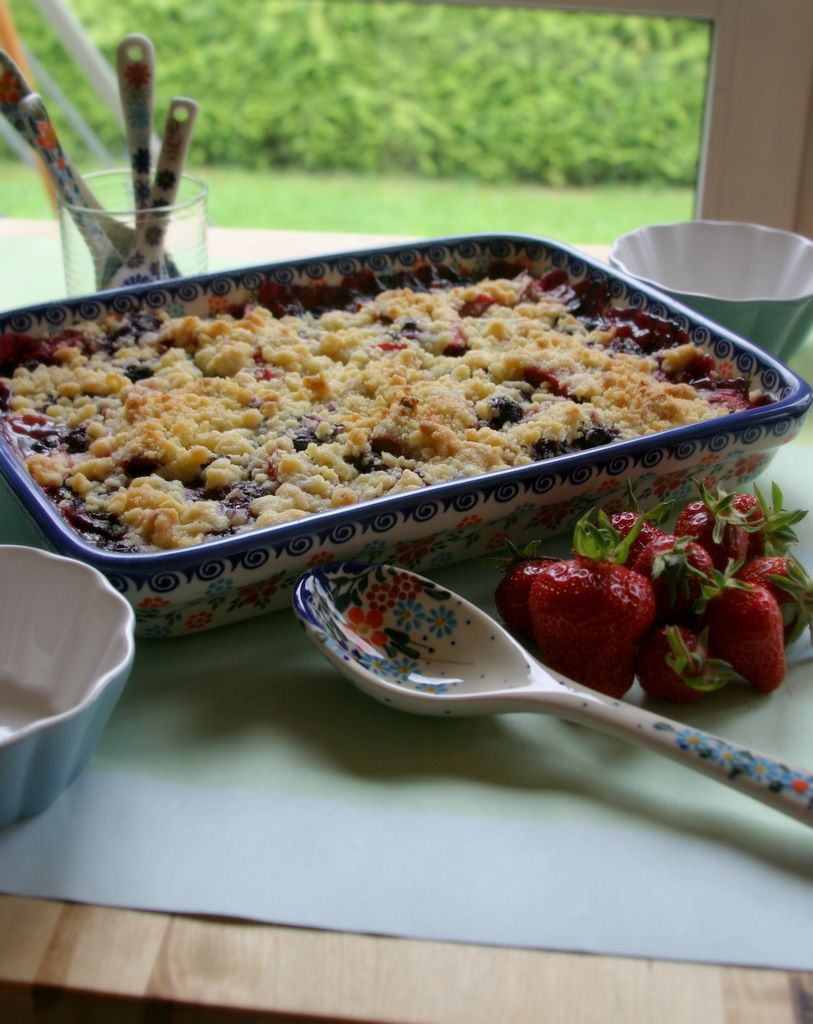
Blueberry and Rhubarb Crumble


I realized that I just missed the 4th anniversary of my little blog!  How on Earth I didn't realize it or find it important enough to mark the occasion, I do not know.  Plus I've let nearly a month go by without a post.  What, oh what, is happening here?

Thursday, March 19, 2015

Spring Kohlrabi Salad


So I don't really remember why we got it going, but somehow an old college roommate and I have started a little farmer's market Facebook game.  It's called "Can you guess the vegetable?".  The whole thing cracks me up because before I met this roommate, she was never into cooking.  A few lessons in our tiny apartment kitchen started what I like to think of as a deep appreciation for getting her bake on, and I'm happy to take all of the credit!

Our game goes a little something like this-

1. I visit the weekly market here in town.  I generally get inspired to take a bunch of photos while wandering from tent to tent, so I snap a few as I go.

2. I post a picture of something odd or particular to Germany and she guesses what it might be (though she has gotten it right, more times than not).


I usually get some odd looks from the Germans selling their goods when I break out the camera or my phone.  It's like they can't figure out what could be so picturesque about their crates and stacks of fruits and veggies.  Of course, to me not much (except my gorgeous kiddos) could be any prettier.  Sometimes stealth is the wisest way to get a great photo, as is the case with the lovely older lady who had no idea I was taking pictures of the gently stacked flowers in her shopping basket this morning (so pretty!).

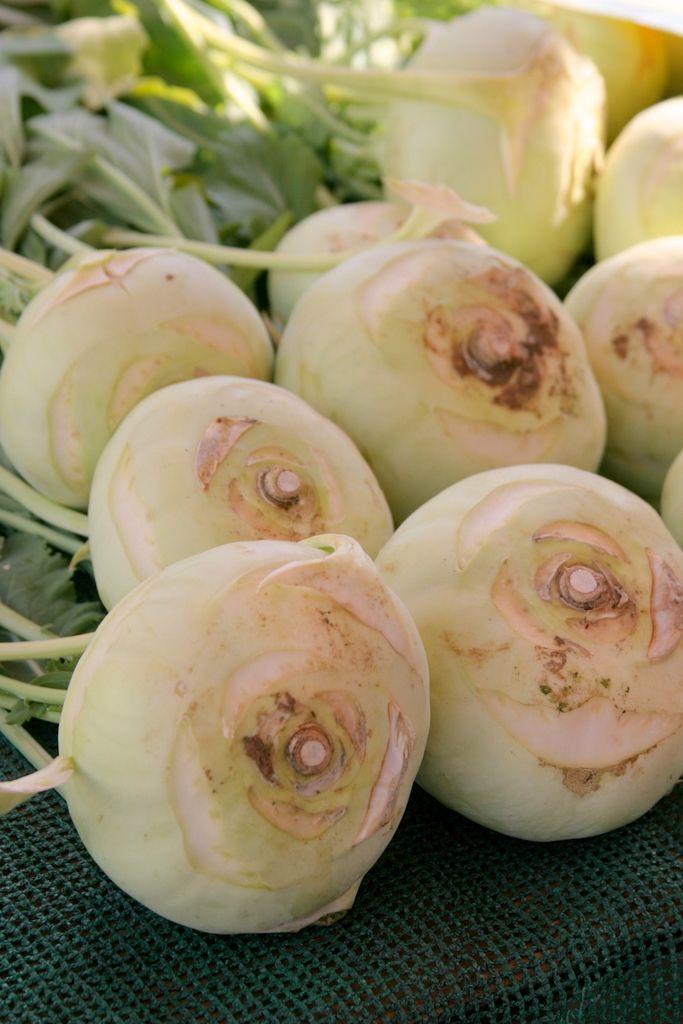
Last week's guessing game centered around the kohlrabi.  It's a totally alien-looking veggie that I had never encountered before moving to Germany.  Though I've noticed it's growing popularity in the US.  My roomie didn't know what it was, but my awesome sister guessed it right away.  I love kohlrabi raw- it's crunchy and juicy very much like an apple but with a sweet earthy flavor reminiscent of broccoli (it's a cousin after all) and cabbage.  But it's also great tossed with olive oil, salt and pepper and roasted along with root veggies.


The conversation that ensued after  disclosing the identity of the "mystery veggie" last week inspired me to make sure I picked up some kohlrabi this week.  As I walked around the market this morning I found several farmers selling giant green heads of it so I had my pick.  Yea me!  My basket also filled up with all sorts of late winter and early spring stuff and I could absolutely feel the transition in the air.  The warm sun, the bushels of tulips, radishes, spring onions.  It was like a perfect storm of inspiration.

I could feel the hibernation of winter shaking off.  The salad that I created when I got home was only the first step.  Hopefully the next few will take me towards asparagus and strawberries.  Then on to the beautiful apricots that lead the way to everything that is delicious and wonderful about summer.  In the meantime, the leftovers of this first salad of many are waiting for me to dig into again tomorrow.

Sweet!


Spring Kohlrabi Salad
Serves 6 as a side dish.
For the printable recipe, click here.

This crunchy salad is more like a slaw than a traditional salad.  Lots of texture and a great balance of flavors.  The dressing is light and slightly tangy with buttermilk and lemon.  I like the nuts in the salad, but you can certainly leave them out if you have nut issues.  Today I used almonds but would have tossed in walnuts if I had them.  Both are equally delicious in the salad.  And as a bonus, this is one salad that keeps well so it's perfect to make ahead or take along to a potluck or BBQ.  One further note- kohlrabi has very thick skin so you definitely need a good sharp peeler.  It might even take two passes to get all of the skin away.

1 pound kohlrabi (1 large head), peeled and sliced thinly into matchsticks
1 medium sweet apple such as honeycrisp or pink lady, sliced thinly into matchsticks
2 or 3 radishes, diced or sliced into matchsticks
1 small spring onion or 1 scallion, thinly sliced
2 tbs chopped parsley
3 tbs sliced almonds or chopped walnuts

1/4 cup buttermilk
1 tbs fresh lemon juice
1/2 tsp honey
1 1/2 tsp whole grain or dijon mustard

Place all the salad ingredients into a large bowl.  In a small bowl whisk together the buttermilk, lemon juice, honey and mustard.  Pour the dressing over the salad and toss gently.

The salad can be kept in the refrigerator overnight in a sealed container.

Thursday, March 5, 2015

Small Batch Ginger Lemon Rhubarb Jam


I'm not going to say too much today.  I just want to bask in the bright pink color of this jam.  It's gorgeous, isn't it?

I found the first rhubarb of the year at the market this past weekend and my incredibly picky middle kiddo practically begged me to buy an armload of the stalks.  He loves rhubarb, which I find amazing considering the enormous list of foods he won't eat.  So I caved and brought home a bundle of the bright pink veggie ready to do some recipe brainstorming.  So far we've done this jam and a rhubarb crostata.  Both of which have received high marks from all of my men.  And the season is just beginning. 

I'm ready for you, Spring!


Small Batch Ginger Lemon Rhubarb Jam
Inspired by a jam in the book, Jam On: The Craft of Canning Fruit, by Laena McCarthy.
Makes 1 pint.
For the printable recipe, click here.

I love the flavor combinations in this jam. It's a bit tart and the gingery background notes make it different from the typical rhubarb and strawberry offerings.  It takes just a bit of time to make because you need to macerate the rhubarb to draw out the juices, but the time commitment is well worth it.  Otherwise it's a simple, straightforward jam in a style that I prefer- low sugar and no added pectin.  The color will vary depending on the rhubarb that you have.  Mine was perfectly pink with no green so the end result is bright pink but if your rhubarb is on the greener side your jam will be darker in color.  Don't panic- it's the natural variation of the vegetable.

1 lb rhubarb (about 3 cups diced)
1 tbs fresh squeezed lemon juice
zest of 1 lemon
1 cup sugar

3 tbs water
1/3 cup sugar
1 1 inch thick slice of peeled ginger

Stir together the rhubarb, lemon juice, lemon zest and 1 cup of sugar in a medium saucepan.  Cover the pan with plastic wrap and let sit on your counter.

In the meantime, in a small saucepan stir together the water, 1/3 cup of sugar and ginger.  Place the pan over medium heat and bring to a boil.  Lower the heat and simmer for a few minutes to dissolve the sugar.  Remove from the heat and let cool completely.

When the ginger simple syrup has cooled, pour it into the saucepan containing the rhubarb mixture, stir and replace the cover.  Let the mixture sit on the counter for 2 hours.

After 2 hours remove the plastic wrap cover and the piece of ginger from the pan.  Place the rhubarb mixture on the stove over medium high heat.  Stir frequently while cooking at a low boil for about 15 minutes or until the rhubarb has broken down and the mixture is no longer watery.  Keep a watchful eye on it towards the last few minutes as you don't want the jam to scorch.  This jam has no added pectin so it will seem a little looser than a commercial jam, but that's okay.  To test if your jam has set place a metal spoon in the freezer while you cook the jam.  When you think your jam is done, place a small amount of it on the spoon and place it back in the freezer for 3 minutes (remove your pot from the heat while you wait).  When you remove the spoon from the freezer the jam should cling to the spoon and not run off when the spoon is tilted.  If it runs, place the pot back on the stove for another few minutes.

Place the completed jam in a pint jar, cover and refrigerate until cool.  The jam is best used within three weeks.  Keep refrigerated.


Thursday, July 10, 2014

Mint Tea


I've gotten a lot of inspiration from our travels around Europe.  My job as we prepare for our trips is to research the area we will be visiting.  I look up all there is to see and do at our destination.  My husband calls me "our travel agent", a role I am happy to fill.  It's really fun to hunt around for information- I read the guidebooks, ask around for experienced travelers to the area and sift through the multitudes of websites available to me to try to get to know an area before we get there.  I usually end up making a huge list that I know we will never get to complete, but I'd rather have lots of options so that we can choose what to do based on our mood at the moment.


Sometimes my lists include food options- places that people online rave about perhaps or somewhere that I've read about in a review that seems to serve the most traditional foods in the area.  But most often we simply wing it.  We ask the locals or wander the streets until something just seems right- usually it's a little place just off the main square that is full of locals.  Both my husband and I really enjoy seeking out the traditional foods of a place.  It's not only a way to taste the local foods, it's also a peek into the culture of the people.  And that's the best part for me.  You really get to know someone (or a whole group of folks) by what is found on the menus.


It's been a few months since we visited The Netherlands but a few shining food moments still linger in my memory.  The cheese is an easy one- any place that can put together entire towns based on the cheese industry is my kind of place.  Gouda and Edam are just a couple of notable examples.  The other dish (of sorts) that I noticed at every restaurant we ate or drank at was a simple tea.  Europeans might be known for their love of coffee, but the Dutch seem to have an equal fondness for tea.  But not the sort of dried black teas that they brought back from their exploration of the Indian continent.  I noticed quite a lot of people lounging after their meals with glasses of hot mint tea.  Very Moroccan inspired, if you ask me.  And certainly memorable.


So in the face of a huge bounty of mint from my garden and very few ideas as to what to do with it all, I called up my memory of the Dutch after dinner drink and set out to make my own mint tea.  Of several varieties of mint I have growing, I chose a Moroccan variety.  It just seemed a natural fit.  Moroccan mint is very peppermint-like, but a bit sharper (zingy would be a good description).  And with just a touch of honey and hot water, it makes a wonderful tea.  With each sip I am brought back to the canals, tulips and wonderful city atmosphere of Delft and Haarlem.


Mint Tea
Serves from one to many.
For a printable recipe, click here.

There really is no recipe for this tea.  It's so simple.  I'll give you a suggested amount to have per cup of tea, but it's ultimately up to you and your dinner guests.  If you have the access to several mint varieties, try them out to see what you like best.  I like pineapple mint, which is sweeter than traditional mint and has the aroma of pineapple, as well as the Moroccan variety.  I used a very mild blossom honey (from Slovenia!) to gently sweeten the tea and not compete too much with the mint flavor.  The glasses that I prefer for the tea are smaller juice sized ones.


Per glass:
1-2 sprigs of mint, rinsed
1/2-1 tsp light-flavored honey
hot, but not boiling, water

Place the sprigs of mint into the glass.  Pour the hot water over the tea and then stir in the honey to taste.  Let the tea steep for 4-5 minutes.


Monday, June 2, 2014

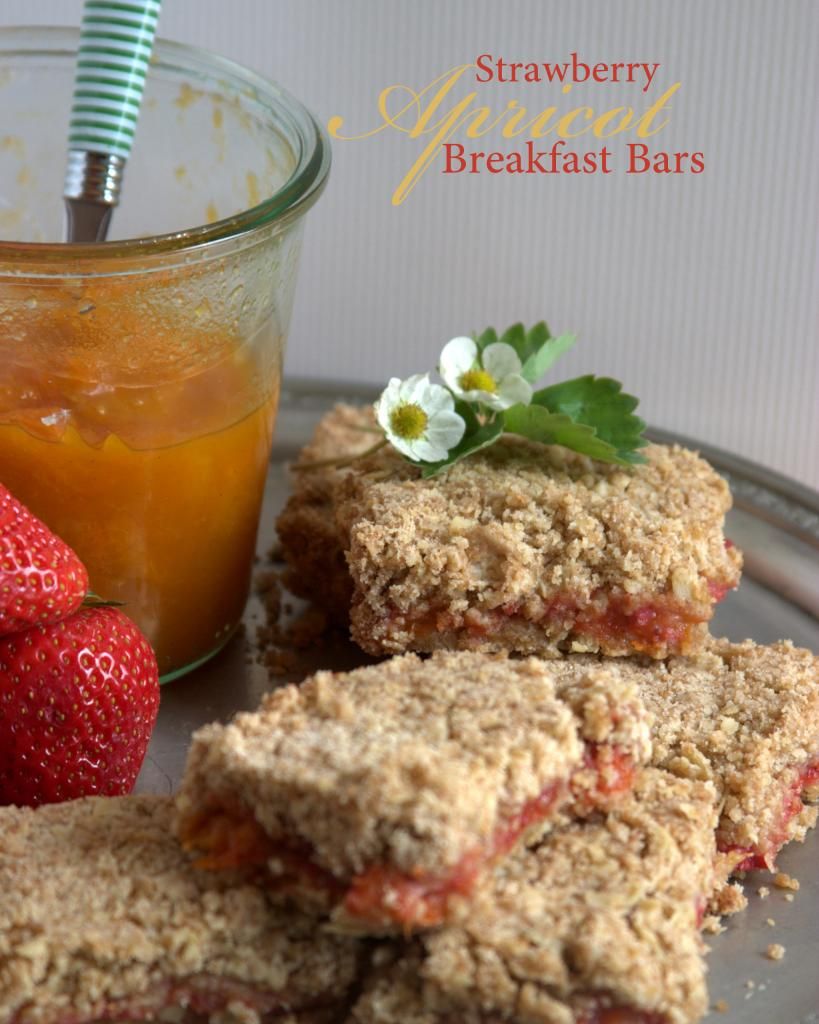
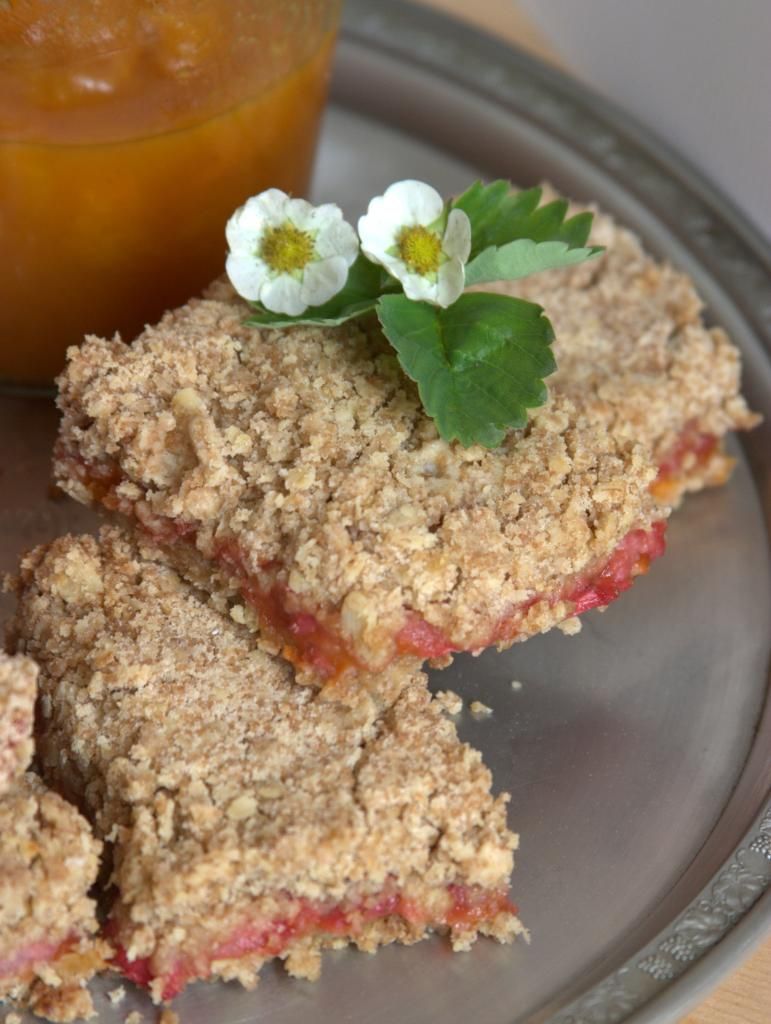
Strawberry Apricot Breakfast Bars


When I started this blog 3 years ago, I was simply trying to document my family's favorite recipes and maybe have a place to point friends to when they asked for the recipes.  I hadn't counted on enjoying it as much as I do or falling in love with food photography (even though I'm clearly still not the world's best at it).  I somehow never dreamed that it would still be going all these many posts later.


I've been going though a bit of a funk lately.  I'm going to chalk it up to being 6 months pregnant and just exhausted, both mentally and physically.  I have these moments of energy and inspiration and can cook, bake and photograph up a storm.  But they run out quickly and I'm back to  feeling blah.  So I've actually got a ton of recipes hanging out in files all edited and ready to go, but I run out of motivation when it comes to getting them out to my (tiny but loyal) following.  This recipe is one of those that's been lingering for a while, but so worthy of sharing.

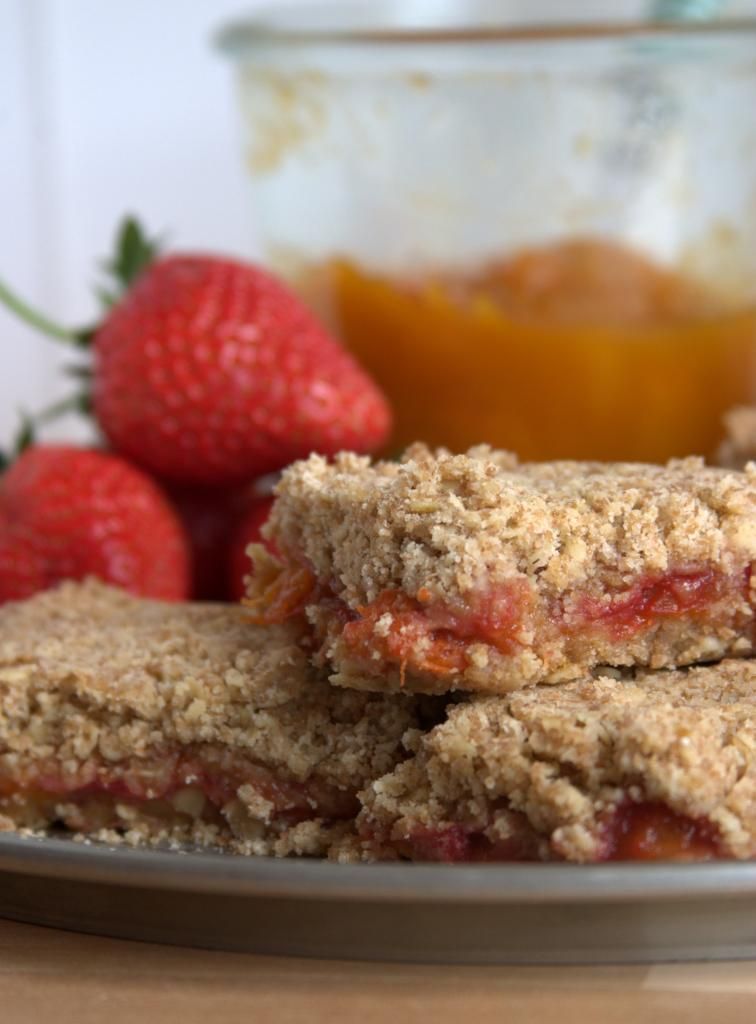
The inspiration for our favorite breakfast bars was a particularly good market day a few weeks back.  Both strawberries and apricots were beginning to make their way to the market and as they are among my little guy's favorites, I brought home a whole lot of both.  The apricots were, as early season fruit often are, a bit on the tart side. So instead of eating out of hand, I turned them into a quick jam.  Coupled with a recipe from the wonderful Pioneer Woman and the few remaining strawberries I whipped the bars up.  The rest is history, as they say, and I have made these bars at the request of my kids several times since.


Strawberry Apricot Breakfast Bars
Makes 12 bars.  Recipe adapted from Pioneer Woman.
For the printable recipe, click here.

I like to throw a bit of whole wheat flour into the mix with these bars.  Maybe it's only psychological, but I feel like I making them healthier by doing so.  I eat the bars for breakfast and it makes me feel better about it.  These are simple to whip up and can be made completely by hand or in the food processor.  Feel free to change up the fruit to suit your taste.  The bars would be equally delicious for dessert served with vanilla ice cream. 

1 1/2 cup all purpose flour
1/2 cup whole wheat flour
1 cup old fashioned oats (not quick cooking)
1 cup brown sugar
1 tsp baking powder
1 tsp grated nutmeg
14 tbs butter (2 sticks minus two tablespoons), cut into small pieces
about 1 cup apricot jam
handful of strawberries, washed, hulled and sliced

Preheat your oven to 350 degrees.  Butter a 9 x 13 inch pan and set aside.

In a large bowl, whisk together all of the dry ingredients (all purpose flour through nutmeg).  Blend the butter into the flour mixture with your fingertips or a pastry blender.  You want the butter to be well blended with the largest of any remaining pieces being no bigger than a pea.  The mixture should hold together when pressed between your fingers.

Press half of the crust mixture into the prepared pan.  Spread the jam over the bottom crust, being careful not to disturb the crust below too much.  Place the strawberry slices in one even layer over the jam.  Pour the rest of the crust over the top, spread evenly and press gently into place.

Bake the bars for 35-40 minutes until the top is just lightly golden and set.  Cool completely before cutting and serving.  The bars will keep on the counter, well wrapped, for 2-3 days.


Thursday, May 22, 2014

Dukkah Spice and Honey Roasted Carrots with Arugula


Goodness, I'm tired.  But tired in a good way if you know what I mean. 

It's the kind of tired that comes from long days of playing with my kids and being a family together.  The kind of tired that happens when life is working and all the little things come together.  When everyone wakes up with the right kind of attitude for facing the day and so much good gets accomplished.  It's the best kind of tired.


I had a few unscheduled moments yesterday so I took the opportunity to sit in the sun on the bench in my garden.  I read a magazine (all the way through!), sipped a blueberry lemon iced tea that I promise will make it to this space soon and simply enjoyed the contentedness of being quiet.  I considered feeling guilty about it for a moment.  Should I be playing with my boys, doing a load of laundry, organizing the room that will be home to a new baby girl in a few short months? 

I could have been doing any of those things, but I realized that the few minutes that I took to recharge my battery in the sun wasn't going to keep me from being a good mom or wife.  In fact, I would probably be a better one having given myself a break.  So I gave myself permission to close my eyes, sit back and enjoy the warm afternoon for just a few minutes longer.


Dukkah Spice and Honey Roasted Carrots with Arugula
Serves 6.  Adapted, barely, from Better Homes and Gardens.
For the printable recipe, click here.

I've made this recipe a few times now in my constant quest for side dishes that involve something other than green beans or broccoli.  The last time it graced our table was for a dinner with friends that are retiring from military life and moving back to the U.S..  It received rave reviews so I think I've got it just right.  The dukkah spice is an Egyptian spice that is a mix of toasted nuts (typically hazelnuts) and seeds.  The one I've outlined for you here is a very traditional one using sesame, coriander and cumin seeds.  I think it's just perfect but if you'd like to try something different I think pistachios and perhaps a bit of heat in the form of a hot paprika or a smoky chili powder would be great additions.  The lemon dressed arugula helps to balance out the sweetness of the honey and carrots.  These carrots are a great accompaniment to any grilled meat or roasted pork.

1 1/2 pounds of thin carrots, scrubbed and peeled if desired (halve any particularly wide carrots lengthwise)
3 tablespoons olive oil, divided
1/3 cup coarsely chopped hazelnuts
1 tablespoon coriander seeds
1 tablespoon sesame seeds
1 1/2 teaspoons cumin seeds
1/2 teaspoon kosher or sea salt
a few grinds of freshly cracked pepper
1 tablespoon honey
a large handful arugula (about 2 cups)
juice of 1/2 lemon

Preheat your oven to 425 degrees.

Place the carrots on a parchment lined baking sheet.  Toss with 1 tablespoon of olive oil, spread evenly on the baking pan and roast for 20 minutes.

In the meantime, heat a small pan on the stove over medium low heat.  Place the hazelnuts in the pan and toast just until the nuts get fragrant and the slightest bit golden, about 3 minutes.  Place the hazelnuts in a bowl and toss the coriander, sesame and cumin seeds in the warm pan.  Place back over the heat and toast the seeds for about 2 minutes or until they become fragrant.  Add the toasted seeds to the nuts and grind them together with the salt and pepper in a spice grinder or with a mortar and pestle until coarsely crushed together.

When the first 20 minutes of roasting is finished, drizzle the carrots with the honey and half of the spice and nut mixture.  Toss to coat.  Return the carrots to the oven and continue roasting for another 5 to 10 minutes or until the carrots are just fork tender (but not burnt or mushy).

At the last minute, toss the arugula with the lemon juice and olive oil in a large bowl.  Arrange on a platter.  When the carrots are ready spread them over the arugula, sprinkle some of the remaining dukkah spice over the top and gently toss together.  Serve immediately.


Wednesday, April 2, 2014

Black & Blueberry Rhubarb Jam {Small Batch}


Don't you just love how little kids get so excited for their birthdays?  The week-long countdowns.  The jumping out of bed ready to get on with all the fun birthday stuff when normally you can't drag them out of bed for anything.  Running into school with a container full of mini cupcakes with all of the anticipation one little body can hold.  It's exhilarating, and sweet, and a reminder for us parents of the simple joys of childhood.

Today is my little man's 5th birthday.  There's something about 5 that just is different from all the birthdays that come before.  It's a signal that toddler-hood is over.  That little boy who would only walk down the street holding your hand is now just as willing to let it drop and go running with his big brother as he is to keep holding on to you.  There's so much more he is capable of doing on his own and he is just a little bit more fearless.  But cautious too, as he understands the world around him the tiniest bit more than he did a year ago.  It's enough to make this Mama both proud and a little bit sad too.


I hope there will never come a day when my little guy won't want to snuggle for a few minutes before bed.  Or run up to me at random moments and hug me ferociously.  Or want to hold my hand for just a minute longer as he eyes up the kids in his new class and wonders whether they will want to play with him.  Of course, I know in my head he won't want to do all of those things for much longer even if he promises that he will give me just as many hugs and kisses when he's all grown up.  But I can hope right?  And for the time being, I will hold onto as many of those moments as I can.  Because for now he's still my little boy.


This recipe is for the birthday boy.  He's my super-picky eater.  Fussy beyond belief.  But if there's one thing I know about him, it's that I can always get him to eat a pb&j sandwich.  Especially if it's made with any of my home made jams (well, except for fig, but I make that one for myself anyway).  We discovered when we moved to Germany that he really enjoyed rhubarb so when rhubarb season rolled around this year I made sure to grab some as soon as I saw those beautiful pink stalks at the market.  This jam is packed with fruit and not a whole lot of sugar (plus a secret sweetener that you don't really taste but makes a huge difference to the balance of the jam).  The little guy doesn't really know anything about the balance of tart, sweet and acidic.  He just knows that it's good.  And that's all that really matters to his Mom.


Black & Blueberry Rhubarb Jam
Makes about 1 pint.
For the printable recipe, click here.

This is an incredibly simple jam to make.  I would have loved to have used fresh berries in the jam, but the seasons of the fruit don't overlap.  So I used organic frozen berries instead.  The jam doesn't suffer any in the end.  In fact, it's probably better that I didn't use fresh fruit as their out of season flavors would not have been nearly as good as the frozen berries that are picked in season and at their best.  Be sure to slice the rhubarb thinly so that you don't get any celery-like stringiness in your jam. There's really not enough jam here to can and save for later, but if you really want to, you can pack the finished jam into clean, sterilized quarter pint jars and process them in a boiling water bath for 10 minutes.  Me- I just stick the jar in the fridge and enjoy it as fast as I can.

1 cup blueberries, fresh or frozen
1 cup blackberries, fresh or frozen
2 cups thinly sliced rhubarb (from about 2 stalks)
1/2 cup pure cane sugar
1/4 cup maple syrup
juice of half a lemon

Place all ingredients except for the lemon juice in a medium, non-reactive saucepan.  Bring to a boil over medium high heat.  Let the mixture cook at a vigorous bubble for 12-15 minutes, stirring occasionally to prevent scorching, until the berries have burst and the jam is thickened.  Stir in the lemon juice and remove from the heat. Spoon the finished jam into a clean pint jar and let cool.  Cover and keep in the refrigerator for 3-4 weeks.


Monday, May 13, 2013

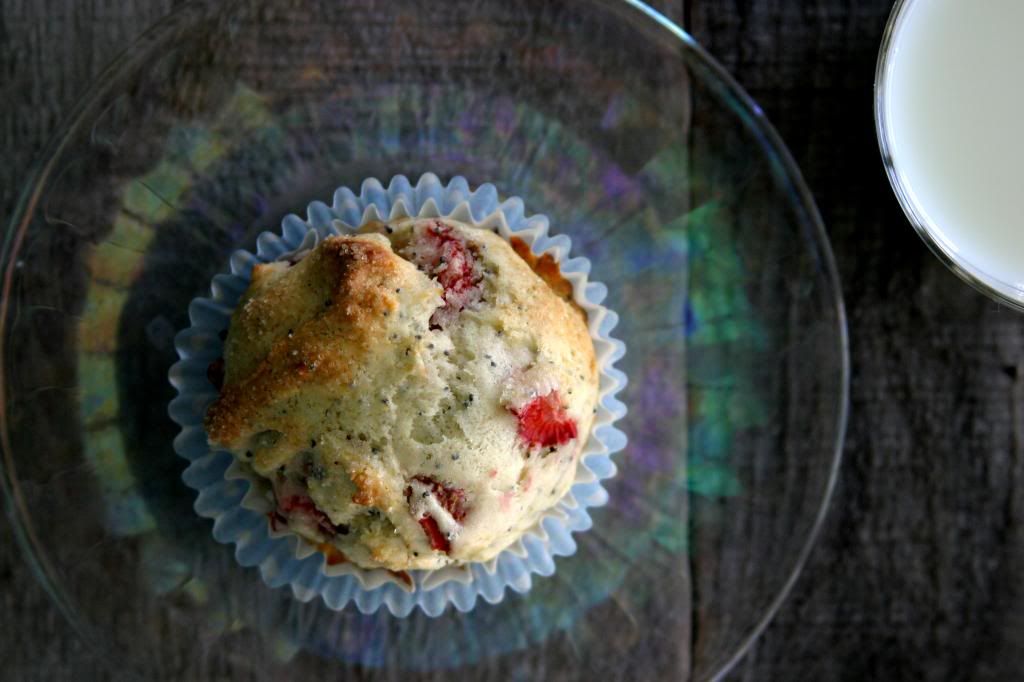
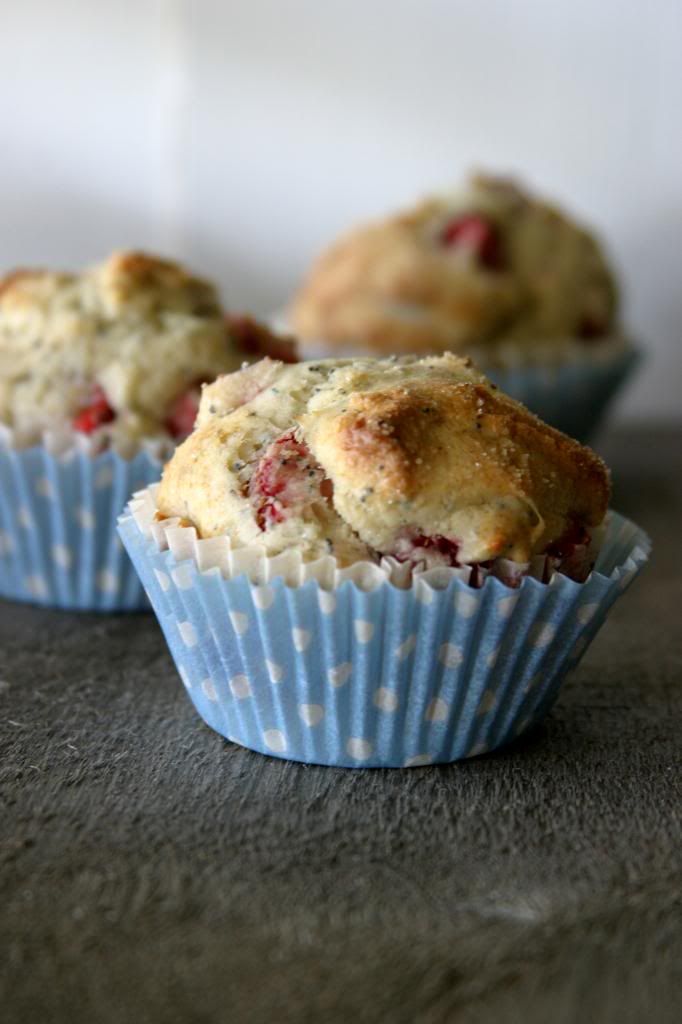
Strawberry Poppy Seed Muffins

There's something about your kids being sick that makes you feel helpless as a parent.  The kind of helpless that makes you start crying for seemingly no reason at all as you make a PB&J that you are hoping and praying one of your littles will feel well enough to eat.  Because after 5 days of stomach bugs and fevers that spring up out of nowhere, eating half a sandwich would be such a huge deal.  And maybe, just maybe, that helpless feeling will go away soon.   Feeling that you are absolutely powerless to make your child feel any measure of comfort may just be one of the worst things a parent can experience.
When my little one was sick last week, it was an emotionally and physically exhausting experience.  At one point while his stomach was rocking and rolling on him, he said to me "I'm scared".  Scared because he didn't understand what was happening to him.  He felt powerless to control his body and to him that was extremely scary.  And I could do nothing but rub his back and let him know that the feeling would go away.  It was the very epitome of helpless.  So when his big brother came home from school Thursday afternoon with a fever, I went over the edge and started bawling over a peanut butter sandwich.

So imagine my joy when both boys woke up the next morning fever free and with hearty appetites.  So I celebrated with a sweet breakfast to satisfy my sweet boys.  And these muffins hit the spot.  No longer feeling helpless, I was doing what I know how to do in order to bring comfort to my children.  That's the best feeling in the world.
Strawberry Poppy Seed Muffins
Makes 1 dozen.  Adapted from Feisty, Frugal & Fabulous.
For the printable recipe, click here.

4 tbs butter, softened
4 tbs cream cheese, softened
2/3 cup sugar
1 egg
2 cups all purpose flour
2 tsp baking powder
2 tbs poppy seeds
1/2 cup milk
1 tsp vanilla extract
1 1/2 cups chopped strawberries

2 tsp sugar for the tops

Preheat your oven to 400 degrees and line the wells of a muffin tin with muffin papers or spray with non-stick spray.

In a large bowl, beat together the butter and cream cheese.  Add the sugar and beat with the butter mixture until fluffy.  Add the egg and mix thoroughly.

In a separate bowl, stir together the flour, baking powder and poppy seeds.  Add half the flour mixture to the butter mixture and stir to incorporate.  Stir in half the milk.  Repeat the alternating additions of dry ingredients and milk.  Stir in the vanilla then gently fold in the strawberries.

Divide the batter equally among the muffin cups.  Sprinkle with the reserved sugar.  Bake for 18-20 minutes, until the tops are lightly golden and a toothpick inserted in the center of a muffin comes out clean.  Let cool for 5 minutes in the pan, then remove the muffins and let cool completely on a wire rack.


Monday, May 6, 2013

Upside Down Almond Apricot Skillet Cake {A Tuesdays with Dorie Post}

Sometimes there is just no story to go with a recipe.  I don't always have a soulful narrative to go with the recipe for each and every cake I post.  There are times when a cake is just a cake and the only reason I made it was because it sounded good at the time.  And because I got so excited about the apricots I found at the market that I couldn't help but buy three pounds of them as if I would never see them again.  And that really is the only story here.
So here is a cake that is just a cake.  Made with a few from the many pounds of apricots I felt I could sacrifice before turning the rest into jam.  But really, could I give you a cake that was ONLY a cake?  It's a Tuesdays with Dorie cake, which means that it comes from a book curated by Dorie Greenspan and Julia Child.  Meaning that it can't be just any ordinary cake.  This one is a lovely upside down cake with a tender crumb and lightly caramelized fruit and nut topping.
It's a cake that will make you smile.  A cake that you can serve with tea to a group of your favorite people.  It's a cake that makes a great after school snack with a big cup of milk.  It's one of those cakes that will become a go-to.  It is anything but ordinary.  It's extraordinariness comes from its simplicity and versatility and also from its ability to bring you comfort on a rainy spring afternoon.  I think that takes this cake far beyond the ordinary.

Because I can't leave well enough alone, I couldn't hep but fiddle with the original recipe.  You can find the recipe as written in Baking with Julia on the blog of our host this week, Erin (When in Doubt...Leave it at 350).  And here's a list of the changes that I made: 

::I swapped out the rhubarb for apricots (3 apricots, halved and each half sliced into fifths)
::I used sliced almonds instead of the pecans and amaretto in place of the bourbon in the topping
::I didn't have creme fraiche, so greek yogurt took its place
::To up the almond factor, I replaced 2/3 cup of the all purpose flour with almond flour
::Oh, and I turned the cakes from several small cakes into one large one baked in a cast iron skillet

Check out how the other bakers fared with their ability to follow a recipe over at the Tuesdays with Dorie site.  I really enjoyed this recipe and think you, my friends, will too if you give it a try.

Marinated Artichoke Hearts

I am not known to be the world's best gardener.  But I am giving it my all and for the past couple of years have had a pretty successful herb and vegetable garden.  Of course, most of the credit must go to the garden-perfect Southern California sunshine and temperatures.  And automatic sprinklers.  Seriously, whoever invented those things is my hero.  I always set out with the best of intentions when I plant flowers, herbs and veggies, but if I plant them anywhere out of the reach of the sprinklers I might as well just kiss them goodbye.

I will forget to water.  I just will.  And I know it.  Sigh....
But in a place where the artichoke plants are a perennial (come back year after year, for you non-garden types), even I can feel like an accomplished gardener.  This year I had four plants that stuck around from last spring with their big, fern-like silvery green leaves.  The plants are actually quite pretty and I would totally put them in my front yard landscape.  If you're wondering, this variety is called Purple of Romagna and the flowers (aka the part that you eat) is a pretty purple color and the petals are a bit spikier than the more familiar globe artichokes.  I grew them from seed.  Yup, I did that.  And, boy, have they produced for me this spring.

My husband loves those marinated artichoke hearts that come on antipasto plates.  So I have been trying to duplicate their flavor at home for a couple of years.  Unsuccessfully.  He always eats them, mind you, but they're never quite right.  The bumper crop of baby artichokes I had inspired me to give it one more try.  And after steaming, grilling and pan roasting what seemed like a mountain of artichokes, I needed something different. 
Paydirt!  I have found the magical balance between vinegar, spice, oil, and herbs to make my hubby go "Mmmmmmmm".  And boy, would I have been bummed had it not been right.  Those little chokes need quite a bit of prep work to get them into fighting shape, ahem, ready for their dunk in the marinade.  But it was all worth it for the look of satisfaction on my husband's face as he stabbed the first one straight from the jar.

If you can still find artichokes in your market, especially small ones, I beesech you to try these just once.  They're so much better than the ones in that olive bar at your grocery store.
Marinated Artichoke Hearts
Makes 3 pint jars.  Adapted from The Art of Preserving, by Rick Field, Lisa Atwood and Rebecca Courchesne.
For the printable recipe, click here.

The difficulty here is not in the recipe itself, but in the prep work.  But if you can stand the few (or 20) minutes it may take you to remove the outer leaves and chokes from the artichokes, you'll be well rewarded.  One of the great things about a recipe like this is that you can adapt the recipe to your liking.  Add more garlic, take away the lemon peel, or use the herbs that you have in your kitchen.  For us, this combination hits the sweet spot.  The recipe makes three jars of artichoke hearts, one to eat as soon as it's ready and the other two to store in the back of the fridge to pull out for unexpected company or to give to friends (who will thank you profusely!).

5 lbs baby or smallish artichokes
juice of 2 lemons, plus 6 tbs
1 cup white vinegar
1/2 cup rice wine vinegar
1 tbs plus 1 tsp kosher or sea salt
zest of two lemons, removed in strips with a vegetable peeler or cocktail zester
3 cloves garlic, thinly sliced
red pepper flakes (1 pinch per jar)
2  1/2 tbs chopped fresh herbs (I used 1 tbs each chopped parsley and basil and 1 tsp each chopped chives and sage)
1 tsp black peppercorns
6 tbs olive oil

You will need 3 hot, sterilized pint jars and their lids at the ready.  You can accomplish this by either washing the jars and then heating them in a hot water bath for at least 10 minutes, or running them through the sterilize cycle on your dishwasher right before use.

Fill a large bowl halfway with water and stir in the juice of 2 lemons.  Working quickly with 1 artichoke at a time, begin peeling off the tougher outer layers of leaves until you get to the pale, tender inner leaves.  Cut about 1/2 inch off the top of the artichoke, cut off any remaining dark leaves from the base,  then cut the artichoke into quarters lengthwise.  Immediately immerse the artichokes in the lemon water to prevent browning.  Repeat with the remaining artichokes.

Remove the artichokes with a slotted spoon and place them in a large saucepan over medium heat.  Add in 1/4 cup of the lemon water from the bowl.  Cover and cook until just tender, about 10 minutes.  Remove the artichokes from the pot and return them to the lemon water.  Stir in a handful of ice cubes to stop the artichokes from cooking further.

Meanwhile, in a medium saucepan, combine the 6 tbs lemon juice, vinegars, and salt.  Add 1 1/2 cups water and bring to a boil.  Stir to dissolve the salt.

Using your prepared jars, evenly divide the lemon zest strips, garlic, peppercorns and herbs amongst the three jars.  Tightly pack the cooled artichoke hearts into the jars to within 1 inch of the rim.  Ladle the hot bring into the jars, leaving about 3/4 inch of headspace at the top.  Add 2 tbs olive oil to each jar.  This should bring the headspace to 1/4-1/2 inch.  Wipe the rims and seal the jars tightly.

Leave the jars undisturbed on the counter for 24 hours, then refrigerate.  Shake the jars daily to distribute the seasonings for 1 week, at which time the artichokes will be ready to eat.  Keep the jars refrigerated.  They will keep for up to another 2 weeks.